
Popsicle stick bracelets! Did that phrase transport you back to childhood? These wooden bracelets are something I loved making when I was younger. I was stunned to learn that many people do not know how to make them. While they may not be the newest trend, they are inexpensive and fun to customize making them a great project for kids and teens.
How to Make DIY Wooden Bracelets
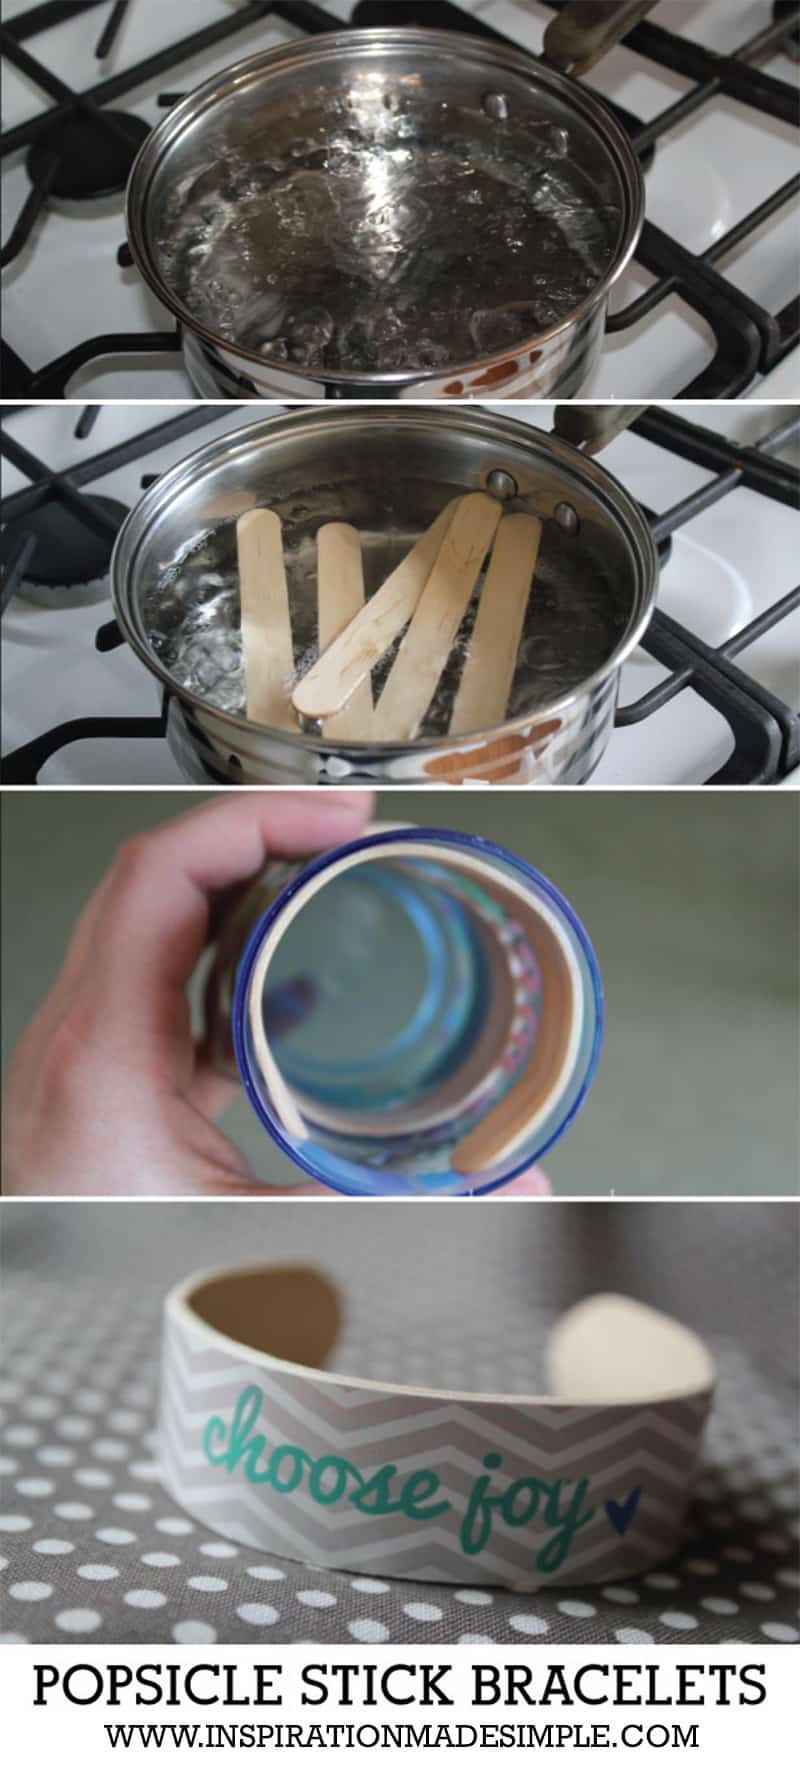
Warning: This does take some prep time! Mama can get everything ready before inviting the kiddies in to help decorate, though older children may enjoy the whole process.
SUPPLIES:
Jumbo Craft (Popsicle) Sticks
Pot of Water
Small Cup – about wrist size
Rubber Band
Embellishments to decorate as desired
Bending Popsicle Sticks
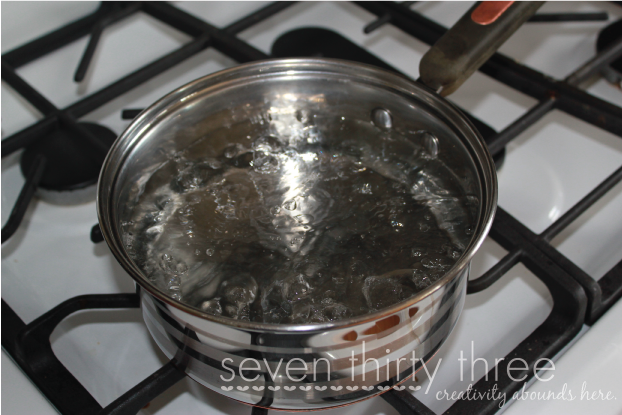
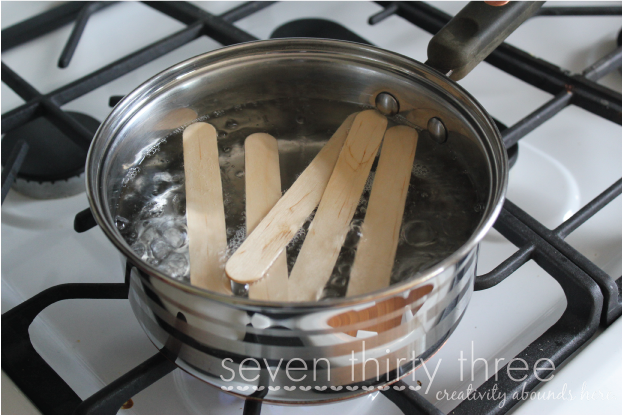
While the sticks are soaking, find a small cup or object roughly the size of a child’s wrist. This will serve as the mold for shaping the bracelet.
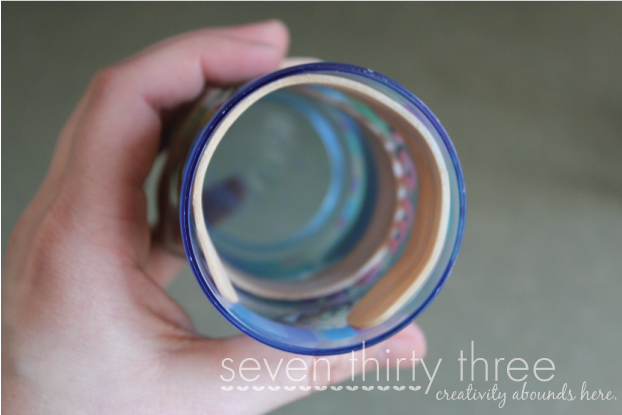
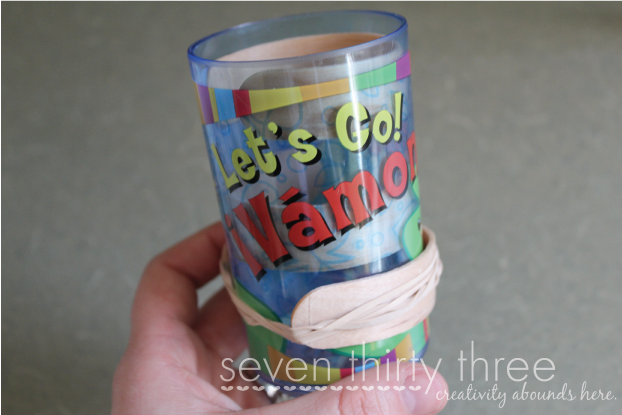
Carefully remove the sticks one at a time. Gently bend and form the softened stick around the inside of the cup or around the cup secured with a rubber band. Be cautious to avoid breaking the sticks.
While those are drying, grab some regular sized craft sticks and a hot glue gun so we can build a little box to keep the bracelets in! Skip to the box tutorial further down the page.
Decorating DIY Bracelets

Remove the sticks from the glass, gather your craft supplies and get to decorating. Here are some ideas to get you started:
Use Mod Podge to adhere pre-cut shapes or designs (traced from scrapbook paper) onto the bracelet surface.

Grab your favorite craft paints and get creative!
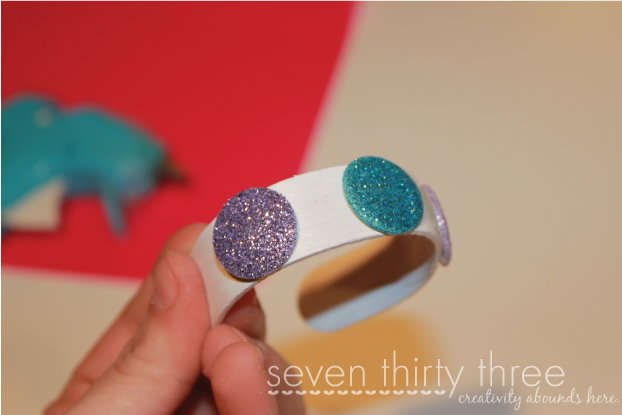
Glitter, rhinestones, and other embellishments can add some extra pizzazz.
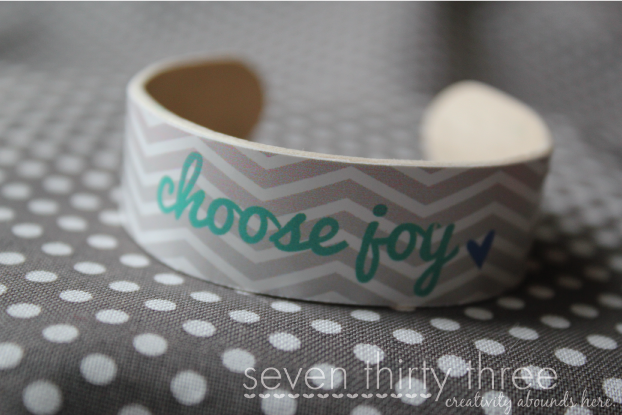
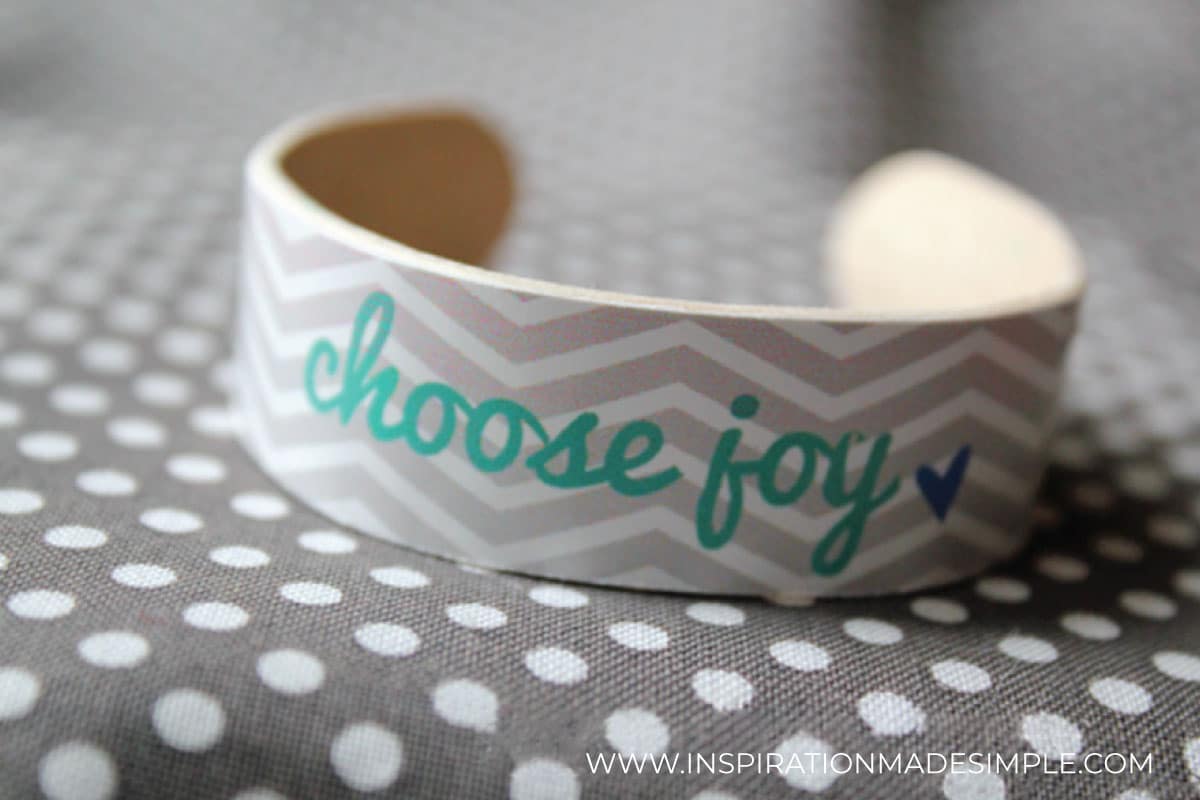
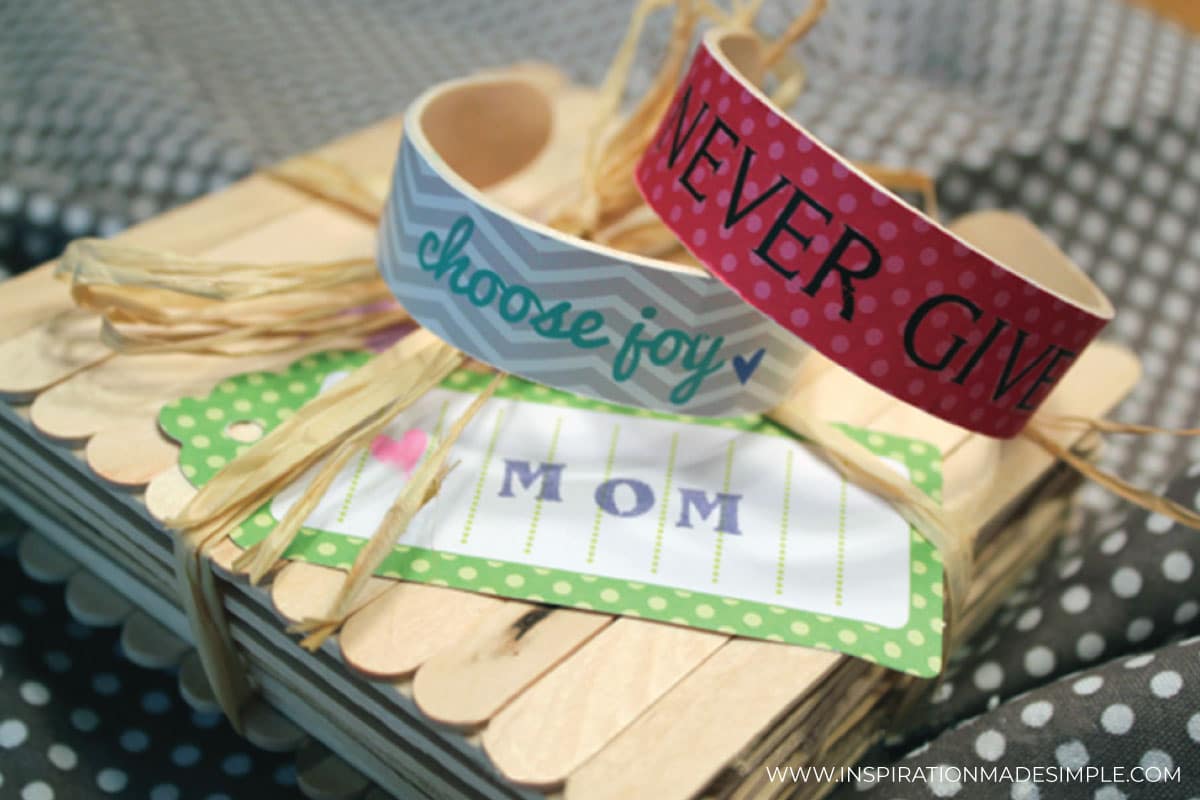
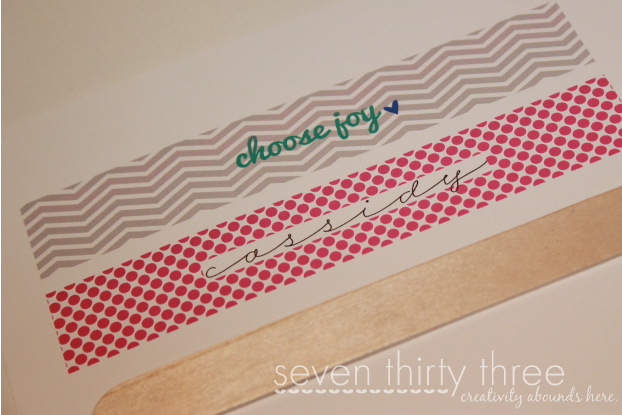
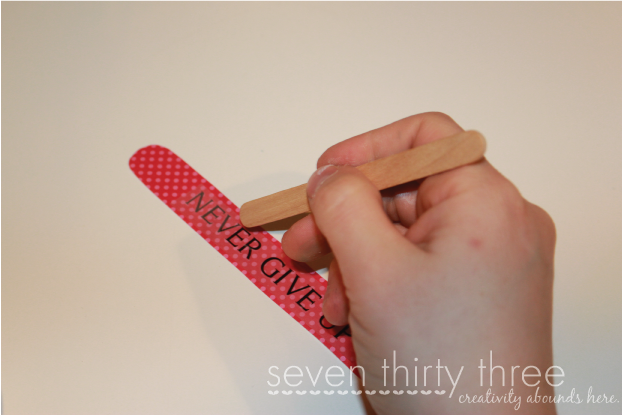
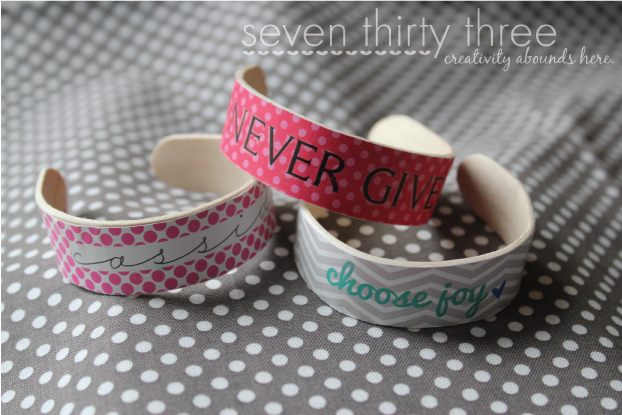
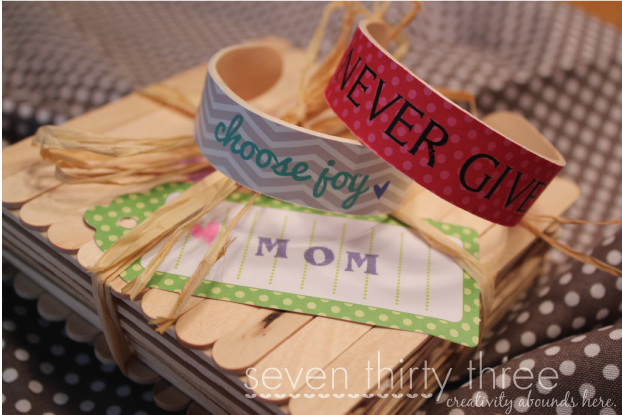
Use rub-on lettering or stencils to add inspirational quotes or messages to your popsicle stick bracelet.
If going the Mod Podge Route:


Add embellishments as desired.
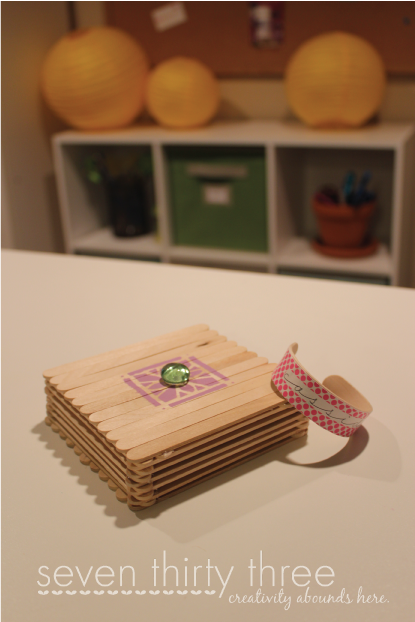
Your wooden bracelet is done! Now let’s make a gift box to keep it safe in.
How to Make a Popsicle Stick Box
SUPPLIES:
Regular-sized Craft Sticks
Hot Glue
Embellishments – paint, rhinestones, etc

INSTRUCTIONS:
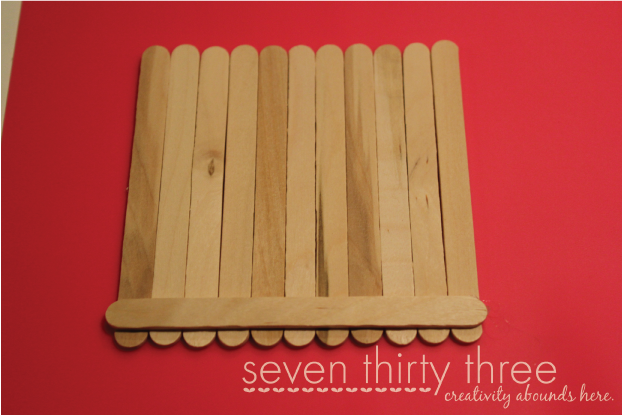
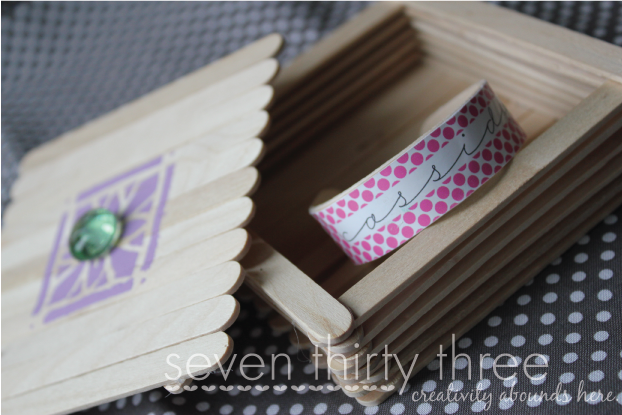
Begin by laying out 11 regular-sized craft sticks side-by-side to form the base of the box.
Using a hot glue gun, adhere a craft stick along the top and bottom edges of the base sticks.
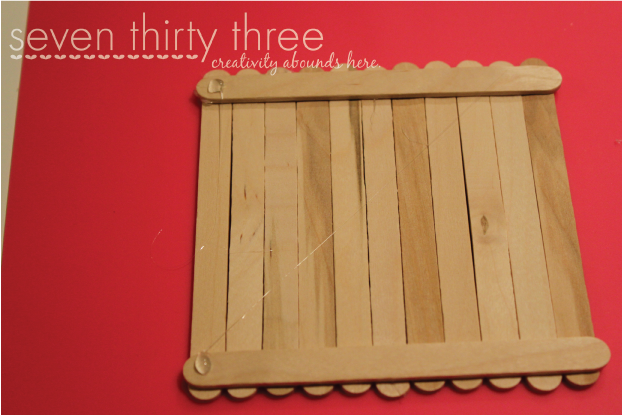
Apply a small line of glue to one of the short ends of a craft stick, attaching it to one of the sticks you just placed. Repeat this process, alternating sides and creating a bridge-like connection between each vertical stick and the base.
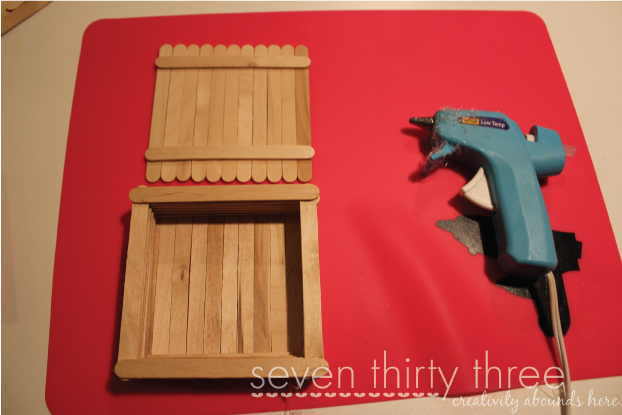
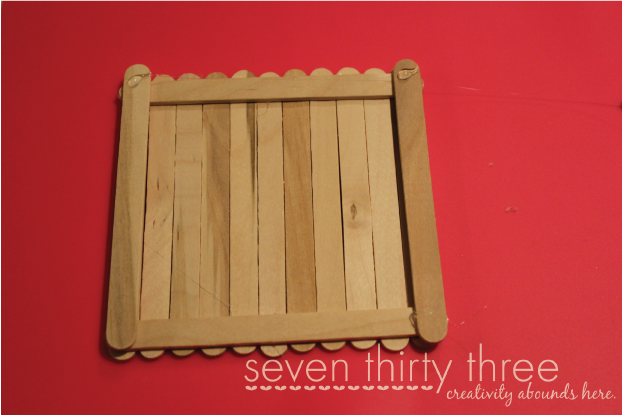
Once the box reaches your desired height, it’s time for the lid. Line up 11 craft sticks again, but this time, glue a stick across the top and bottom, leaving at least a stick’s width or two from the edge.
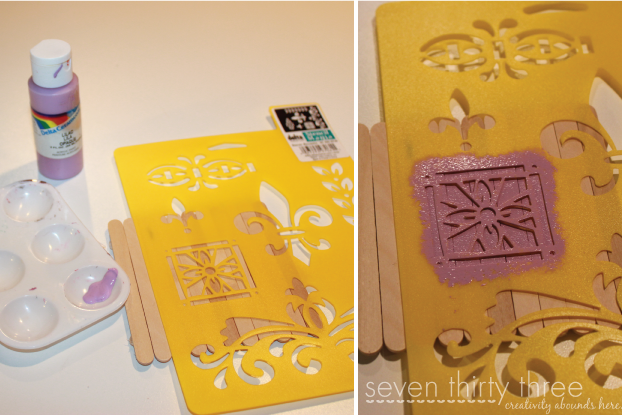
Decorate the top as desired. I used a Fleur de Lis stencil and glued on a marble accent to act as a handle. Place the lid on and ta-da! Your simple gift box is complete!

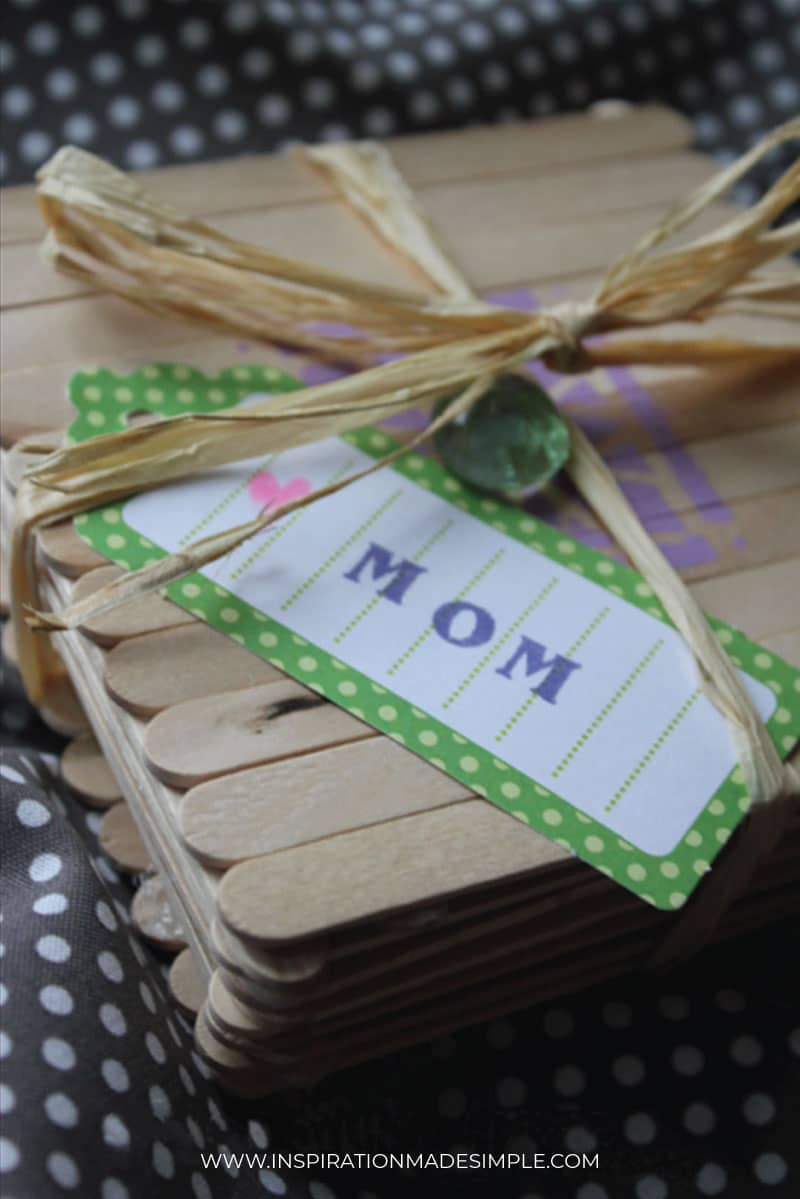
Wouldn’t these make a fun gift idea? Check how cute it looks all packaged into a sweet little gift presentation.


Oh My! What a wonderful craft! I might can even do this! Love this idea! Thanks for posting this and going step by step with us…I want to try this seriously. Pinning it to! Thanks again. Hugs and blessings, Cindy
These are super cute!!! Found you from Just A Housewife… so glad I did 🙂
Fantastic! I had no idea that you could boil craft sticks to make them bend. This is such an adorable idea! I hope you’ll link up this week: http://www.serendipityandspice.com/2012/03/manic-monday-linky-party-9.html
-Melissa
Great job!! I may have to do this. 🙂 I considered it for my challenge but wound up doing something else. I have a question – what font is your “just saying” on one of your tutorial photos?
So brilliant! Love the “choose joy” bracelet.
I love these bracelet, and the craft stick jewelry box is totally classic! You did an amazing job!
Thanks Amanda! My 4 year old really loved the box and begged me to make his own. He used the glue gun (with supervision) and built the entire thing and MAN was he impressed that he actually built something all by himself! Such a confidence builder. 😉
Those are great! When I opened my box, my first thought was the bracelets too and now I’m thinking I might do them anyways with my daughter just for fun! They’re so cute! Love your pictures and your step-by-steps!
Kim, Thank you so very much for posting this!! When I was a kid (back in the stone ages… ok the 70’s) I knew girls who had bracelets like these but had no idea how they made them. Now I do! And I have a friend who is looking for birthday party ideas for their spring party. Once again thank you!!!
You are so welcome! If you and your friend make some, please share a picture!!
Such a great idea!! Love that you made a little box for them too! 🙂 Well done girlie!
Fabulous! I LOVE what you did with these. Going to pin and of course, feature!!
the bracelets are AWESOME!!!! i mean, so very gorgeous! great job! and I love that you made a box to go with them…so creative!
I love this! This is such a great craft to do with kids too!
http://www.thecraftyblogstalker.blogspot.com
That would make a fab party project! Just have the bracelets ready to go before hand. Great use of the Scribble Shop products Kim!
This is so cool! thanks for sharing on how to make these bracelets.
Pretty brilliant! When we opened our box, bracelets did not cross our minds- what a fun craft to do w/ kiddos 🙂
:)Kelli & Kristi
http://lollyjaneboutique.blogspot.com/2012/03/popsicle-stick-flower-clips.html
Such a clever use of craft sticks and I love the sentiment!
I seriously had no idea that you could made craft sticks pliable!! Seriously. This is incredible!! Great ideas Kim!!
These are so cool! What a great project to do with the kids!!
I would love to have you link it up at Fantabulous Friday going on now!
http://littlebeckyhomecky.blogspot.com/2012/03/fantabulous-friday-4.html
Hope to see you there!!
Kim… these are fabulous!! Such a great idea!
Thanks for linking up to last week’s Catch a Glimpse party! I will be featuring this tomorrow!
The craft stick bracelets are super-genius! And I am in love with the little craft stick treasure box.
Hi Kim,
Thank you for participating in the Scribble Shop Challenge.
We had no idea that you could make bracelets out of popsicle sticks! You did great job using all of the materials that were supplied in the box!
We are posting the finalist on our facebook page http://www.facebook.com/ScribbleShop tomorrow, March 30th, 2012.
Stay Tunned!
I love your bracelets. I have made popsicle stick bracelets several times with my kids and it is such a fun project. These are so cute. And I love the coordinated box. I am your newest follower from TheStuffofSuccess. Feel free to stop by and say hello. Have a great week. Athena
I absolutely love these! Going to make them for little extra tree presents! Thanks for sharing the idea 🙂
Love this! I want to do this for family craft day with my mom and aunt. I’d like to recreate your “choose joy” bracelet, what fount did you use and did you boil the “never give up” bracelet after putting mod podge on it?
I don’t remember which fonts I used, unfortunately. It was a while ago! And no, you boil prior to putting on Mod Podge.
I love this! I want to do this on family crafty with my mom and aunt. I’d like to receate your “choose joy” bracelet, what you use? Did you boil your “never give up” bracelet after you put the paper and mod podge on it?
Did not work for me. Followed directions exactly. They did not dry in 24hrs. They did not hold their shape when I finally took them out of the glass. Craft project failure.
I’m so sorry to hear that! Did you let them continue to dry completely before taking them out of the cup? Were they in a dry place, with lots of sunlight? I’m wondering if where they were left was not conducive to 24 hour drying period?
Hello,
I’m late in the game to this post! So cute! Just a point of clarification. Do you boil the bracelets for 15min or let them sit in the water for 15 min. after letting the water come to a boil, and then turn it off and let them sit?
Once the water is boiling, I put them in and boil the sticks for 15 mins, turning it down a smudge if it starts to boil over. You can do it the other way, but it typically takes longer to get the sticks pliable and I like fast!
Just came across this! So cut and unique. I will try this!
I was just wondering what program you used to make the papers you glued to the braclets
As a graphic designer I used Adobe Illustrator, but you could also create it in Word or Publisher by adding a block of color or a pattern using the shape tool and adding text over it! I measured the popsicle sticks and then made the rectangle of color a tad larger.
Oh my goodness, my daughter is going to love, love love this project. Fashionista in the making.
I love this idea! Can’t wait to make them with my youth group!
Thanks Stacey! Make sure to share the end results. 🙂
i’m trying these this weekend. I make and sell little girl jewelry
This is a great Christmas gift. Thanks for sharing.
You’re very welcome!
Cute idea! I love your blog – I keep coming across it and as a blogger, I love the simple but cute design! Thanks for sharing.
Awww! Thanks for the kind words Chantal!
I never imagine you can make bracelets out of craft sticks. WOW. I need to try to make this for the kids for their moms. cool idea. Thanks
Kids love it!
This is such an inspiring post! So compliments to you and a question! I’m crafting my wedding to show it can be done cheaply. My theme is enchanted forest! I have found birch dishes and flatware and want to take it one step further. Do you think it’s possible to make them in a smaller size? I’m going to use the smaller sticks and follow your direction on boiling and using a glass to make the shape. However! I’m thinking of using a shot glass and making napkin rings! Before I dive into this, I wanted your experienced opinion. Do you think I will be able to wrap them down that small, or should I trim the ends? I would love to hear back even though this is such an old post!
Yes, the smaller ones should work as well! I’ve love to see the end result!
Thank you for your post. I am trying these out for my students and after/during drying they are bending/twisting. I have them inside of mason jars to dry, but they are mostly warping. Any thoughts?
I would try wrapping them around a small cup and secure with a rubber band. This keeps them secure so that they cannot warp or twist as they dry. I think being inside the mason jar allows them to move around too much.
This was an assumption that the mason jars were too big to allow to dry properly… Good luck!
These are great! I think my niece would love working on these bracelets thank you for sharing.
Love this idea! Wondering how durable they are after drying and decorating. Do they break easily?
Ours never broke. We had them for a couple of years.
That’s cool. totally awesome. My teen words. dating myself. Lol my kid 7 will love this. Thanks