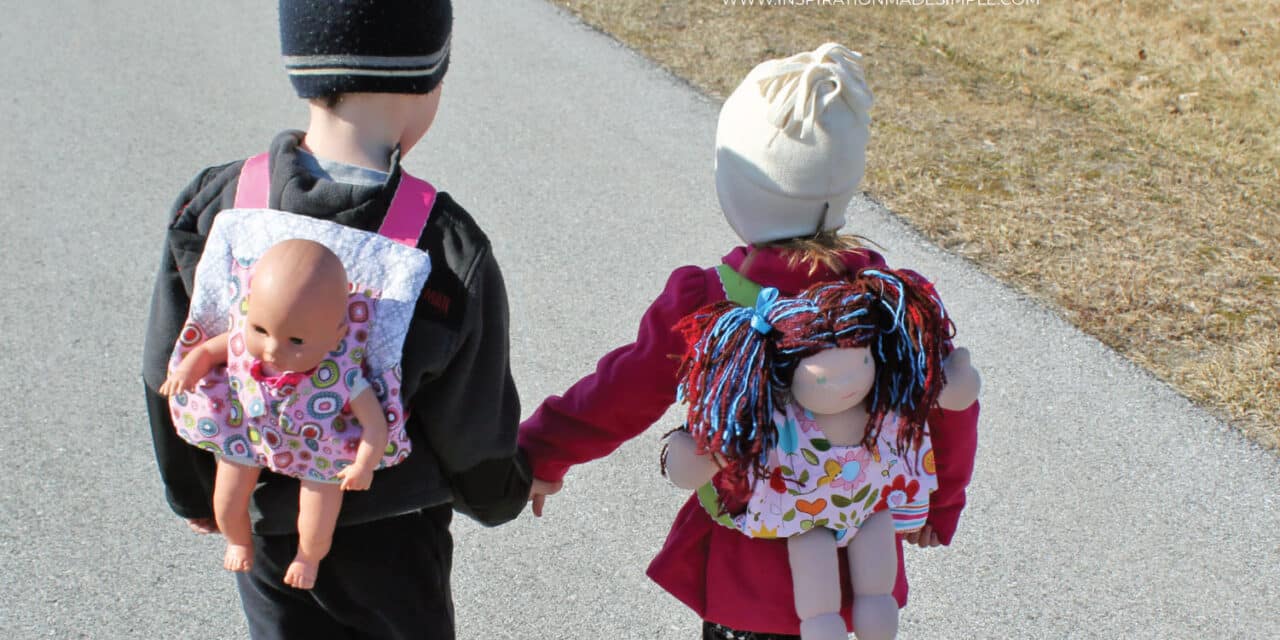
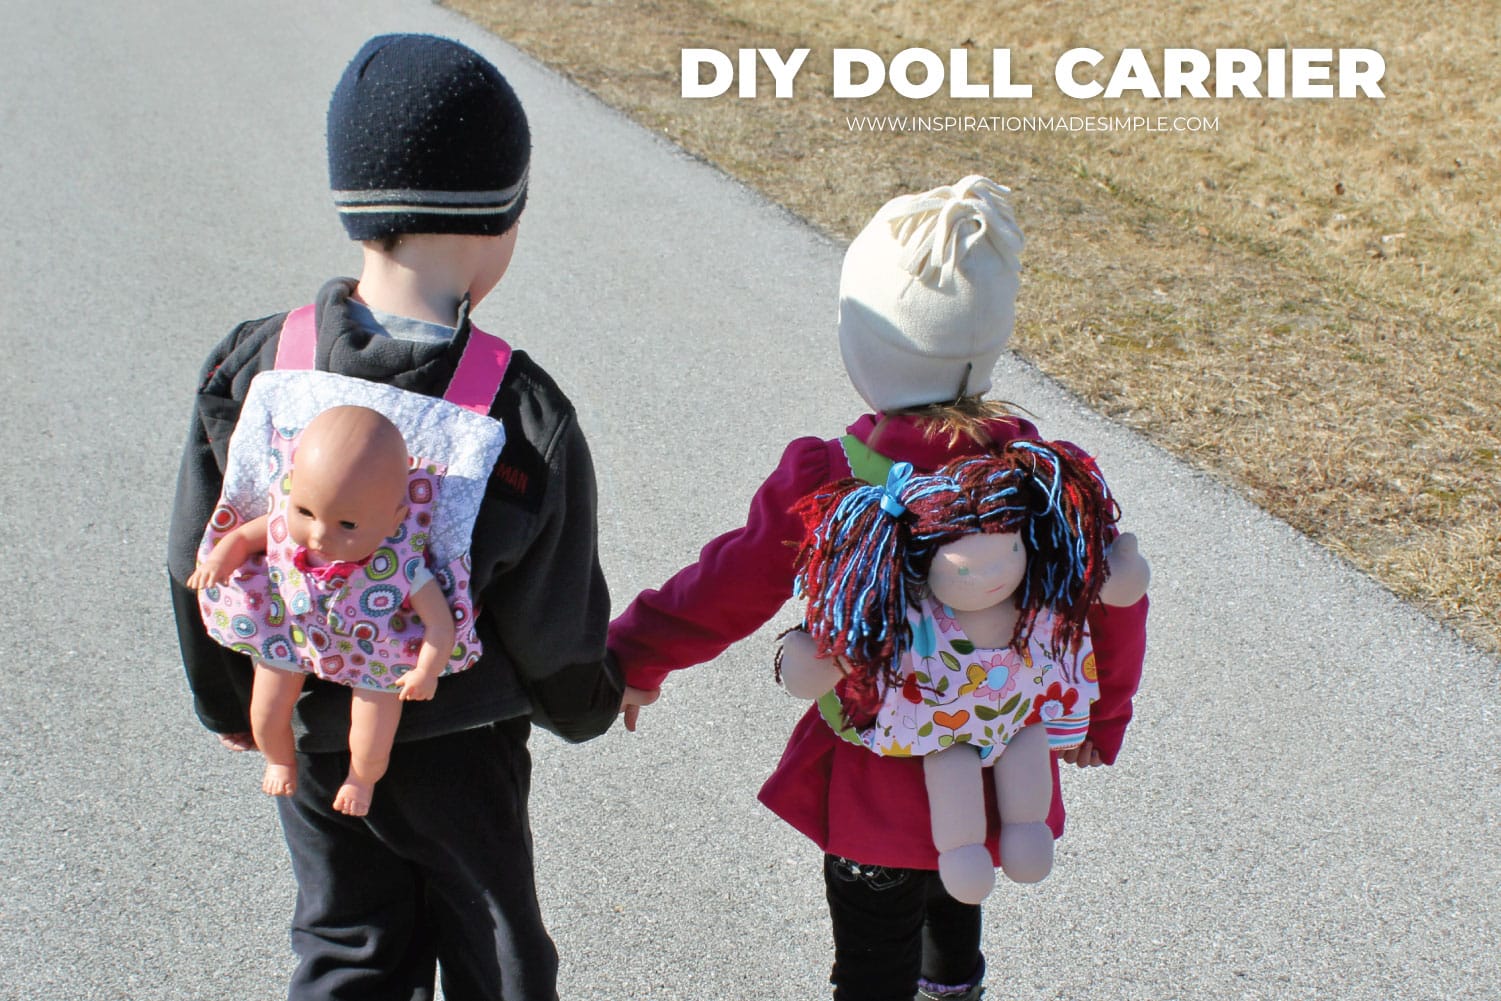
Has your child ever wanted to take their baby doll everywhere, but you’re tired of carrying it for them? I know that I am. I needed a quick and simple solution to this problem, so with a bit of fabric and my sewing machine, I created this DIY doll carrier. It’s quick, easy, and requires minimal sewing skills. Plus, it’s a great way to personalize something special for your little one.
This is a fairly quick project, so if you are planning on making this during nap time, then make sure you grab a baby doll from your little one’s bedroom beforehand!
The measurements I share in the tutorial below made a carrier that fit both my 2.5 year old and my 4.5 year old. To fit a bigger child, add a little more length to the straps. Directions:
First, let’s cut the fabric. You will need:
Main Fabric: 2 panels, 11″W X 10″L
Quilters batting: 1 panel, 11″W x 10″L
Contrasting fabric for the belly band: 2 panels, 14″W x 6″L
Crotch strap (same as belly band fabric): 2 panels, 3″W x 6.5″L
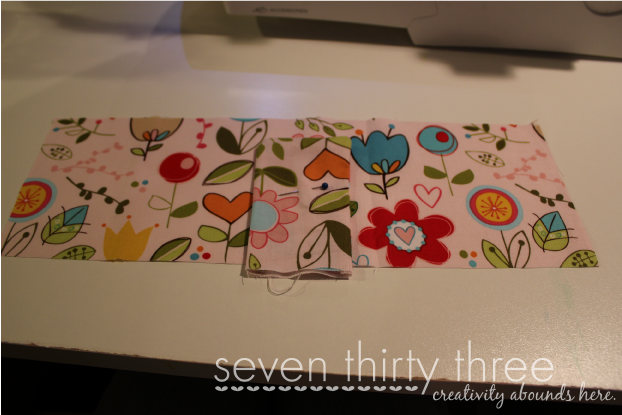
Shoulder straps: 2 panels, 2.5″W x 9″L (These can be cut on the fold so that you only make two cuts, see picture below)
2 strips of ribbon 12″ long
2 strips of ribbon 18″ long
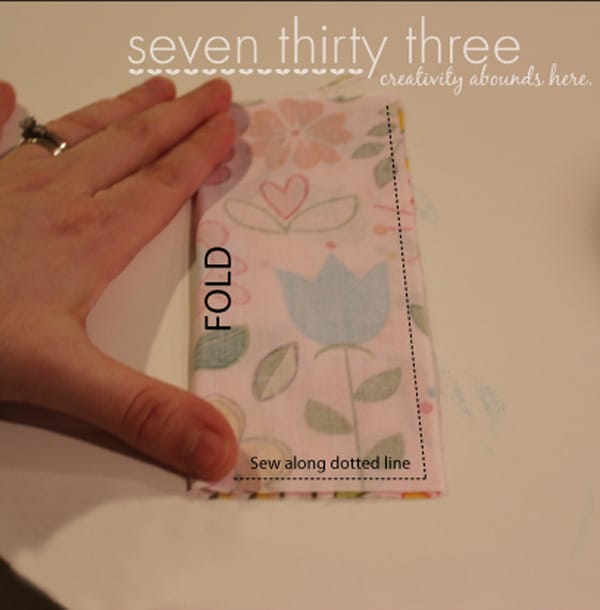
Working with the fabric for the crotch strap, sew the right sides together, leaving the top open for turning. Turn the right side out and iron flat.
With the right side up, find the center of your belly band piece.
Line up the crotch strap with the center mark with the unsewn edge down. It should hang over the bottom of the belly band by about 1/4 inch. Pin in place.
Place the second belly panel right side down, over the top, sandwiching the crotch piece between the two. Pin in place.
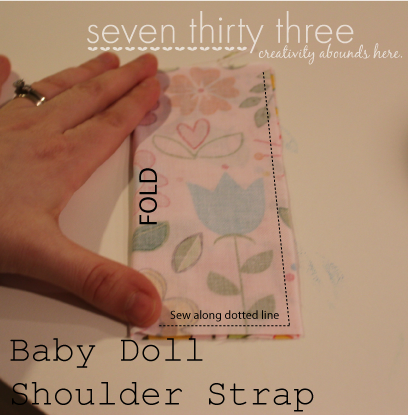
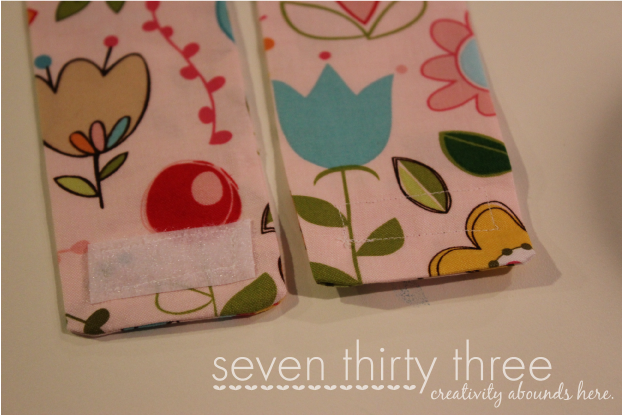
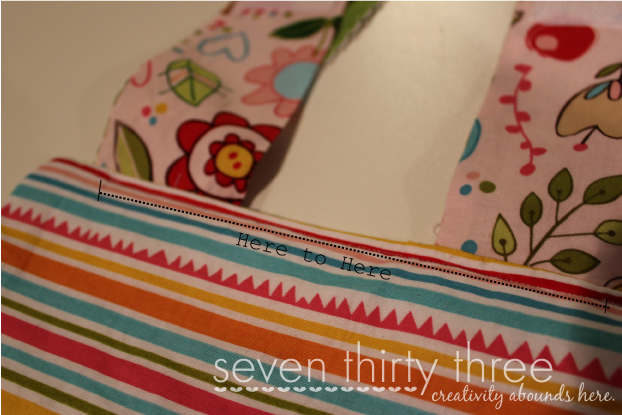
Sew the top seam and the bottom seams of the belly band, leaving the sides open. Flip right side out and iron flat. Sew along the bottom of one of your shoulder straps and up the side. Do the same for the second piece. Turn right side out and iron flat.
Cut pieces of velcro to fit the width of the straps. Sew the hook side of the velcro onto the bottom of your straps.
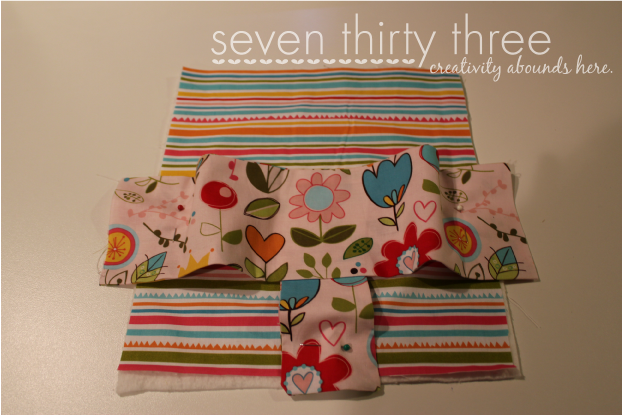
Lay the quilters batting flat. Place one of the main fabric panels on top of the batting, right side up.
Find the center along the bottom seam. Match up the crotch strap with the center mark, overhanging the fabric by about 1/4″. Pin crotch strap in place.
The belly strap should hang over the edges by about .5″ on either side. Pin in place. Also, note in the picture above that the crotch strap has a little give, it isn’t pulled tight.
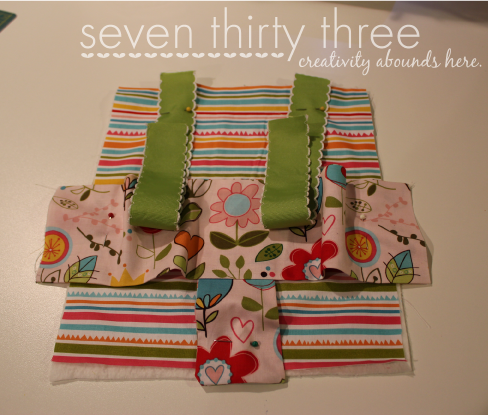
Along the top of the main fabric, measure 1.5″ from the side and place one shoulder strap (velcro face down) and then one 12″ ribbon.
Center the ribbon over the shoulder strap piece. Pin in place. Do the same for the other side.
Along the bottom of the main fabric, measure 1.5″ from the sides and pin ribbon in place. See photo above.
Pin the extra ribbon into the middle so that it doesn’t accidentally get sewn into the seam.
Place the second main fabric panel right side down and sandwich everything in. Pin in place.
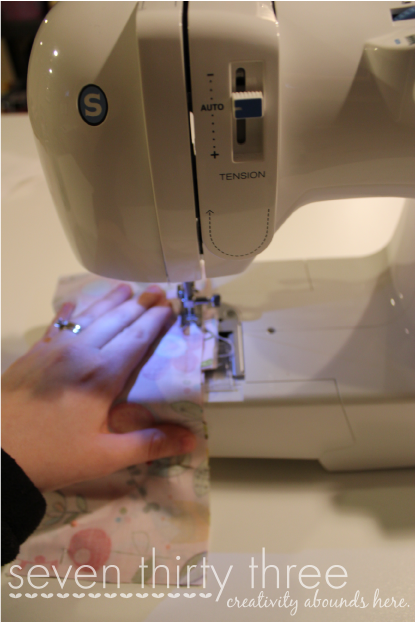
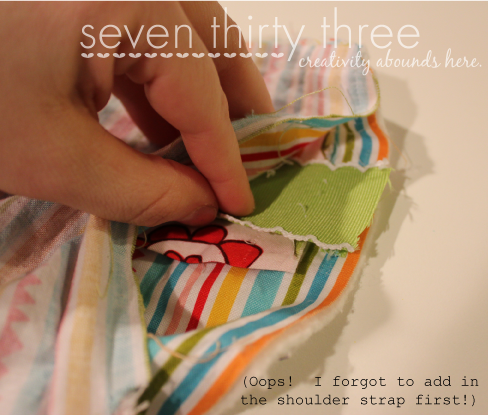
Starting at the edge of the right shoulder strap, sew around the edges of the main fabric panels, until you get to the edge of the other shoulder strap.
This will leave you with approximately a 4″ gap for turning.
Clip the corners and remove all pins before turning the carrier right side out.
Top stitch across the top opening to close it. I usually start under the shoulder strap and go across to the other shoulder strap, though you are welcome to top-stitch around the whole main panel.
Place your child’s doll in the carrier and determine the placement of the straps. Place the soft portion of the velcro pieces where you want them on the belly bandand pin in place. Make sure to sew the velcro pieces onto the belly band piece only!
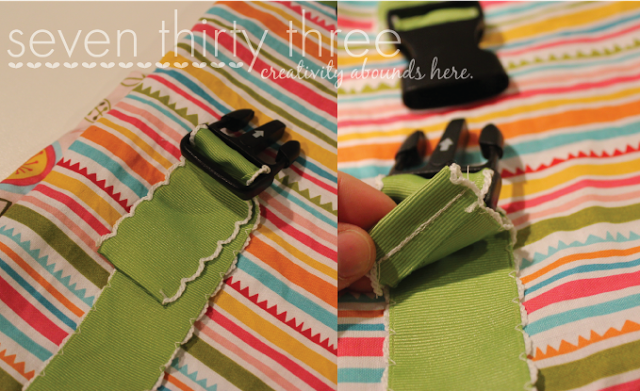
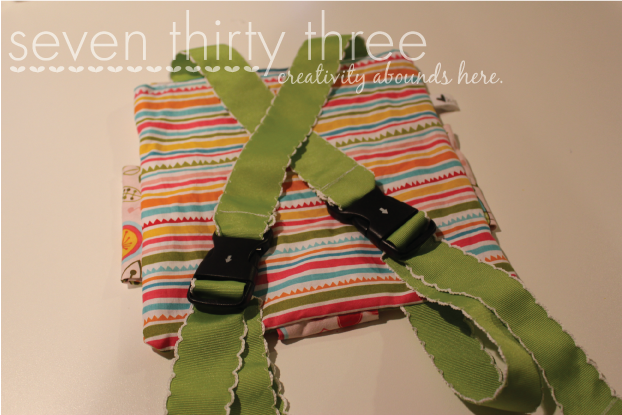
Melt the ribbon ends with a lighter or use Fray Check to prevent fraying.
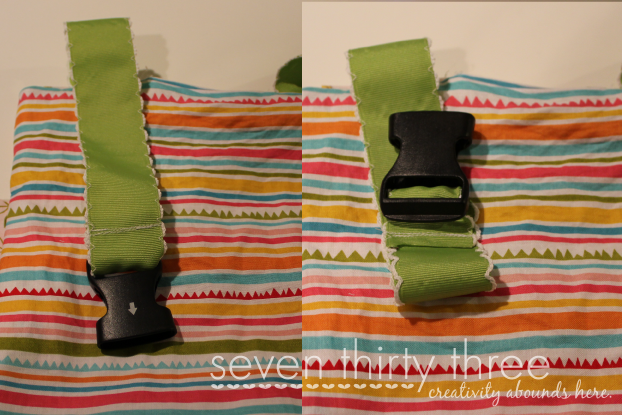
Secure the top ribbons to the buckles by sewing them in place.
Attach the insert buckle onto the bottom ribbons. Flip over the edge of the ribbon by about 1/2″ and sew across. This will prevent the buckle from sliding off.
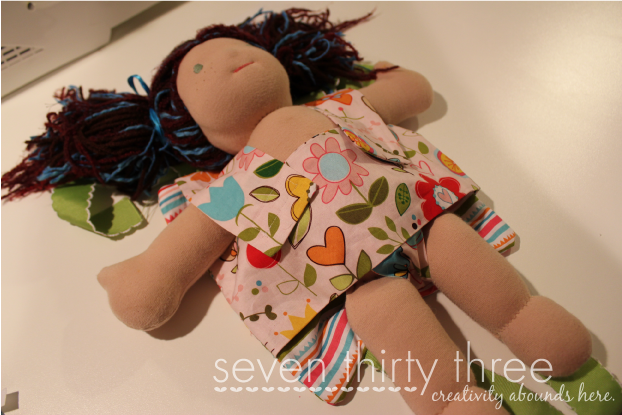
Criss-cross the straps and buckle them together. Your DIY Doll Carrier is complete!
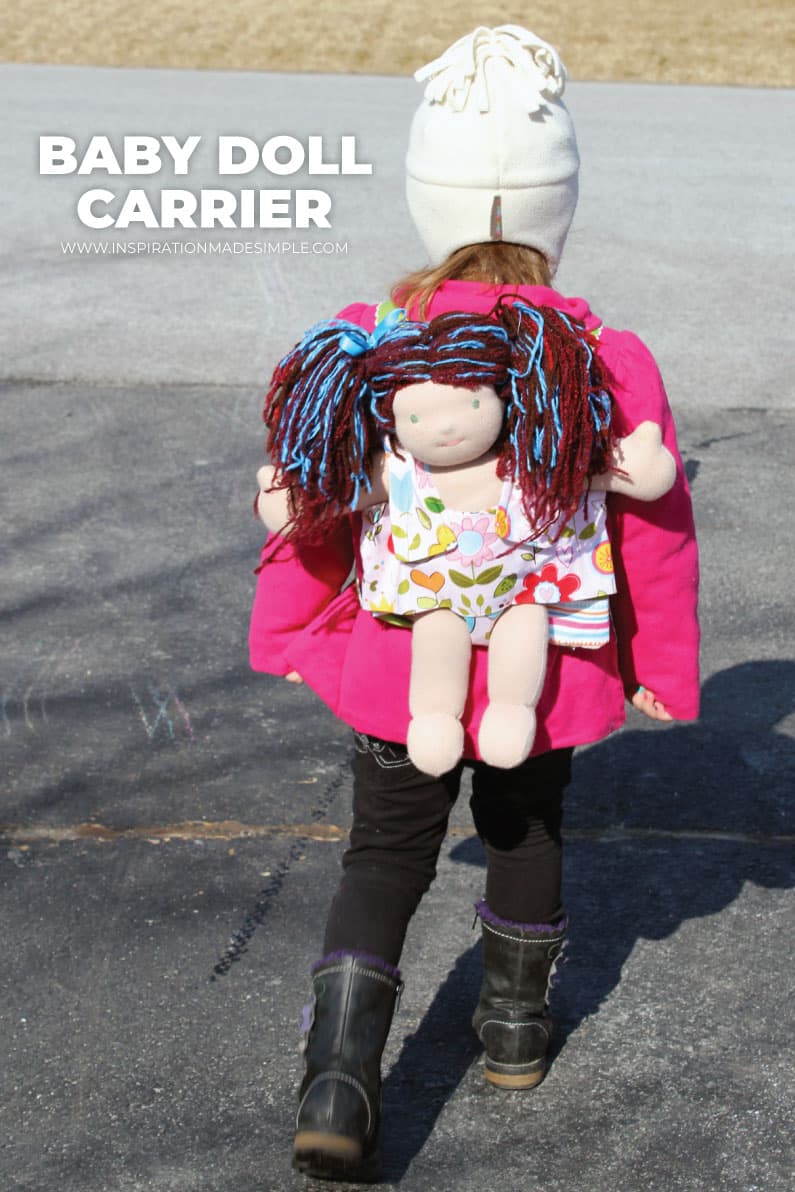
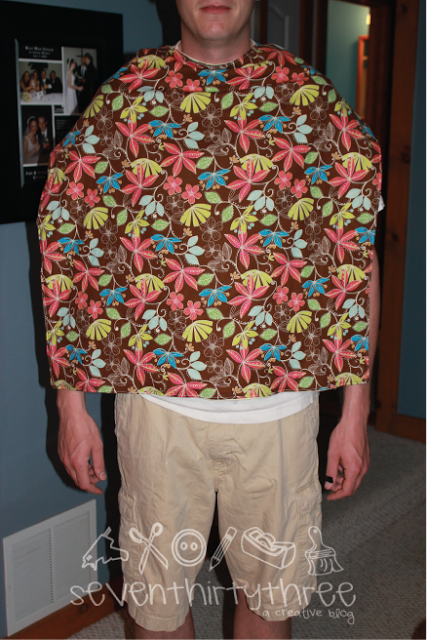
My daughter has taken this DIY Doll Carrier on our vacations so she can still bring her baby along. And as you can see, it also can be worn in front:
This doll carrier is a lifesaver for parents with little ones who love to take their baby dolls everywhere. It’s also a fun and creative project that you can make together with your child. Feel free to share pictures of your creations online! I’d love to see your unique doll carriers.
Kim is a Marketing Specialist with Inspiration Media Solutions by day and Blogger by night. She's a wife, mom of three beautiful children and two fur-babies, a Goldendoodle and a rescued Pibble. For even more Inspiration Made Simple, like her on Facebook and Instagram+.
Thank you. I too have been looking for a good tutorial. I want to make these as birthday gifts for my son’s friends. Did you just buy your buckle at JoAnn’s?
I’m almost a year late finding this, but I’m so glad I did! Making one for my son’s little friend’s second birthday next month! Thanks for the tutorial!
Hi there,
I was just wondering how many yards total of each fabric I need to make one carrier, and also, what length of ribbon? I do not trust myself to figure it out, and this will most likely result in my being two cuts in on something important and realizing I didn’t buy enough. 🙂 Thanks! Such a super cute idea!
My name is Kim, founder of Inspiration Made Simple, and I'm really glad you have stopped by!
I'm a mom, wife, fitness and fashion enthusiast. I love sharing simple and affordable ideas that help make your busy life easier, including craft tutorials, affordable fashion, printables, recipes, party ideas, and fun family activities. Learn more about Kim...
Occasional Newsletter
Inspiration straight to your inbox, never miss a post!
Thanks! Keep an eye on your inbox for updates including a free gift!
Manage Cookie Consent
To provide the best experiences, we use technologies like cookies to store and/or access device information. Consenting to these technologies will allow us to process data such as browsing behavior or unique IDs on this site. Not consenting or withdrawing consent, may adversely affect certain features and functions.
Functional
Always active
The technical storage or access is strictly necessary for the legitimate purpose of enabling the use of a specific service explicitly requested by the subscriber or user, or for the sole purpose of carrying out the transmission of a communication over an electronic communications network.
Preferences
The technical storage or access is necessary for the legitimate purpose of storing preferences that are not requested by the subscriber or user.
Statistics
The technical storage or access that is used exclusively for statistical purposes.The technical storage or access that is used exclusively for anonymous statistical purposes. Without a subpoena, voluntary compliance on the part of your Internet Service Provider, or additional records from a third party, information stored or retrieved for this purpose alone cannot usually be used to identify you.
Marketing
The technical storage or access is required to create user profiles to send advertising, or to track the user on a website or across several websites for similar marketing purposes.


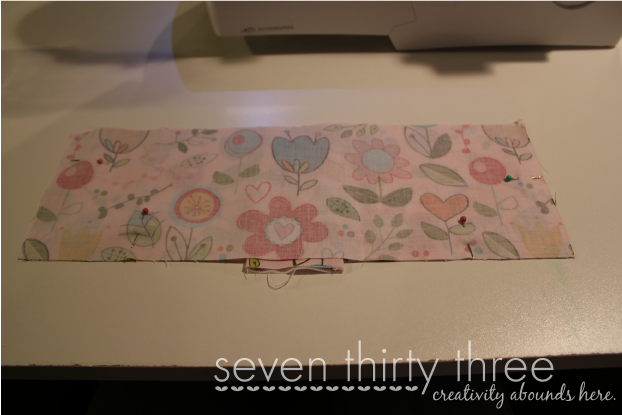
 Sew along the bottom of one of your shoulder straps and up the side. Do the same for the second piece. Turn right side out and iron flat.


I love it! This is a really great project! I would love it if you would come link this up at my Pinworthy Projects Link Party.
Very cute, my daughter would love this! I look forward to seeing you at My Dream Canvas.
Thank you. I too have been looking for a good tutorial. I want to make these as birthday gifts for my son’s friends. Did you just buy your buckle at JoAnn’s?
I featured this at Sinful Sewing & Sweets as part of my 30 Sew-Made Holiday Ideas. Check it out at http://sinfulsweetsandsewing.blogspot.com/2012/11/day-2-doll-accesorries.html
Thanks for the cute idea,
Kandice
I’m almost a year late finding this, but I’m so glad I did! Making one for my son’s little friend’s second birthday next month! Thanks for the tutorial!
I love it! This is a really great project! I
very cute . .
Hi there,
I was just wondering how many yards total of each fabric I need to make one carrier, and also, what length of ribbon? I do not trust myself to figure it out, and this will most likely result in my being two cuts in on something important and realizing I didn’t buy enough. 🙂 Thanks! Such a super cute idea!
Allison
2 coordinating fat quarters is all you need for fabric. All of the necessary measurements are in the post – see Step 1. Good luck!