
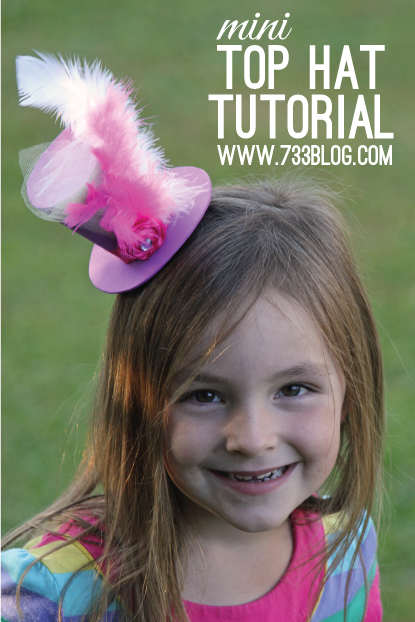
I’m planning my daughter’s 13th birthday and it is a Tea Party Luncheon theme. I’m going for a fun vintage vibe, but these are tween/teen girls, so I want to add a bit of physical activity to help keep the shrieks to a minimum… although my idea may induce a few. And one of the activities requires a hat, so I decided to make a DIY Mini Top Hat!
For this activity, I purchased two 80’s dresses for $5 each at Goodwill’s which made me laugh – the are SO 80’s. The idea is that the girls will break into two groups. At their feet there will be a pile of clothes – dress, shoes, sweater, glasses, and a cute diy mini top hat. One at a time, the girls need to get dressed, run to the end of the driveway and back where she gets undressed. The next person in line does the same. The first group done wins. Fun, right?
That’s the backstory for the need for a DIY Mini Top Hat, so here’s how to make it:
I grabbed my daughter’s Math Instruments kit and used her compass to create the top and arch that creates the sides of the hat. I also used a stencil to create the oval shape of the bottom. But don’t worry, you won’t have to go to those extremes because I did it for you!
Download the Hat Template and keep reading to learn how to assemble it!
How to Make a Foam Top Hat
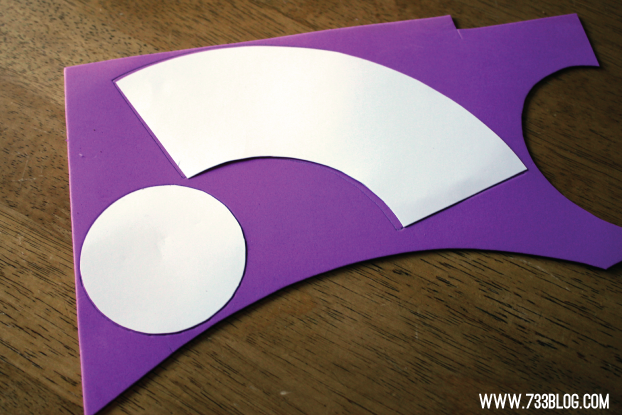
Cut out the template and trace it onto a piece of craft foam – mine was from the Dollar Store.
Cut out each piece.
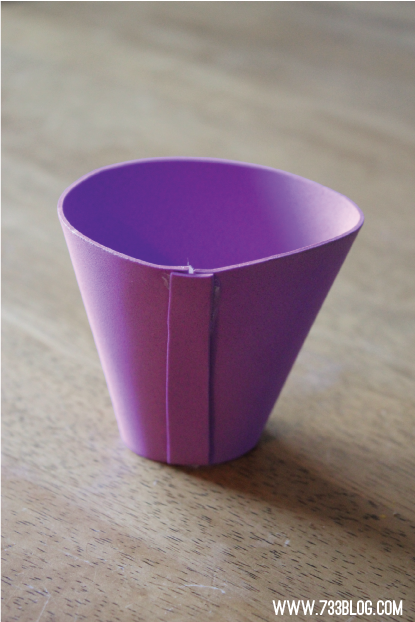
Assemble the side pieces by hot gluing the ends together. You may need to cut a small foam strip to help seal the two ends together
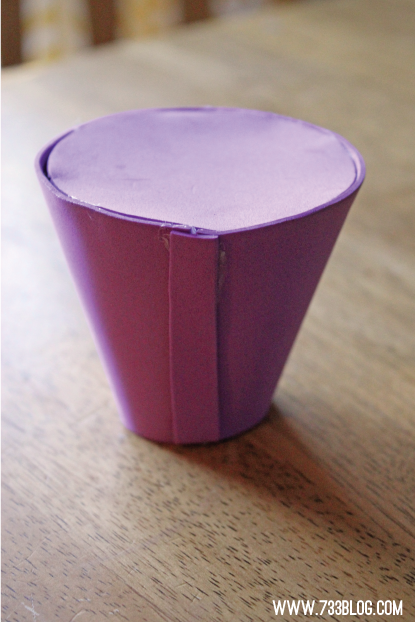
The top is a bit tricky, but very carefully glue that to the top of the cone you created.

Lastly, glue the top portion of the hat to the hat brim.
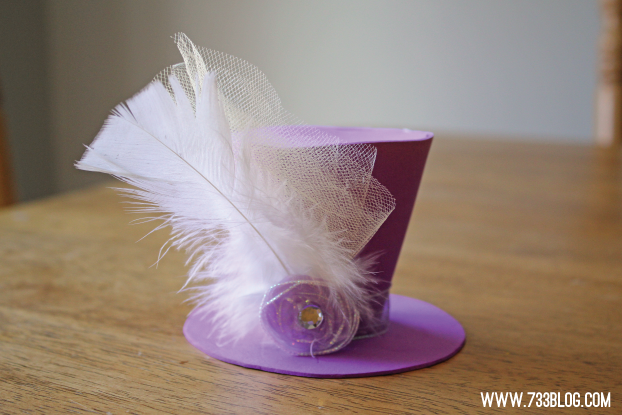
I chose to embellish mine with a ribbon flower, feathers, and tulle. Get as fancy and elaborate as you want – just have fun with it!
But how to attach it to hair? You could glue it to a headband, but I chose alligator clips.
Adding Clips to the Hat
I cut a circle of felt to glue to the bottom of the hat. I then glued two alligator clips to the felt, with the opening of the clips facing toward the front of the hat. And that’s all there is so to making this simple DIY Mini Top Hat!

