
For Christmas this year my side of the family decided to exchange ornaments instead of gifts. Of course I couldn’t just buy ornaments, so I broke out my Cricut and vinyl and made four unique and fun ornaments! I purchased clear glass ornaments from Walmart and then began brainstorming a concept for each person. I have a thing for llamas at the moment, so mine was a given. Olivia went straight to unicorn and Todd decided on the Grinch. Mason was the only undecided and after a little thinking I decided on a Flamingo. There’s an inside joke about the pink birds in my family, so I thought he’d enjoy making people giggle. Want to see them all?
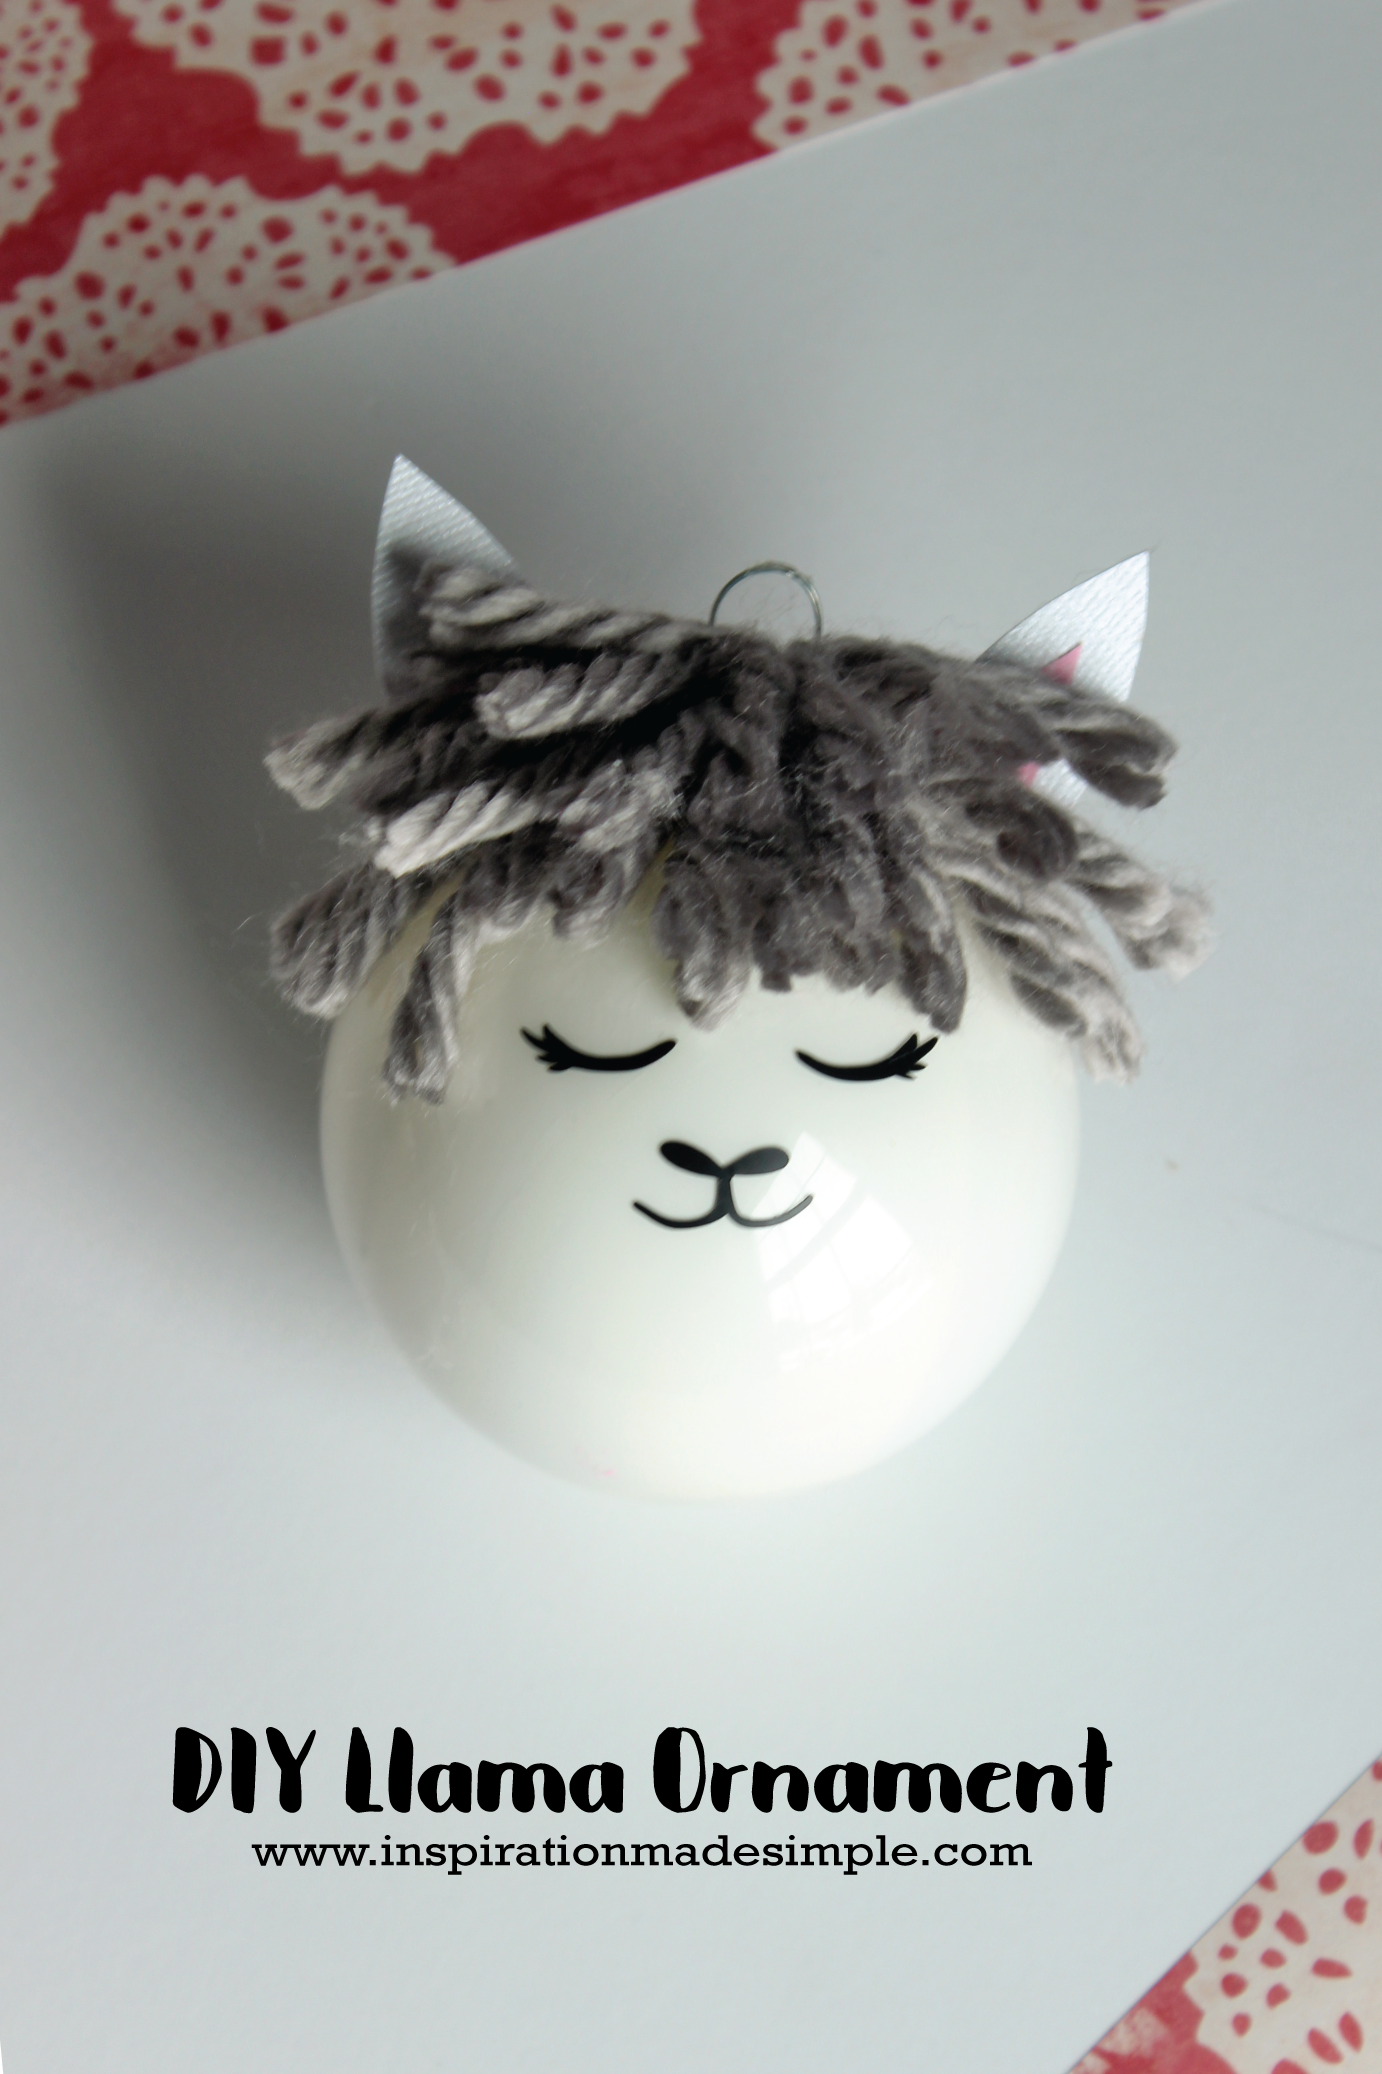
Don’t you just love it? SUPER easy with a vinyl face, paper ears and yarn mane.
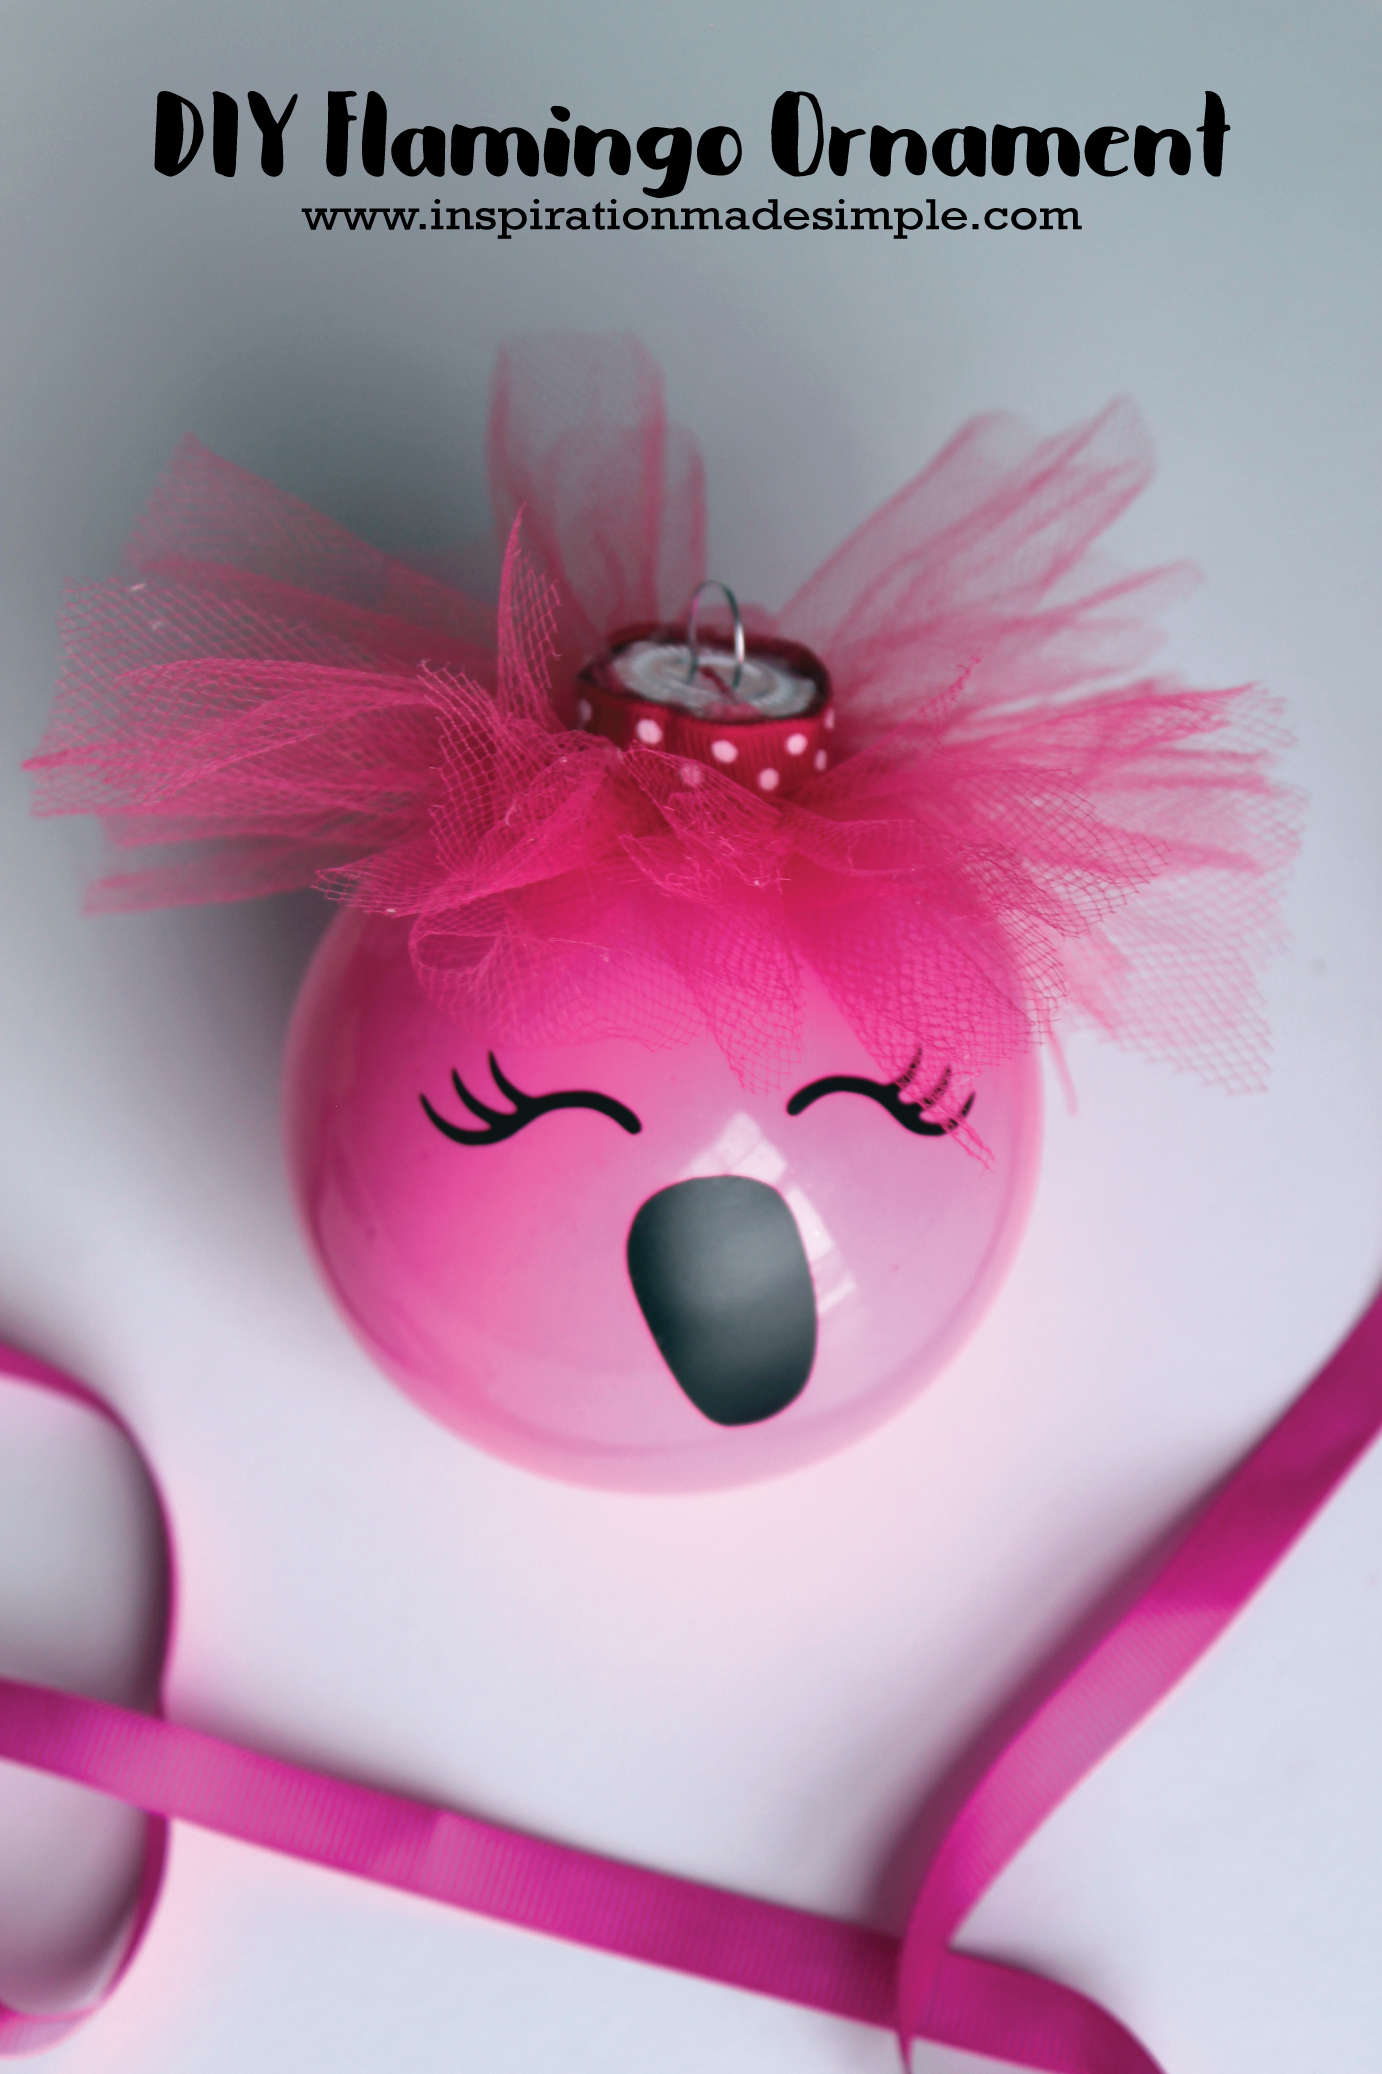
Another simple ornament with vinyl face and tulle “feathers”.
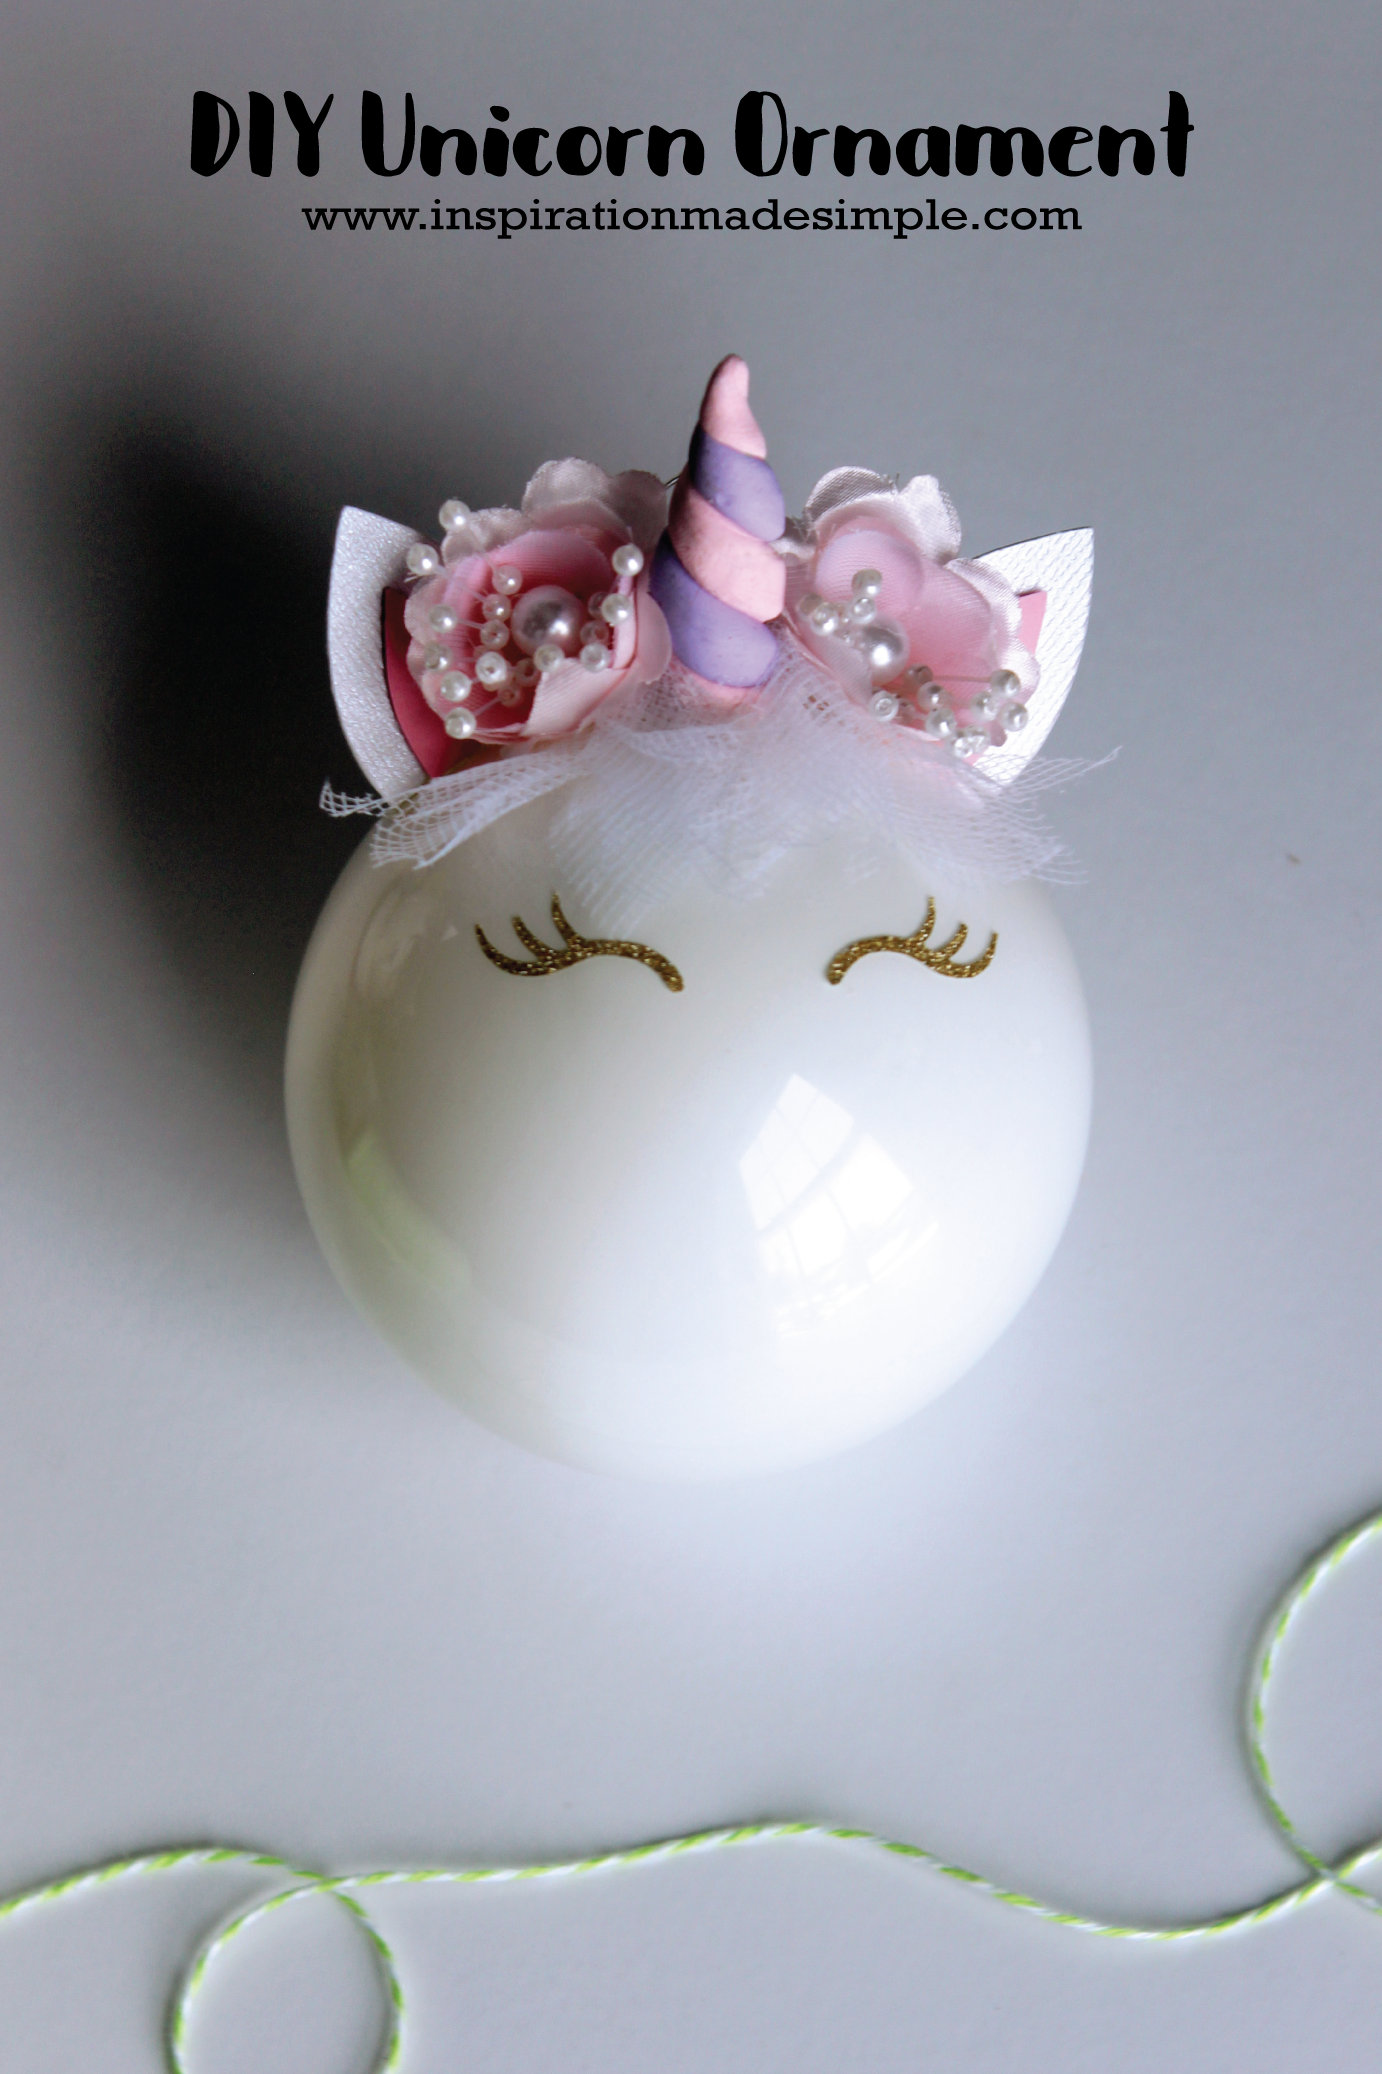
There are tons of amazing Unicorn ornaments out there. This is my take with a clay horn, recycled flowers I found in one of my craft drawers, tulle mane and vinyl face.
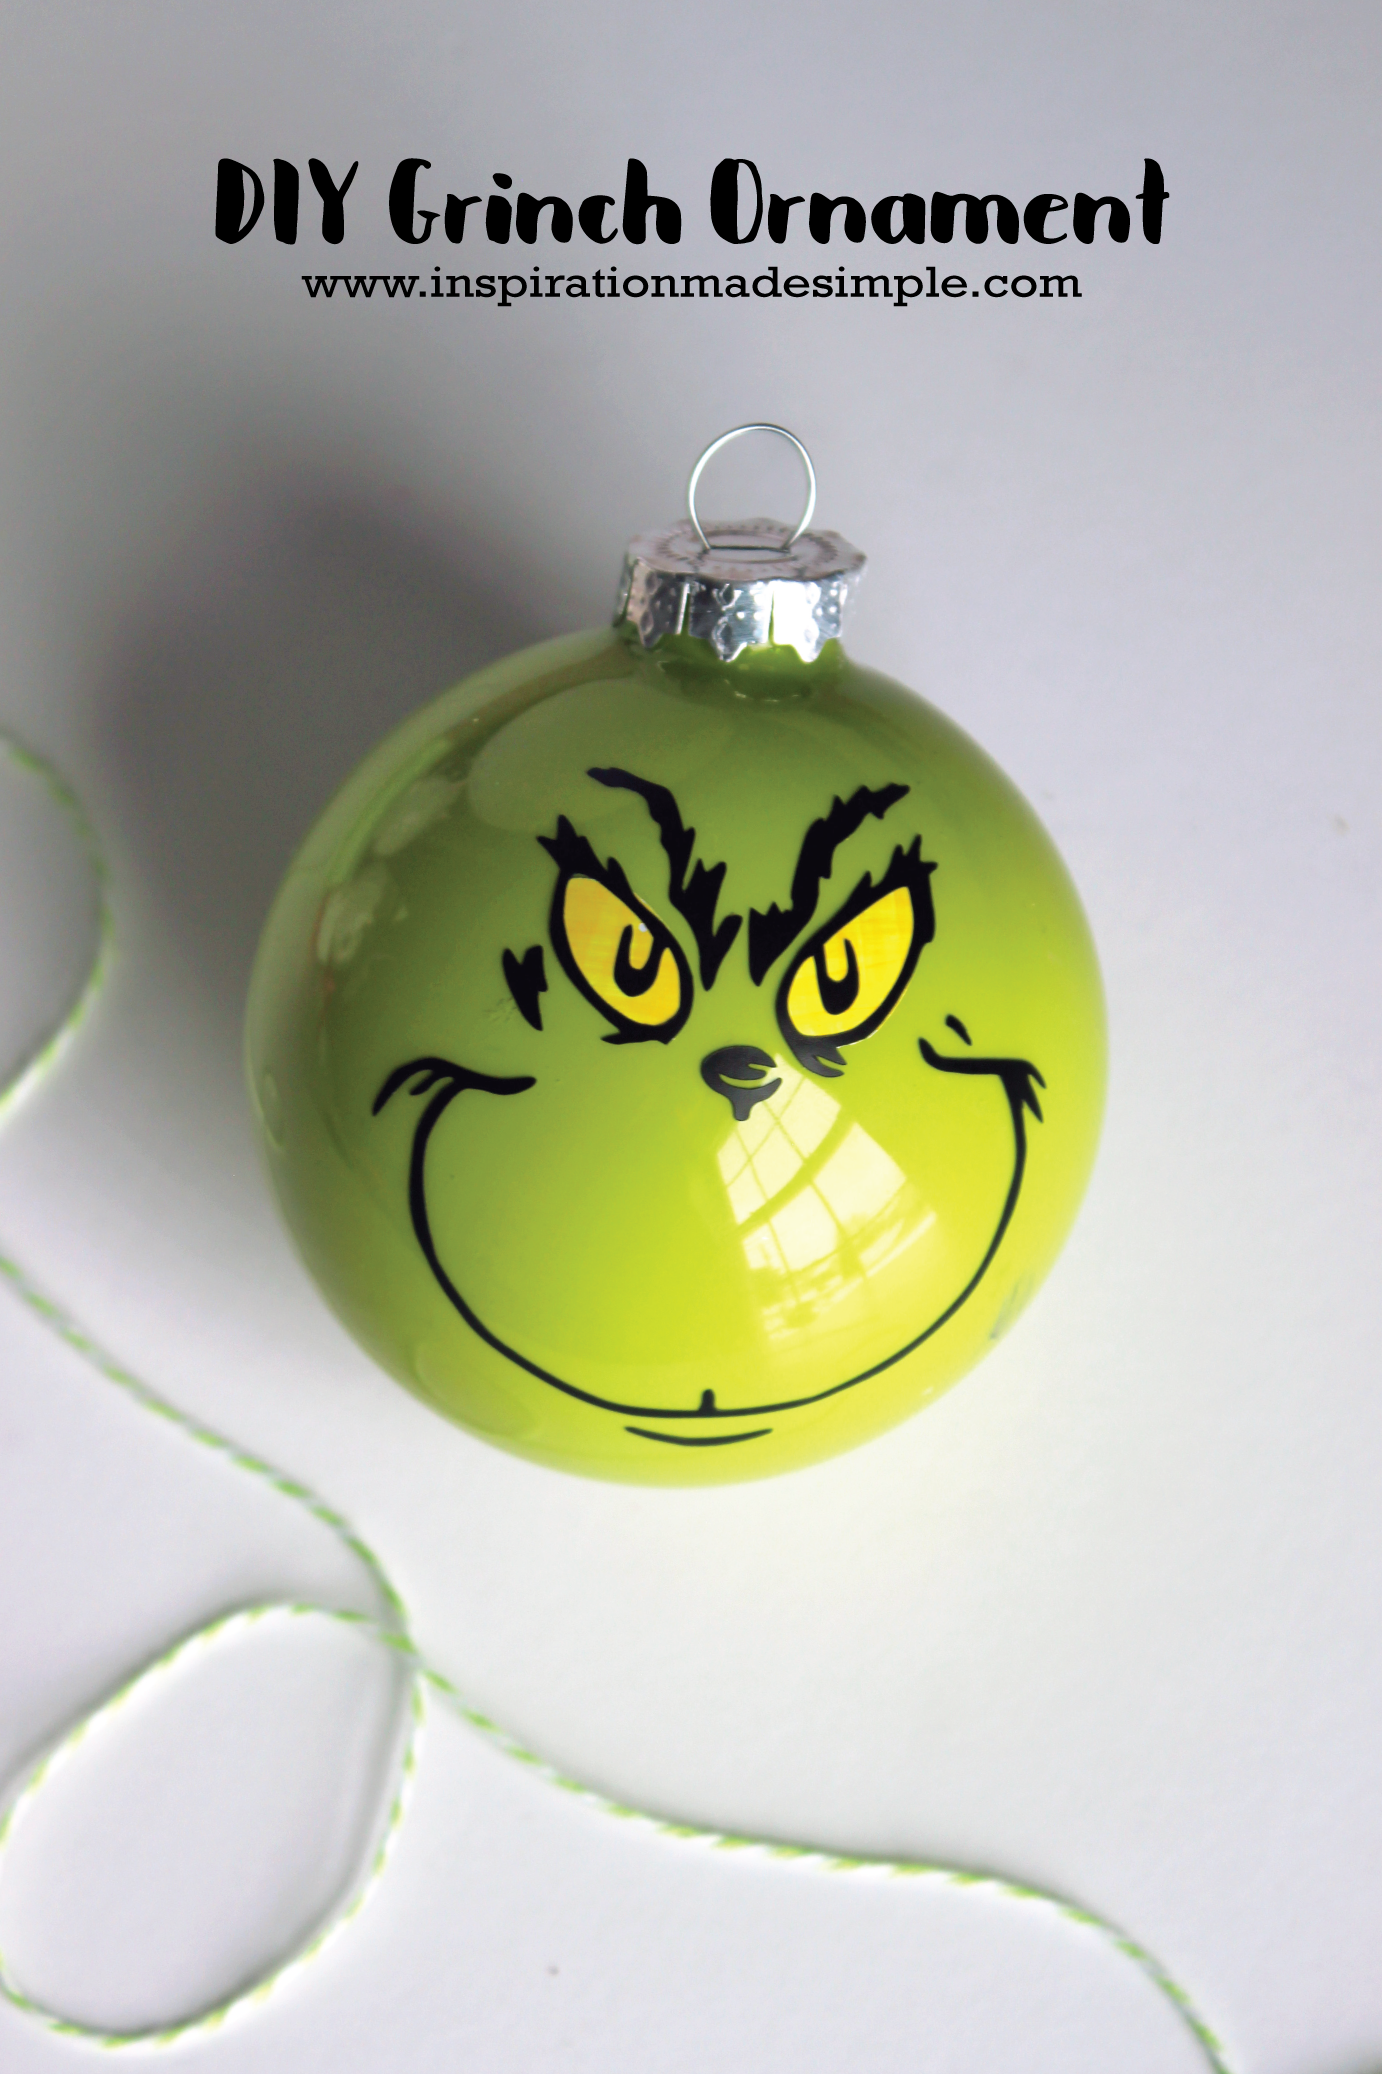
And last, but not least, the Grinch. All done in vinyl, including a vinyl heart on the back.
I created each of these in Cricut Design Space and saved my files so that you can easily make your own! The LLama was part of the Cricut Image Libary. I created the unicorn and flamingo designs, and uploaded a simple image of the Grinch and used Design Space to clean it up. All designs are for personal use only.
I didn’t take process photos, but I’ve outlined each one below. The first step is always the same:
Using acrylic paint, pour a small amount into the ornament and carefully turn the ornament until you get good coverage. Add a bit more paint and continue to turn until the inside is completely coated. Turn the ornament upside down on a paper towel and allow to dry overnight.
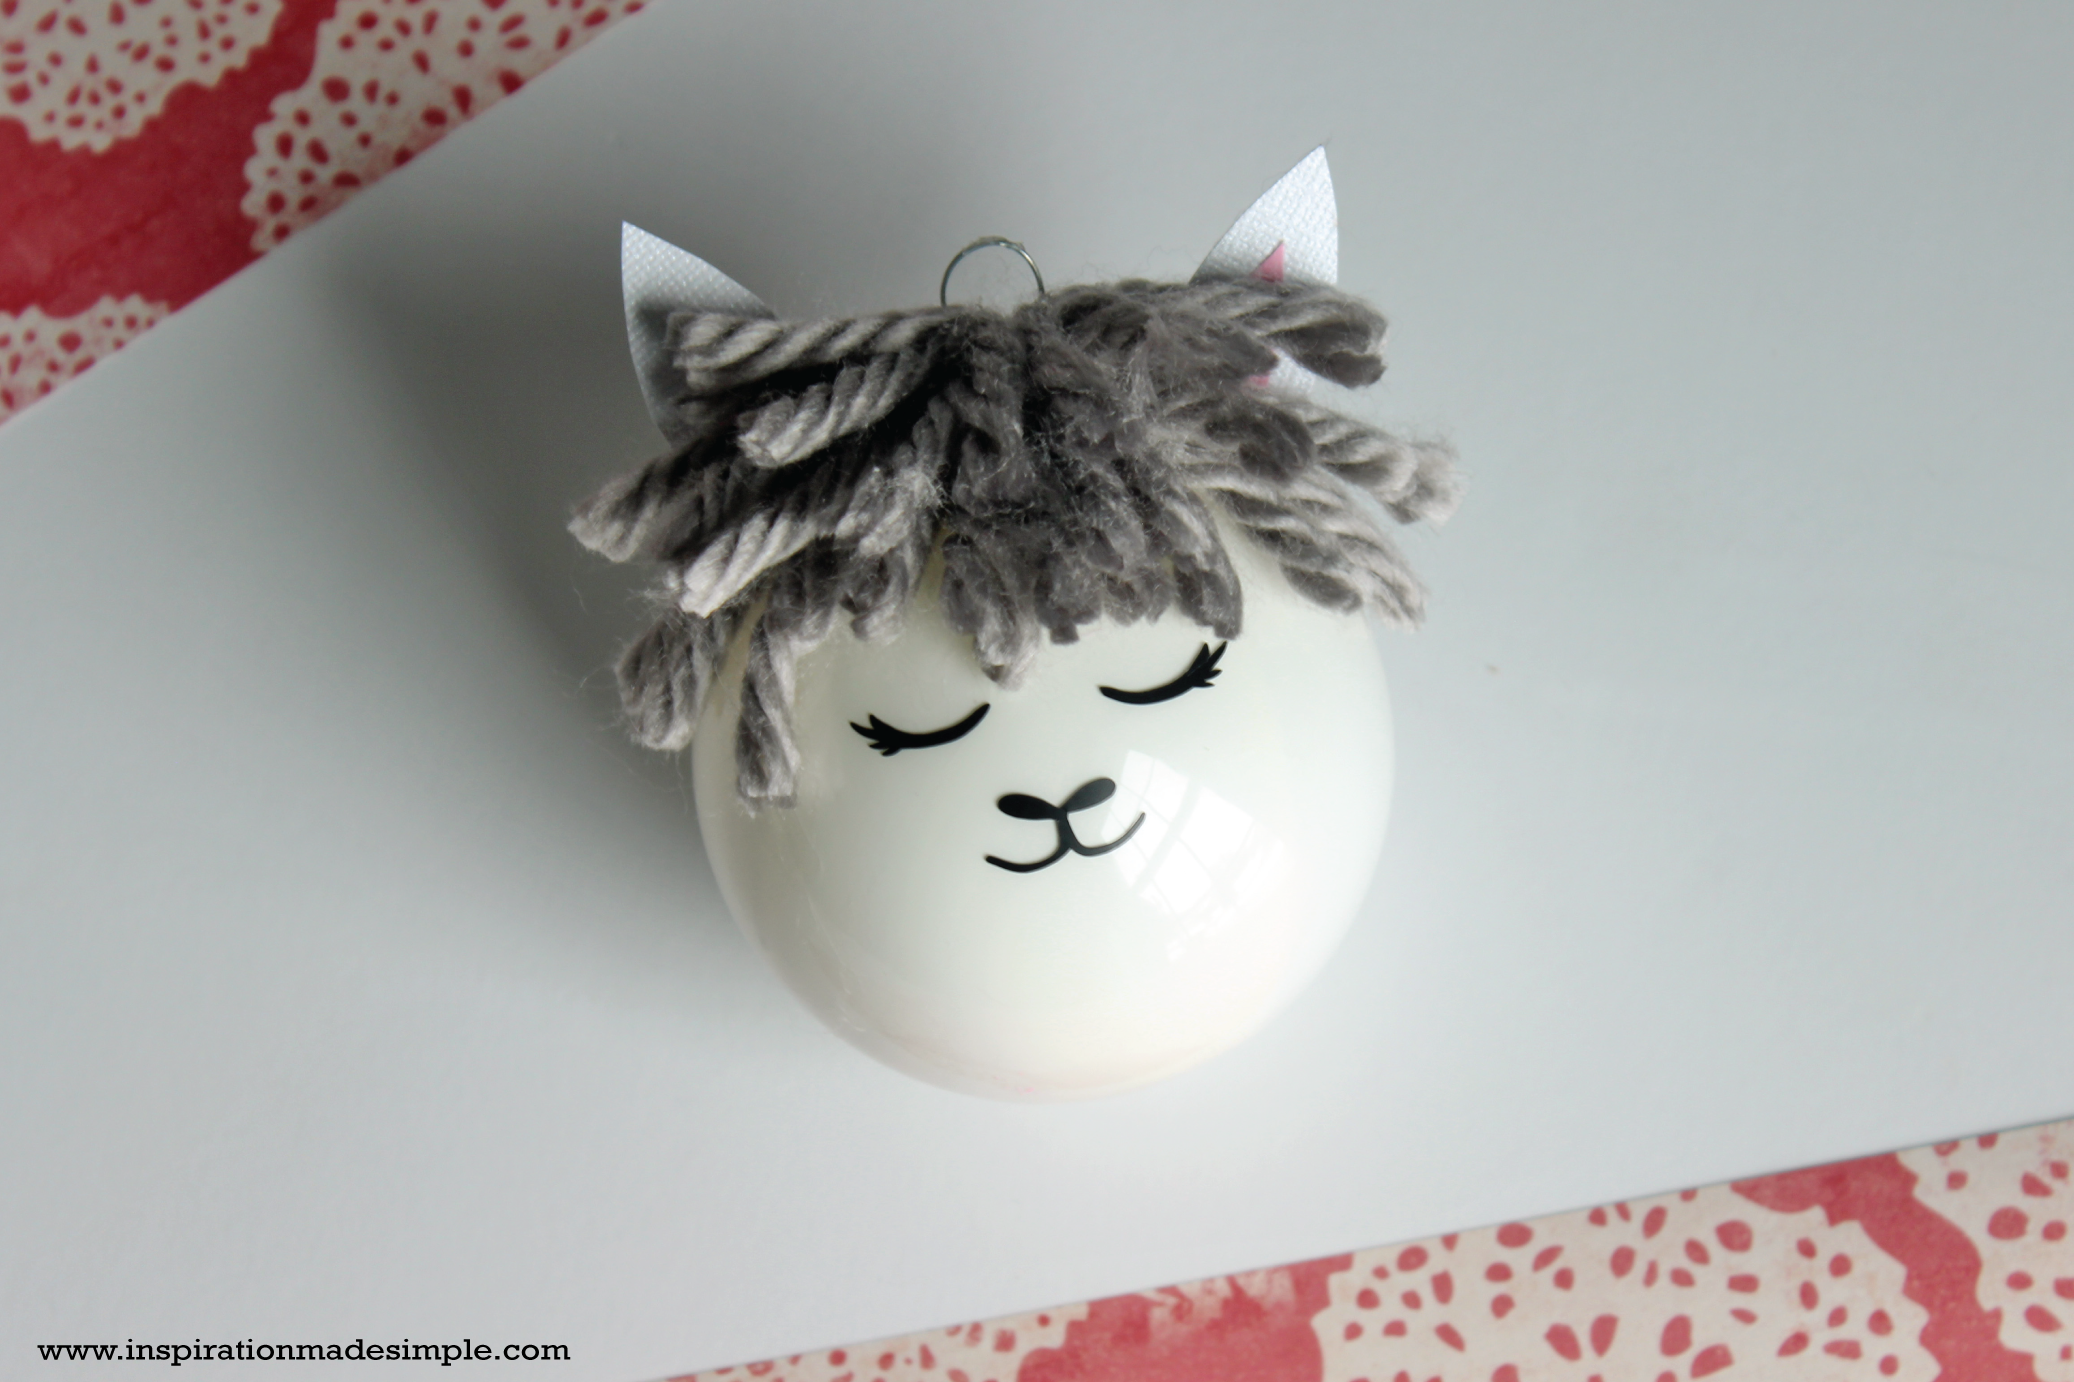
Once the ornament is painted, simply open the file above and cut out the vinyl face and paper ears. Glue the pink ear pieces onto the white. Fold the bottom of the ears and glue onto the ornament. Peel and stick the vinyl face onto the ornament. Lastly, using a thick yarn, attach to the ornament rim. I worked with one piece of yarn and zig zagged up onto the rim, attaching with glue as I went. Once I was done, I cut the loops so that each piece looked like hair.
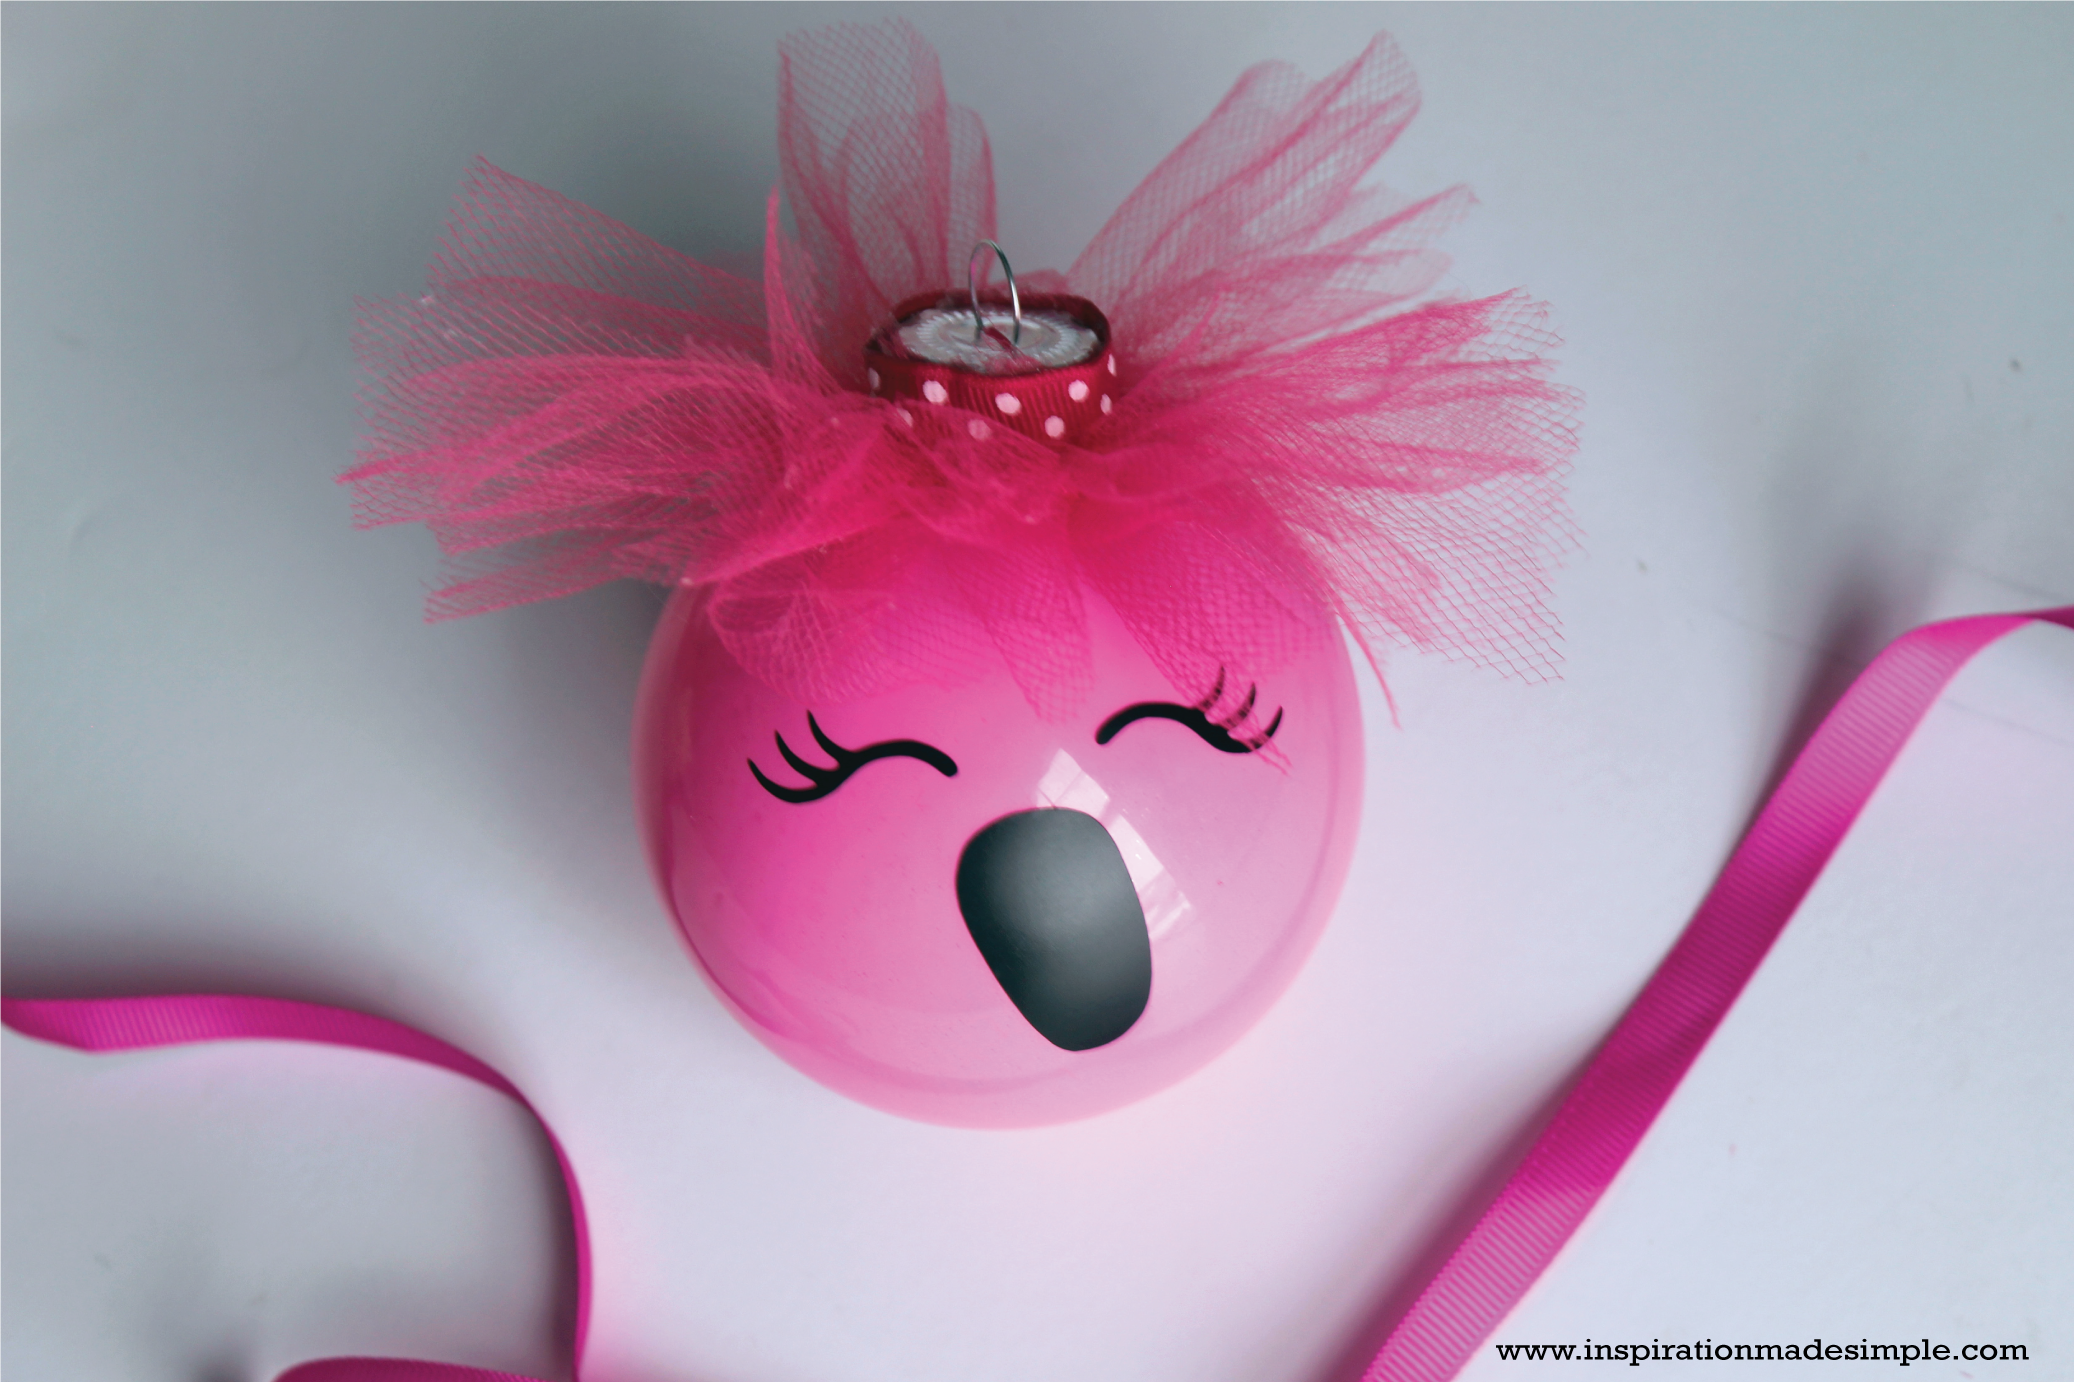
Once the ornament is painted, simply open the file above and cut out the vinyl face. Peel and stick the vinyl face onto the ornament. Using pink tulle, attach to the ornament rim all the way around. Cover the messy ends with a piece of ribbon.
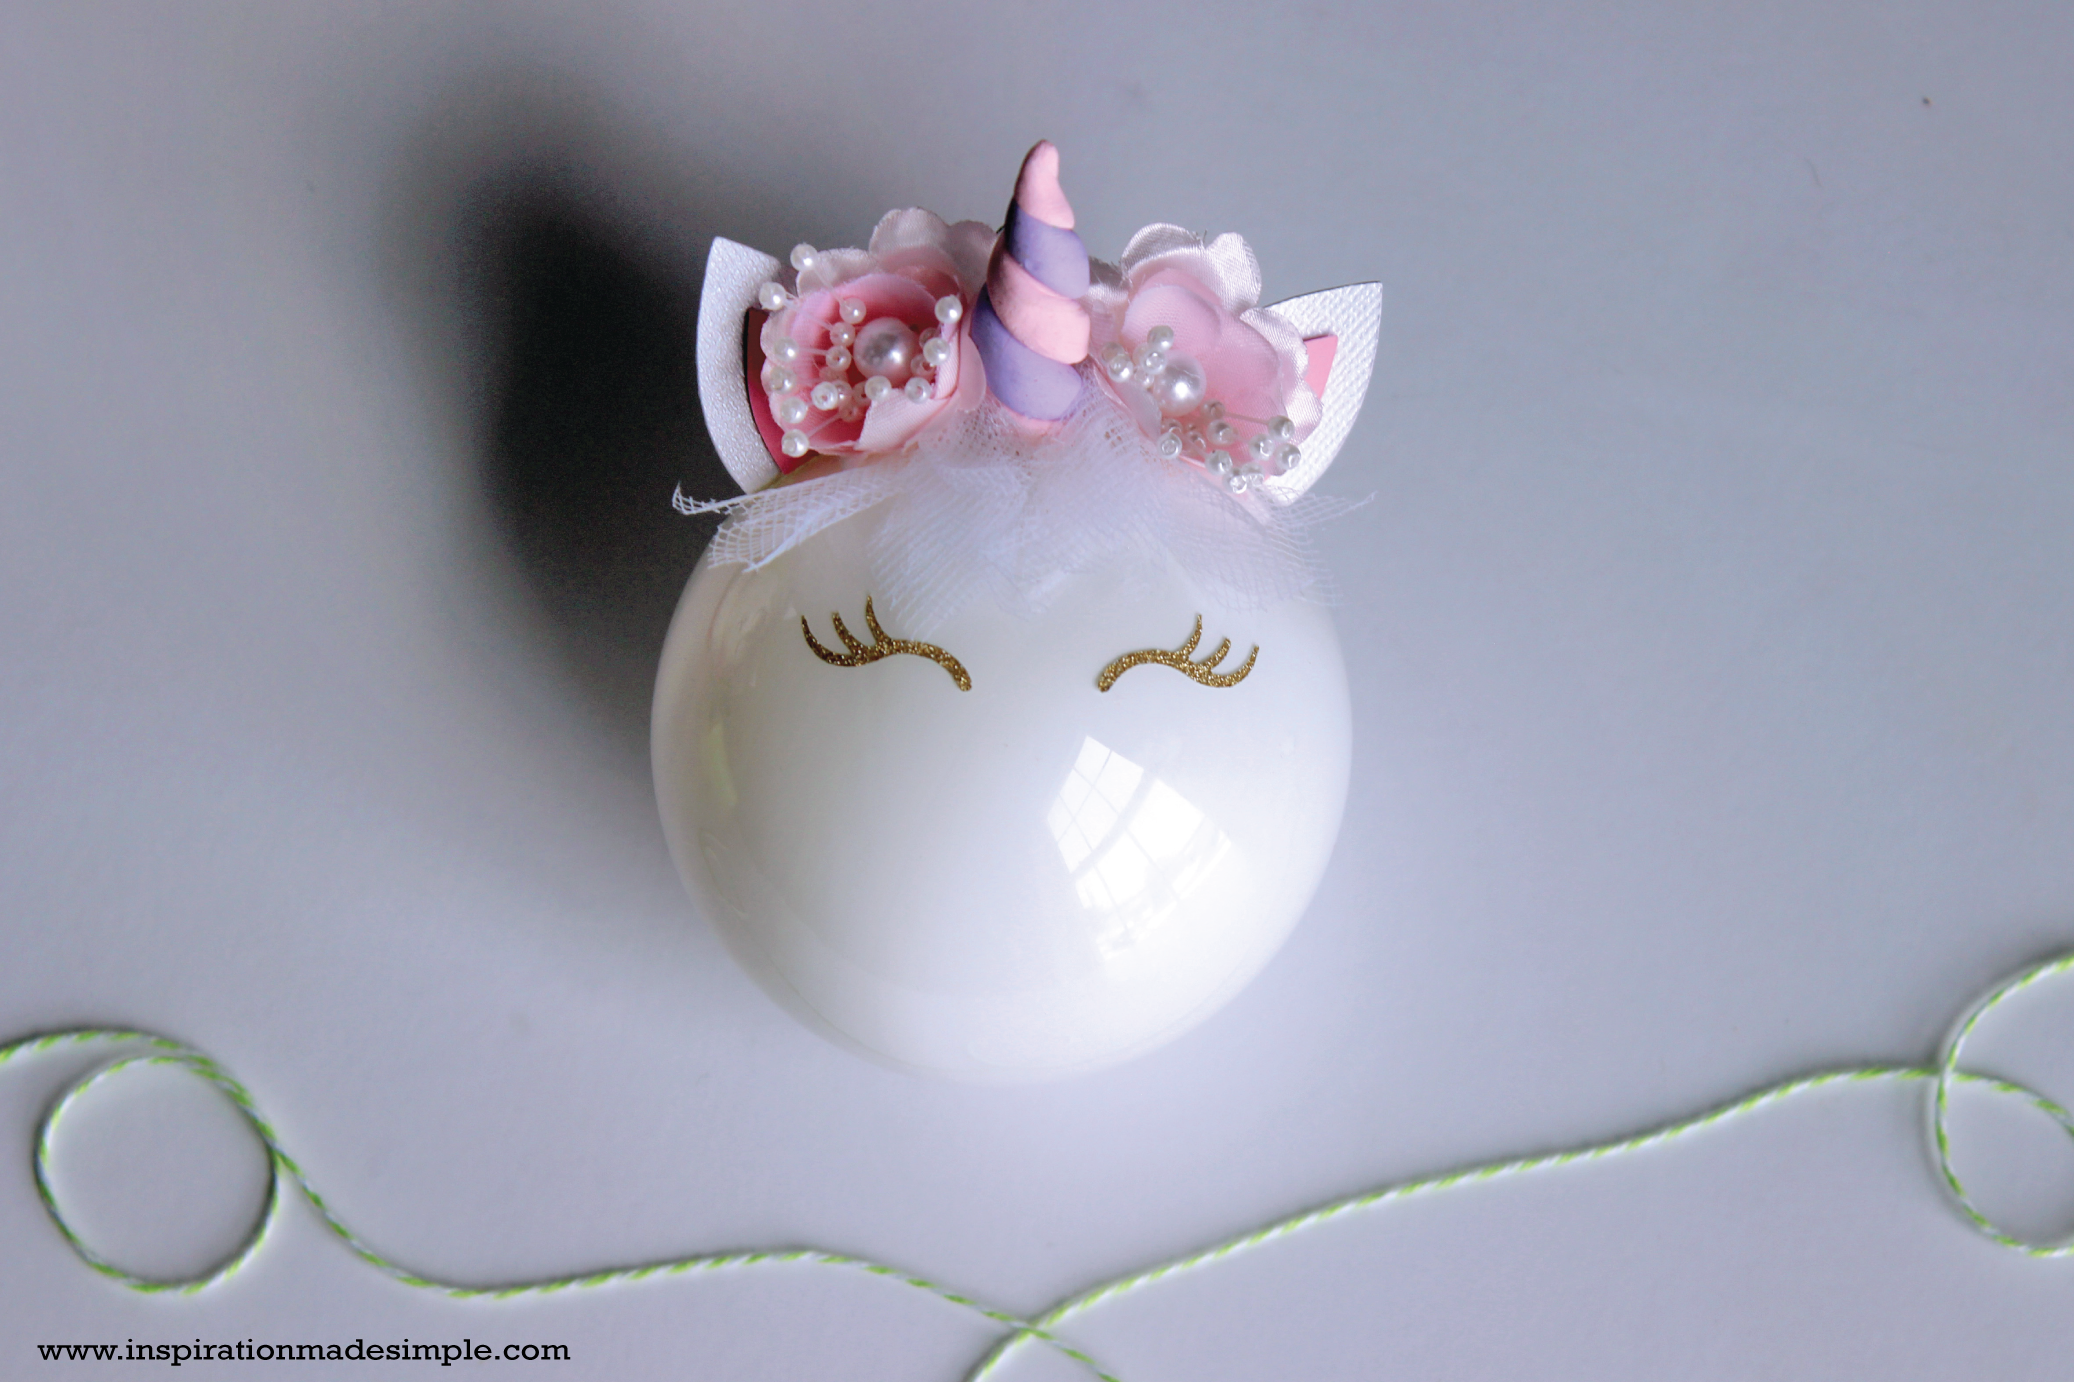
Once the ornament is painted, simply open the file above and cut out the vinyl face and paper ears. Glue the pink ear pieces onto the white. Fold the bottom of the ears and glue onto the ornament. Peel and stick the vinyl eyes onto the ornament. Working with clay, roll two colors into small snakes about 1 inch long. Place next to each other and roll into a horn. Bake following the directions on the clay package. Once cool, attach the horn to the ornament. Adhere small flowers between the horn and the ears. Using small pieces of tulle, attach behind and around the horn to create a mane.
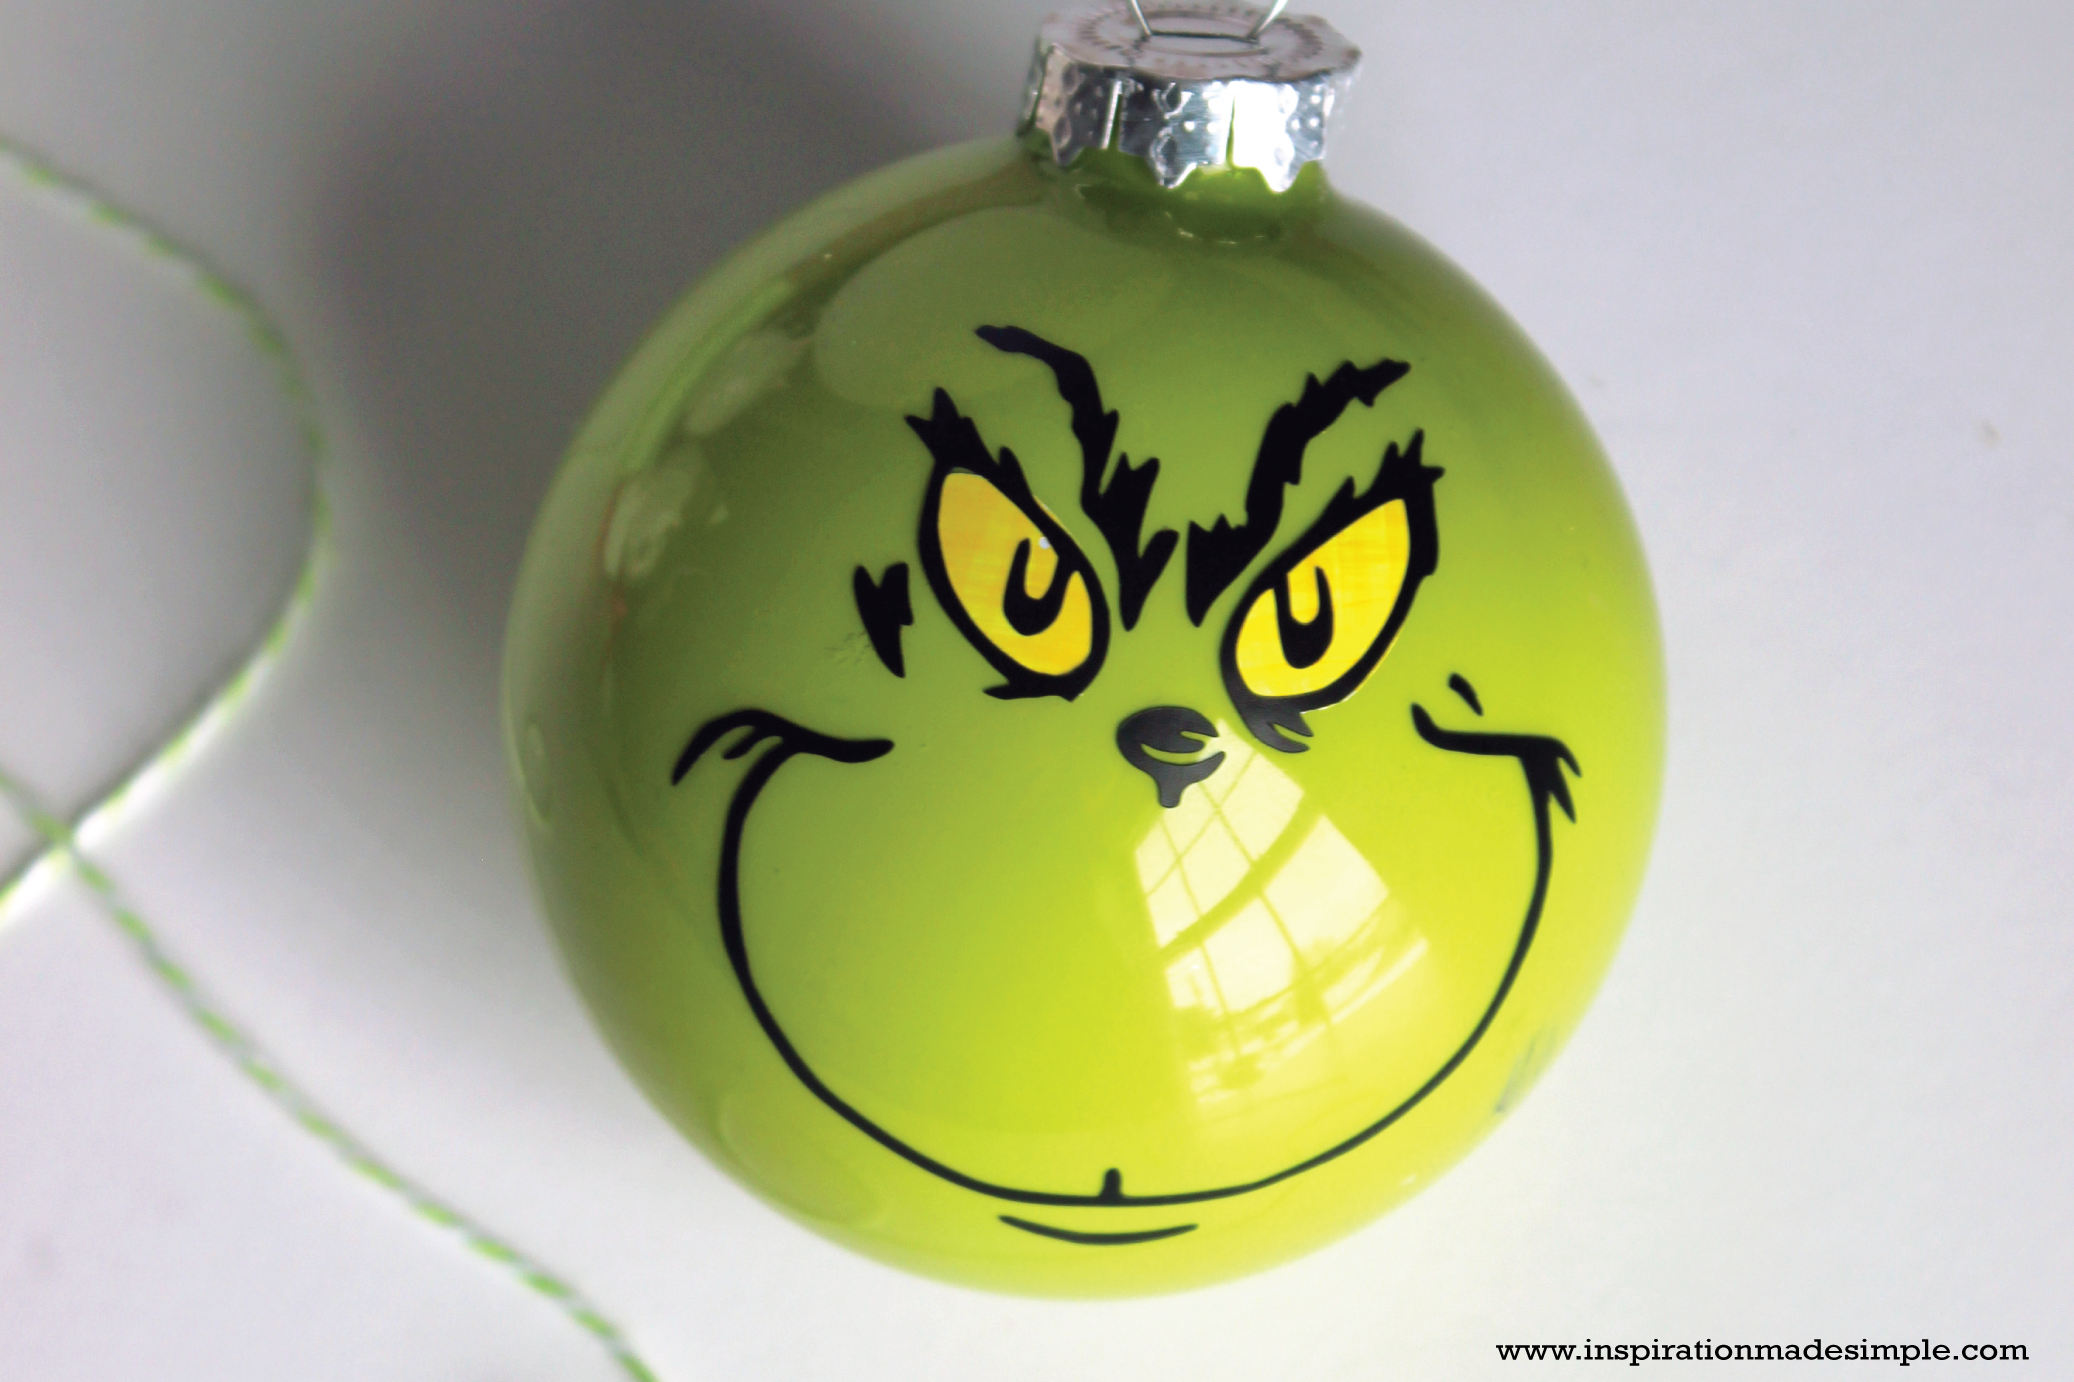
Believe it or not, this one was the hardest of the four, and that’s only because it was the most intricate of the vinyl. I didn’t have any yellow vinyl, so I colored on some white print and cut vinyl. lol Once the ornament is painted, simply open the file above and cut out the vinyl face and heart. I didn’t use transfer tape for this, I simply peeled and stuck the face onto the ornament by eye. Do whatever works best for you. Turn the ornament around and add a fun little heart because we all know the Grinch is truly a softie!
Now tell me, which one is your favorite? Do you ever make ornaments?


great ornaments
Thank you so much. My daughter is obsessed with Flamingos and we’re doing 12 days of homemade Christmas, so I wanted to make her a flamingo ornament. Happened on this post through Pinterest. Thank you for allowing us to use your SVG files for personal use. You’re a blessing!!!