
 Hi everyone! I’m pretty excited to have a good Bloggy friend visiting today – Amanda and I go way back almost to when I started blogging. I LOVE the project she is going to share, and I hope you do too! Make sure to head on over to her blog from more projects like this!
Hello seven thirty three readers! I am so happy to be here today and share a fun project with you! My name is Amanda and I blog over at The Contractor Chronicles with my partner in crime, my husband, Spencer. We bought a house is 2007 and have spent the past few years updating it and making it our own. For the past couple weeks I have been remodeling a room for my two sons and wanted to share my recent build/décor item with you guys – an easy (one hour) 1×6 floating shelf.

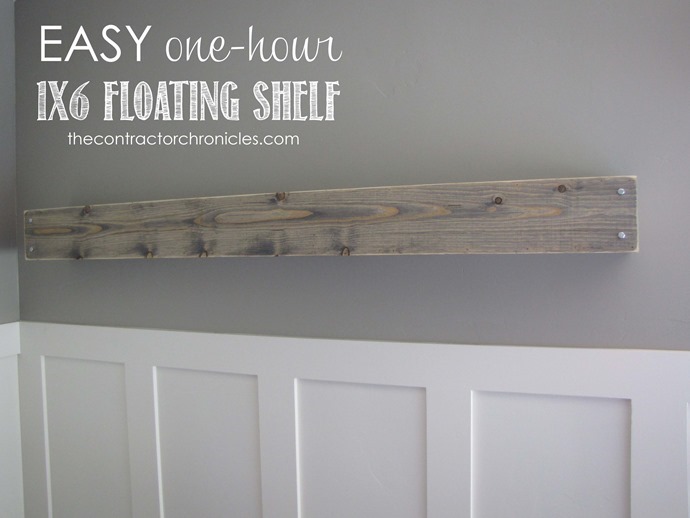
The best part of building things yourself is that you can make them the size, shape or length you want. This shelf is 5 feet long, but if you need/want one longer you can follow the same steps, just adjust the lengths to your measurement. This shelf is a really easy build and you can be waiting on stain to dry in just an hour! YOU WILL NEED: (3) 1” x 6” x 6” pine boards Wood Glue (1) 2×4 Pin nailer/nails Wood FillerScrews 1 x 1 1/2” bolts (optional) Sandpaper Stain of your choice. CUT LIST: (3) 1” x 6” x 6” at 5 feet. (top, bottom and front/face) (2) 1” x 6” x 6” at 4 inches (sides) If you don’t have a miter box, Home Depot will cut the wood for you.  copy")
 copy")
Pick the piece you want as your face piece. I wanted mine to be knotty and look rustic and old so I picked the one with the most “character.” Glue the entire edge of top piece.  Then using your pin nailer or nails and hammer, nail the face piece to the top piece. Then glue and nail your face piece to the bottom piece. You should have a box…. missing the bottom. If should look like this. The face piece for your shelf is the piece on the top in this picture. The shelf face will have nail holes.
 Then using your pin nailer or nails and hammer, nail the face piece to the top piece.
  Then glue and nail your face piece to the bottom piece.
  You should have a box…. missing the bottom. If should look like this. The face piece for your shelf is the piece on the top in this picture. The shelf face will have nail holes.
  copy")
Glue both sides of the side pieces, insert them into the end and nail in place. 


Now the shelf if built!! Give it a quick sand to smooth it out a bit. Fill the little holes with wood filler or if you have a matching putty, just wait and putty when you are done staining. All the wood in their room is stained Classic Gray by Minwax so that it my stain of choice.
 Fill the little holes with wood filler or if you have a matching putty, just wait and putty when you are done staining. All the wood in their room is stained Classic Gray by Minwax so that it my stain of choice.
 copy")
After your stain is dry, sand your shelf down again to give it a weathered look – then give it a once-over with Rustoleum Matte Clear Finish Spray. It has been about an hour and you are done building and just waiting for everything to dry and cure. I waited over night and was ready to hang the shelf up – but first I wanted to add a little bit of character to the shelf. Using the same bolts I used to hang up their planked truck art and to attach their bed rails – I screwed them into the wood. These are purely for decoration! But if you want some too… measure in 1 1/4” from each side and mark it. Use a 9/64 drill bit and pilot drill a hole.
 It has been about an hour and you are done building and just waiting for everything to dry and cure. I waited over night and was ready to hang the shelf up – but first I wanted to add a little bit of character to the shelf. Using the same bolts I used to hang up their planked truck art and to attach their bed rails – I screwed them into the wood.
  These are purely for decoration! But if you want some too… measure in 1 1/4” from each side and mark it.
  Use a 9/64 drill bit and pilot drill a hole.
 copy")
After you pilot drill use your bolt and 7/16 socket bit and drill them in.

 copy")
HOW TO HANG A FLOATING SHELF So now your shelf is built, dry and ready to hang. Measure the inside of your shelf – Mine is 58 1/2” and then cut your 2×4 to be 1/2 an inch smaller – so I cut mine at 58”. Find the center of where you want to hang your shelf, use your level to make sure it is straight and screw your 2×4 in the wall at the studs. If you don’t have studs – use drywall anchors – but make sure your 2×4 is nice and secure and level! Now you screw your shelf into the 2×4 and you are set. To make this part easier, measure in 3/4” to make sure you hit the middle of the 2×4 and pre-drill your screws.
 Find the center of where you want to hang your shelf, use your level to make sure it is straight and screw your 2×4 in the wall at the studs. If you don’t have studs – use drywall anchors – but make sure your 2×4 is nice and secure and level!
  Now you screw your shelf into the 2×4 and you are set. To make this part easier, measure in 3/4” to make sure you hit the middle of the 2×4 and pre-drill your screws.
  copy")
Before you drill, if you need to, make sure you measure both sides of the wall to make sure your shelf is right in the middle. Since your 2×4 is only 1/2” smaller than your shelf you wont have to wiggle it too much. Then finish drilling your screws into the 2×4. And now you are done! It seems like there are a lot of steps, but trust me – this is an easy to build shelf and hanging it is a breeze!! 
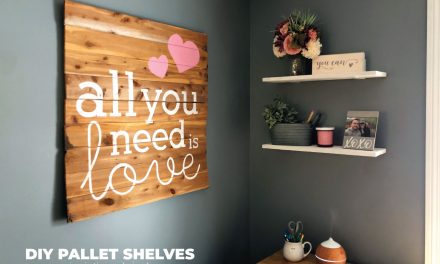
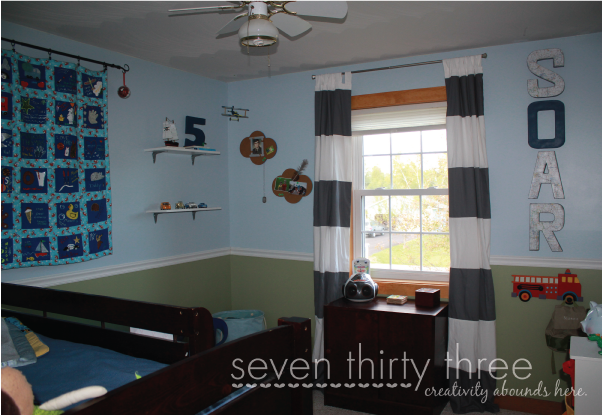
 Now to decorate! I need some fun frames and cute printable and trucks! I would love if you would follow along with me with my boy’s room remodel and see what I end up putting up there in the end! Thank you so much for having me today! And make sure you swing by to see the other projects we are working on.
 And now you are done! It seems like there are a lot of steps, but trust me – this is an easy to build shelf and hanging it is a breeze!!


 Now to decorate! I need some fun frames and cute printable and trucks! I would love if you would follow along with me with my boy’s room remodel and see what I end up putting up there in the end! Thank you so much for having me today! And make sure you swing by to see the other projects we are working on.

You can also follow me here as I am always showing sneak peeks of the projects we are working on!

Stay up-to-date with all things seven thirty three:


Awww! Thanks for having me today! Can you believe we have been doing this blogging thing for so long? It has been so fun to get to know one another! Have a great day friend!