
Is your little shredder ready to rock their birthday? Planning a bash fit for a rockstar can be tons of fun, and crafting personalized party favors adds a special touch. Look no further than a one-of-a-kind guitar pick necklace – the perfect keepsake for any budding musician!
There are countless ways to celebrate a rockstar birthday, and these custom guitar pick necklaces are a guaranteed hit. They’re easy to make, budget-friendly, and can be customized to match your party theme, the birthday kid’s favorite band, or even use a photo of their favorite singer.
As you can probably tell, I’ve been busy planning my daughter’s 11th Rock Star Glam Birthday Party. I made these Guitar Pick Necklaces and thought I should share how I made them in case anyone else wants to give it a go.
How to Make a Custom Guitar Pick
Mod Podge
Paint Brush
Scrapbook paper or other design to customize guitar pick
Xacto Knife or Scissors
Drill & Drill Bit
Elastic or other Necklace Material

Designing a Guitar Pick
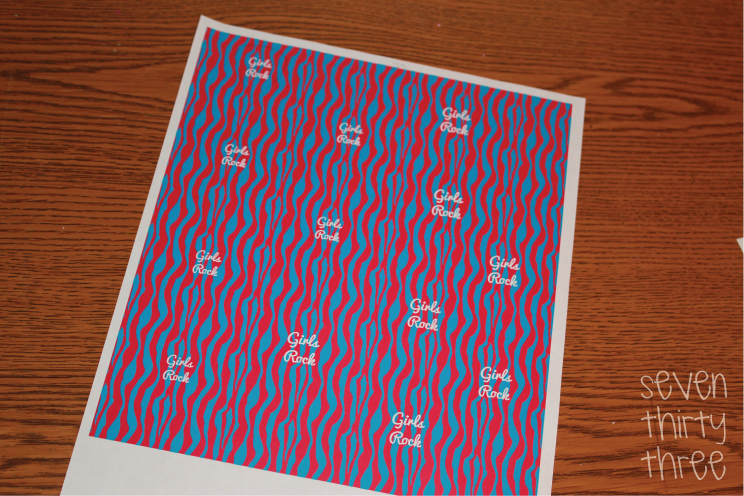
In a word processing or design program, set up the design making sure that the dimensions of the design, in my case “Girls Rock”, fit within the dimensions of the pick. You can do anything you want – a name, photos, etc.
TIP: Not tech savvy enough to design something? That’s OK! Use scrapbook paper or trace the pick and then have the kids draw their own image!
If you’ve designed the pick on the computer, print it onto a piece of paper, ideally using a laserjet printer so there is no worry about the ink bleeding.
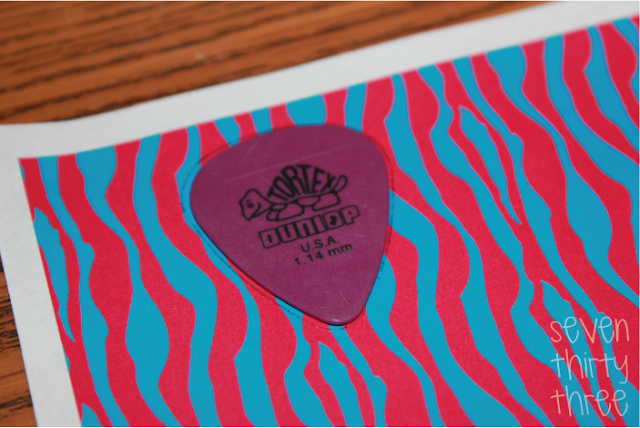
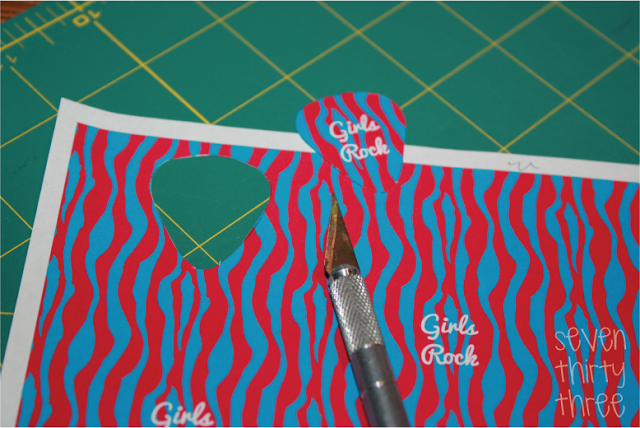
Place the pick over the design on the paper and trace around it.
 Using an Xacto knife cut along the line.
Using a paint brush, add a thin layer of Mod Podge to the pick.
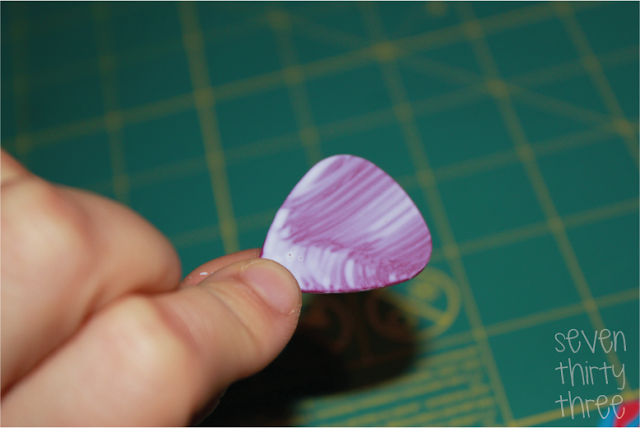
Place the custom design cut out onto the pick and press down, flattening out any air bubbles. Fold over the sides and set aside to dry.
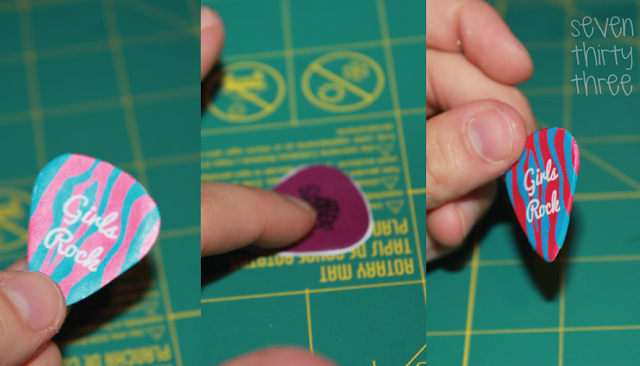
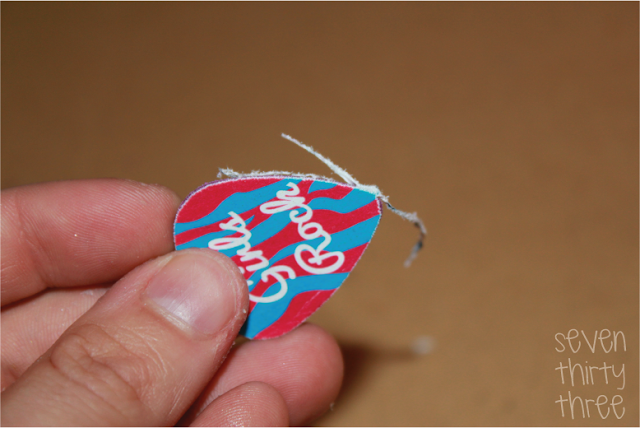
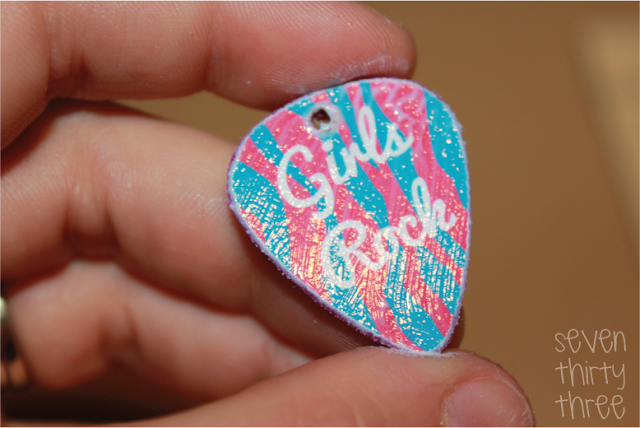
Once the Mod Podge is dry, sand off the overhanging edges with sandpaper.
Making the Necklace
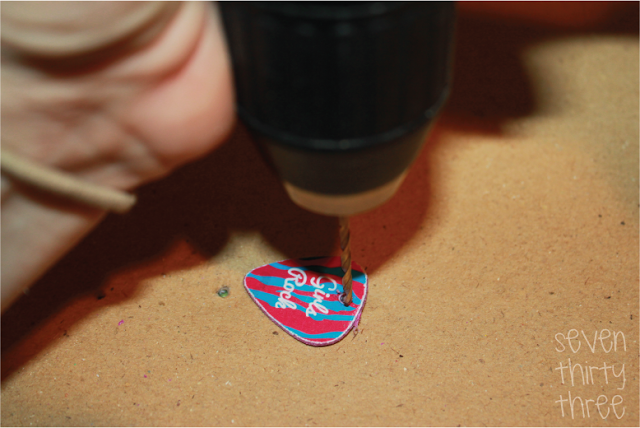
Drill a small hole in the center top of the pick. I found it best to do this from the front of the pick and go in until you break through the back. Then pull the pick off the drill, don’t reverse it. If you do, it pulls the paper back through, and when I tried to sand it down, it left it messy-looking. If any of the paper pulls back through. use a pencil to push it back.
Add a couple of layers of Mod Podge on the front and sides of the pick. Allow the Mod Podge to dry completely before moving on to the next step.
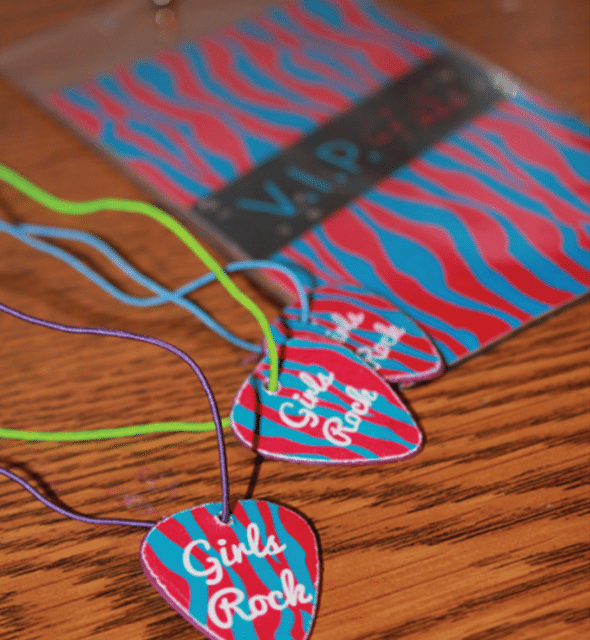
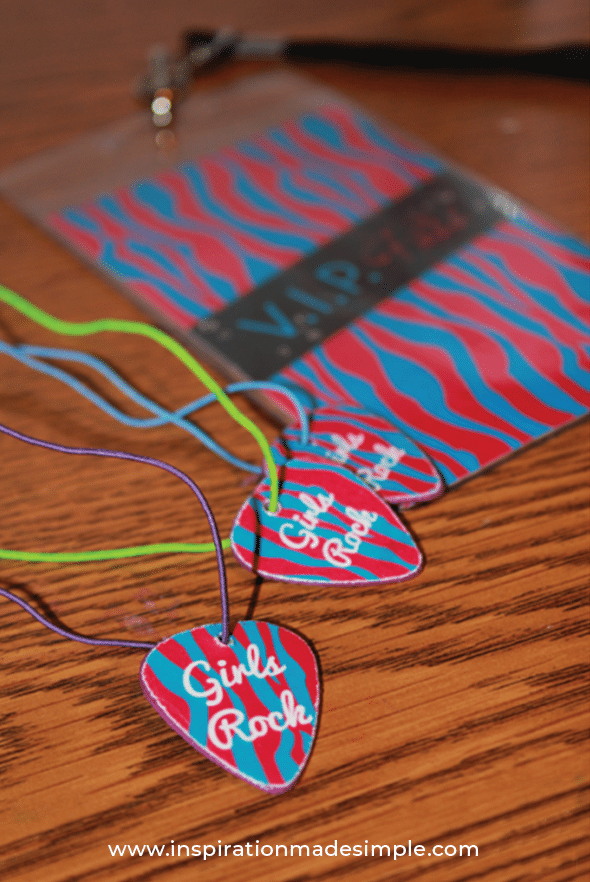
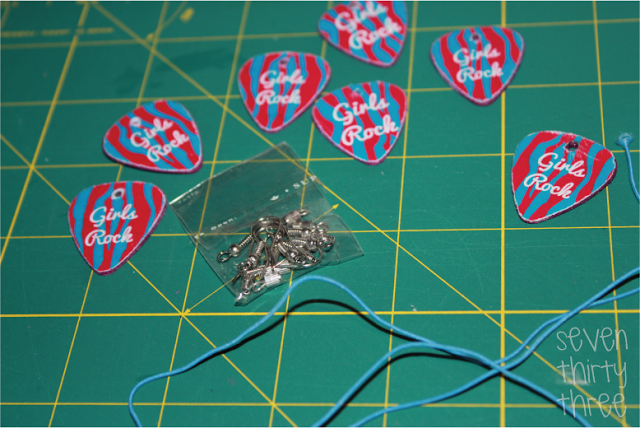
Using necklace elastic, run it through the front of the pick. Tie off the elastic or add a clasp and you are done with your DIY Guitar Pick Necklace!
There you have it! With a little creativity and these simple steps, you’ve crafted personalized guitar pick necklaces that are sure to be a hit. They’re perfect for party favors, birthday gifts, or even stocking stuffers for any music lover. Let your imagination run wild and create unique keepsakes that celebrate the rockstar within!

Love this! My 12 year old saw it…guess what I’ll be making!!?? Thanks for sharing! 🙂
Thank you for sharing this – I bookmarked this and can’t wait to make some.
This is so great! My son is learning how to play guitar, and he is always jealous of jewelry I make for myself and his sister. I gonna make a boy version for him! He will love it! 🙂
This is an adorable craft that is sure to be a hit at your daughter’s party. It also would be a fun craft for me to make with my niece.
That’s awesome!! 🙂 Have you seen the guitar pic punch? It’s a heavy duty punch that, you guessed it, punches a guitar pic out of most anything… Ideas are endless!! Thanks for sharing this!! It’s a great alternative to buying the punch!! 🙂
You are a genius! What an adorable idea for a party favor.
I would love for you to post this on my Fall In Love linky party today.
What a great idea! Stopping by from Someday Crafts link party
What a great idea!! These are super cute 🙂 my husband is a musician and my daughter loves all things music…she would LOVE this!
I would love it if you would link up to my new fashion linky party 🙂 It’s called DIY Diva Thursdays. Hope to see you!
Kara
http://www.mineforthemaking.com
I wanted to let you know that I featured this on my “What I Bookmarked This Week” post – stop by and see! Thanks for the inspiration.
Just stopping by to let you know that I have featured your project on Fun Family Crafts today! You can see it here
http://funfamilycrafts.com/guitar-pick-necklace/
If you have other kid friendly crafts, I’d love it if you would submit them 🙂 If you would like to display a featured button on your site, you can grab one from the right side bar of your post above.