
My good friend Krista asked me if I would help plan her daughter, Everleigh’s first birthday party. You know me and how much I love to plan a good party, so I jumped at the chance!
Krista is pretty crafty herself, though she would say she isn’t, and has had a lot of great idea, so I decided to take the decorations upon myself, while she planned the favors and food.
I decided on the modern Minnie from Minnie’s Boutique, so we have a pink and black theme with LOTS of polka dots. I’ll share the final design of the dessert table, and the fun favor tags and banner I made after the party (which is in March), so make sure to check back for those!
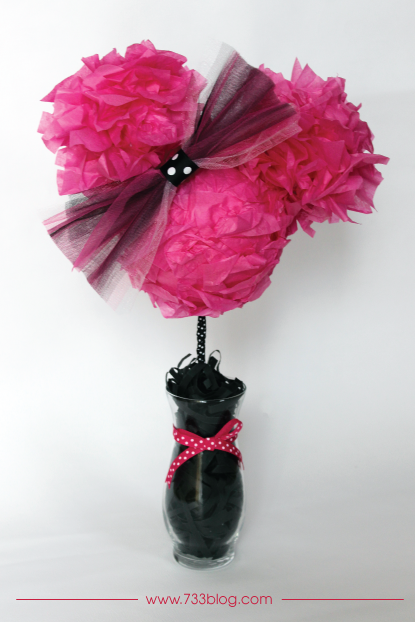
TOday I’m going to show you had I made these adorable Minnie Topiaries that will add some height to the dessert table. They are super easy to make and I think they are just the cutest things ever.
For one topiary you need:
1 – 5″ styrofoam ball
2 – 3″ styrofoam balls
Pink tissue paper
Wood Dowel
Black polka dot ribbon
Pink polka dot ribbon
Black shredded paper
Black, Pink and white tulle – 1/4 yard is plenty
Hot Glue Gun
Skewers
Scissors
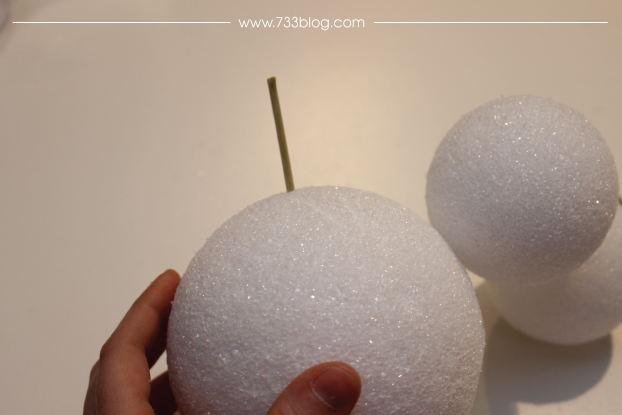
First I put together Minnie’s head using the styrofoam balls and shish kabob skewers. Break a skewer in half, insert into the 5″ ball and then insert the other 3″ ball onto the other end. I also added hot glue along the skewer where the two balls met to keep them in place. Do the same for the 2nd “ear”.
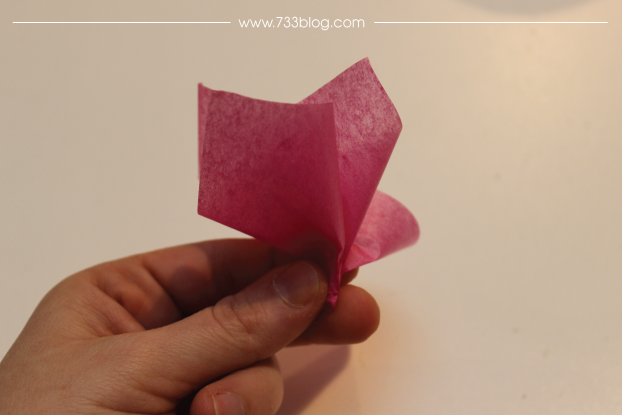
Next you will cut 3″x4″ rectangles out of the pink tissue paper. Pinch the middle of a rectangle and folded it up so that you get a point at one end and a poof at the other.
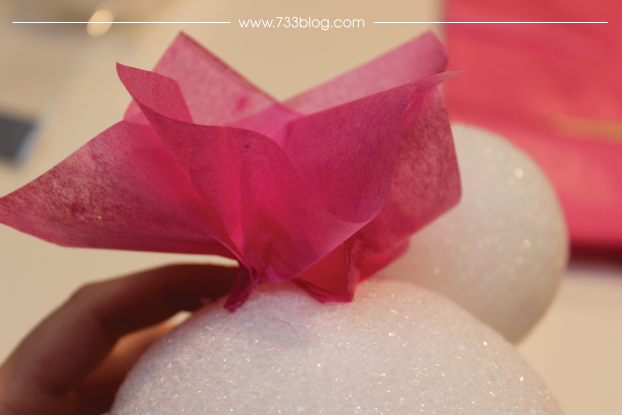
Starting toward the right ear of the head, add a dab of glue to the pointed end of the tissue paper and adhere to the styrofoam ball.
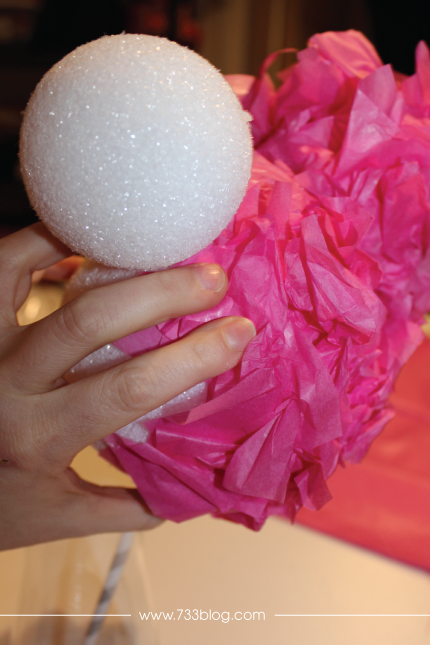
For the head I would adhere 2-3 pieces and then I smushed the tissue paper kind of flat and glued against the ball in a couple of places. Repeat around the entire head.
For the ears you do the same thing, but I didn’t smush the pieces down as much so that the ears are a bit “poofier”.
Once you have completely covered the balls with tissue paper, insert a wood dowel into the bottom of the head (I actually did this once I was done the front of the head – it helped me hold the head better).
I shredded black cardstock and packed it into my vase – nice and tight. I then stuck the dowel into the shredded paper, all the way to the bottom of the vase, and packed in more shredded paper until I was sure the head would stand up straight.
I wrapped ribbon around the wood dowel that showed and used hot glue to adhere it to the dowel.
I wrapped ribbon around the vase and glued in place. Then I tied a bow and glued that to the vase where the ribbon I just glued to the vase overlapped.
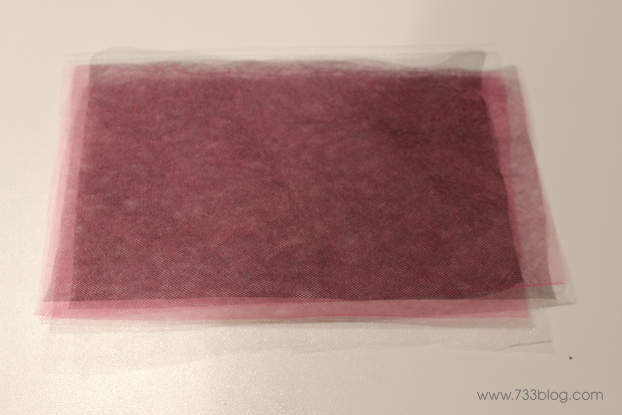
The last step is to create the tulle bow. I cut a total of four layers of tulle of the following: 8″x5″ of pink, black and two layers of white. I layered the two pieces of white, then two pieces of pink, four pieces of black, and finished with two pieces of pink.
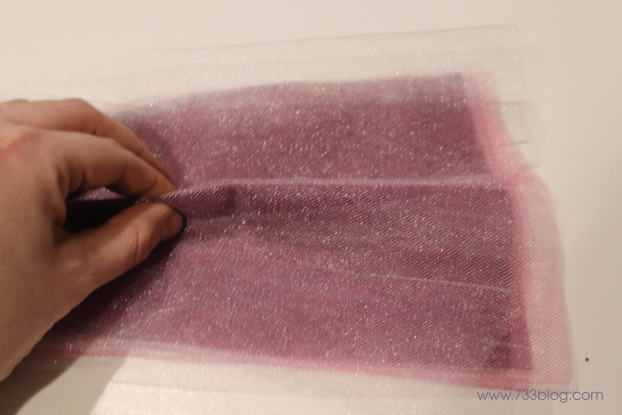
Pinch the middle of the tulle.
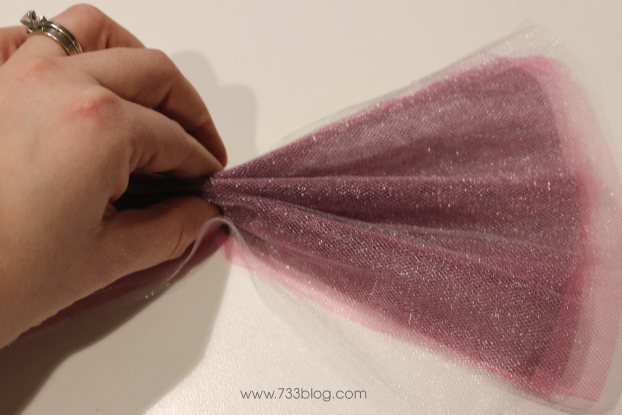
Pinch the outer edges into the middle. Now you’ve formed the bow. I used hot glue and wrapped a 1″ polka dot ribbon around the middle “pinch”.
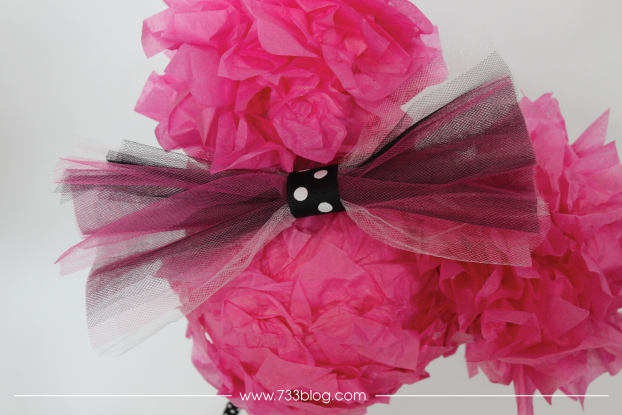
That’s it! You’re bow is complete, glue onto your Minnie Head and and you’re done! Step back and admire the cutest Minnie Topiary ever!
Stay up-to-date with all things seven thirty three:


How beautiful!! My daughter’s first birthday was Minnie Mouse wish I would’ve seen this 3 years ago! 😉 so cute!!
This is so cute and creative! How did you even come up with it? I know some people that would just love to have this in their rooms 🙂