
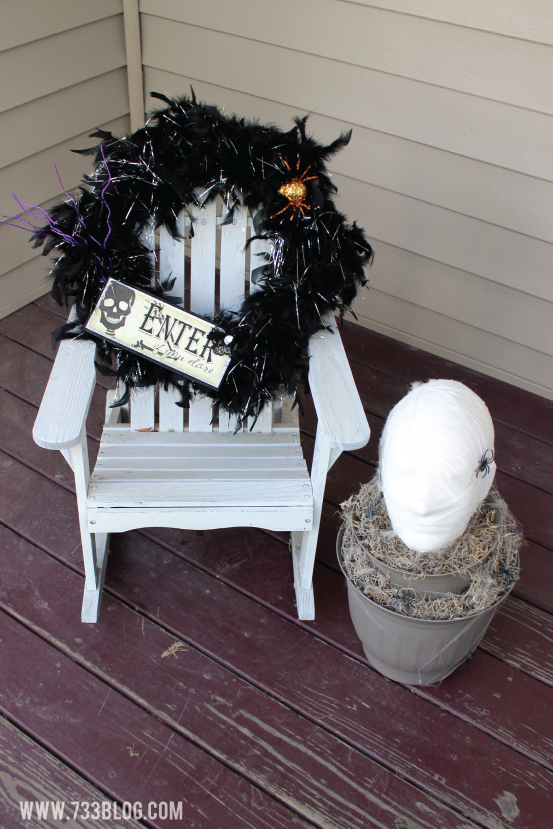
 Last week I shared my DIY Foam Head Mummy Topiary and gave a sneak peek at the Feather Boa Wreath that I made. I’m loving both decorations and am excited to get them up… but I’ll wait for October. To help you prep for Halloween, today I’m sharing how I made the wreath.
Supplies:
Black Yarn
6′ Black/Silver Feather Boa
Hot Glue Gun
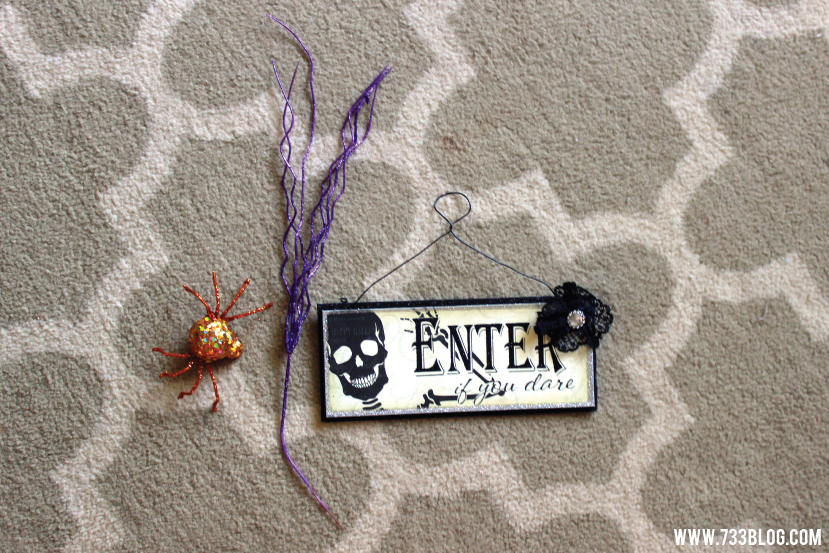
Small Halloween Decorations – I used a “Beware Sign” some purple branches and an orange spider
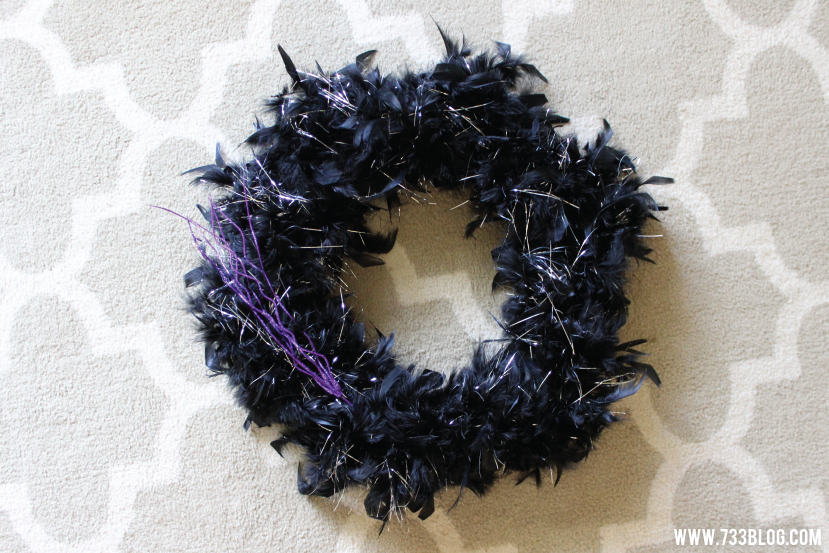
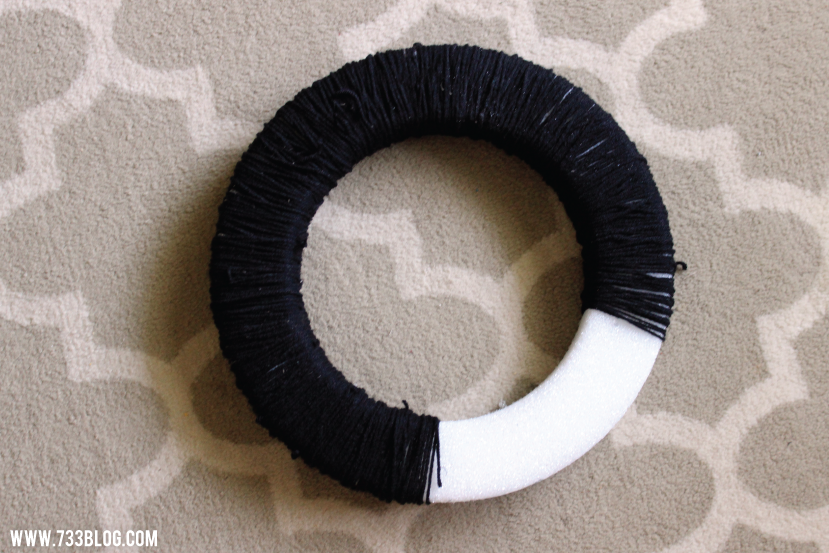 Because I was trying to keep the cost of the wreath down, I only purchased one Feather Boa. That meant that I needed to come up with an idea that would cover the rest of the wreath foam. I could have spray painted it black (careful that you don’t melt the foam if you try that!), but I wanted more depth and texture, so I ended up wrapping the wreath form in black yarn, which I had on hand. I cut a length of yarn and tied it around wreath form and then began to wrap it around and around. Once I ran out of yarn, I tied another length on and continued on my way. Continue to wrap until you’ve covered the whole form. This took the longest amount of time, but is easy enough to do in front of the TV.
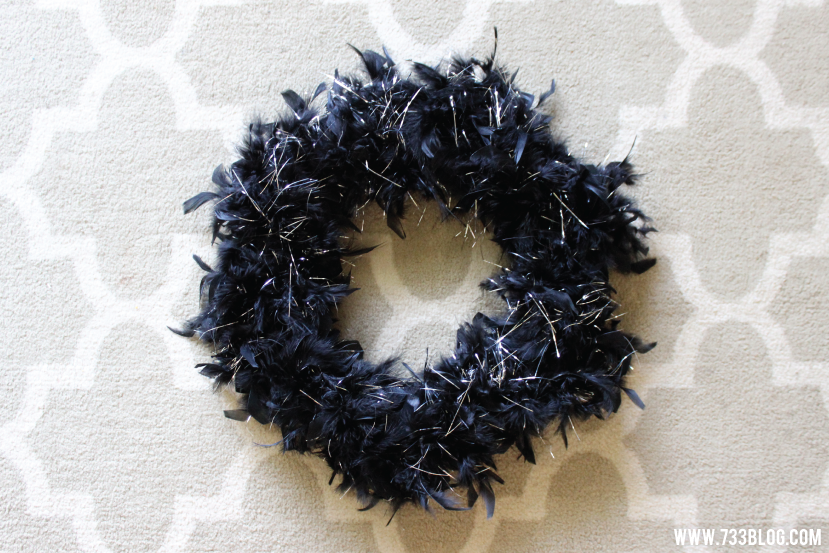
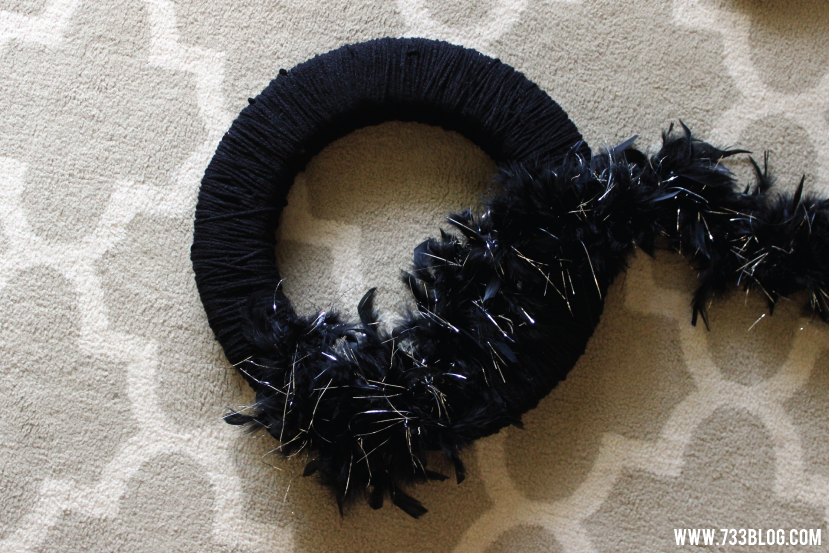 The next step is to glue the feather boa on. The boa is only covering the front and the sides of the wreath form. I went in a loose zig zag pattern all the way around. This took a few tries to see how far to space things out, so try it before hot gluing in place. Once complete if you see any thinner spots, just fan the feathers out and strategically hot glue in place. When it’s done it will look like this:
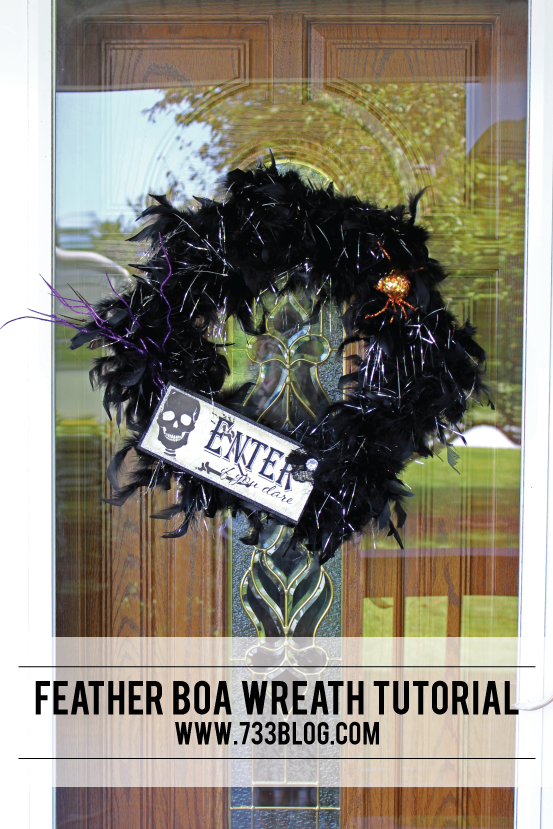
 Next up is to add the Halloween accessories using hot glue:
 That’s it! You’re ready to hang your beautiful new wreath!


What a great idea, Kim! I haven’t even started my Halloween decorating yet – you are on the ball!