
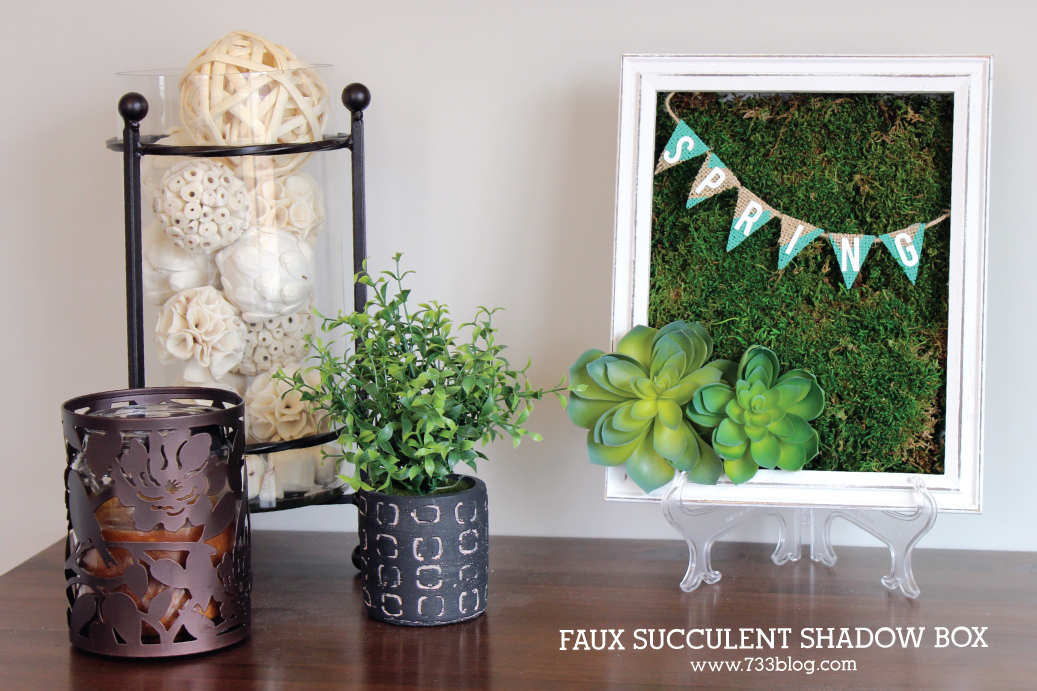
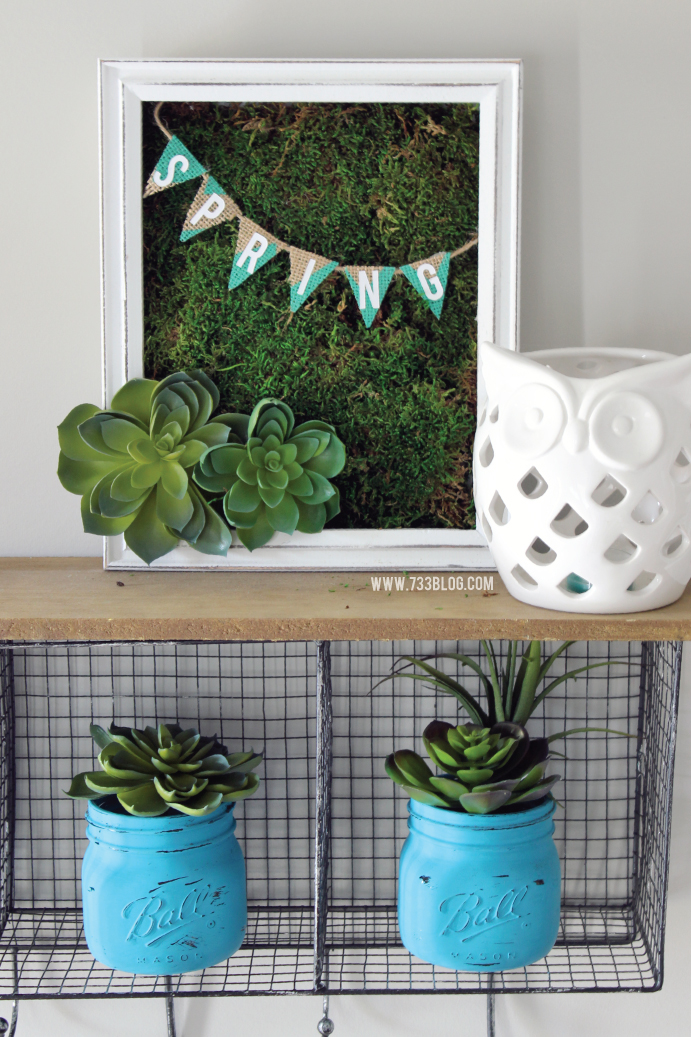
I have a horrid black thumb and cannot seem to keep plants living longer than just a few months. After years of trying, I’ve come to accept that fact. But that doesn’t mean that I can’t have greenery in my house, and no, I don’t mean the horrid fake plants that look plastic and awful! Since Winter is so long and cold here in Vermont, I love to add some greenery to my home, and so the DIY Spring Faux Succulent Shadow Box was born! The moss is so vibrant and the succulents look like the real deal.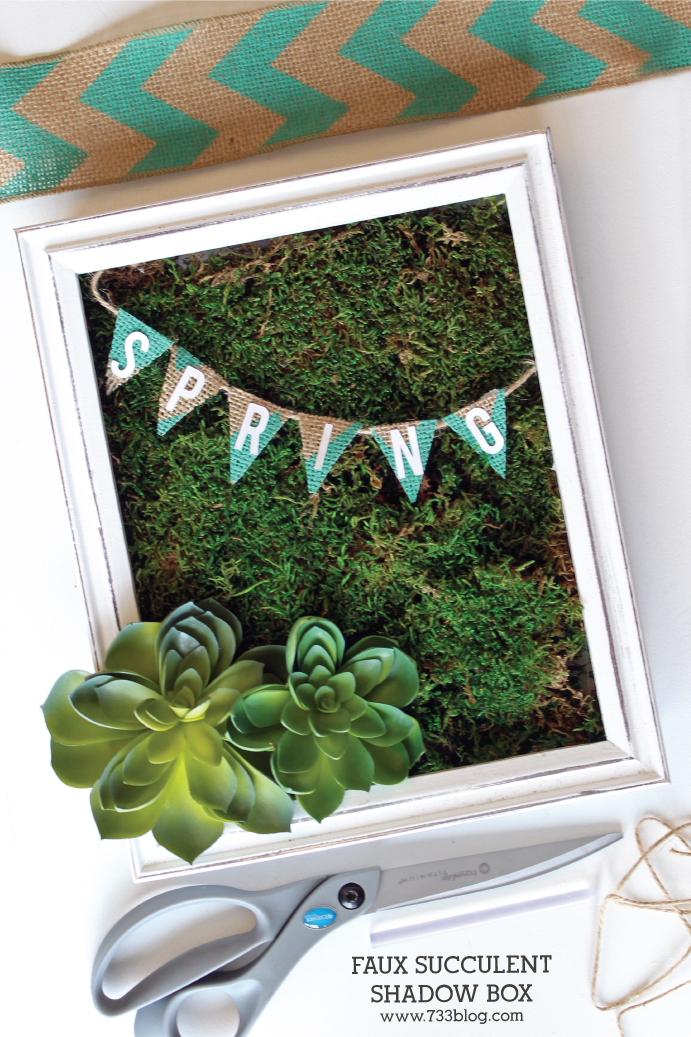 Don’t you just love it? The best part is, it is so easy to customize! I added “Spring” to the bunting since I was adding this to my Spring decor, but you can make it say anything you want – add “Welcome” and place it in your entry, or “cheers” or whatever your little heart desires! Honestly, the hardest part of this project was deciding where I wanted to display it! Want to make one for yourself? Let’s get to it!
SUPPLIES:
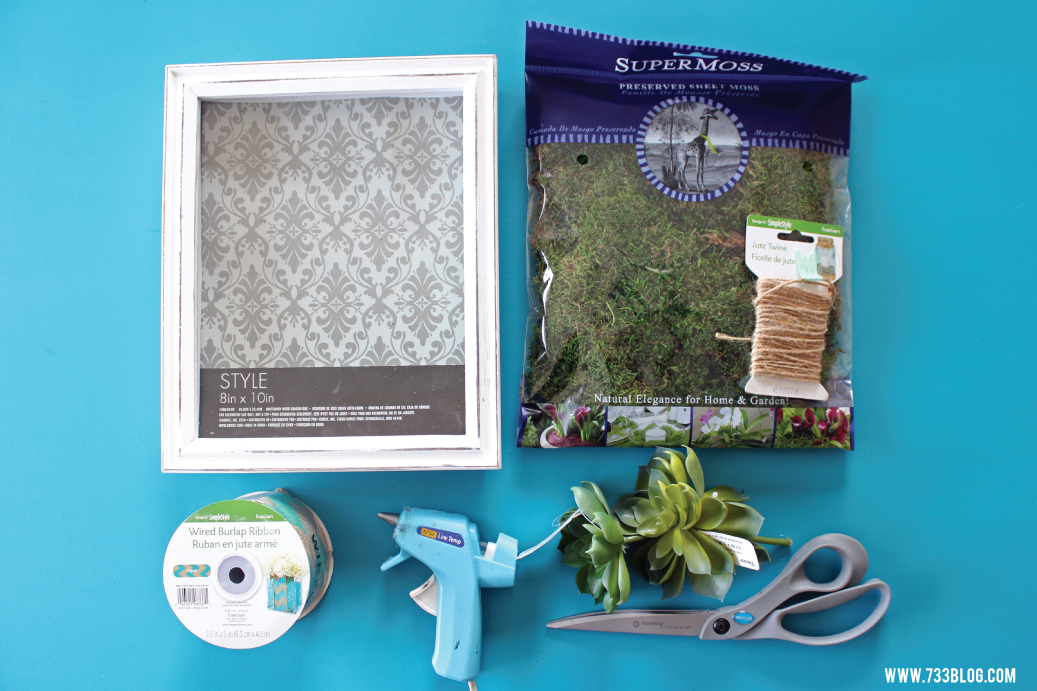
8×10 Shadow Box
Green Sheet Moss
Artificial Succulents
Twine
Hot Glue Gun
Scissors
Burlap
White Chipboard Letters (or cardstock and a craft cutting machine to make your own)
 DIRECTIONS:
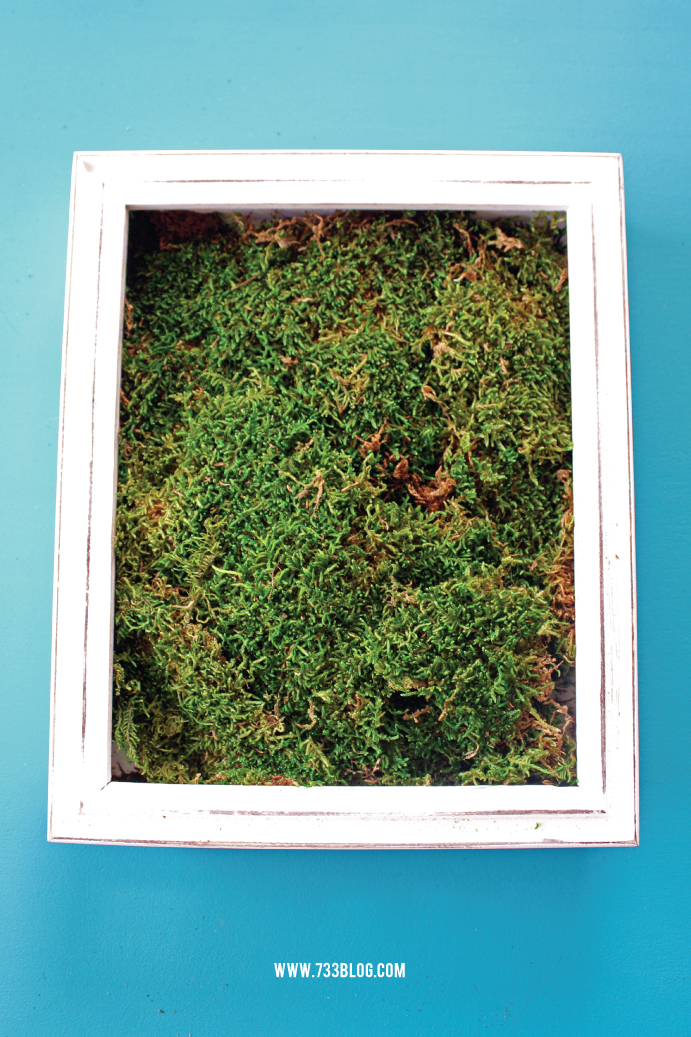
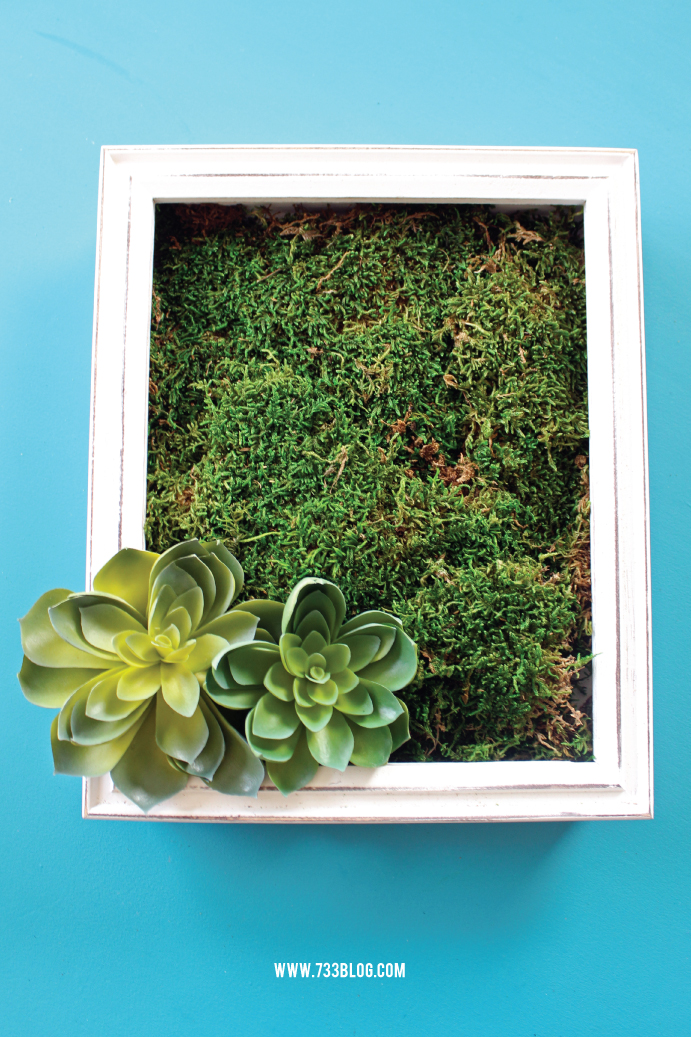
Remove the glass from the shadow box. With the slot for the glass on the bottom, stuff the sheet moss inside the frame, tucking under the edges.
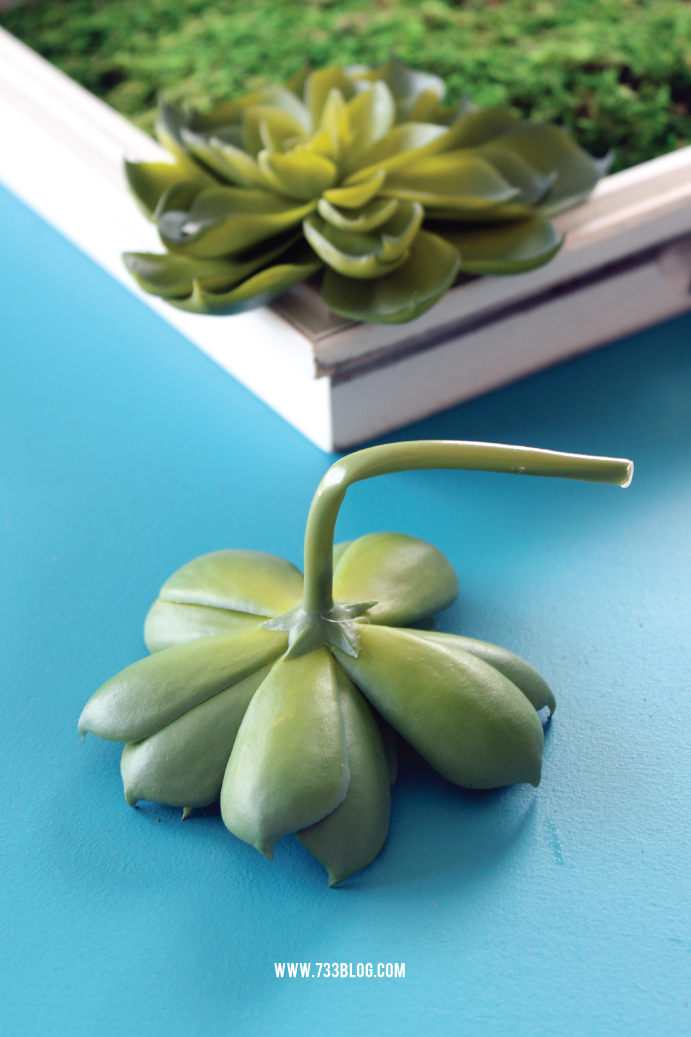
Next we will add the succulents to the frame. First, bend the stem so that the succulent can lay flat against the frame. You could also cut the stem short, but this way I have the opportunity to reuse it once Spring is over and I take down my frame.
Tuck the stems of the succulents under the moss. I added a bit of hot glue to a few of the succulent petals and attached them to the frame to hold them in place. This isn’t 100% necessary, but if there is a chance that the frame could get knocked or little fingers can reach it, this will ensure the succulents stay in place.
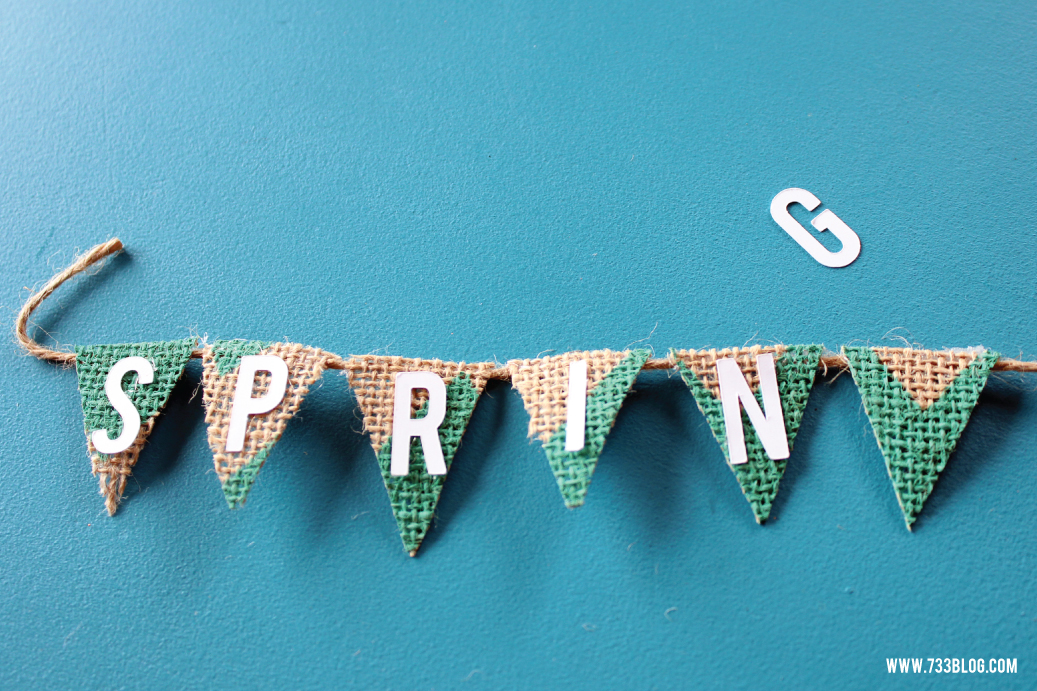
To make the banner I freehand cut the pennants – they are about 1″ wide – out of printed burlap ribbon. I laid them onto the frame to determine how many I wanted and what the spacing should be.
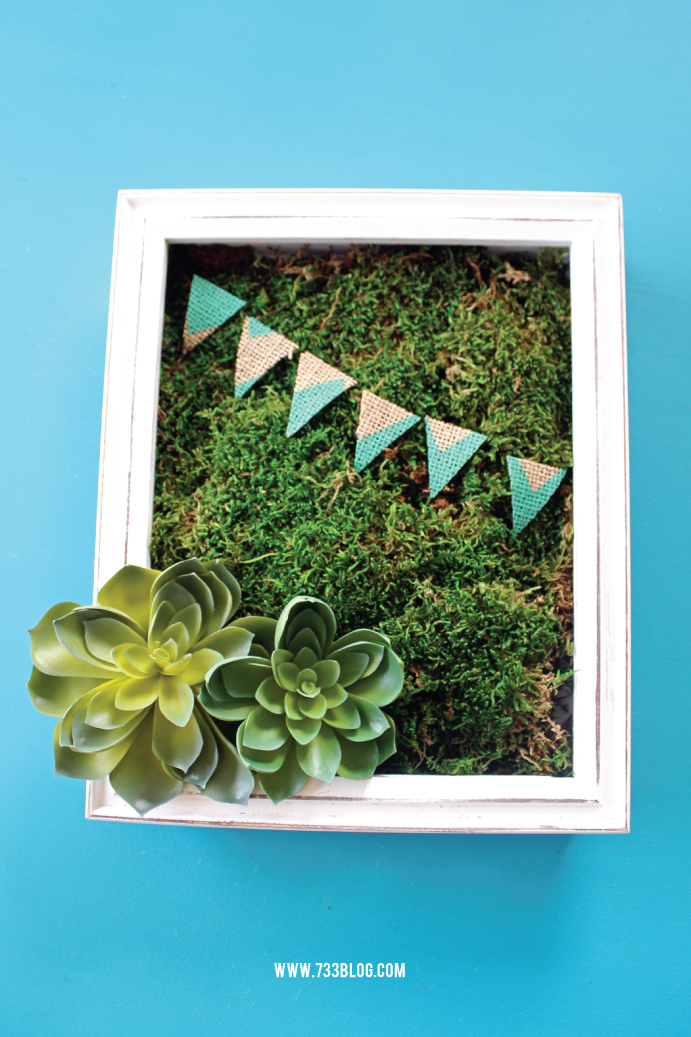
Attach the burlap pieces to a length of twine with hot glue.
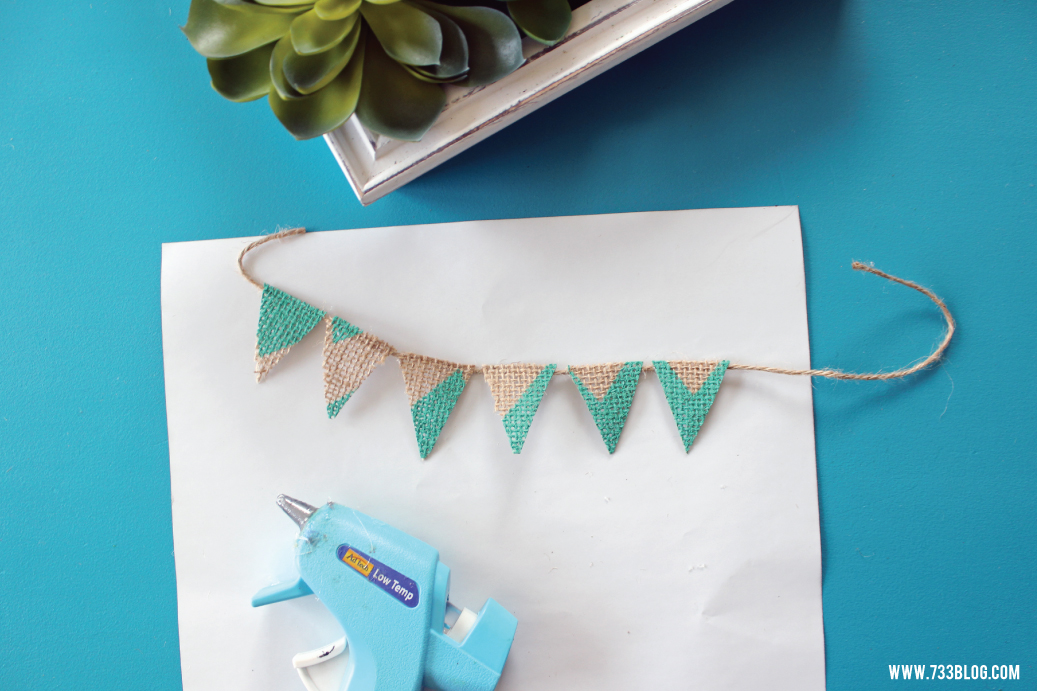
Using my Cricut Explore I cut “Spring” out of cardstock, sized to fit the bunting. If you don’t have a craft cutting machine, small chipboard letters or stickers would work. You could also print out the word Spring on your printer and then use an xacto knife to cut them out.
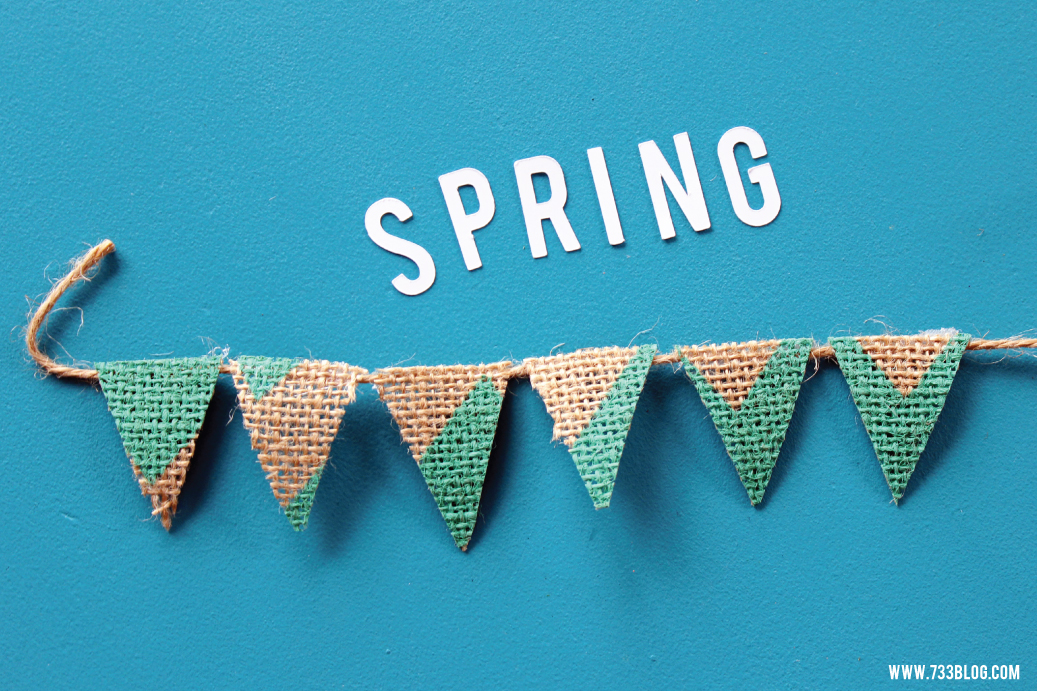
Hot glue the letters to the burlap bunting.
Lastly, glue the bunting into the frame by adhering the twine to the inside edges. That’s it! You’re ready to put this beauty on display!
 This post originally appeared on Crafts Unleashed where I am a contributor.


