
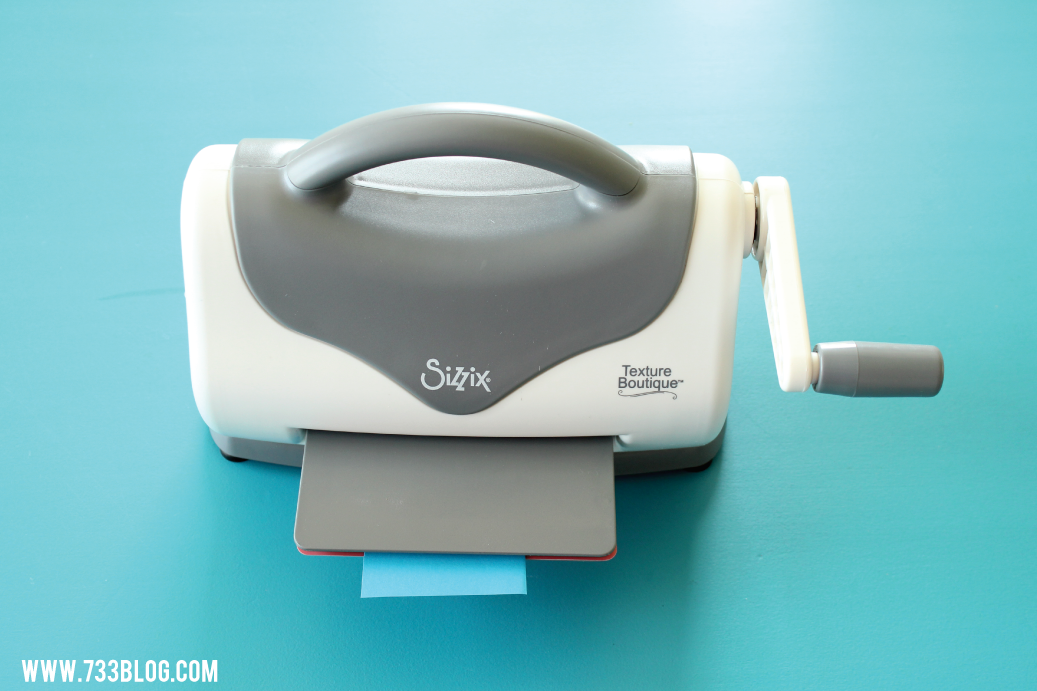
As a contributor over at Consumer Crafts I am able to come up with fun ideas and try new techniques based on the theme each month. Last month embossing was one of our options – when I saw that I may have done a little happy dance! I’ve been eyeing an embossing machine for quite sometime but wasn’t sure how often I would actually use it since I’m not a scrapbooker. I went ahead and ordered the Sizzix Texture Boutique Embossing Machine, which is super affordable (under $30!) and is convenient because of its small size. It comes with everything you need to start embossing. Within 5 minutes of its unboxing my daughter and I had whipped up our first card. That’s how easy it is to use. I’ve been experimenting with it and am going to share one of my favorite projects so far: Handmade Embossed Gift Wrap.
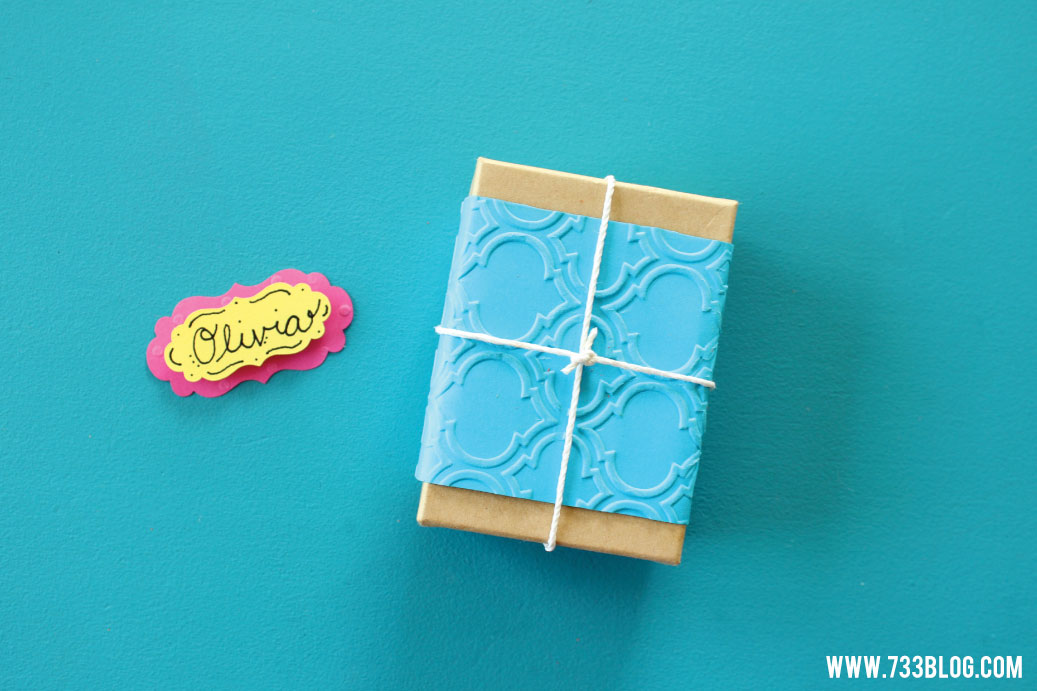
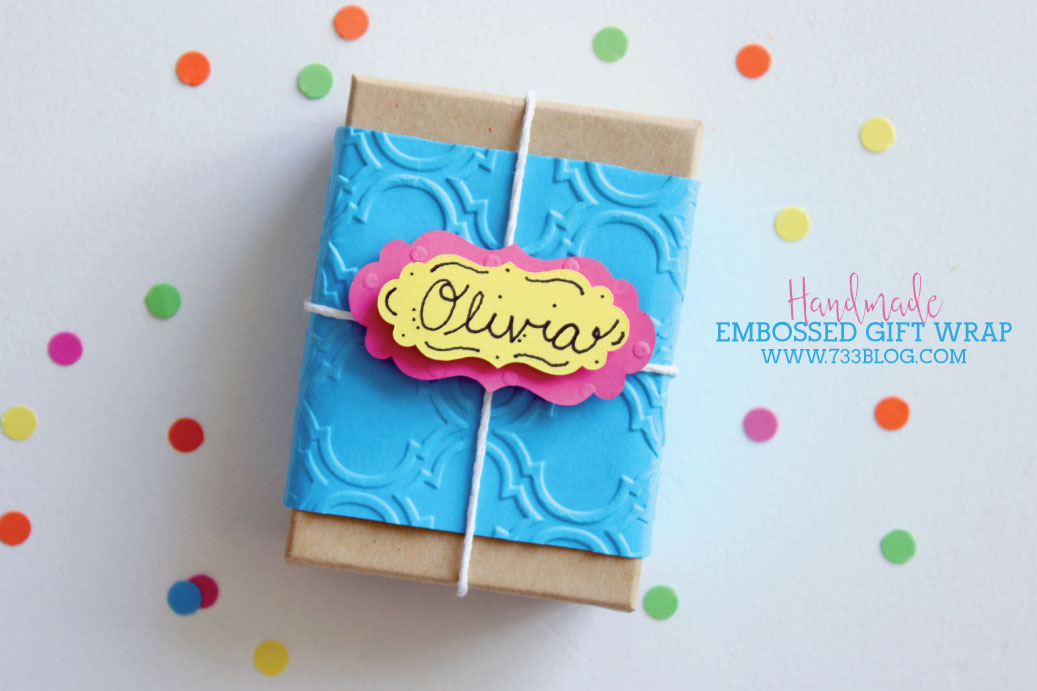 I absolutely adore handmade gift wrap. It is so easy to customize to the recipient, and really takes the gift up a notch! I mean, isn’t this little jewelry box just too stinkin’ cute?!
Follow along as I show you how I put together this sweet little package.
SUPPLIES: (Affiliate links for your convenience)
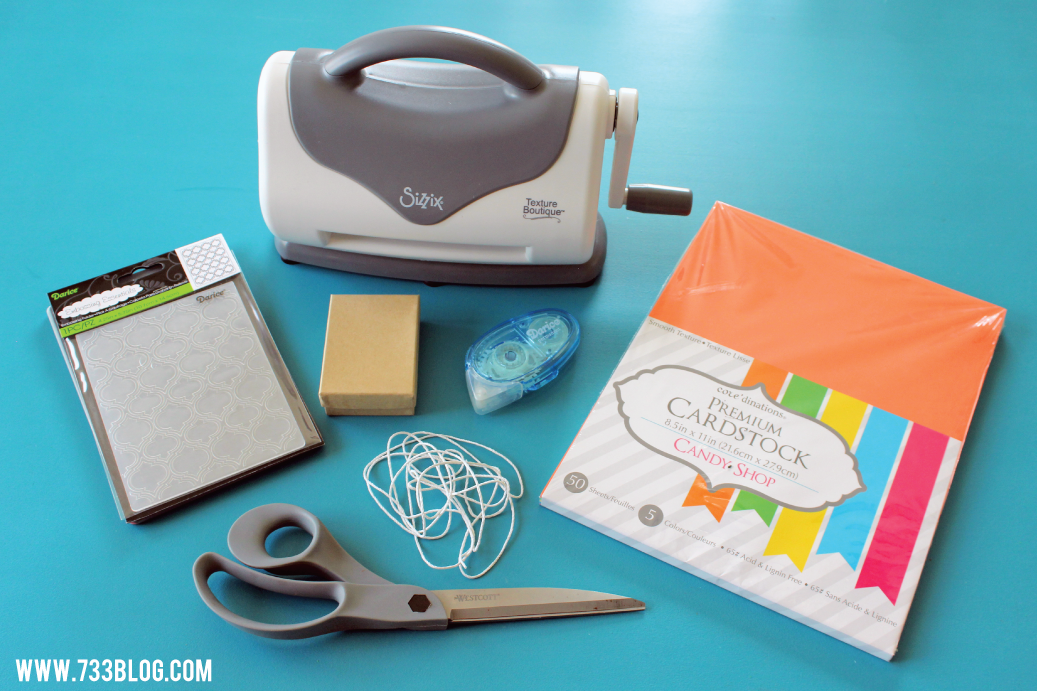
Sizzix Texture Boutique Embossing Machine and Embossing Folder
Cardstock in several coordinating colors
Double Sided Tape
Foam Dots
Twine
Pen or Marker
Scissors
DIRECTIONS:
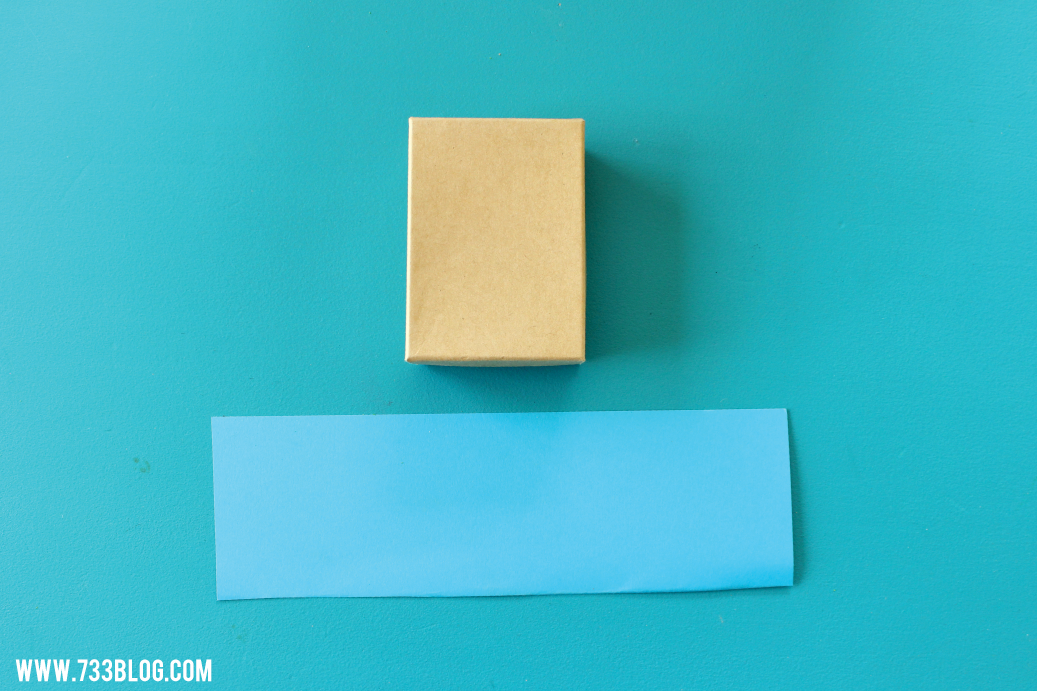
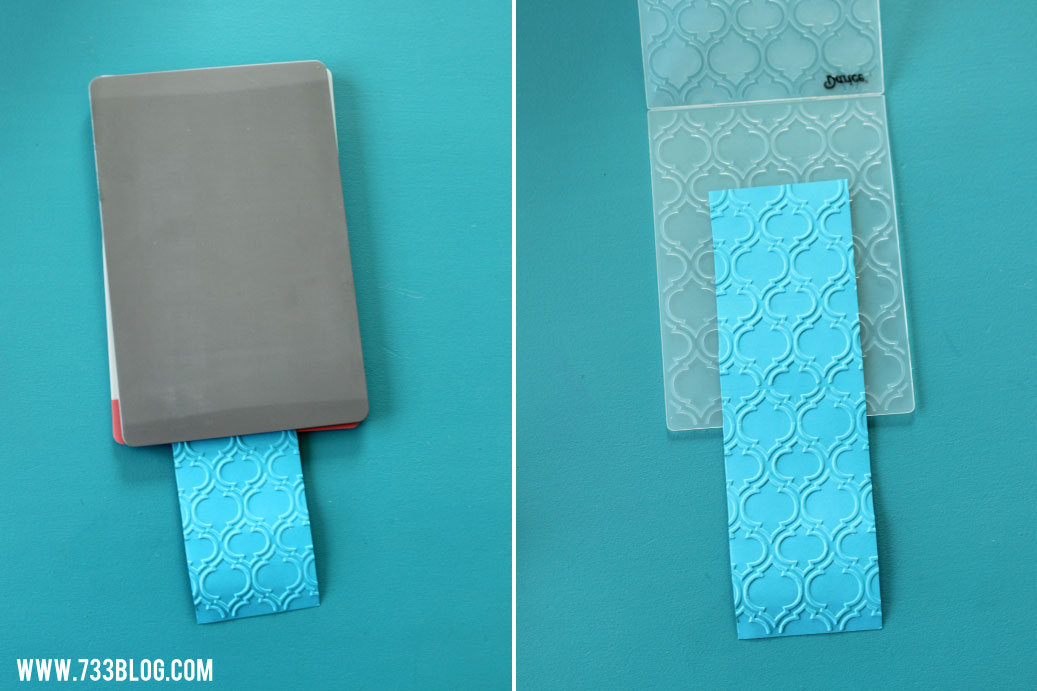
Measure your gift box to determine how big your gift wrap should be and cut out a strip of cardstock. Mine measured 2″ x 7″.
Open the embossing folder and sandwich the cardstock strip inside.

Place the shim on top of the embossing pad, the embossing folder on top of that and cover with the 2nd embossing pad.
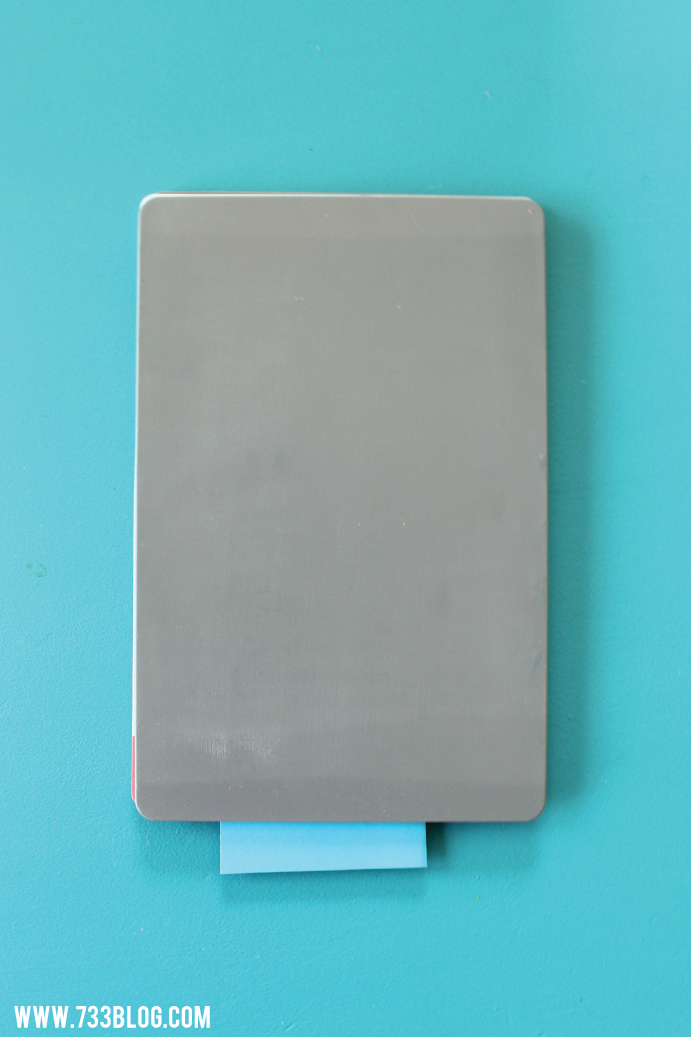
Run the plates through the machine, front to back, turning the handle until the plates come out the other side.
Remove the cardstock from the embossing folder. Isn’t the texture fun? My strip was too long for my embossing folder so I simply flipped it around, carefully lined up the embossed portion to the folder and ran it through the machine again.
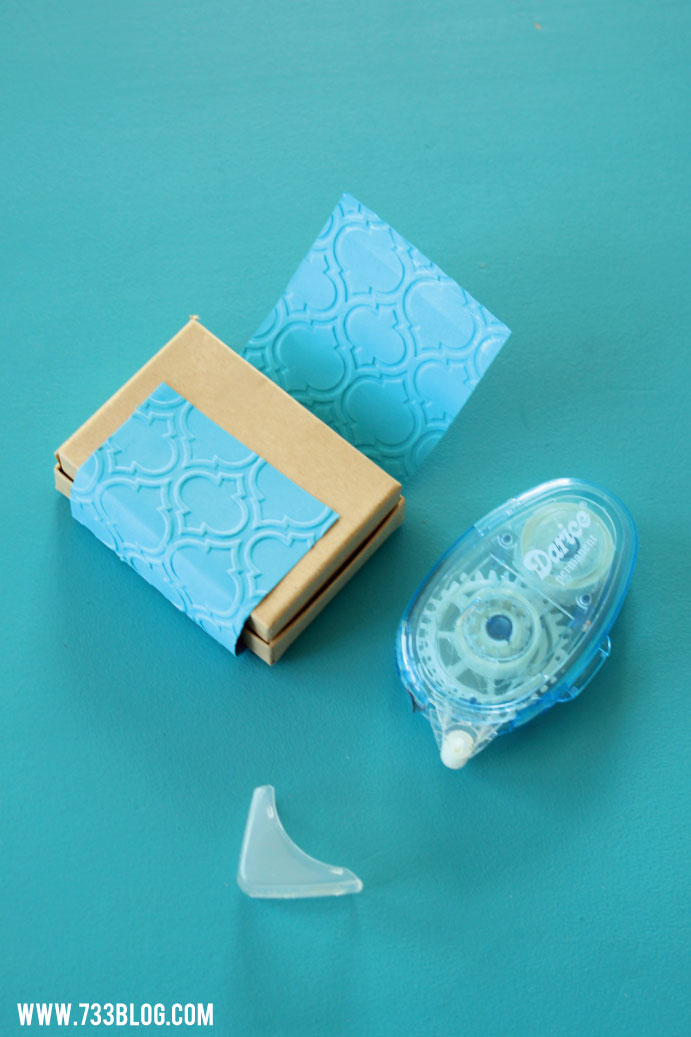
Once the strip is embossed, use double sided tape to adhere the strip to the bottom of the box. Carefully wrap it around the entire box, creasing the paper at the corners and adhere the other side to the bottom of the box with tape.
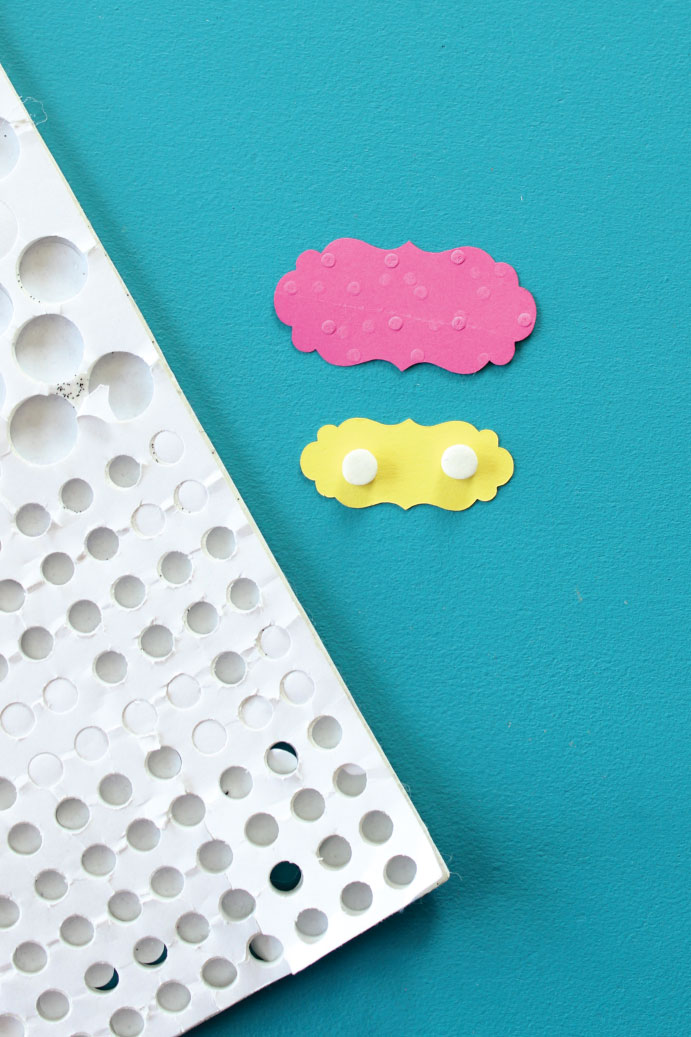
For the tag I used my Cricut Explore to cut the two shapes, though you can use a hole punch or hand cut the shapes with scissors. I ran the bottom tag through an embossing folder several times. After I was through I sandwiched the tag between the two embossing pads and pressed down to flatten the design.
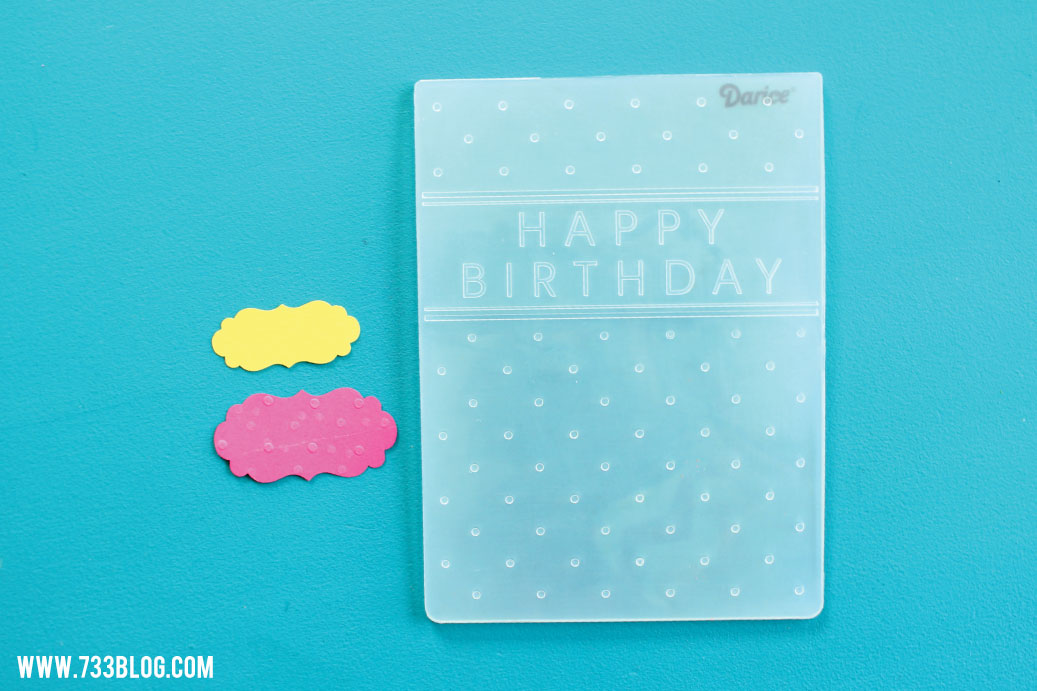
Using a Sharpie I added the recipients name to the top tag. Using foam dots, adhere the top tag to the bottom one.
Wrap the gift box with twine.
Attach the tag to the box with two more foam dots.
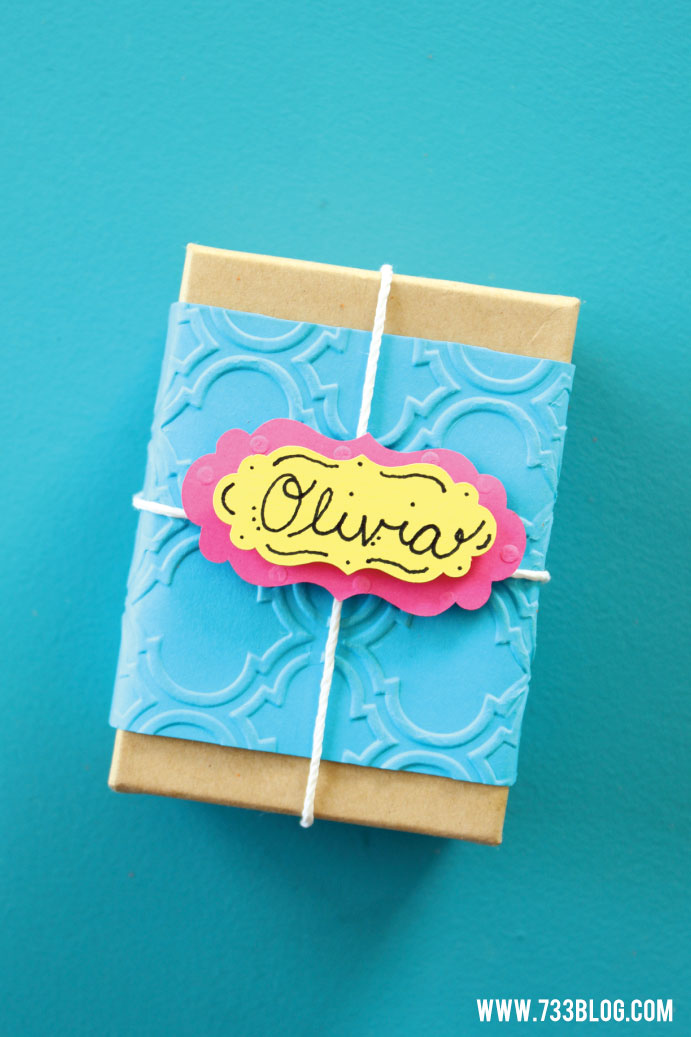
Simple and adorable gift wrap that is sure to make the gift recipient feel ultra-special!
This post originally appeared on Crafts Unleashed in August 2016, where I am a paid contributor.
