
Mother’s Day will be here before you know it! Last year I designed a Mason Jar Mother’s Day Card for both my mom and mother-in-law but I didn’t it too late to share here with you all, but don’t fret! I saved everything and am sharing with you now.
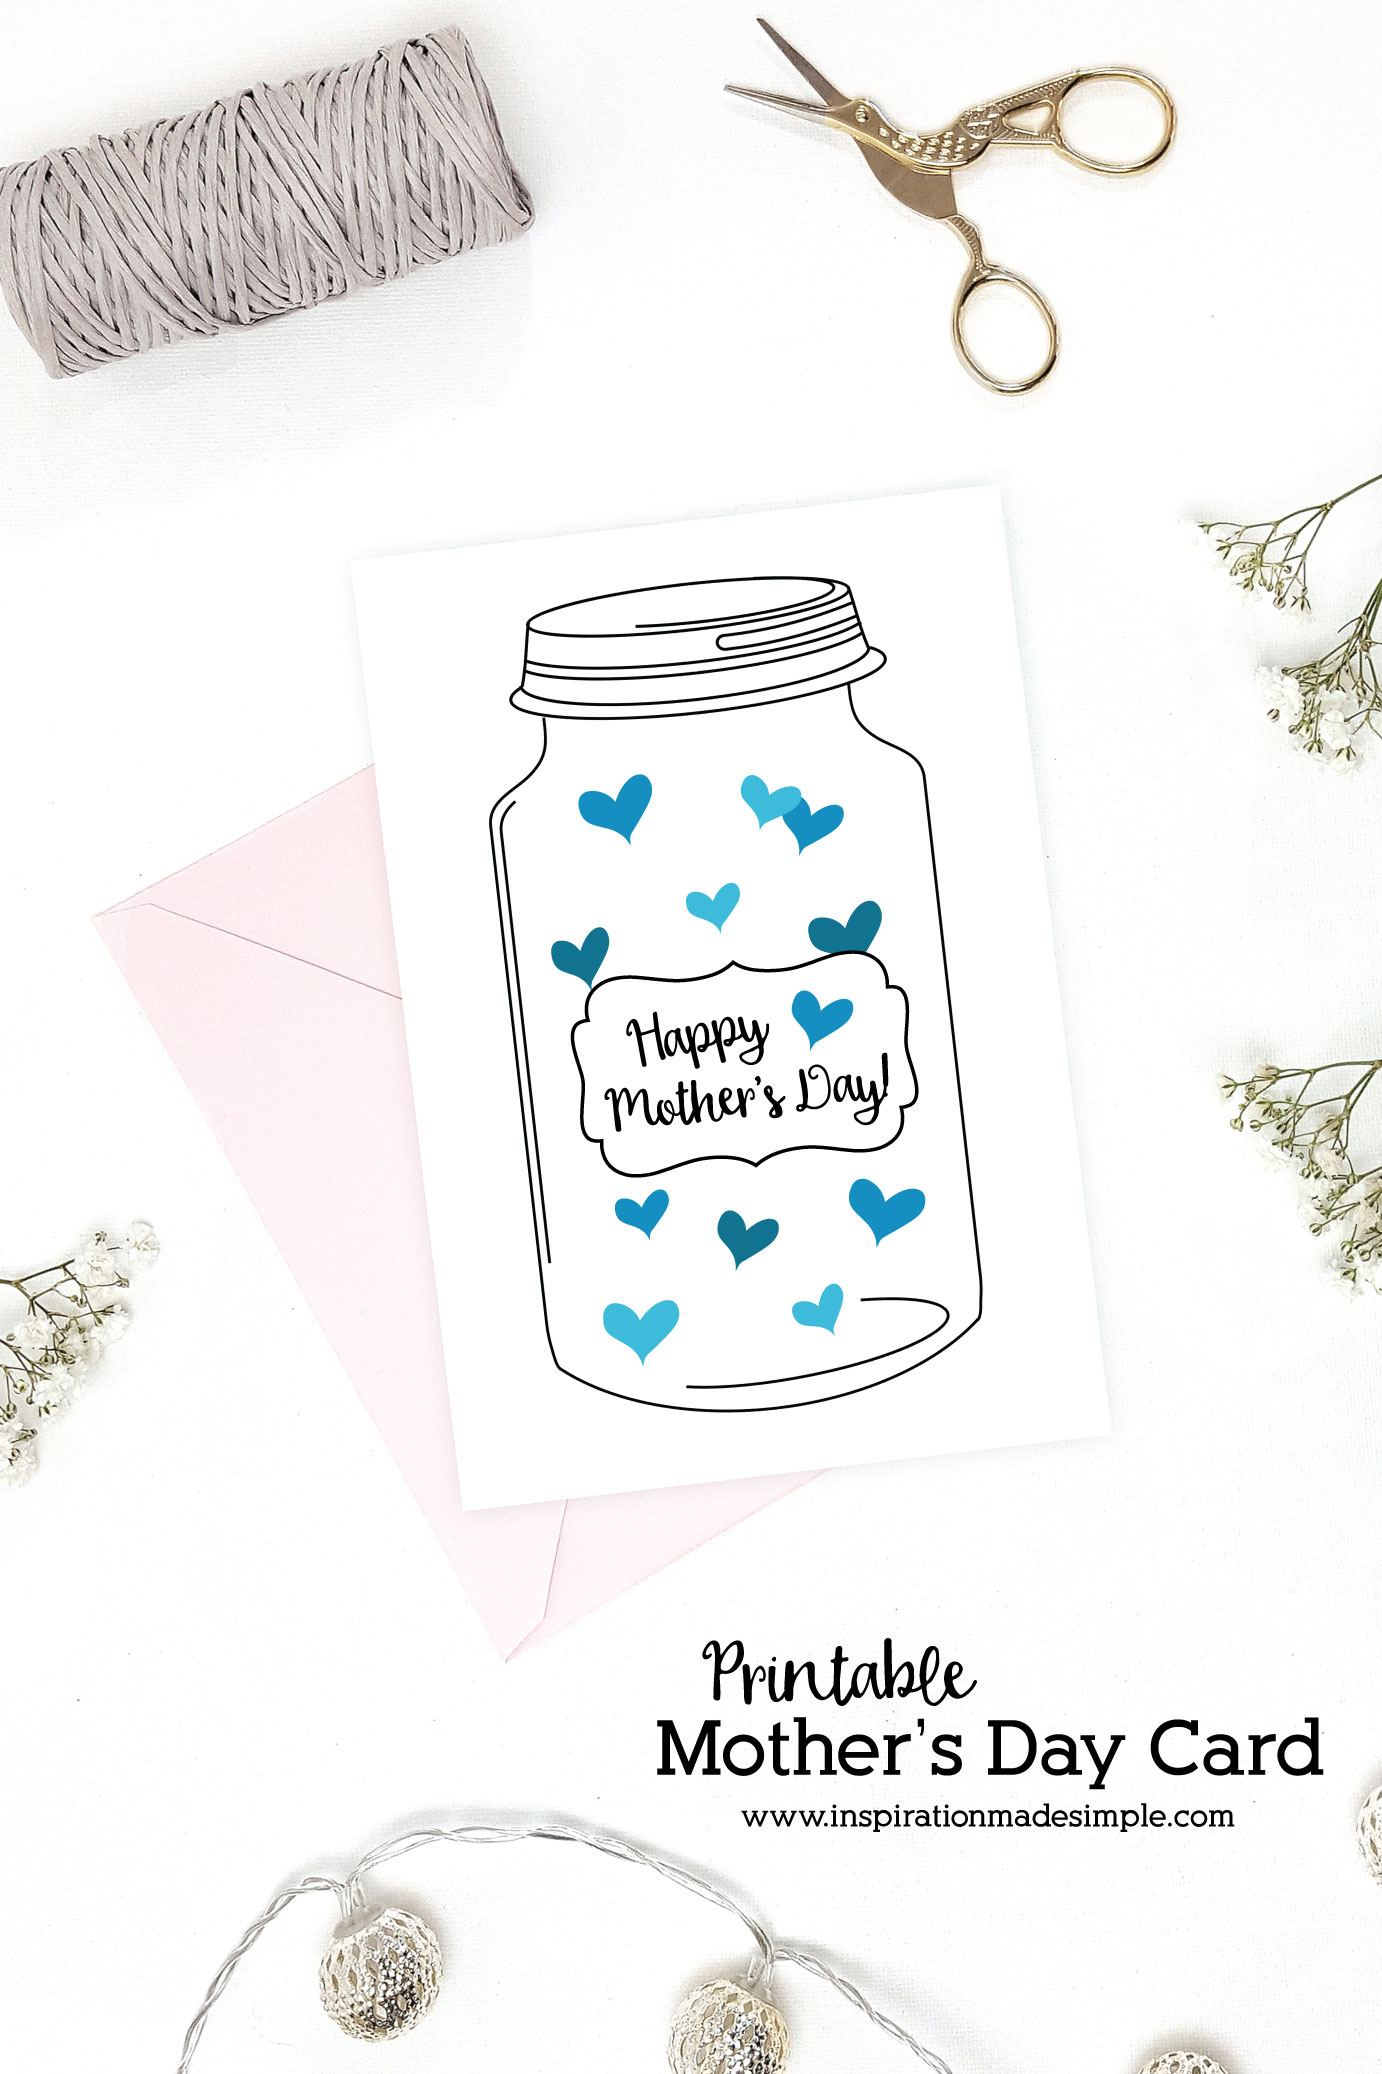
If you’re looking for a simple card featuring the ever popular Mason Jar, filled with love – this is it! The inside is left blank so that you have plenty of room to write a special, heart-filled note to the woman that gave you life and that raised you through bad times and good… or use my idea below. 😉
There are two color options available – one with pink hearts, the other with blue. Simply download the pdf file below and save the file to your computer. Open it in Adobe Reader and print onto 8.5 x 11 cardstock. Once printed, fold the card in half. Either make your own envelope or place it in a store bought one! Don’t know how to make an envelope? Then I definitely recommend the We R Memory Keepers Envelope Punch Board (affiliate link)! It is one of my favorite tools.

I ended up adding a pop up flower bouquet on the inside of the cards that I made last year. My kids helped me create them and both mom’s were quite amazed when they opened the cards. It looks daunting, but it is actually quite simple to do. I used a technique similar to the video below:
Personal use only. Do not alter. Copyright Inspiration Made Simple 2018.


