
Planning a monster bash birthday party, like I am? Why not add some cuddly companions to the mix with these adorable DIY monster stuffies! This easy-to-follow tutorial is perfect for creating unique party favors or handmade gifts for any monster fan. Keep reading to learn how to make a DIY Monster Plush!
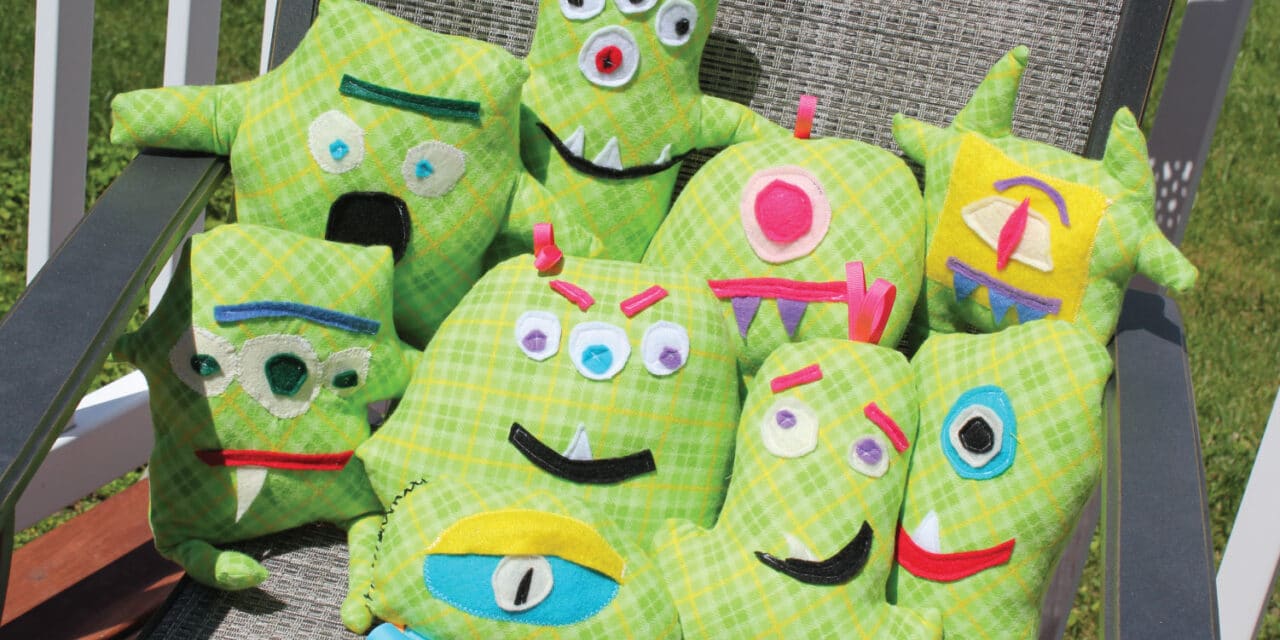
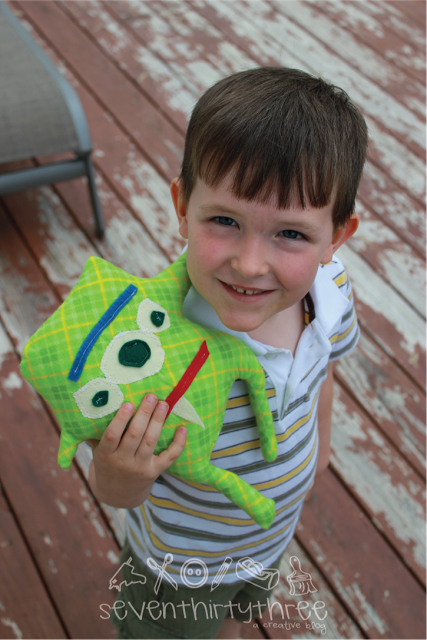
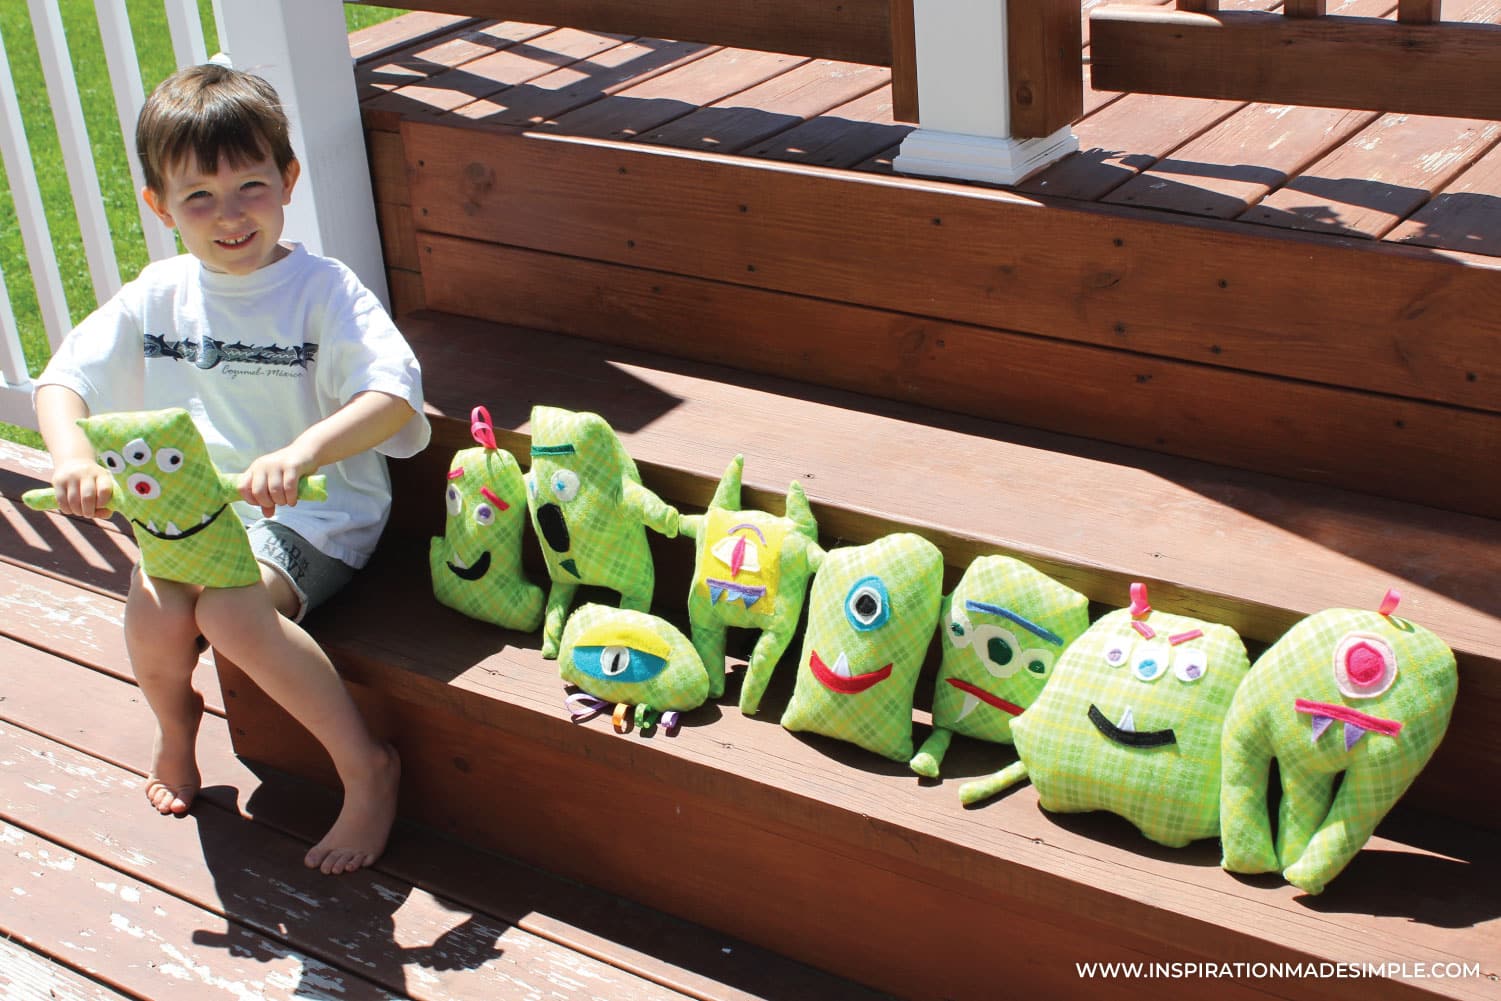
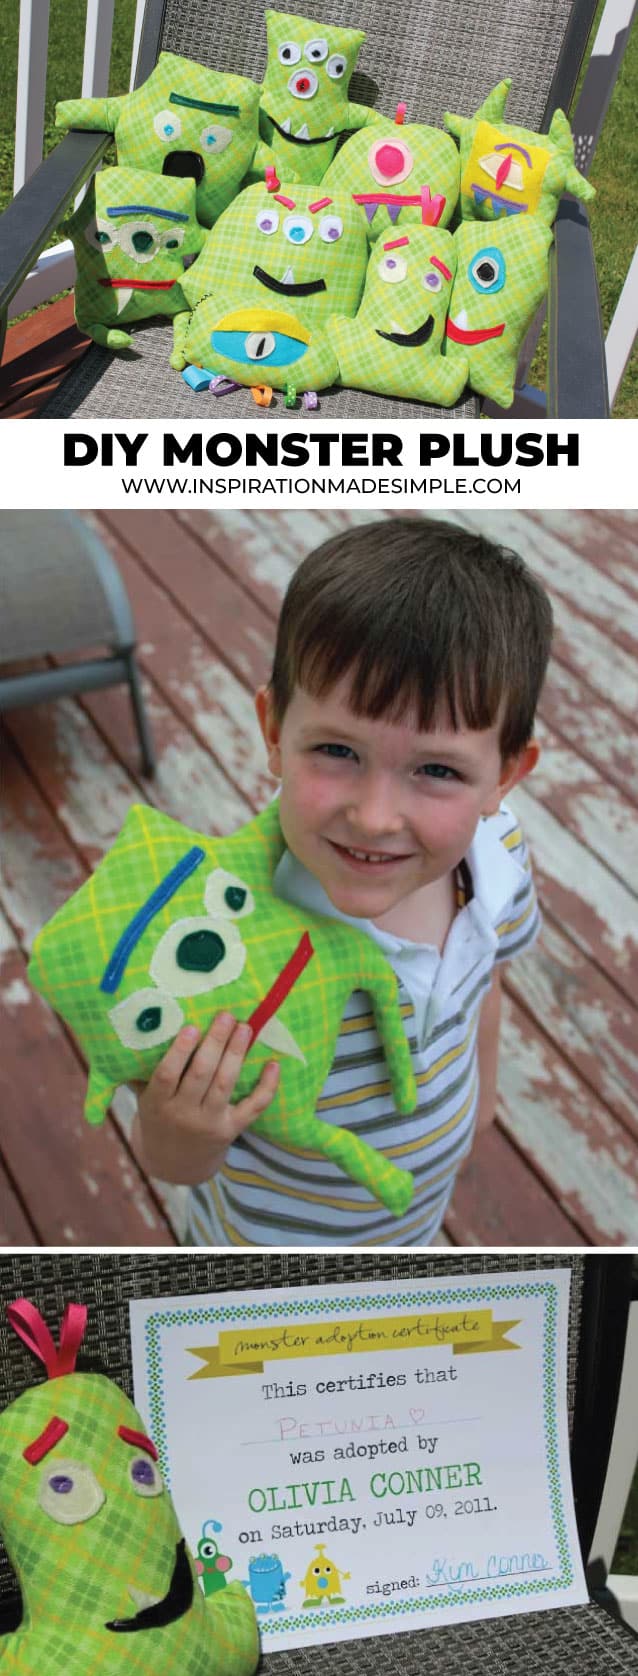
For my son’s 4th Birthday Party, I decided it would be fun to create a bunch of Monster Friend Favors to hand out to the kids and I love how they turned out. These are simple to make and the best part is you can’t really mess them up! They’re supposed to look a little weird.

My son, Mason, chose the monster theme for his party and he asked if I could make Monsters for each of his friends to bring home. When one of my children asks me to craft for them, how can I say no? He worked with me closely on the stuffed monsters. Mason wanted total control of the appearance of the monsters so I had him draw some up and I did my best to match them.
How to Make a Monster Stuffie
Supplies:
A fabric of your choice – I purchased 3 yards of flannel and made a total of 10 monsters
Stuffing
Thread
Felt
Sewing Machine
Directions:
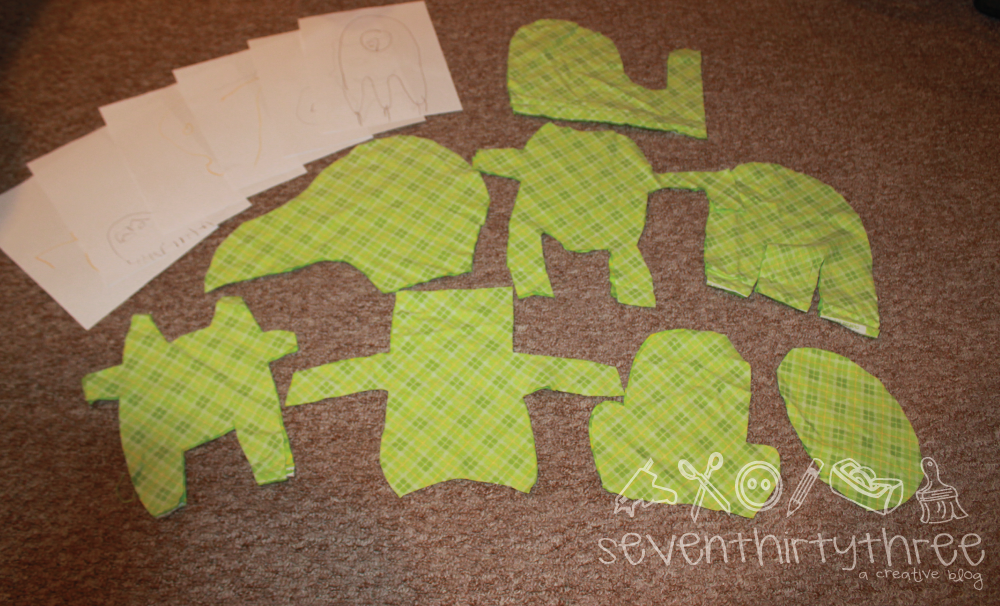
Design Your Monsters! Let your creativity run wild! Sketch some monster ideas or encourage your little one to draw their dream monster companions.
Once you have your monster designs, use them as templates to cut out two corresponding pieces of fabric for each monster’s body. If you are doing more than one monster, I suggest cutting out all of your monster shapes now and then working on them – assembly-line style.
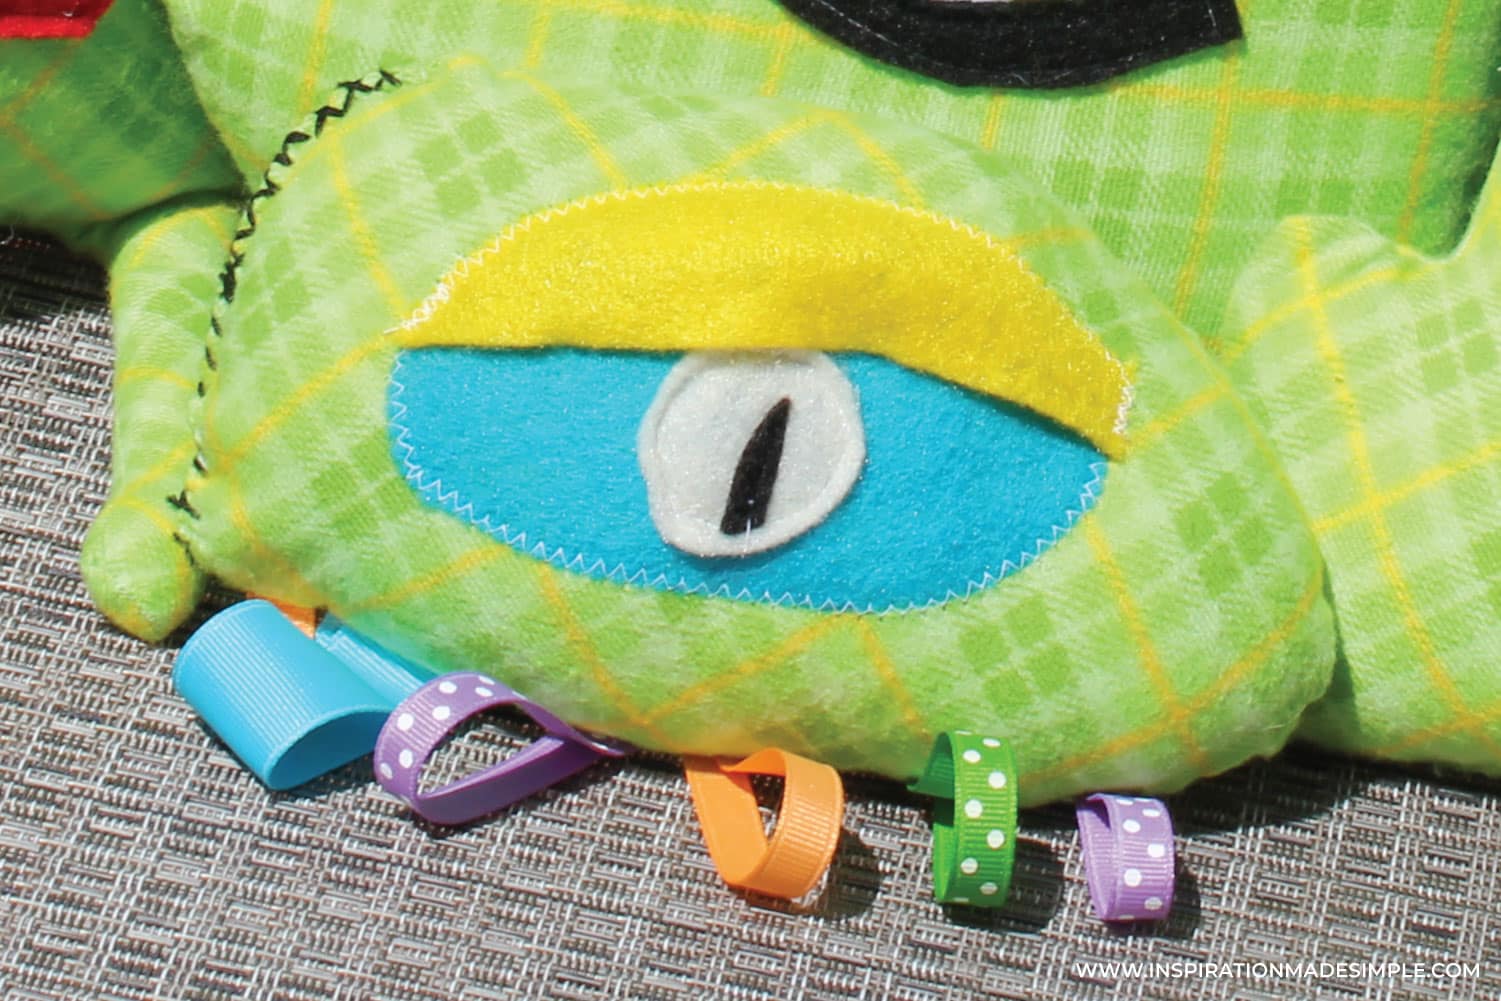
Using felt, cut out the embellishments for each monster – eyes, eyebrows, mouth, teeth, etc. As I stated before, Mason wanted creative control so he chose how many eyes each monster got, whether they had a nose, and what expression the monster had. He also dictated the color of felt that was used and how many teeth they got! Include your children in the process. They’ll love having some control and the creations are usually super fun.
Now it’s time to bring your monster to life! Arrange the facial features on the right side of the fabric body, leaving at least a 1/2 inch seam allowance from the edges. Pin them in place to keep everything secure. When it comes to sewing them on, there are no hard and fast rules! Use a variety of stitches for a playful touch. Try a zig-zag stitch around the eyes for a quirky look, and a simple straight stitch in an X-shape for the pupils. Remember, these are monsters, so get creative and have fun with your stitching.

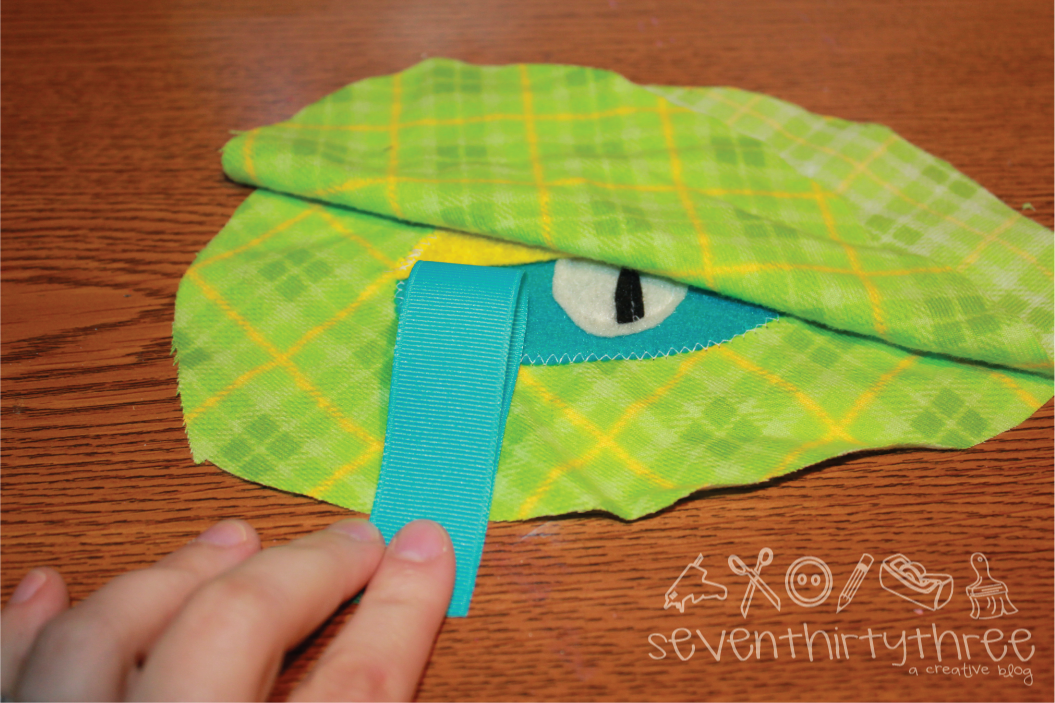
Once down with the face, place the two fabric monster pieces together with the right sides facing each other. Now’s the time to add any fun embellishments like ribbon hair or crazy ribbon legs. If you’re using ribbon, make sure the ribbon is facing inwards towards the monster’s face, with the raw ends pointing outwards. Pin everything in place to keep it secure before sewing.
Now that everything is pinned in place, it’s time to sew up the monster! Use a straight stitch to sew around the entire edge of the monster’s body, leaving a gap of about 3 inches for stuffing. Here’s a tip: If your monster has legs, consider leaving the opening near the crotch area for easier stuffing and a cleaner finish.

Flip the monster plushie right side out. Fill it with stuffing, making sure to squeeze it into the limbs.

Fill the monster nice and full. Hand-stitch the monster closed and you are done! Super cute DIY Monster Plushies to help make the Monster Bash even more fun!
Adopt a Monster Friend
To add to the monster fun, I created adoption certificates for my son and his party pals! Each child will get to choose their very own monster friend and give it a name. I’ll then personalize their adoption certificates to make it official. The best part? I’m sharing the printable certificate with you all, so your little monsters can be adopted too!
Download the blank Monster Adoption Certificate for your own Monster Bash!
And did you see that potato-looking monster? He’s going to help us play Hot Potato – Monster Edition during the birthday party!
With a little bit of sewing magic, you can create a whole crew of cuddly monster friends that will be a cherished reminder of your child’s monster bash birthday party. So grab your fabric scraps, unleash your creativity, and get ready to sew a simple DIY Monster Plush (or 10)!


What a great idea, I love that they are “adoptable”. Your certificates are really cute and such a creative idea.
Jennie
these are so fun! i love how you based them off your son’s drawings. such a good mom 🙂
Those are so adorable.!!