
This post brought to you by Expressions Vinyl and Get Away Today. All opinions are 100% my own. Post contains affiliate links.
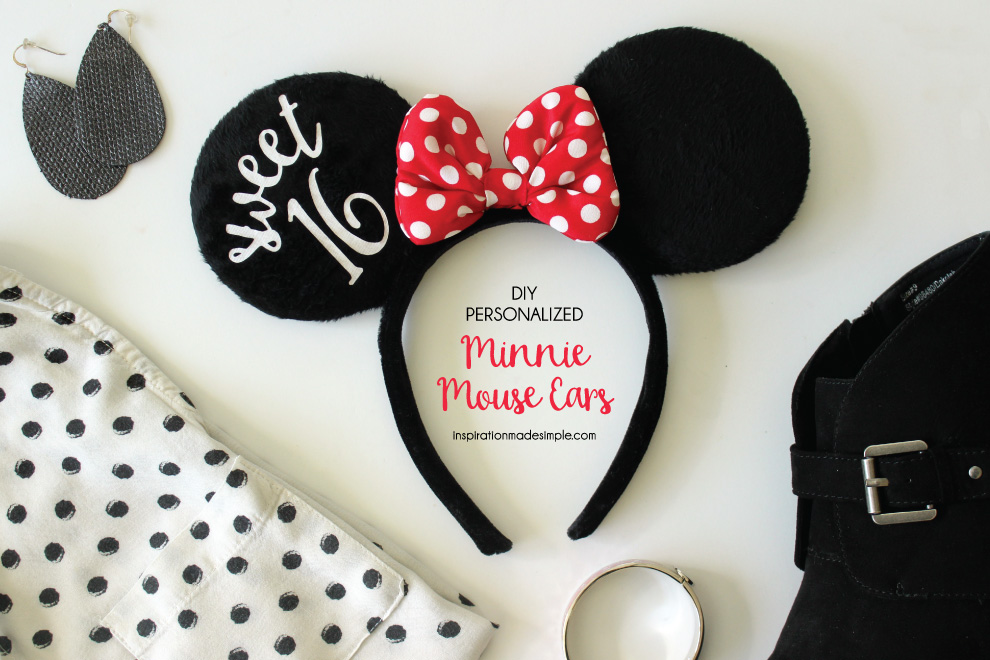
In just 46 days, my family of 5 and our best friends are heading down to Orlando, Florida for a fun filled week at Disney World. Everyone is super excited and we cannot wait to go. Since we’ll be down there around the time of my daughter’s 16th Birthday, I figured we’d make the trip extra special for her by ensuring that everyone knows it’s her birthday! Of course we’ll get the birthday pin from Town Hall in Magic Kingdom, but since she’s a little fashionista, I whipped up some adorable “Sweet 16” Personalized Minnie Mouse Ears for her to wear!
Before we get to today’s project, I have some exciting news! Get Away Today is offering an amazing giveaway for an amazing 3 night hotel stay in Anaheim or San Diego, PLUS 2 adult and 2 children 1 day tickets to 2 Southern California Parks! Scroll to the bottom of this post to enter to win!
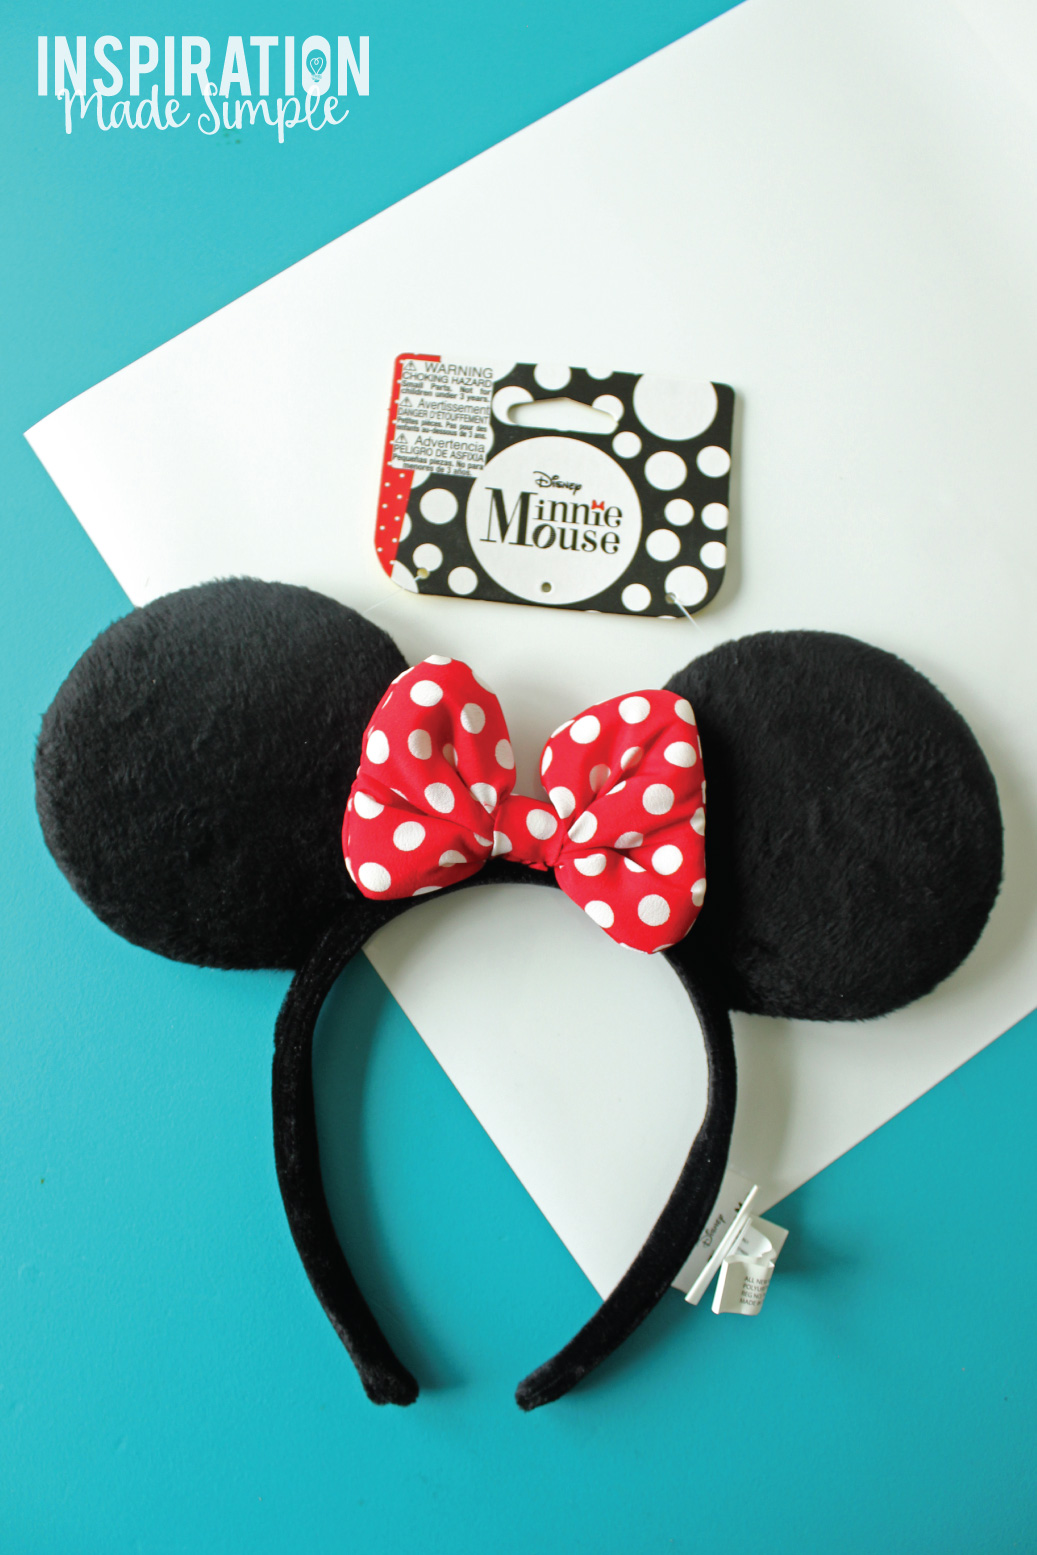
 Aren’t they cute? I found these Minnie Mouse Ears on Amazon for about $9. They fit kids and adults well and I love that the ears are soft and fuzzy.
To personalize them, I used Heat Transfer Vinyl from Expressions Vinyl (my all-time favorite place to purchase quality vinyl) and my Cricut Explore.
 DIY MINNIE MOUSE EARS SUPPLIES:
Minnie or Mickey Mouse Ears
Heat Transfer Vinyl
Cricut Explore
Iron
DIRECTIONS:
I set-up the design in Adobe Illustrator and then converted it into a JPEG image for use with Cricut Design Space, though the design could have easily been created right in Design Space.
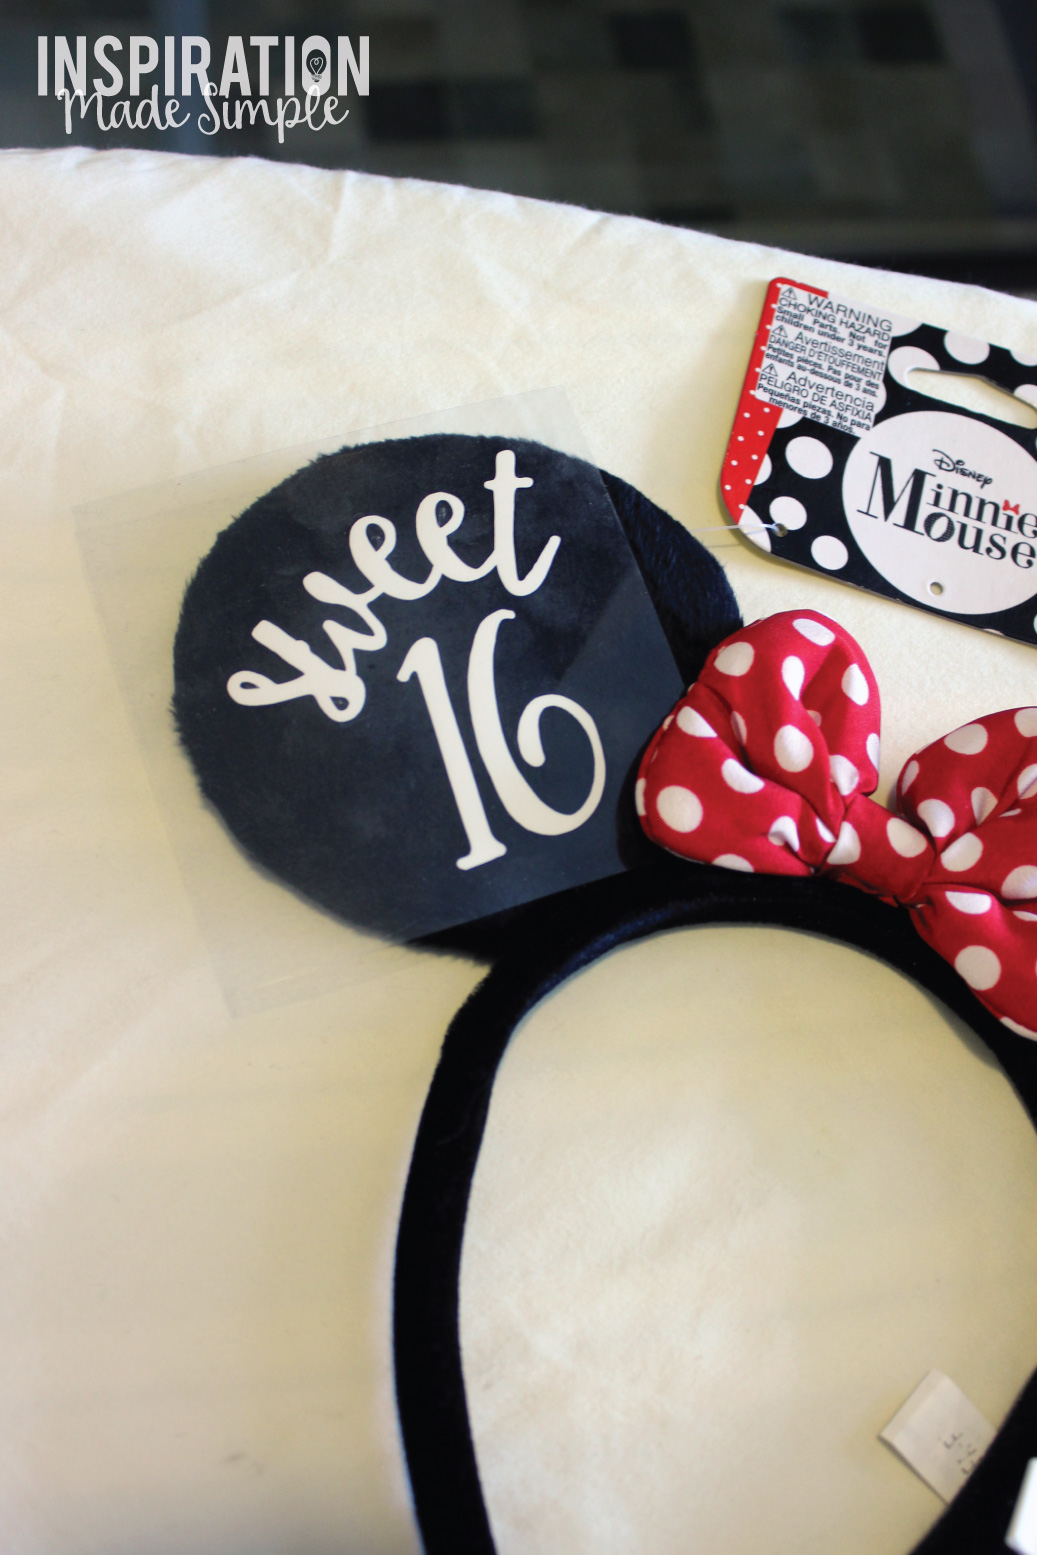 Once the machine cut the vinyl, I weeded it and then ironed the “Sweet 16” onto the left ear. To do this, simply place a pillowcase on top of the vinyl, turn the iron to high, while turning off the steam function, if there is one. Hold the iron firmly in place over the design for 30 seconds, repeating several times. Remove the pillowcase and try to peel the clear backing away from the vinyl. If the vinyl pulls up, place replace the pillowcase and hit the troublesome area again. I was a little nervous since the ears were fuzzy, but the vinyl adhered perfectly and looks great!
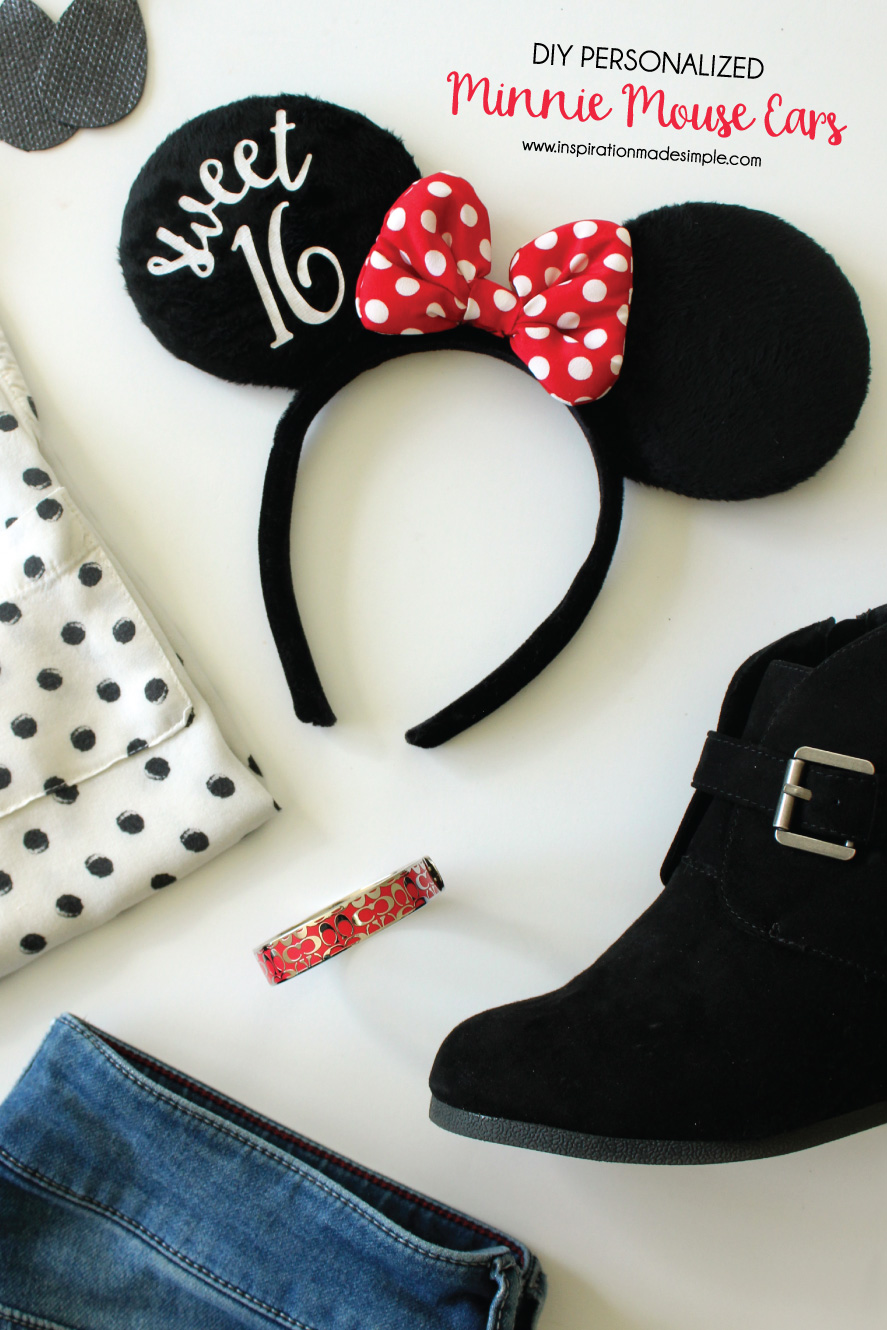 Don’t those ears look extra special? This project was so simple, only taken a few minutes to complete. And there are just so many ways that one can personalize a pair of store bought ears!
These other 25 amazing bloggers also made some fun Disney Crafts and you do not want to miss their amazing ideas!
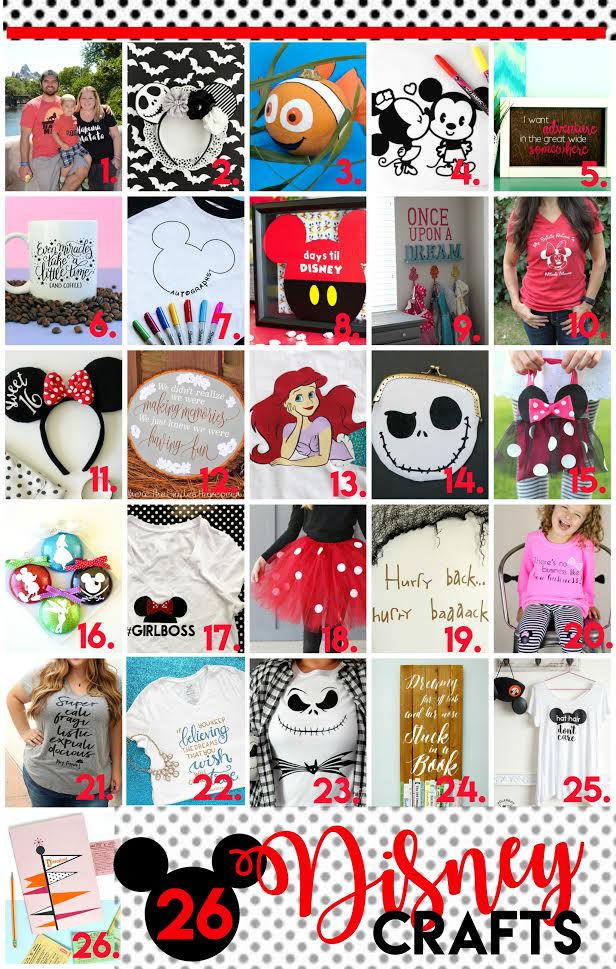
1. Lion King shirts by Play Party Plan
2. Jack Skellington Ears by A Pumpkin and a princess
3. Nemo pumpkin from C.R.A.F.T.
4. Disney coloring shirt by Artsy Fartsy Mama
5. Belle framed art by Crafting in the Rain
6. Miracles free cut file By Dawn Nicole Designs
7. Autograph shirt by the Pinning Mama
8.Disney countdown by Frenchi Wraps
9. Girl dress up by Over the Big Moon
10. Spirit animal shirt by Smashed peas and Carrots
11. Customized Minnie Ears by Inspiration Made Simple
12.Winnie the Pooh quote from Where the Smile Have been!
13. Modest ariel from Kiki & Company
14. Jack Skellington coin purse by Tried and True
15. Minnie Mouse purse by A girl and a glue gun
16. Disney ornaments by Happiness is Homemade
17. Girl Boss shirt by Sweet Rose Studio
18.No Sew Minnie tutu by Sugar Bee Crafts
19. Haunted Mansion door design by Simple simon and Co.
20. Minnie Mouse bow shirt by Girl loves Glam
21. Mary Poppins design by the Crafted Sparrow
22. Cinderella hand lettered shirt by Pitter and Glink
23. Jack Skellington shirt and pumpkin by the Scrap Shoppe
24. Beauty and Beast book sign by Flamingo Toes
25. Hat hair shirt by Polka Dot chair
26. Vintage Disneyland by Persia Lou


What a sweet and simple idea! So cute!
These are so cute! I love the whole outfit layout!!! I would totally wear it!