
Do you ever have times where ideas just pop into your head and it turns into a creative whirlwind? I love when it happens because I get so much done! While my son was at archery I started daydreaming about Nerf targets and I come up with this great idea to create an epic DIY Spinning Nerf Target and I couldn’t get it done fast enough!

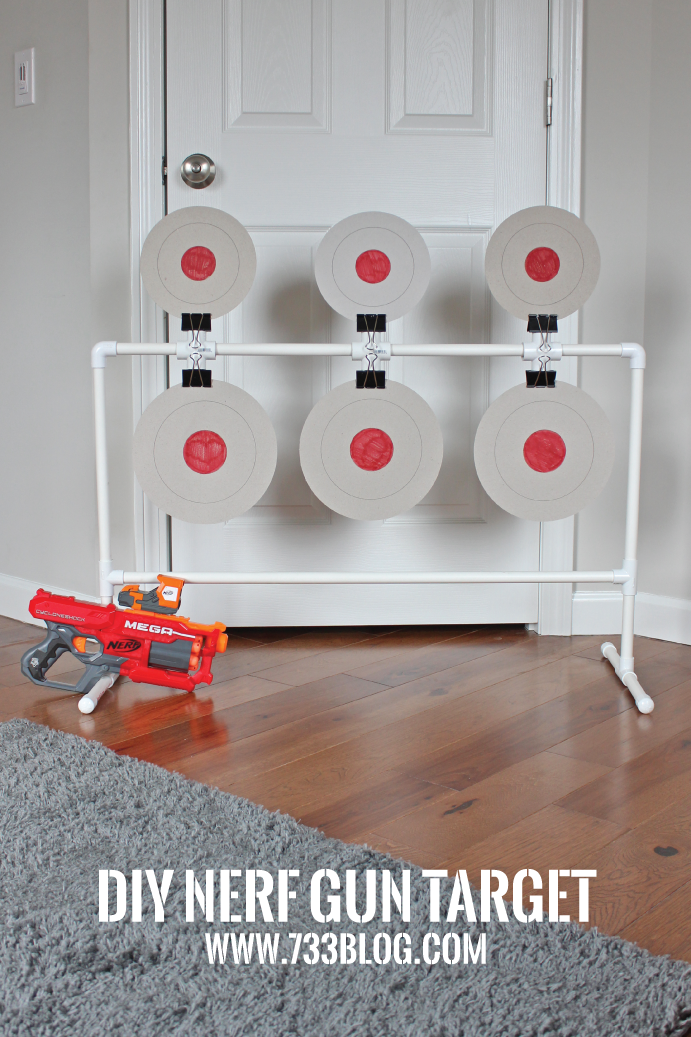
Before heading to Lowe’s, I sketched out a design for the PVC target frame. I decided on 3′ wide and 18″ tall. Once I had the frame figured out, I needed to find a way to connect the targets – I wasn’t 100% sure how to make it happen, but figured I could find something at the store.
I found some things that I thought would work, so I bought everything, headed home, and did a little testing. The Nerf target worked as well as I imagined! Now I’m sharing the plans with you so you can make someone’s day a little brighter with this fun gift!
The total cost for this project was $22. If you already have PVC laying around you’re golden! If you need to buy a pipe cutter to cut the PVC, you’re looking at anywhere from an additional $6-$11. My 8-year-old son helped me build this whole thing – we had a great time working on this together, so I definitely recommend letting your child help!
NERF TARGET SUPPLIES:
3 5′ 1/2″ PVC Pipes
2 1/2″ Elbow Connectors
4 1/2″ Tee Connectors
4 1/2″ End Caps
3 3/4″ Cross Connectors
6 Large Binder Clips
Gorilla Glue Super Glue
Chipboard (paper plates, cardboard, etc)
DIY Target Frame
Directions:
To build the frame you need to cut the PVC pipe to the following dimensions:
6 6″ sections
2 36″ sections
2 15″ sections
Start by creating the feet – take two 6″ sections and connect them together using a tee connector. Add end caps to the ends of the two 6″ sections. Repeat for the other foot.
Add a 6″ section into the top of the tee connector. Repeat for other foot.
Add a tee connector to the top of the 6″ sections.
Add a 36″ section in the horizontal slot of the tee connector – connect to the other side.
Now your frame is taking shape!
Add the 15″ sections to the top of the tee connectors.
Add the elbow connectors to the top of the 15″ sections.
Add the three cross connectors onto the last 36″ section.
Add the 36″ section to connect the two elbow pieces, completing the frame.
Make sure all of the joints are pushed in and fit nice and tight.
Spinning Targets
Directions:
Post contains affiliate links for your convenience. The targets were made using chipboard and a Cricut Explore. The bottom targets are 10″, the tops are 8″. The machine cut the circles and drew the inner circles and I colored the bullseye red.
NOTE: We also tried round Tupperware Container Lids, so if you have extras laying around, totally give them a try!
See the target in action:
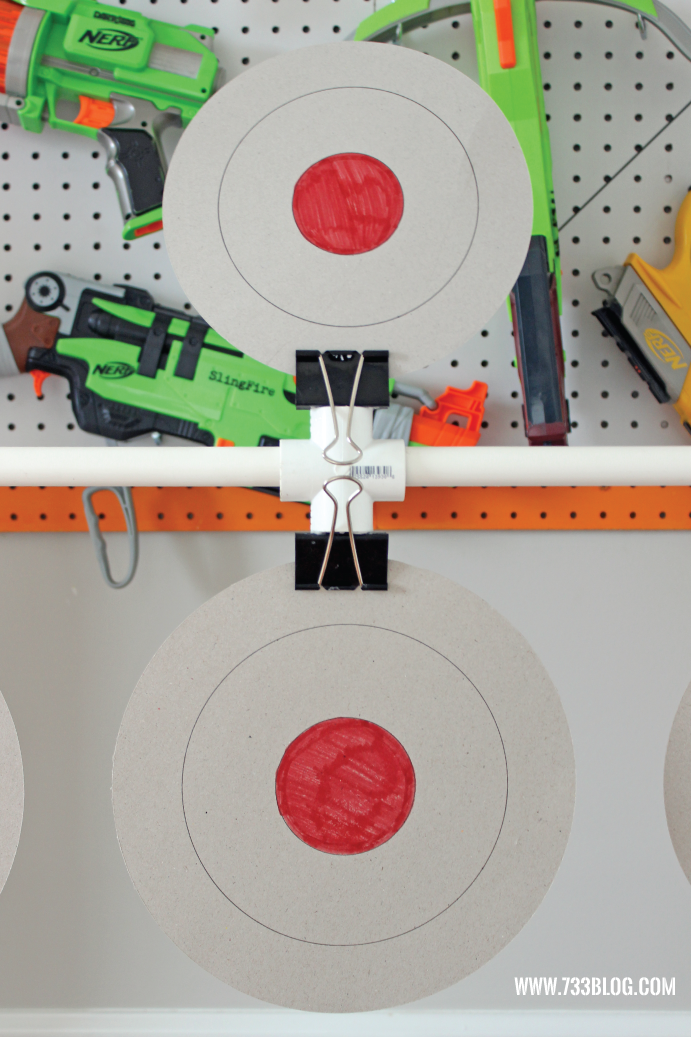 I ended up using large binder clips to attach my targets to the frame. I had some other ideas in mind but felt this would work best. It took a little trial and error with different glues, but this is what I found worked best:
Use Gorilla Glue Super Glue (it’s important it’s the super glue! We tried regular Gorilla Glue and it didn’t work – neither does hot glue!)
Attach a binder clip to the bottom of the cross connectors. Firmly hold in place for 60 seconds.
Repeat for the top of the cross connector.
Repeat for the two other cross connectors.
I would let the glue set overnight before adding the targets
Note: if you really don’t want to wait, then make sure the targets are already IN the binder clips when you attach them, that way you don’t have to squeeze the binder clips open, which usually causes an issue if the glue isn’t fully set!
That’s it! You’re ready to play!
We had so much fun playing with this target. My son, his father, and I had a mini tournament and there was lots of trash talk and laughter. We found the Mega Nerf guns work the best because they have a lot of power to really get the targets moving – they CAN spin around, though they usually just wobble back and forth – enough to tell you the target was hit.
If you make this project, please share! I’d love to hear how it came out.
If you’re drowning in Nerf guns and are looking for an ideal storage solution, you’ll love this:
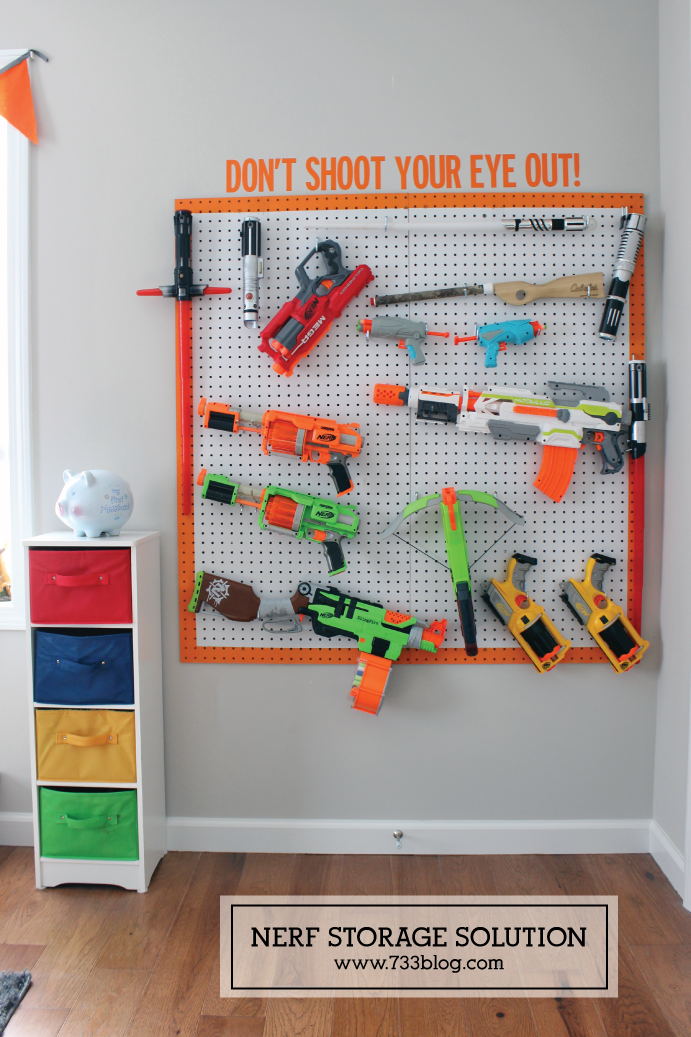


I don’t know who would love this more: my brother or my husband!! How fun!
Better make two! 🙂
What a great idea, love the storage solution too!!
Thanks! We’ve been having fun playing with it! And that storage has been a life saver!
This is such an amazing idea! How come I never thought of it! The kids will definitely love it, especially my oldest, he’s just obsessed with nerf guns. Thank you so much!
Great Idea. Made one for the grandkids for Christmas. Had some trouble with the adhesives also so got flat top plugs for the cross pieces and then drilled a hole in the center of each plug head and in the center of the binder clip. Used 8-32 truss head screws and nylock nuts to attach the binders to the plugs then inserted the plug/binder pieces in the cross pieces. I don’t have a Cricut which would made things much easier so I used plastic lids and painted bulls eyes on them.
Thanks very much for the inspiration!
Sounds like you came up with the perfect solution! I did get the adhesives to work (and they’re still going strong!) but it did take a bit of manipulation on my part. I hope your grandkids enjoy their gift! I’m sure they’ll have lots of fun with it, I know my son and his friends sure have. Wishing you a very Merry Christmas!!
I’m not sure how you got it to spin. Could you explain?
I’m not sure how to explain it more so than in the post. I glued the binder clips to the cross connectors that then were fitted over the top rail. I clipped cardboard circles to the binder clips. When the gun hits the target, it spins (or if not hit hard enough it rocks back and forth).
This is perfect. Making 1 for our annual spring fair and 1 with my son for his room. Also love your storage idea.
Yay! I hope all the kids enjoy it!
Hi! I love this tutorial. I have a question about attaching the targets. How are the binder clips attached? Are they seated directly on top of the cross connectors where the bottom of the black part is glued to the connector? Or is one of the “legs” glued to the inside of the connector? If it is the former, what size clips did you use. I have large binder clips but they are not as wide as the diameter of the cross connector so squeezing them after they are glued down wouldn’t work… Thank you for your insight!
They are large binder clips and they are glued to the connected via the bottom of the block part. We don’t really squeeze them hard to open them – just enough to slip in the sheet of cardstock – you can even get it into the seam without squeezing if you worked at it.
Ok. Thank you 🙂
This project is awesome and totally doable for a stay-at-home mom! Just picked up all the supplies at Lowe’s (price is now double, of course). Going to be a Christmas gift along with a nerf-type bow and arrow. Using corrugated plastic for the targets so that they aren’t ruined if left outside. Thanks for the wonderful idea!
Love this and hope your kiddos have fun with it!