My daughter started brainstorming Halloween costumes two weeks ago and told me she wanted to be a Mermaid. I was going to nix it because hey, it snows most Halloweens here in Vermont! But then I got to thinking that I could probably make a pretty easy Mermaid costume. In case you didn’t know, my motto is cheap and easy… guess I’m sort of a crafting bimbo! Anyway, not only did I think I could create a warm one, but one that didn’t restrict movement.After a little brainstorming and a quick mock-up of the tail I was ready to get to work on my DIY Mermaid Costume. Today I’ll share how I made the Mermaid tail.
SUPPLIES:
Emerald Lame (I purchased 1.5 yards for my daughter who is a size 10/12 and I should have only purchased 1 yard)
1 Yard Batting (or however much of the Emerald Lame you get)
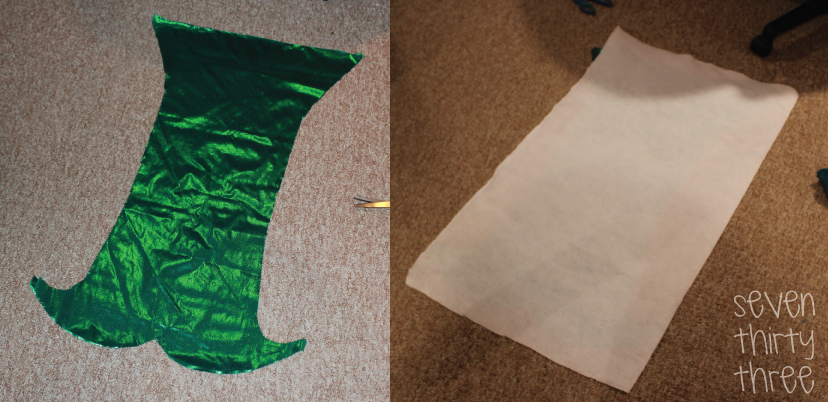
Fold the fabric so that it is right side touching right side lengthwise. First I grabbed a pair of my daughters pants and laid them down on the piece of Emerald Lame (which was still folded in half length wise). I used this as my guide for the height of the tail. I added 2 inches to the height.
Next I drew out the shape of my tail. I then decided I wanted to be as symmetrical as possible so folded the fabric in half again and cut it along one side of my guides.’
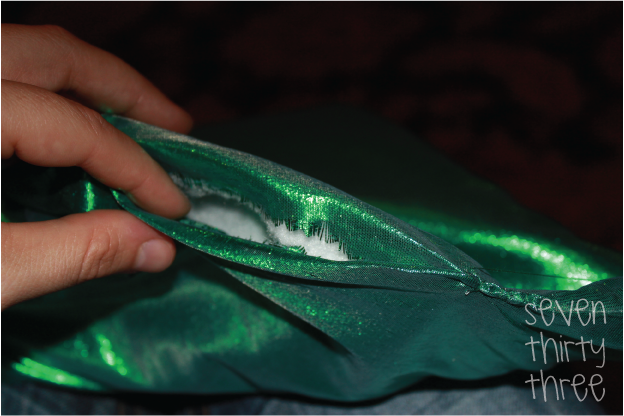
Unfold and you have your tail shape. Lay your batting over the top and cut out a rectangle making sure to cover all of the tail. So now you have a sandwich of batting and two pieces of right sides touching Emerald Lame.
I didn’t pin everything together, but if you find it easier, feel free to do so. Sew all the way around, leaving a 3″ gap on the side so that you can flip it right side out. I started at the tail because it seemed the most important and hardest area with the curves and such. Trim off the excess batting (thank you for ignoring that I didn’t cut my rectangle of batting big enough so the top of my tail went off it… it didn’t hurt the integrity of the design, just a sign of caution for you! HA!).
Turn your tail right side out, and check the height on your child. If it is laying where you want to (just below the belly button and not too long that it will get tripped on) then hand sew up your 3″ hole.
UPDATE: I don’t know why I didn’t think of this at the time – but I would just use elastic and skip the straps that tie in the back to hold up the tail. Measure your child to determine the amount of elastic needed and then sew onto waist of tail.
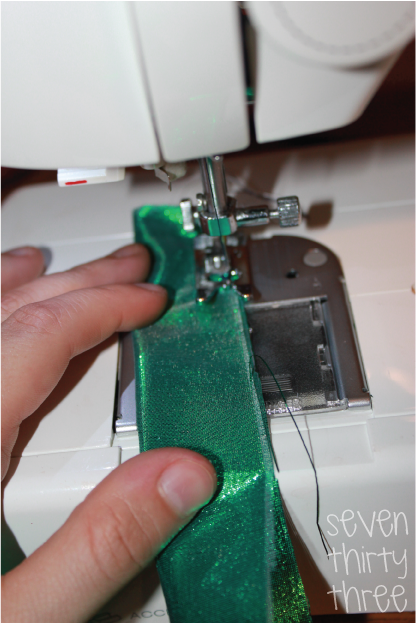
I added straps to the tail by cutting 2″ x 6″ strips, folding them in half length wise and sewing shut the long way.
I then spent more time trying to flip them right-side out than I did on anything else on this project!
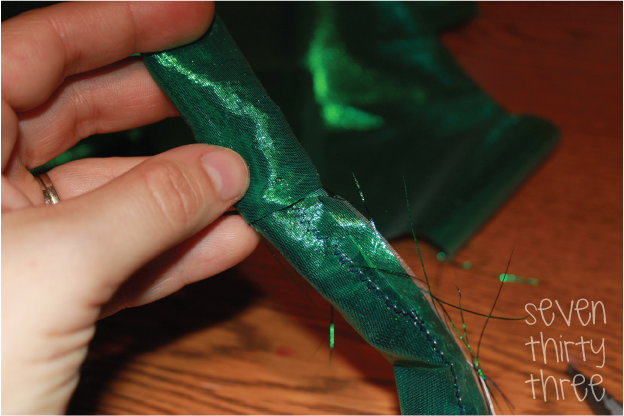
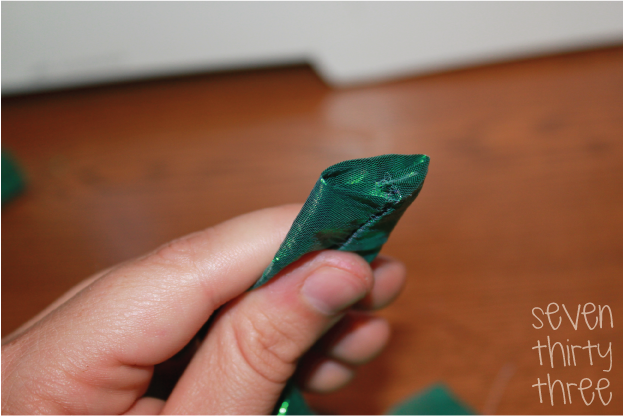
Fold the fabric into the hole on either end of your strap and sew shut.
Now sew your straps directly onto the top corners of your tail.
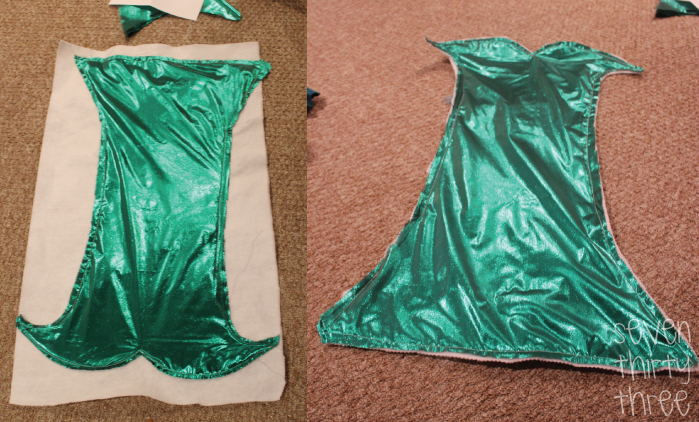
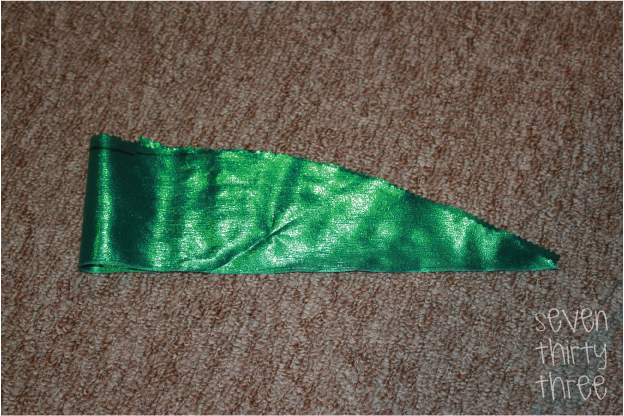
Once I got the whole ensemble on my daughter and she ooo’ed and ahhh’ed in the mirror for 10 minutes she said she loved it but… Ariel has that cool part where her upper body meets her fin and sort of notches away from her belly button… and I said “UGH! You’re right. I wish I had remembered that instead of going straight across at the waist. I can’t cut out the notch now.” She was sort of like “Darn, so there isn’t anyway you can add fabric to make that work?” and I was like “No, not now and I can’t cut the notch because this fabric frays terribly.” She still loved it and forgave me my error…. But I couldn’t stop thinking about it! SOOOO, I went back down to my sewing desk and pulled out the fabric and cut out and sewed the curve of this shape:
The vertical seam you see a few inches to the right of the fold is because I cut the piece too wide. I sewed the vertical seam and cut off the fabric to the left. The point should end in the center of the tail, and the edge needs to hit the edge of the tail. You will need two of these. Flip the fin piece right side out.
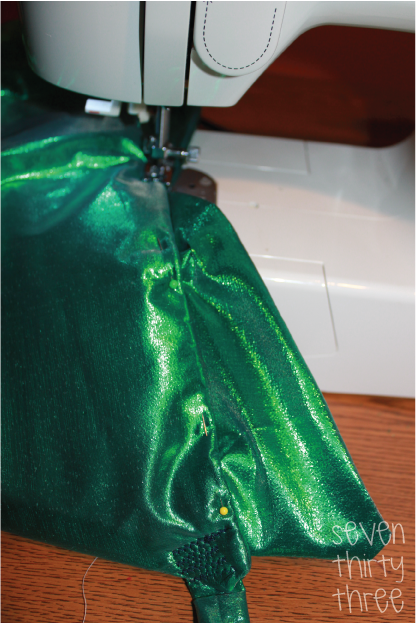
I was a bit apprehensive about actually attaching it because what if it doesn’t work out the way I had planned… but this is me and I couldn’t not do it so away I went. I measured it so it ended in the center of the upper tail and then starting from the side, sewed a straight line attaching it along the top. I did the same to the other side and it worked EXACTLY as I hoped. By this time my daughter was in bed, but I was so excited that I ran up to show her . She was like “that is SO awesome” and had to get up to give it a try. So thank you to my daughter, Cassidy, for having this bright idea!
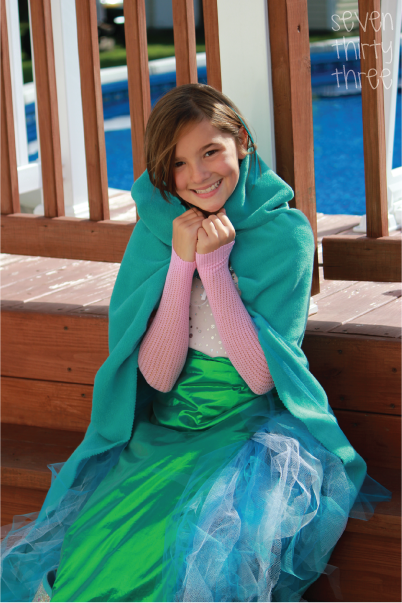
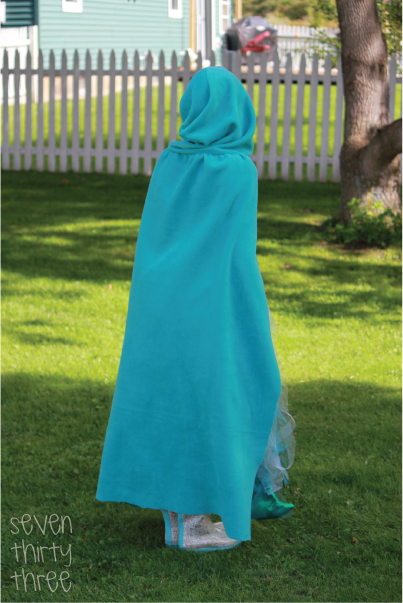
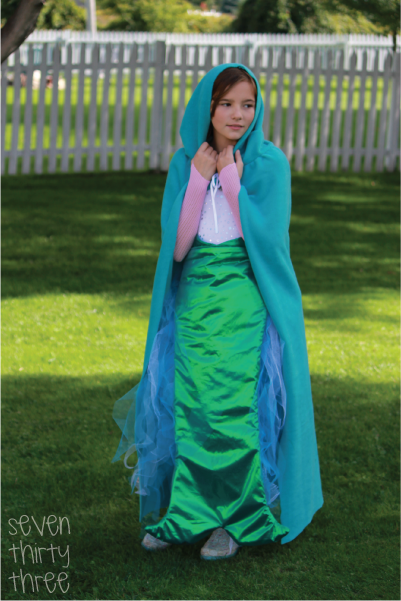
The Hooded Water Cloak was made generally following this tutorial. I used fleece and it was super easy, no hemming needed!
Come back tomorrow and I will show you how to make the Tulle Water Skirt!
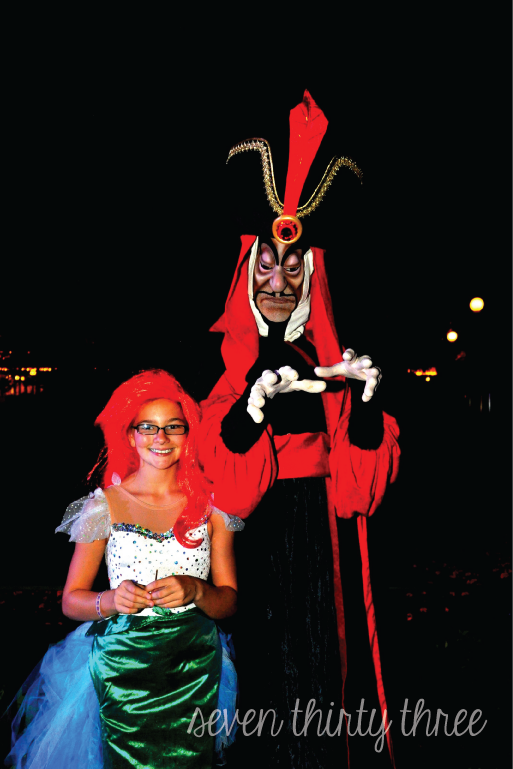
Posing with Jafar – a little disheveled after riding numerous rides and a fun night of trick-or-treating at Walt Disney World!
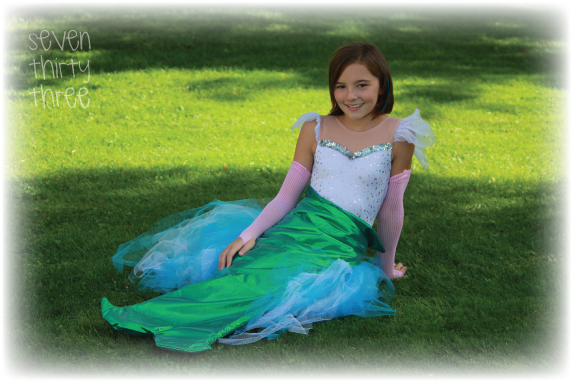
October 2012 Update: My daughter wore this costume sans cape to Disney World and received SOOOO many compliments on it. People kept asking where we got it and she took great pride in telling them I made it.
Kim is a Marketing Specialist with Inspiration Media Solutions by day and Blogger by night. She's a wife, mom of three beautiful children and two fur-babies, a Goldendoodle and a rescued Pibble. For even more Inspiration Made Simple, like her on Facebook and Instagram+.
your mermaid costume is great, what a great way to make the tail (and still walk around!) my daughter has been wanting a costume like yours for sometimes now, it might happen soon!
This is awesome! My girls have wanted to be mermaids for Halloween for years now but it’s simply too cold in October where I live. They could easily wear this costume over a pair of sweats! Thank you so much for sharing!
Hi – I’m sorry if this is my second post. I’m not sure if you have to approve posts before they go up, or if something happened when I made my last comment. Anyway, it said something along the lines of this:
Thanks to your tutorial, I told my daughter (after being told no every other year) that she could be a mermaid this halloween. So I’m planning to follow your tutorial (I’ve already made the water skirt and I used some tulle that had glitter on it. It looks great!), but I’ve never sewn with Lame before. I did a google search, but I’m not finding anything. Do you know if Lame is washable? Should I prewash before I make the tail?
Holy cow…I love what ya did. It took me a minute to figure out how it was all put together. I was trying to make a mermaid outfit out of an old skirt…not sure if it will work…but this is my go to, if I can’t figure out the skirt. Great job!
I just saw your mermaid costume on #LivingCreative and love the tutorial. My daughter wants to be a mermaid this year and I’ve been trying to figure out how not to kill myself making this costume!
My name is Kim, founder of Inspiration Made Simple, and I'm really glad you have stopped by!
I'm a mom, wife, fitness and fashion enthusiast. I love sharing simple and affordable ideas that help make your busy life easier, including craft tutorials, affordable fashion, printables, recipes, party ideas, and fun family activities. Learn more about Kim...
Occasional Newsletter
Inspiration straight to your inbox, never miss a post!
Thanks! Keep an eye on your inbox for updates including a free gift!
Manage Cookie Consent
To provide the best experiences, we use technologies like cookies to store and/or access device information. Consenting to these technologies will allow us to process data such as browsing behavior or unique IDs on this site. Not consenting or withdrawing consent, may adversely affect certain features and functions.
Functional
Always active
The technical storage or access is strictly necessary for the legitimate purpose of enabling the use of a specific service explicitly requested by the subscriber or user, or for the sole purpose of carrying out the transmission of a communication over an electronic communications network.
Preferences
The technical storage or access is necessary for the legitimate purpose of storing preferences that are not requested by the subscriber or user.
Statistics
The technical storage or access that is used exclusively for statistical purposes.The technical storage or access that is used exclusively for anonymous statistical purposes. Without a subpoena, voluntary compliance on the part of your Internet Service Provider, or additional records from a third party, information stored or retrieved for this purpose alone cannot usually be used to identify you.
Marketing
The technical storage or access is required to create user profiles to send advertising, or to track the user on a website or across several websites for similar marketing purposes.


Would LOVE it if you would link this project up at my turquoise lovin’ party going on right now!! http://www.sweetlittlegals.com/2011/09/turquoise-lovin-5.html
your mermaid costume is great, what a great way to make the tail (and still walk around!) my daughter has been wanting a costume like yours for sometimes now, it might happen soon!
You are a genius! What an adorable costume.
I would love for you to post this on my Fall In Love linky party today.
This is awesome! My girls have wanted to be mermaids for Halloween for years now but it’s simply too cold in October where I live. They could easily wear this costume over a pair of sweats! Thank you so much for sharing!
How fun!! This is such a great costume idea! I wish I had your sewing skills!
Hi – I’m sorry if this is my second post. I’m not sure if you have to approve posts before they go up, or if something happened when I made my last comment. Anyway, it said something along the lines of this:
Thanks to your tutorial, I told my daughter (after being told no every other year) that she could be a mermaid this halloween. So I’m planning to follow your tutorial (I’ve already made the water skirt and I used some tulle that had glitter on it. It looks great!), but I’ve never sewn with Lame before. I did a google search, but I’m not finding anything. Do you know if Lame is washable? Should I prewash before I make the tail?
Thanks!
Holy cow…I love what ya did. It took me a minute to figure out how it was all put together. I was trying to make a mermaid outfit out of an old skirt…not sure if it will work…but this is my go to, if I can’t figure out the skirt. Great job!
I featured this post today on my blog! 😀
http://www.betweenuandme.com
You did a great job! My daughter also chose to be a mermaid, must be popular this year.
Thanks so much for the tutorial! We had a great time mermaid-ing it up this Halloween.
http://cominguprosemary.blogspot.com/2011/11/mermaid-halloween.html
I just saw your mermaid costume on #LivingCreative and love the tutorial. My daughter wants to be a mermaid this year and I’ve been trying to figure out how not to kill myself making this costume!