
Yesterday was our 14th Wedding Anniversary. I can’t believe that 14 years ago I was a 20 year old woman, still in college, walking down the aisle with the man I fell in love with when I was 16. I’ve shared our Love Story before, if you’re interested in reading it. It seems fitting to share these DIY Wood Signs that I recently made for our master bedroom. Since I purchased new bedding for our room and our walls have been sadly bare since we built the house two years ago, I decided it was time to add some wall decor.
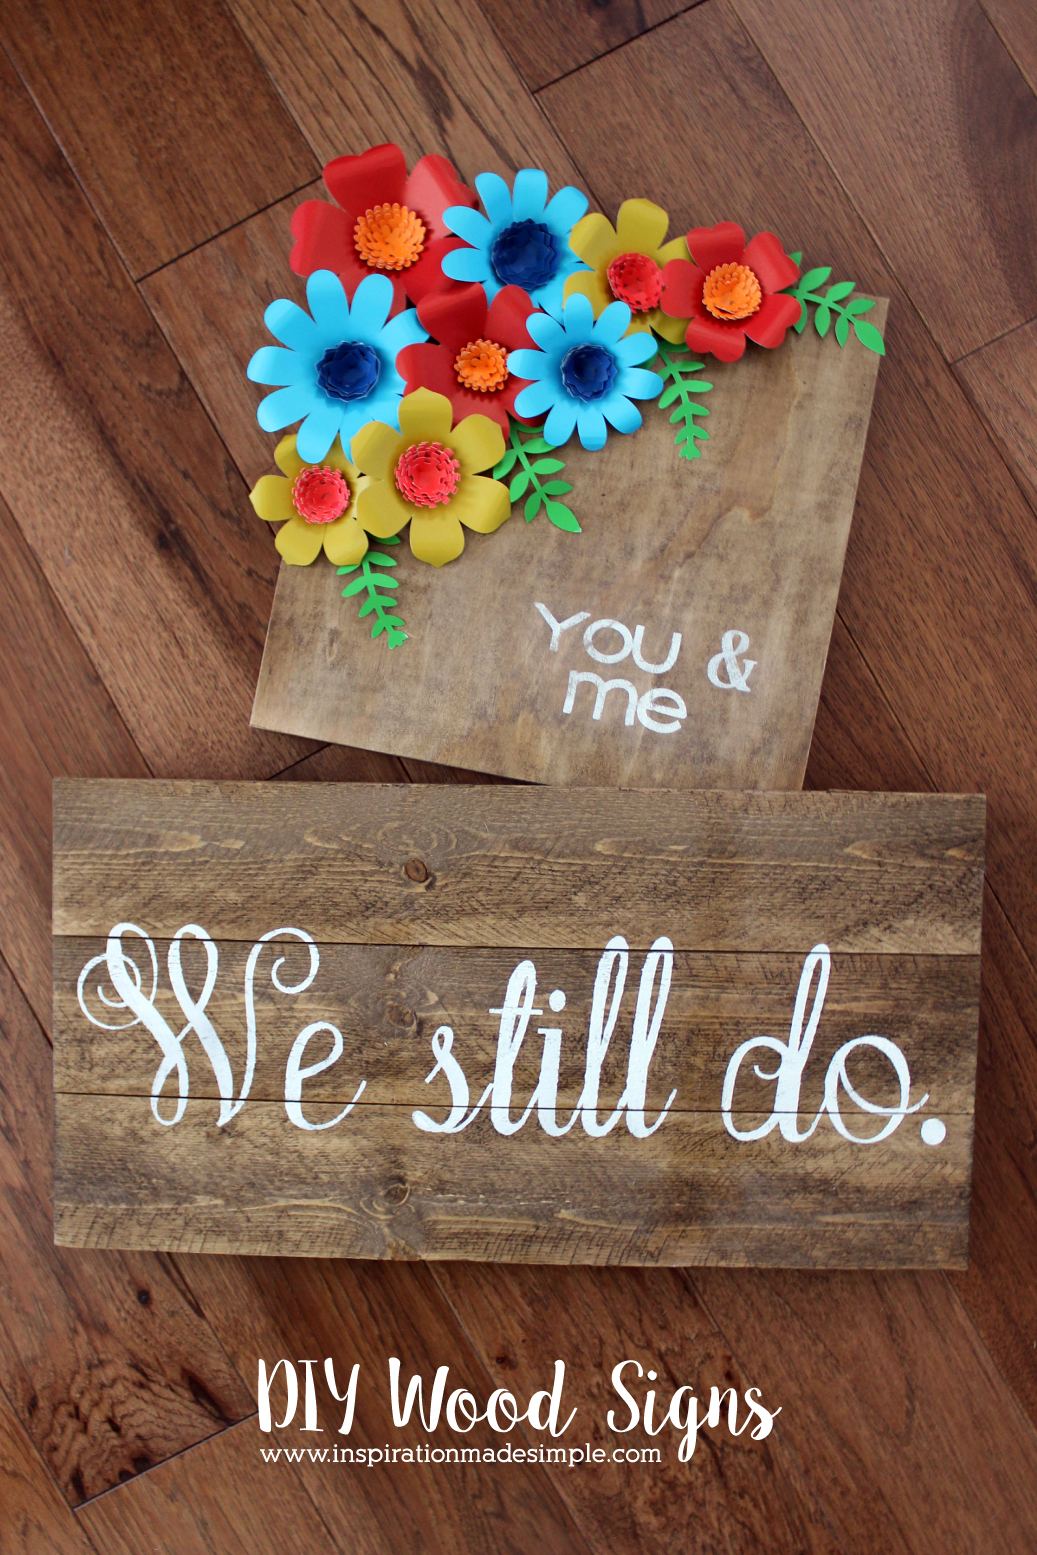
I made two different signs – one with a fun burst of color that matches my new bedding and one with a quote perfect for a married couples bedroom. I used my Cricut Explore to Create my own stencils, used a bit of paint and, for one, gorgeous DIY Paper Flowers. I’m happy to report that my husband actually told me that he loved our new wall decor, so I call these signs perfection!
Supplies Needed:
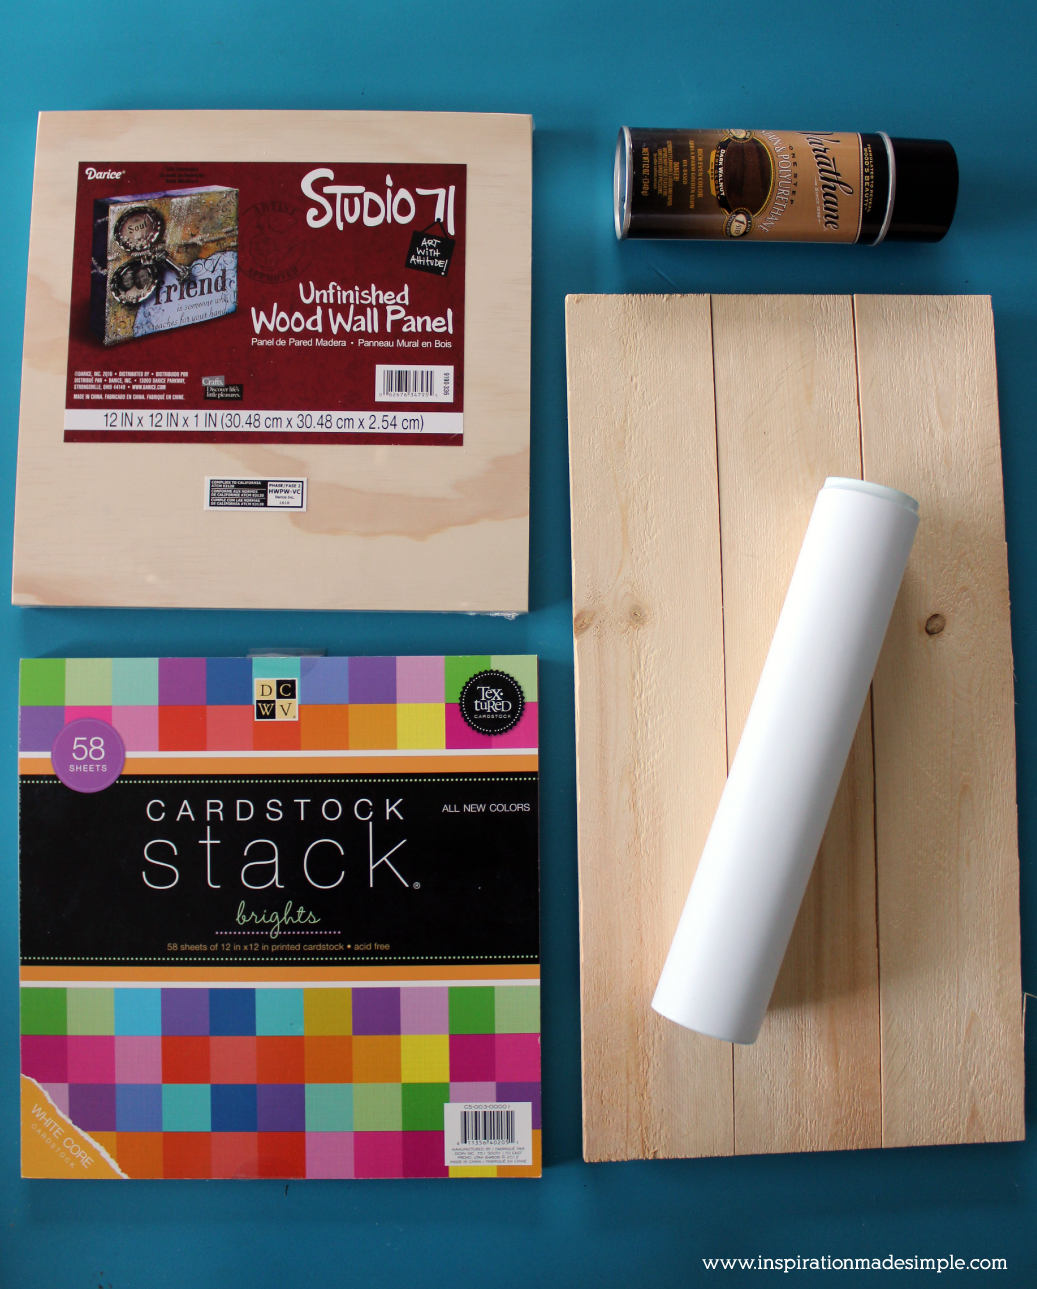
12×12 Wood Plaque
20×10.5 Pallet Sign
Cricut Explore
Cricut Cutting Mat
Craft Paint and Brush
Hot Glue Gun
Cardstock
Wood Stain
Sandpaper
Vinyl and Transfer Tape (Optional)
Cricut Design Space Floral Sign Cut File
Cricut Design Space We Still Do Cut File
Let’s start with the Flower Sign.
First, stain the board with a wood stain of your choice.
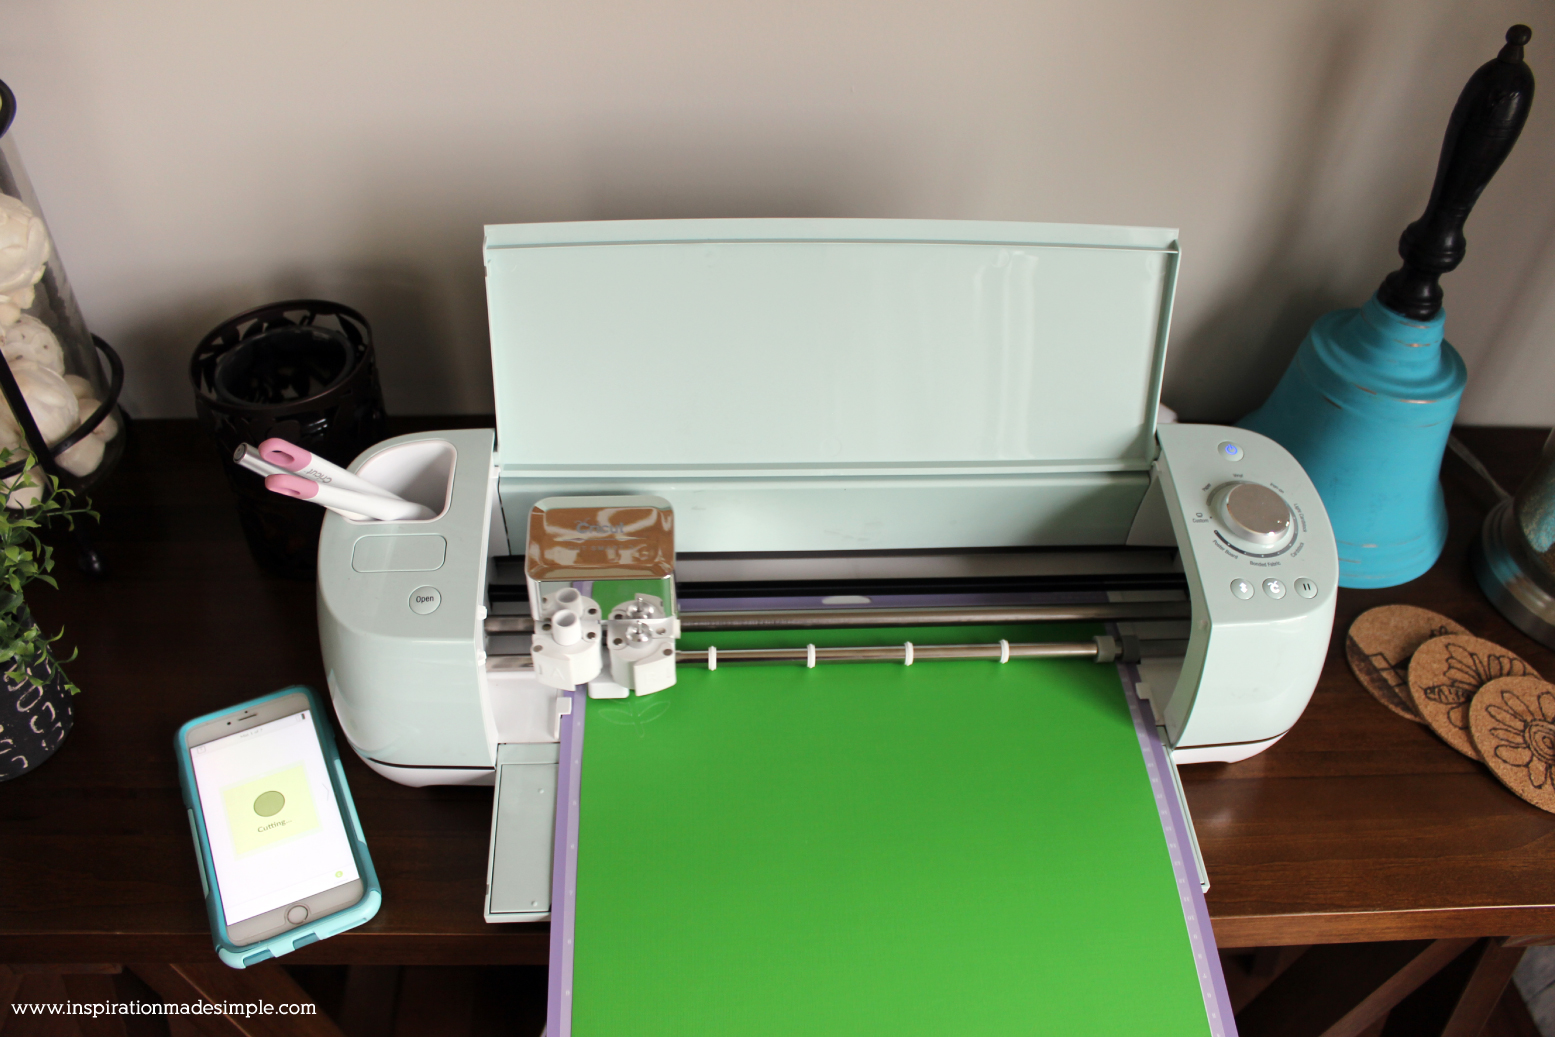
While the board is drying, use a Cricut Explore to cut several flower types out of cardstock using the Cricut Design Space file I created and linked to above. I chose flowers from the Cricut Image Library. I also added a leaf. One of my favorite things about the Cricut is that I can actually design right on my iPhone and send it to the machine to cut! I would definitely recommend the Cricut Access pass so that you don’t have to pay for each image individually, which can add up!
While cutting the flowers, I also cut a stencil that read “You & Me” using vinyl, though you could use cardstock as well and just use tape to adhere the stencil to the board.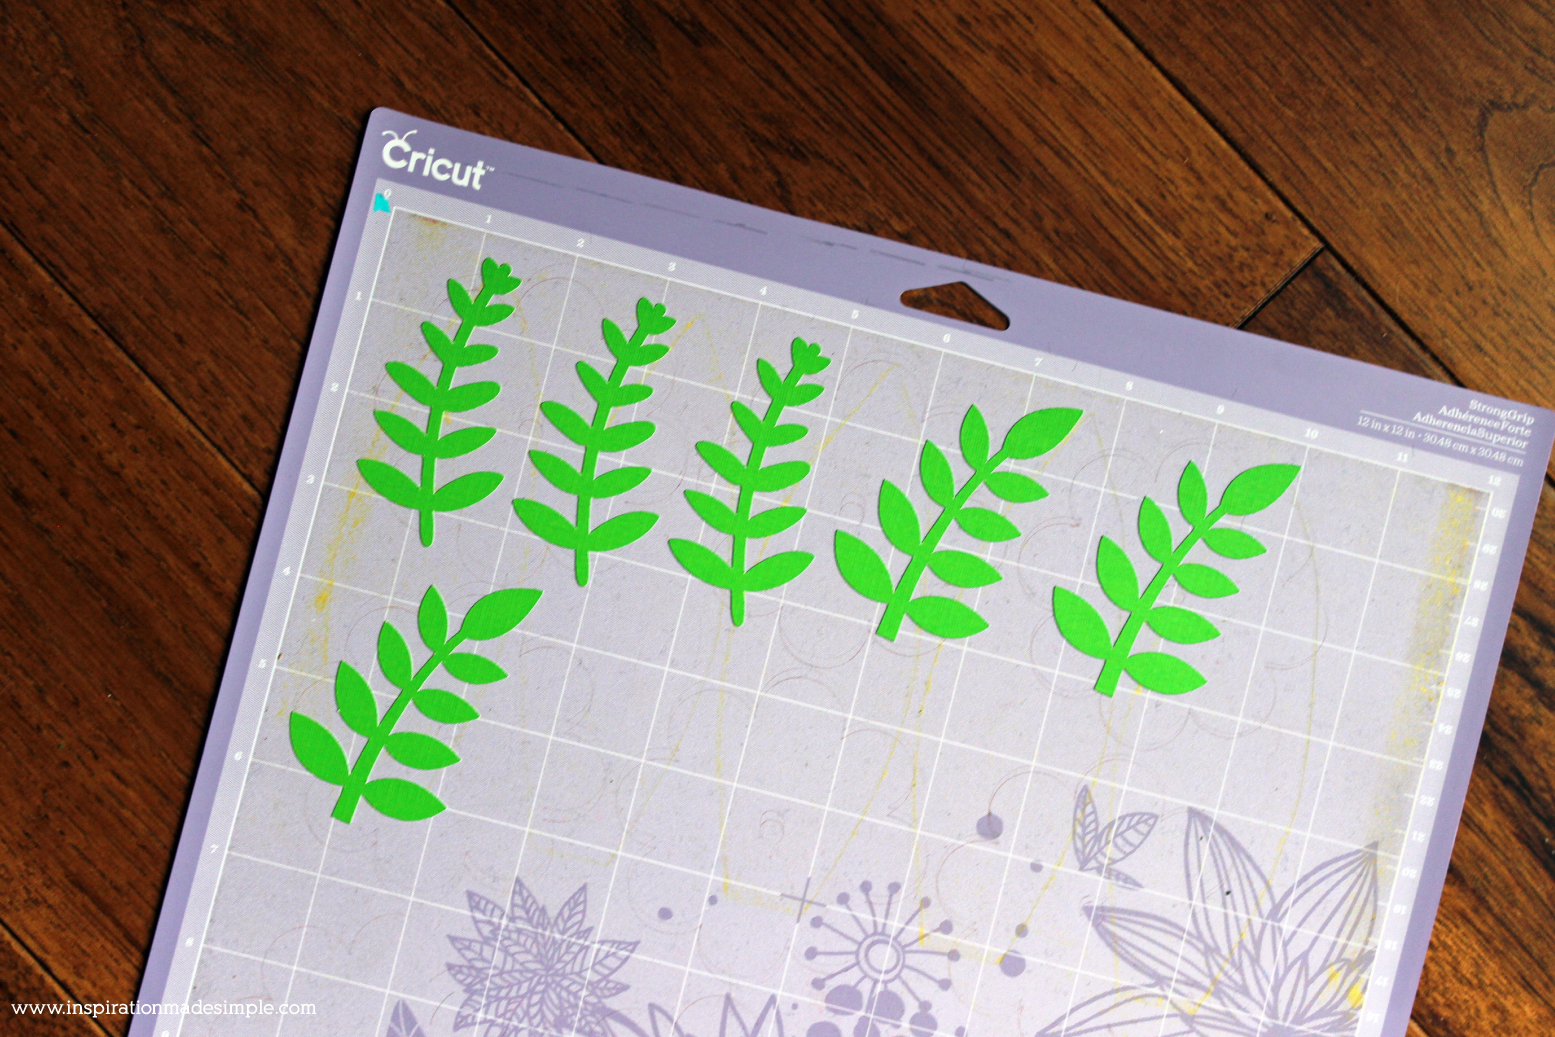
Weed the flowers, leaves and vinyl and remove from the mat.
The flowers are very easy to assemble:
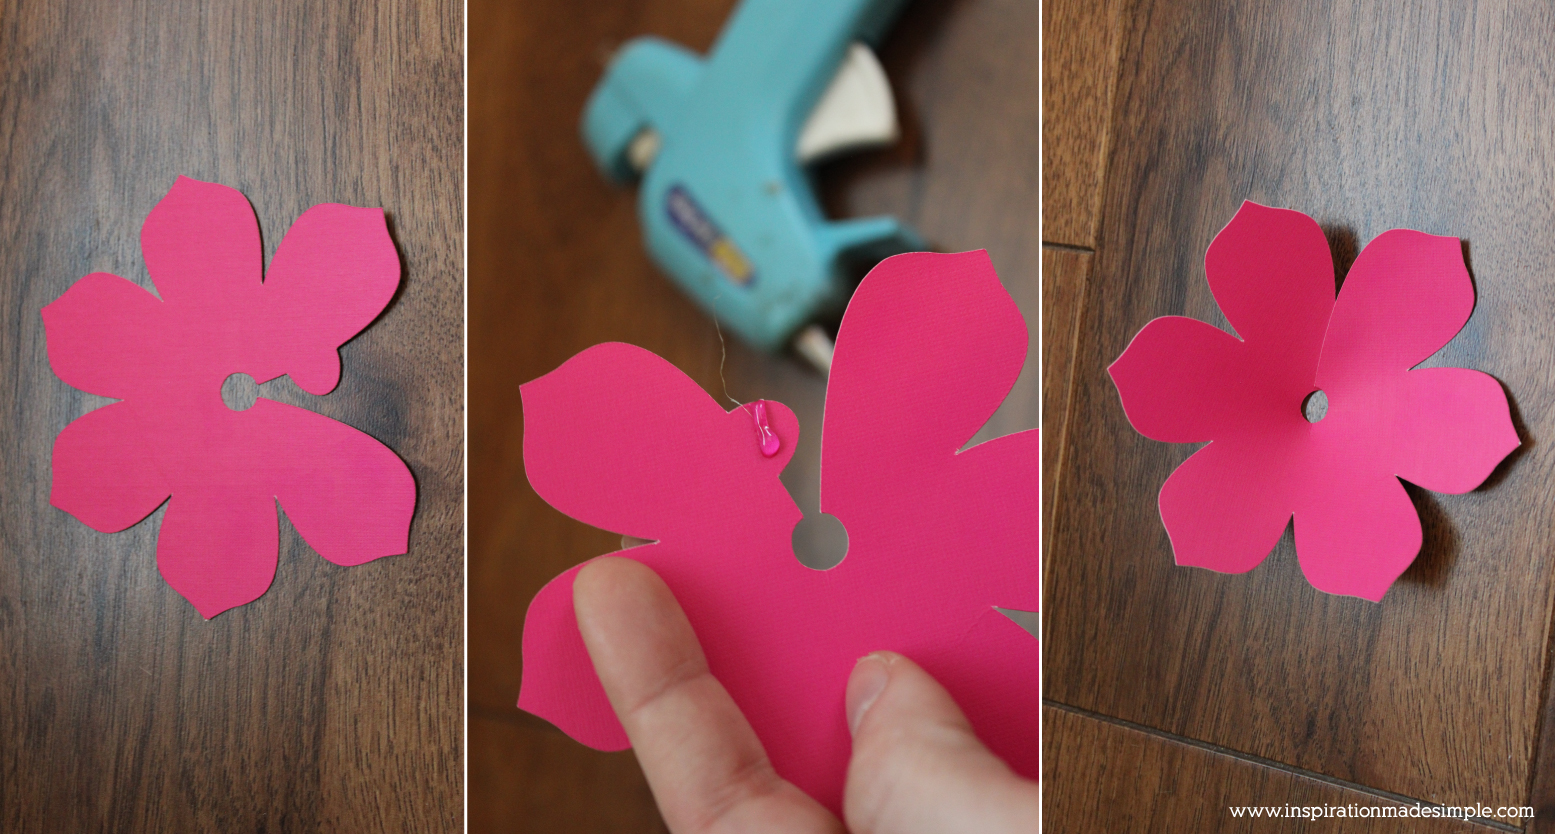
Once the flower petals are glued together, move on to making the center.
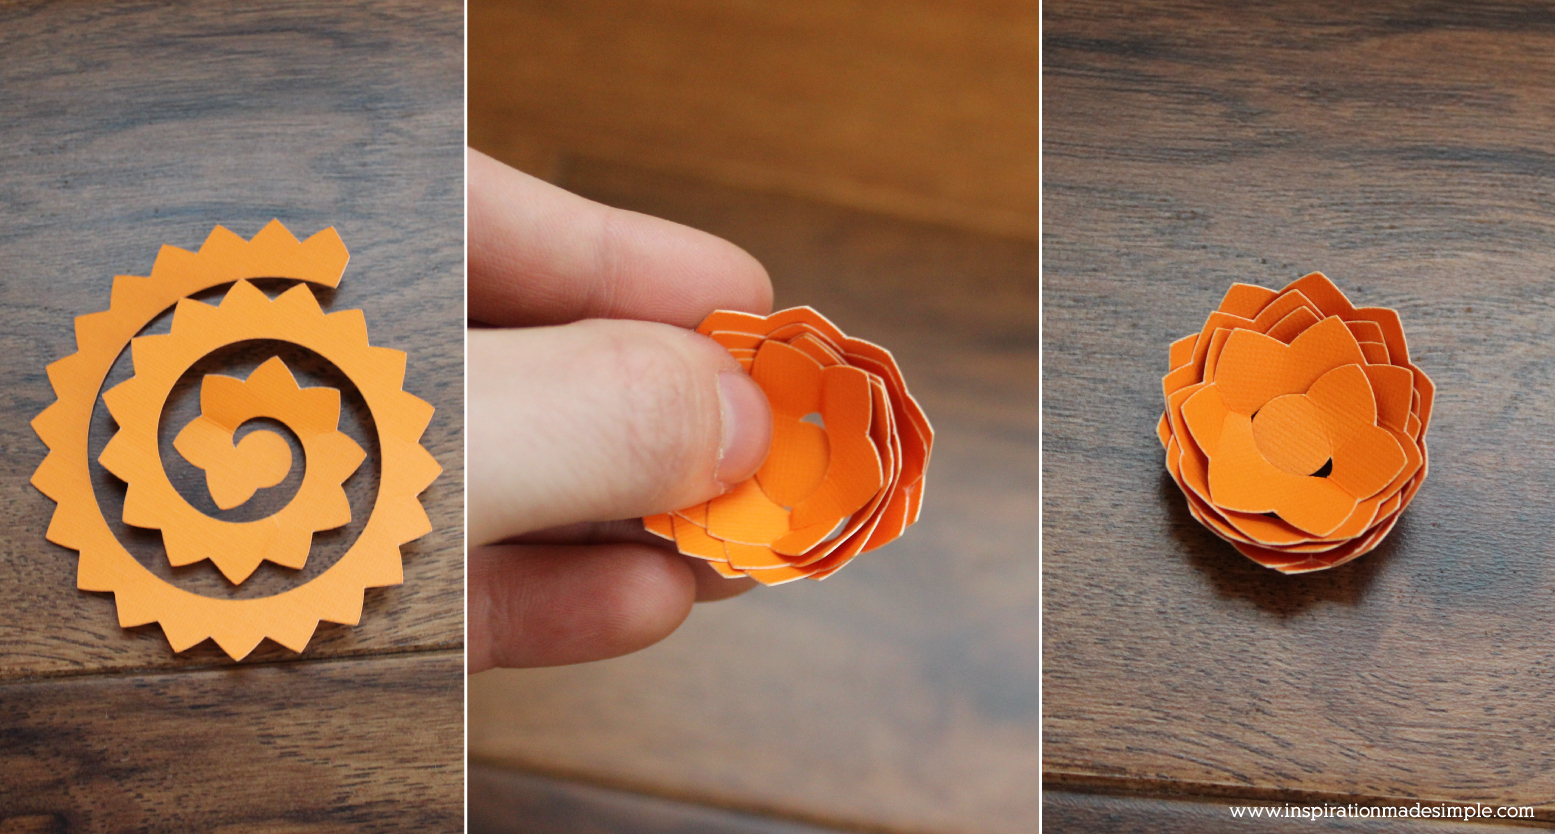
Hot glue the center of the flower onto the petals.
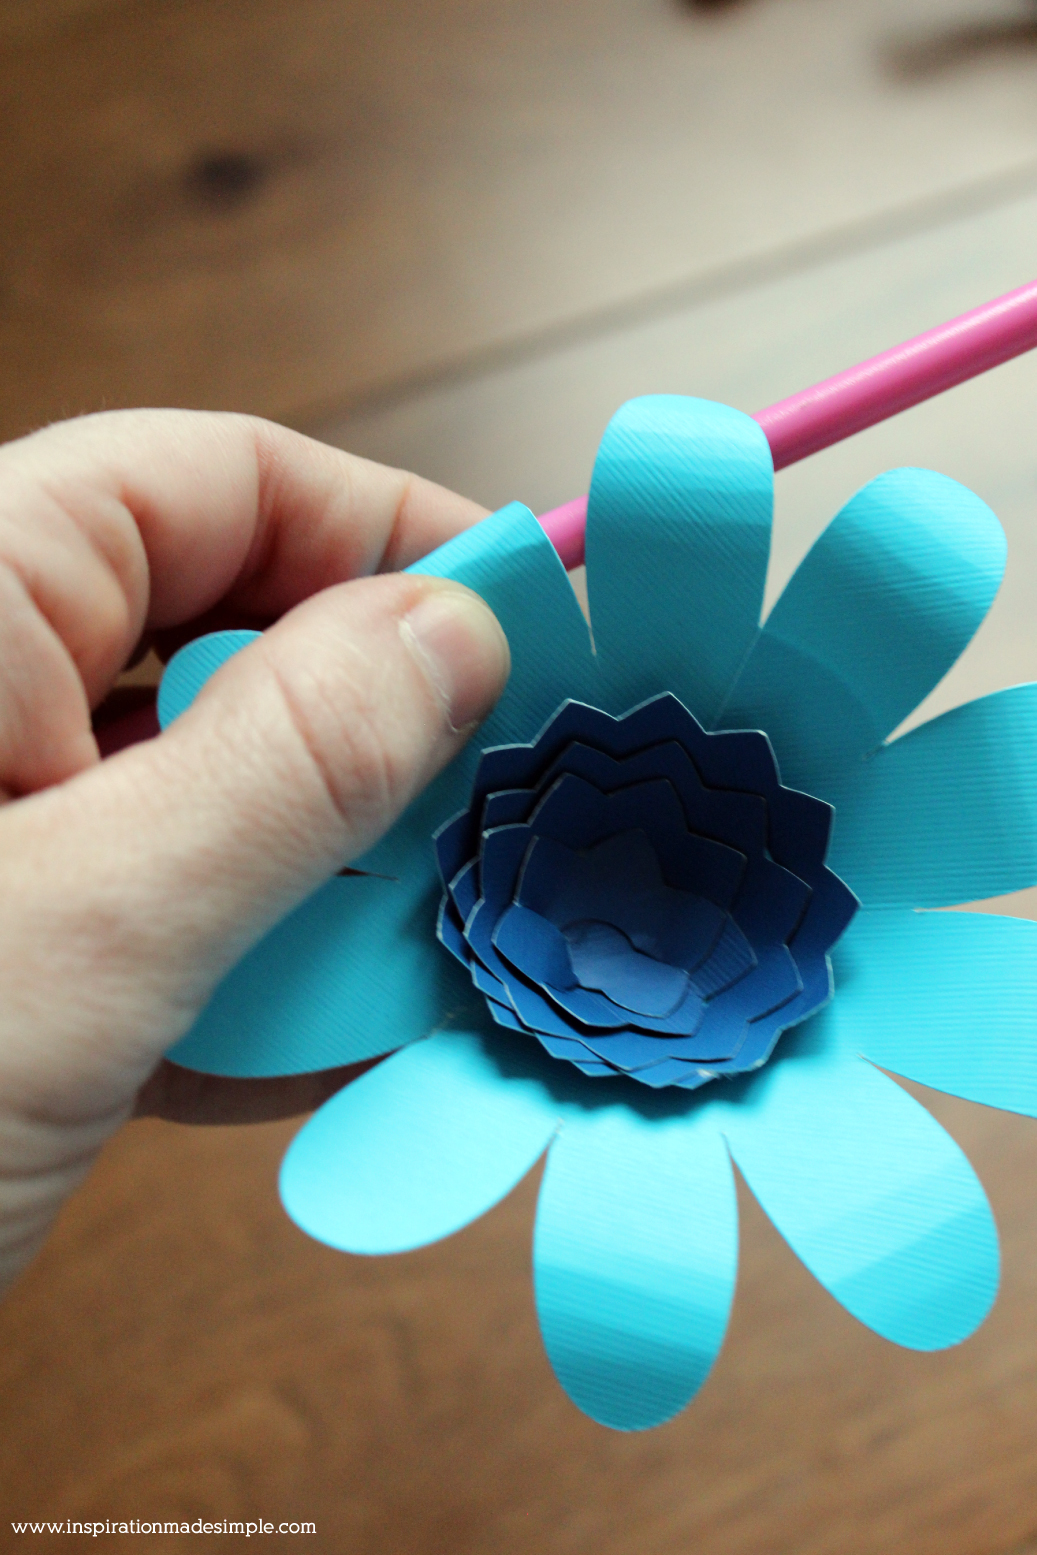
Using a pencil, roll the petals around the pencil to curl them backwards. I created 9 paper flowers for my 12×12 board.
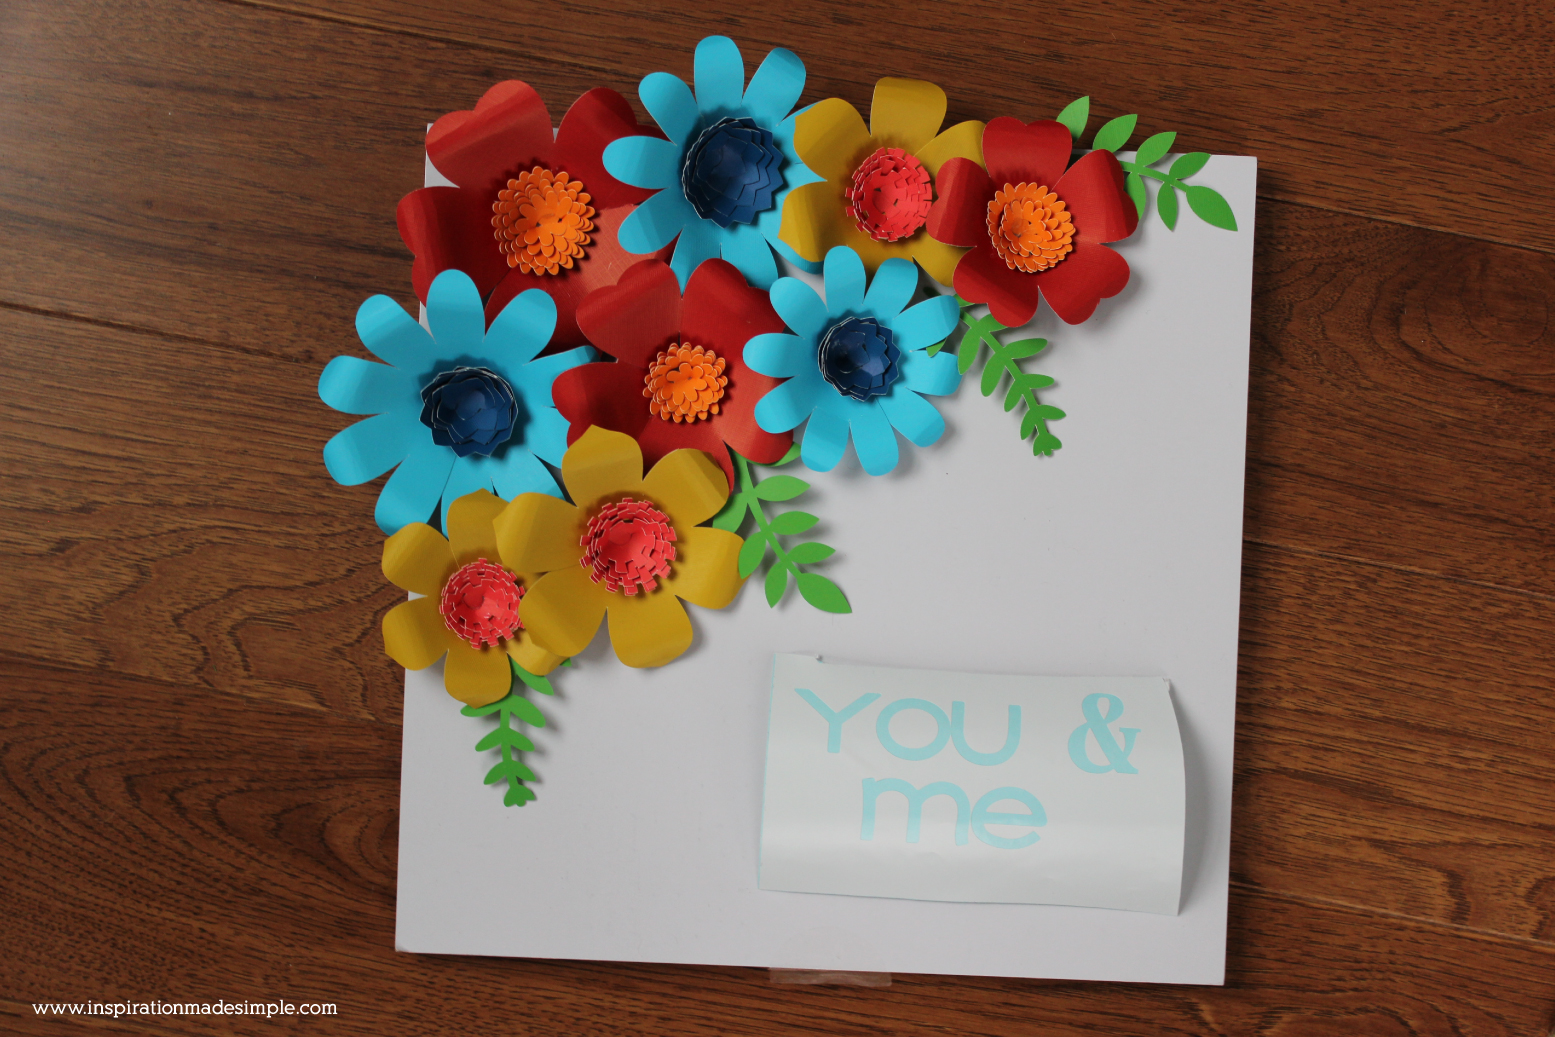
I used a 12×12 sheet of paper to figure out the arraignment of my flowers and leaves, as well as determining where I wanted to place the “you & me” type. I took a photo of the arrangement so that I could copy it onto the board.
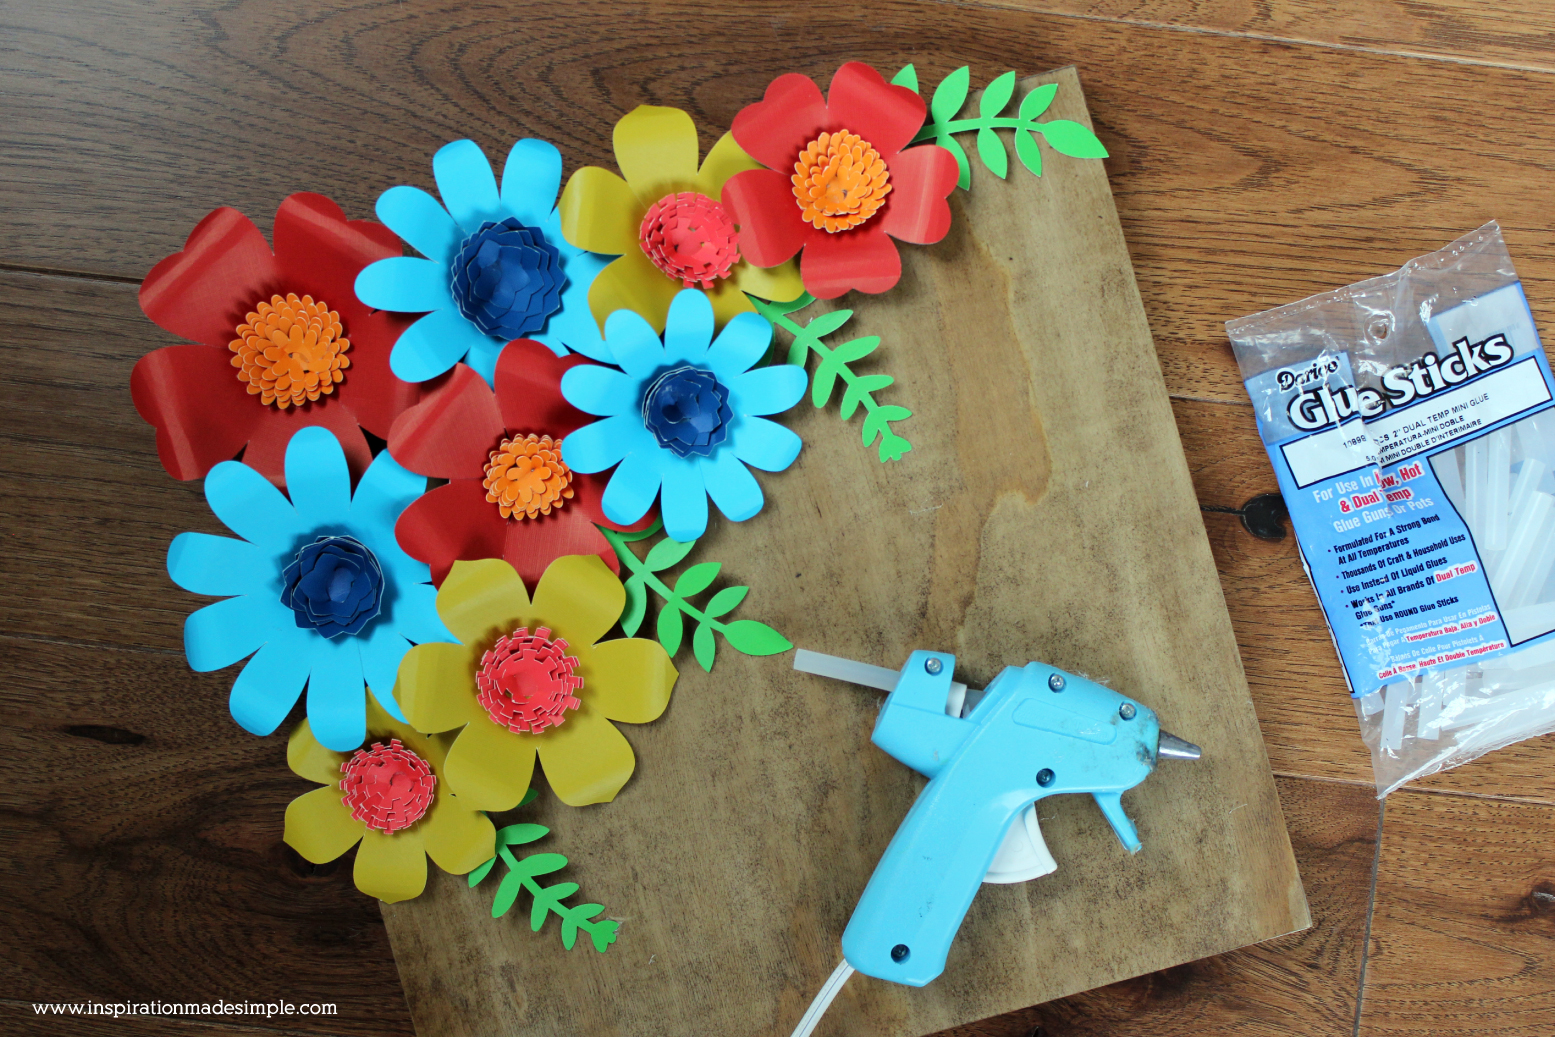
Once the board was fully dry, I used a hot glue gun to attach the flowers and leaves.
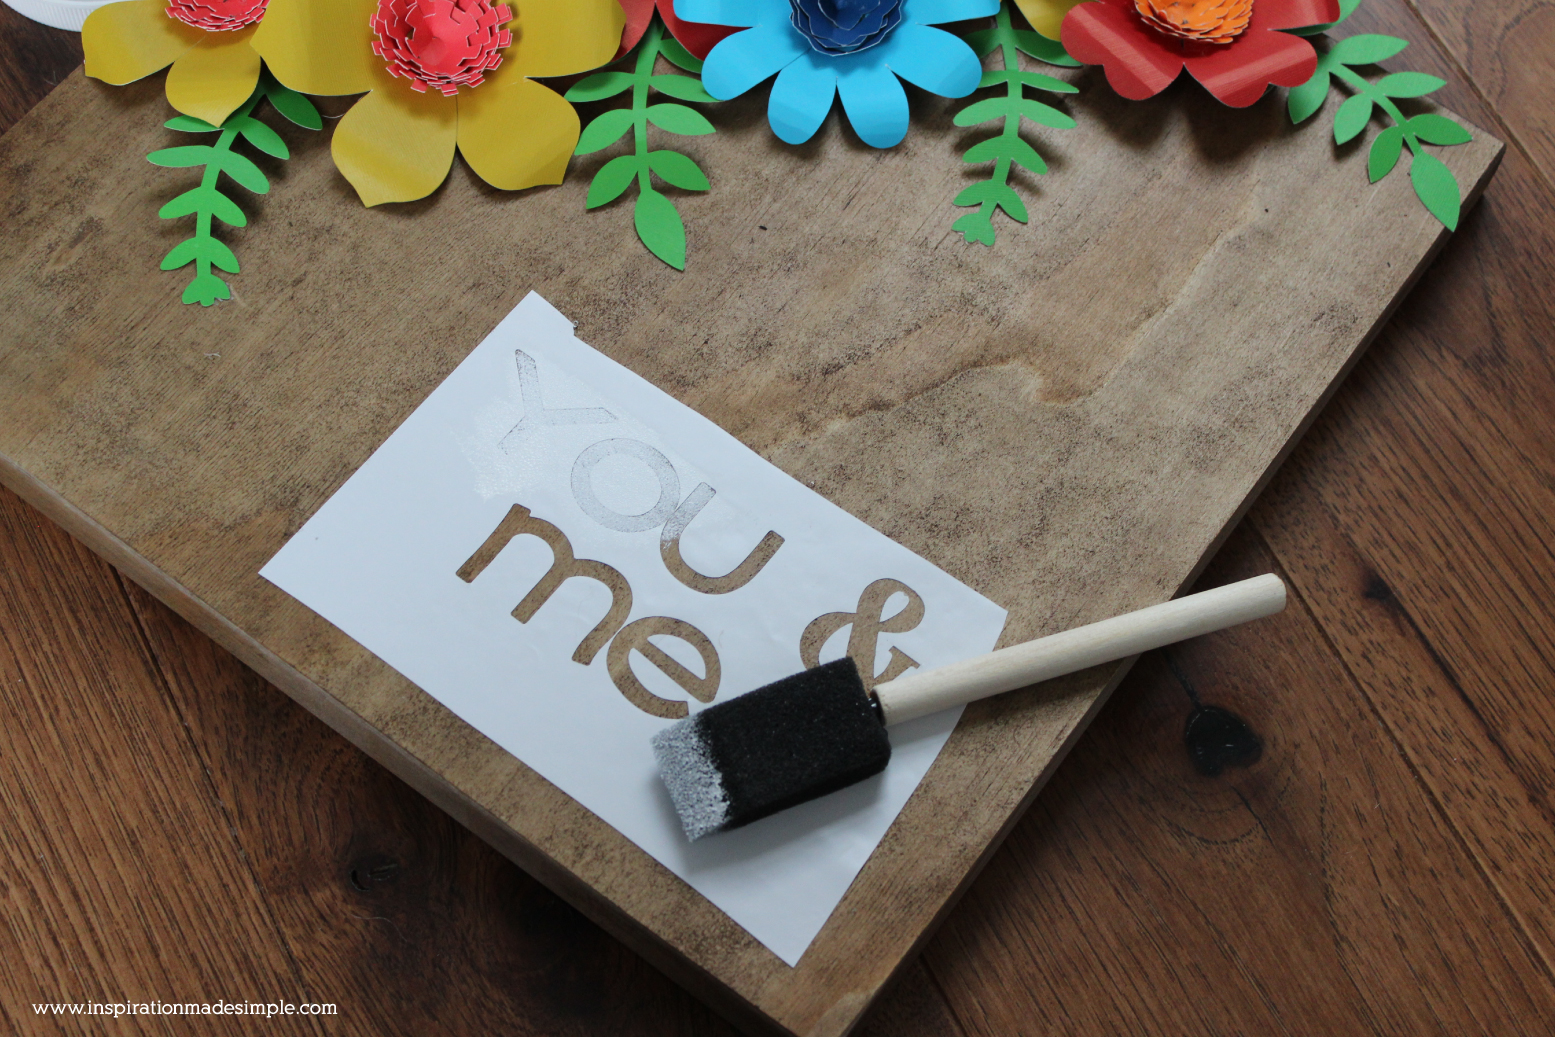
I placed the stencil onto the board and used a foam brush to pounce on the paint.
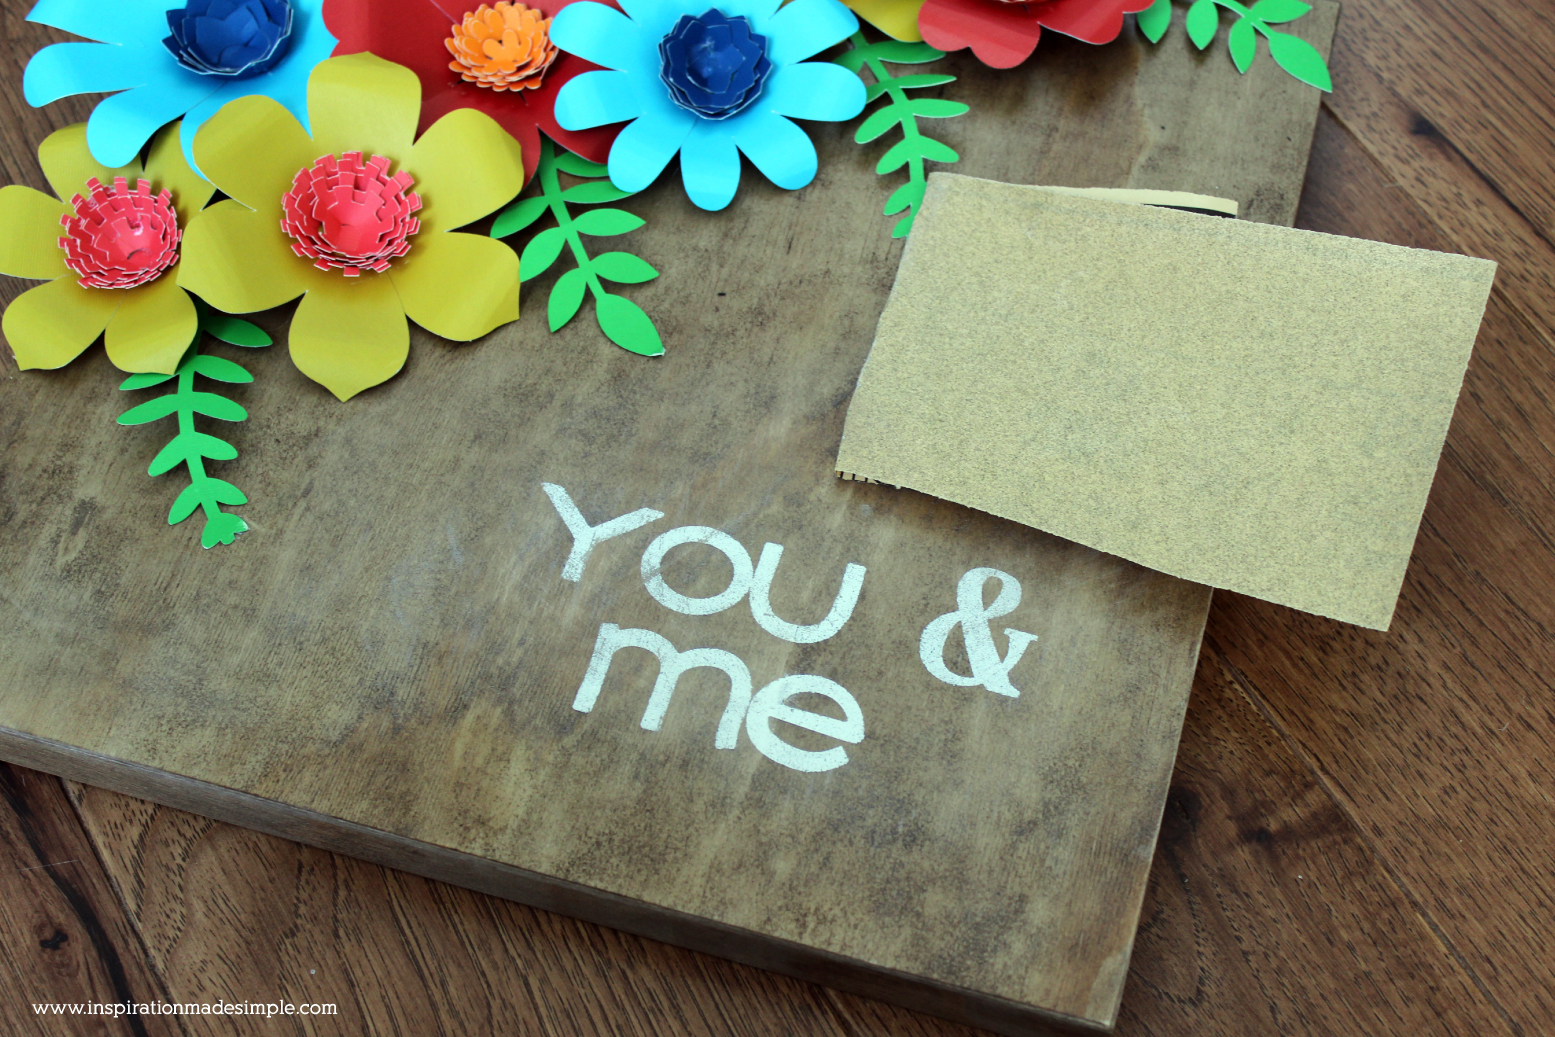
Once the paint was dry, I removed the stencil and used sandpaper to distress the paint.
Now it’s time to make the “We Still Do” Pallet Sign:
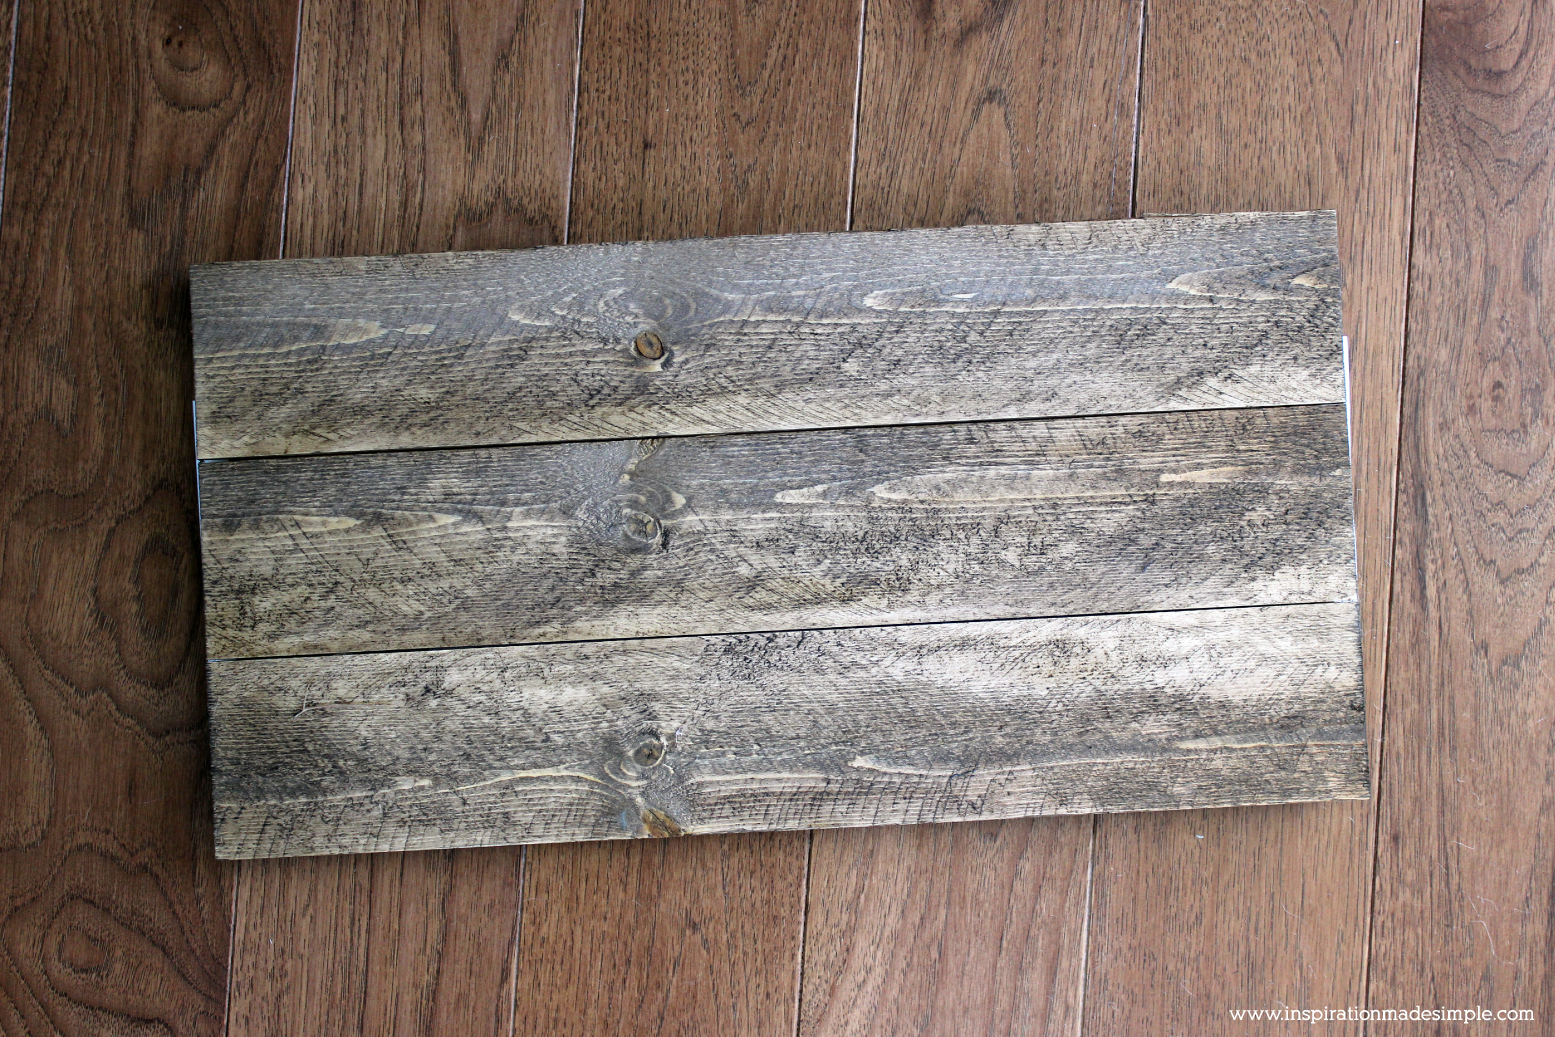
Stain the board and set aside to dry.
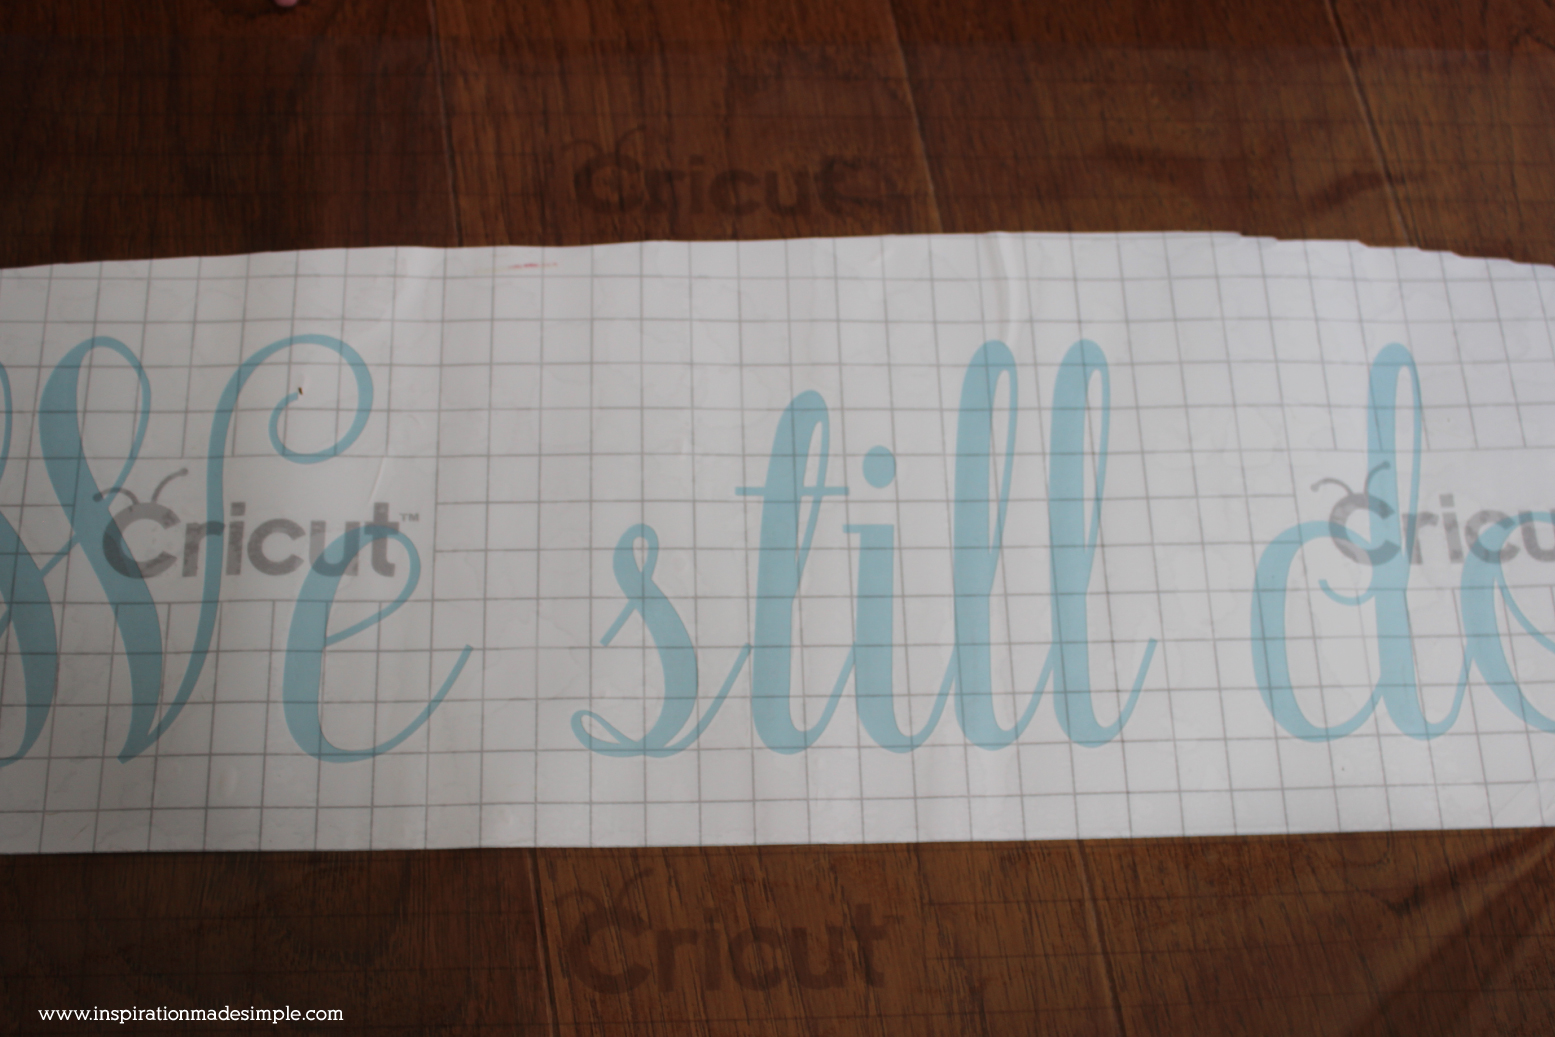
Using the Cricut Explore, open the We Still Do. cut file above to create a stencil using vinyl. Using Transfer Tape, adhere the stencil to the board. (FYI: You could create a stencil out of paper as well, and tape it to the board so that it doesn’t move).
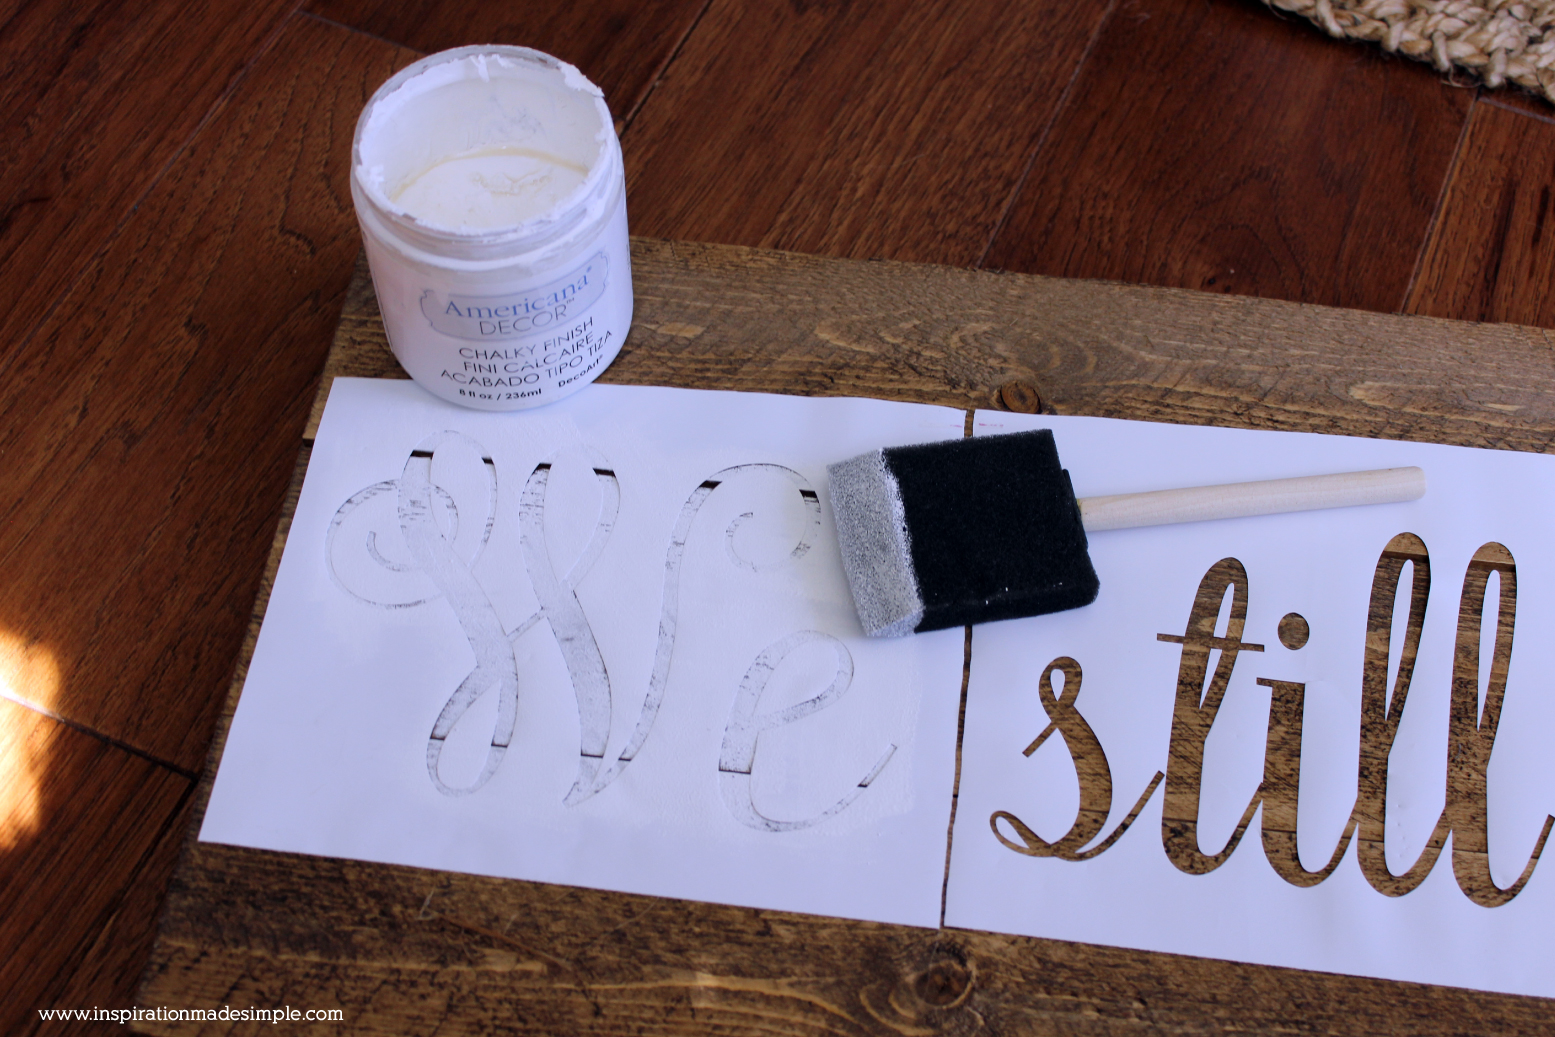
Once the stencil is adhered to the board, use paint and a foam brush to pounce on the paint.
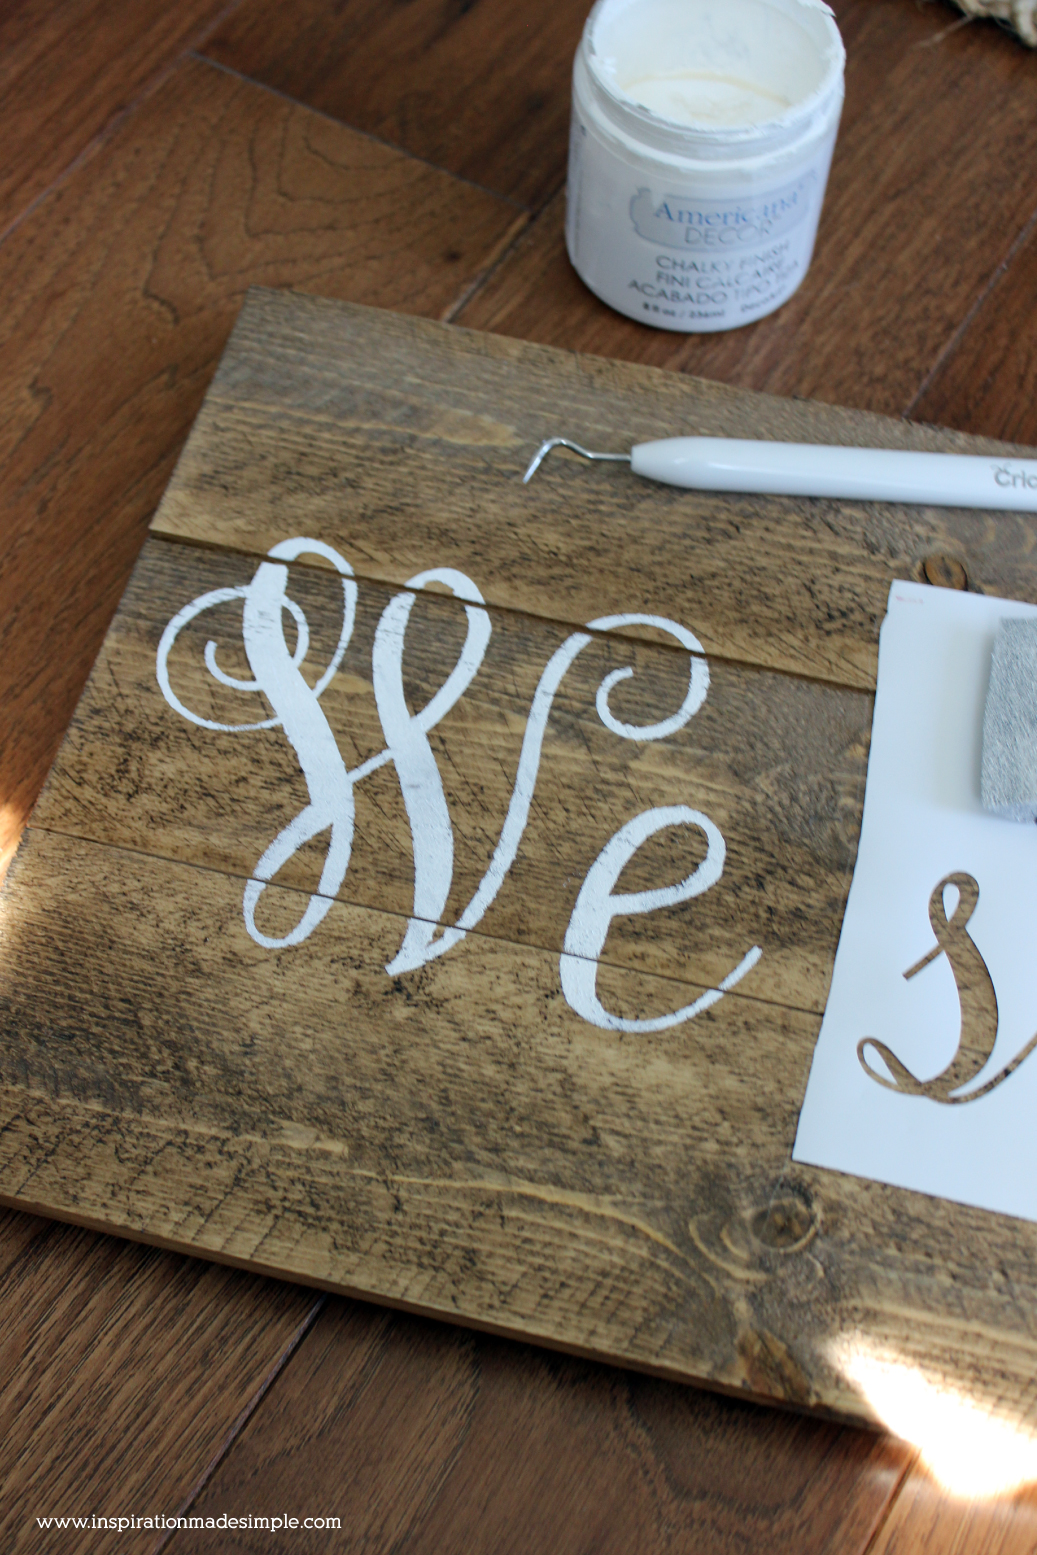
Remove the stencil, weeding out the small stencil pieces and set aside to dry.
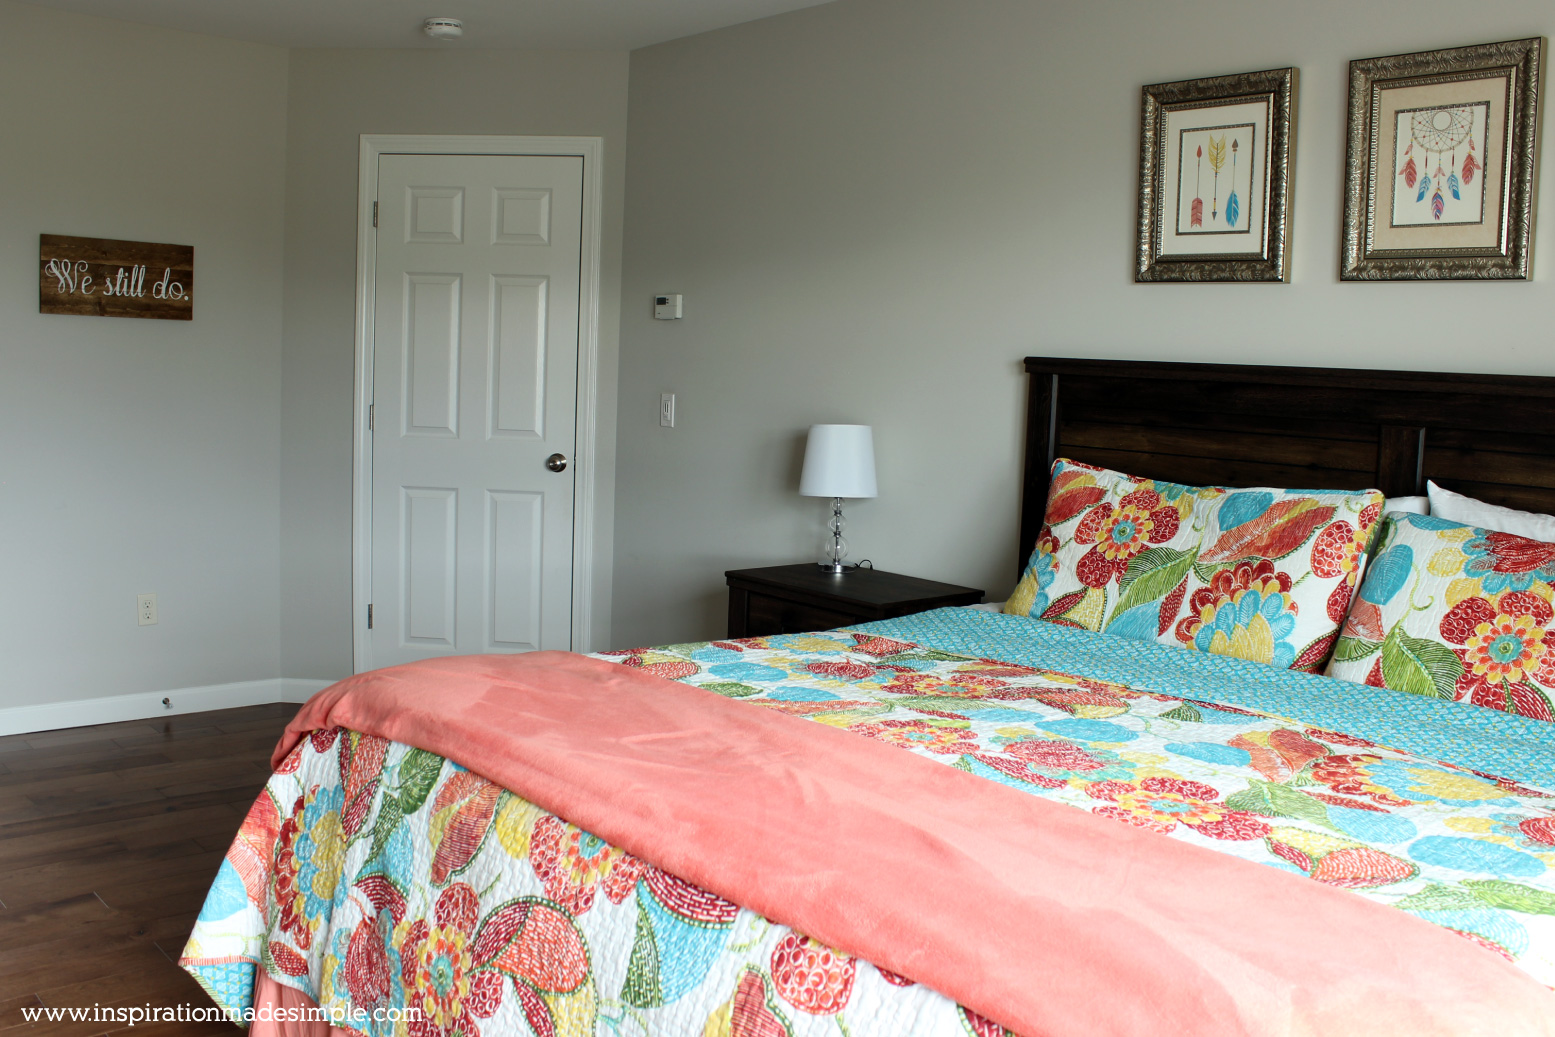
Check out how adorable these look in my master bedroom:

This post originally appeared on the Darice Blog in May 2017, where I am a paid contributor.


This sign looks amazing. You made it beautifully.