
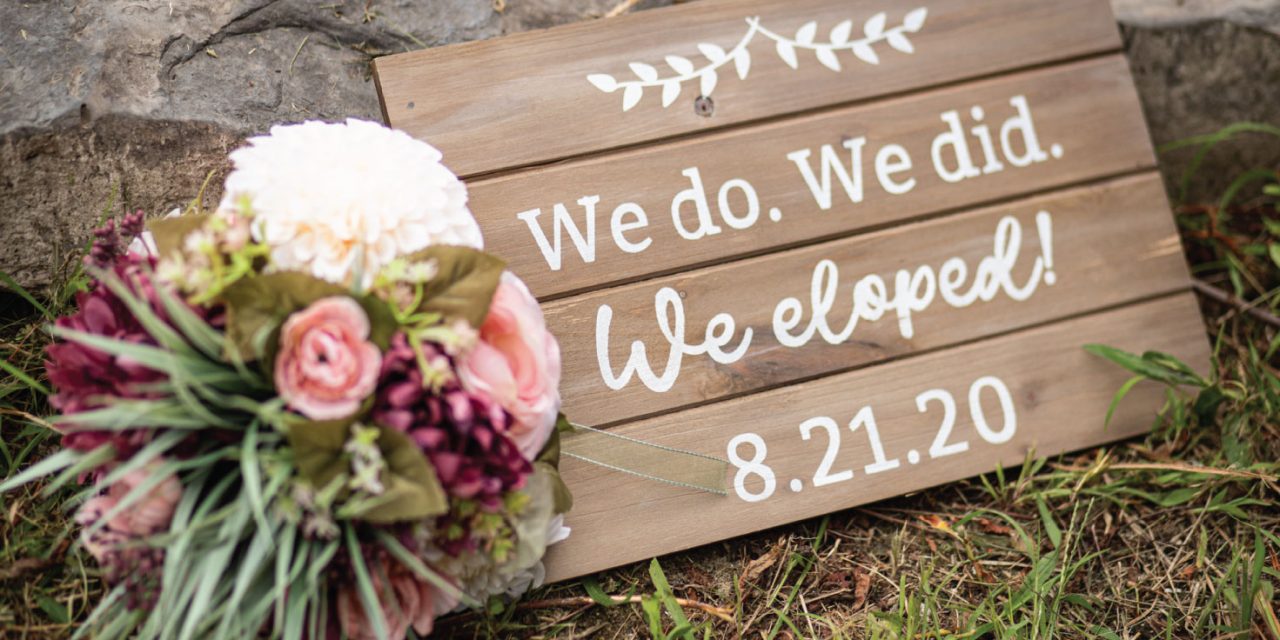
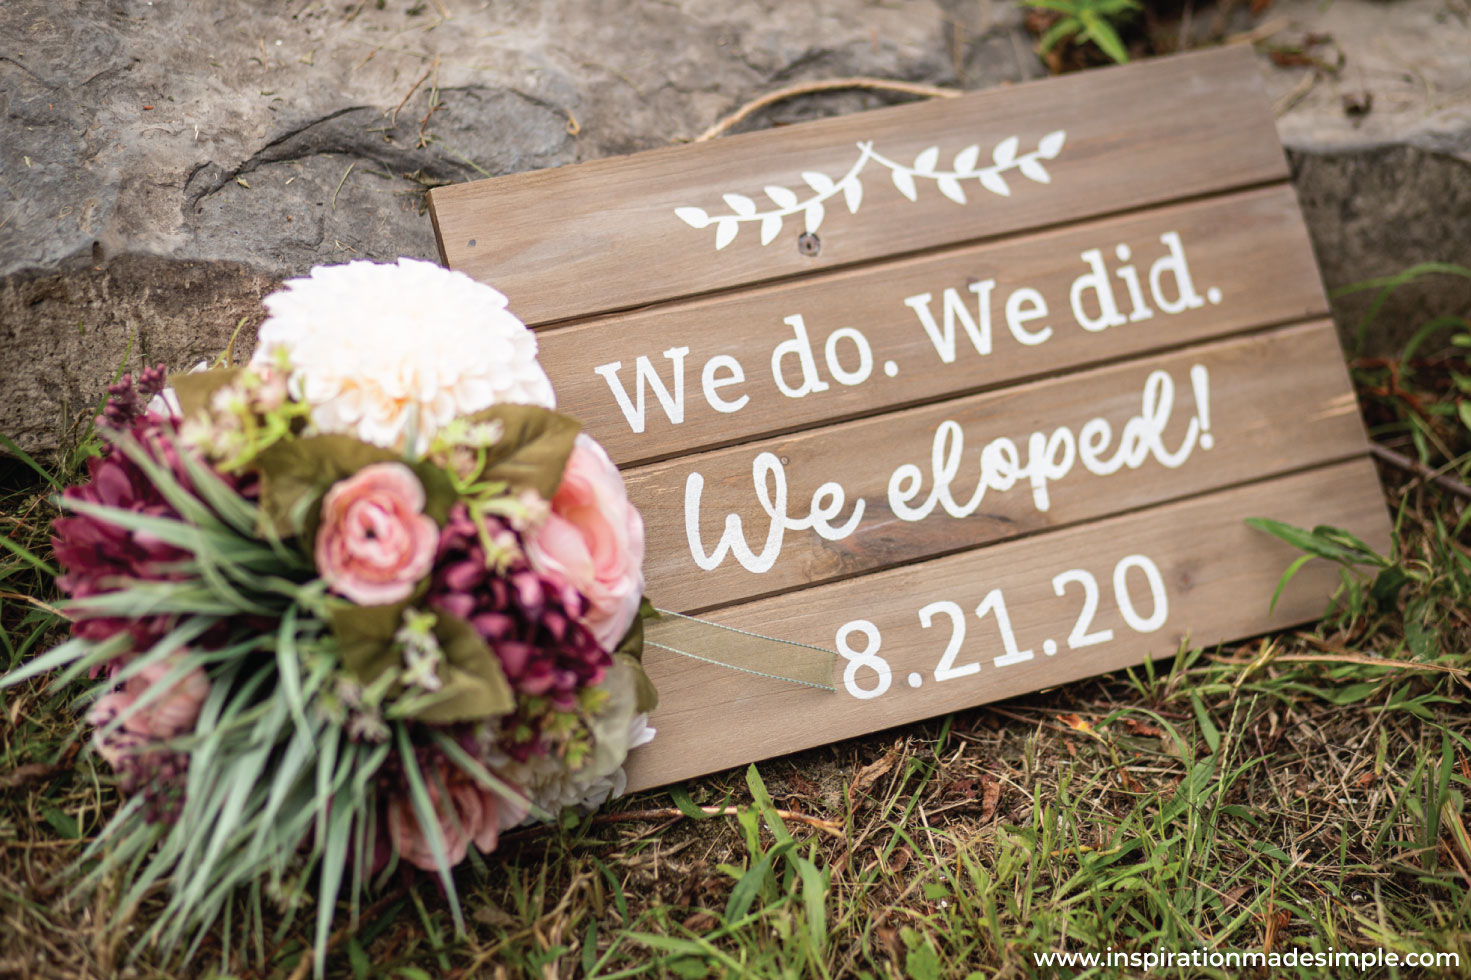
On 8/21/20 we eloped. In preparation for the big day and the photos that would occur, I made a DIY We Eloped sign. I thought it would be a fun way to announce our new marriage. Plus now it is hanging in our bedroom as a fun reminder of the day.
 Have you considered eloping? For us, it was perfect. We were able to celebrate with my children and really make the day exactly the way we wanted it to be. We kept expenses down but still have a memorable day that is special to us. If you’ve thought about eloping, or are planning an elopement, keep reading for this simple sign tutorial!

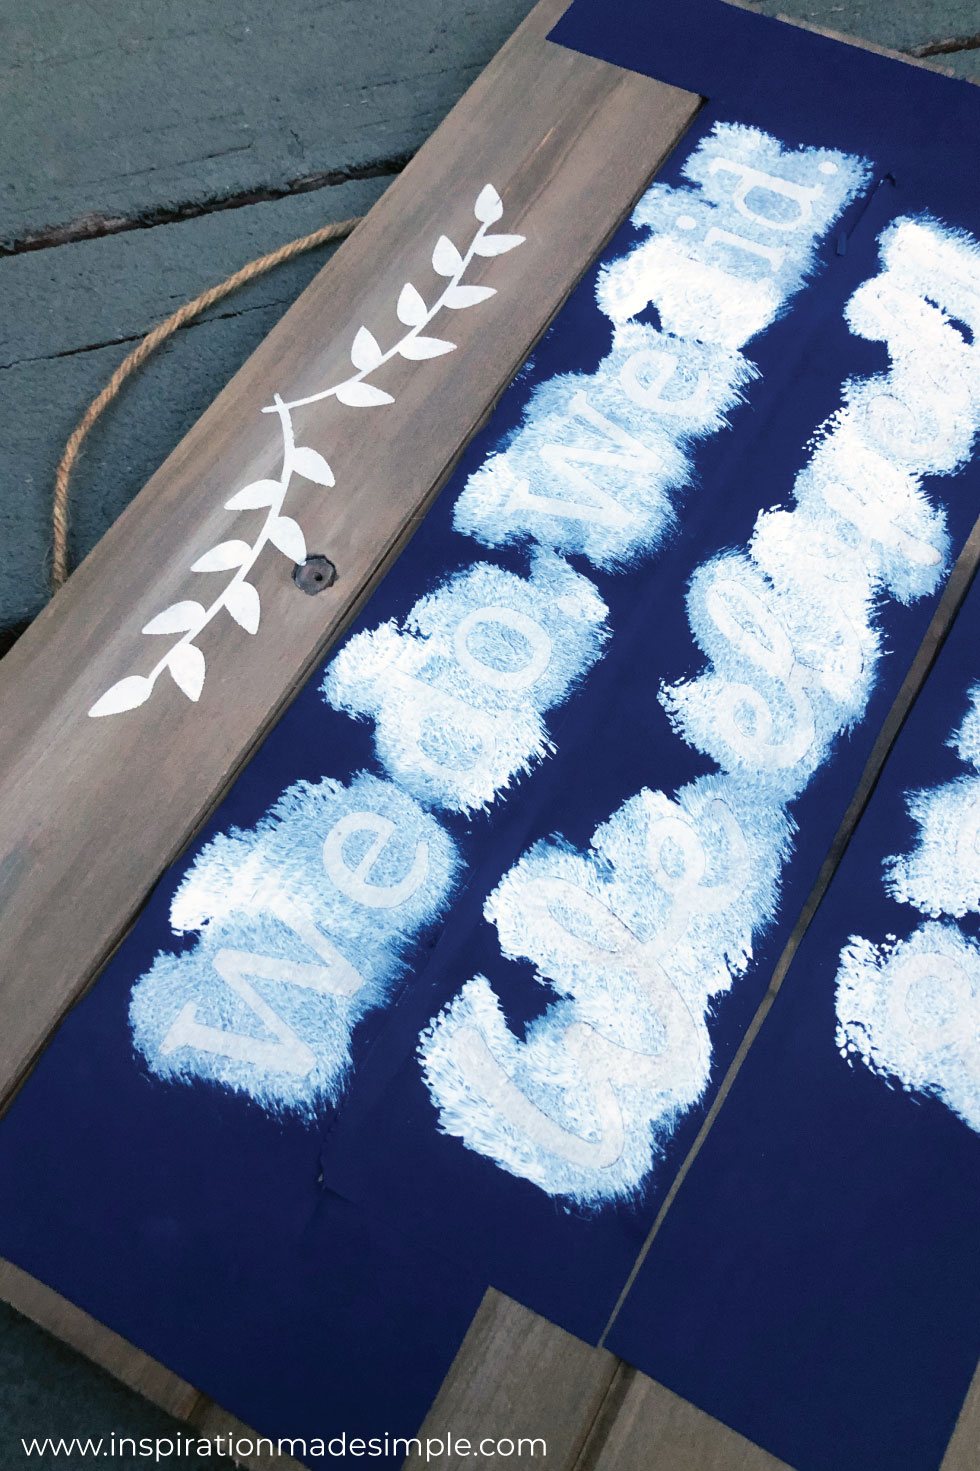
We Do. We Did. We Eloped.
Supplies:
Wood Sign – mine came from Michaels
Paint
Paint Brush
Stencil – I created my stencil with my Cricut Maker and vinyl, though you could get alphabet stencils and use those instead
Create the stencil using the Cricut Maker:
Using Cricut Design Space, upload the We eloped SVG file at the bottom of this post.
Insert into the Cricut Design Space canvas.
Add your elopment date at the bottom.
Select all and attach.
Send the file to your Cricut Machine to cut the stencil using vinyl.
Painting the sign:
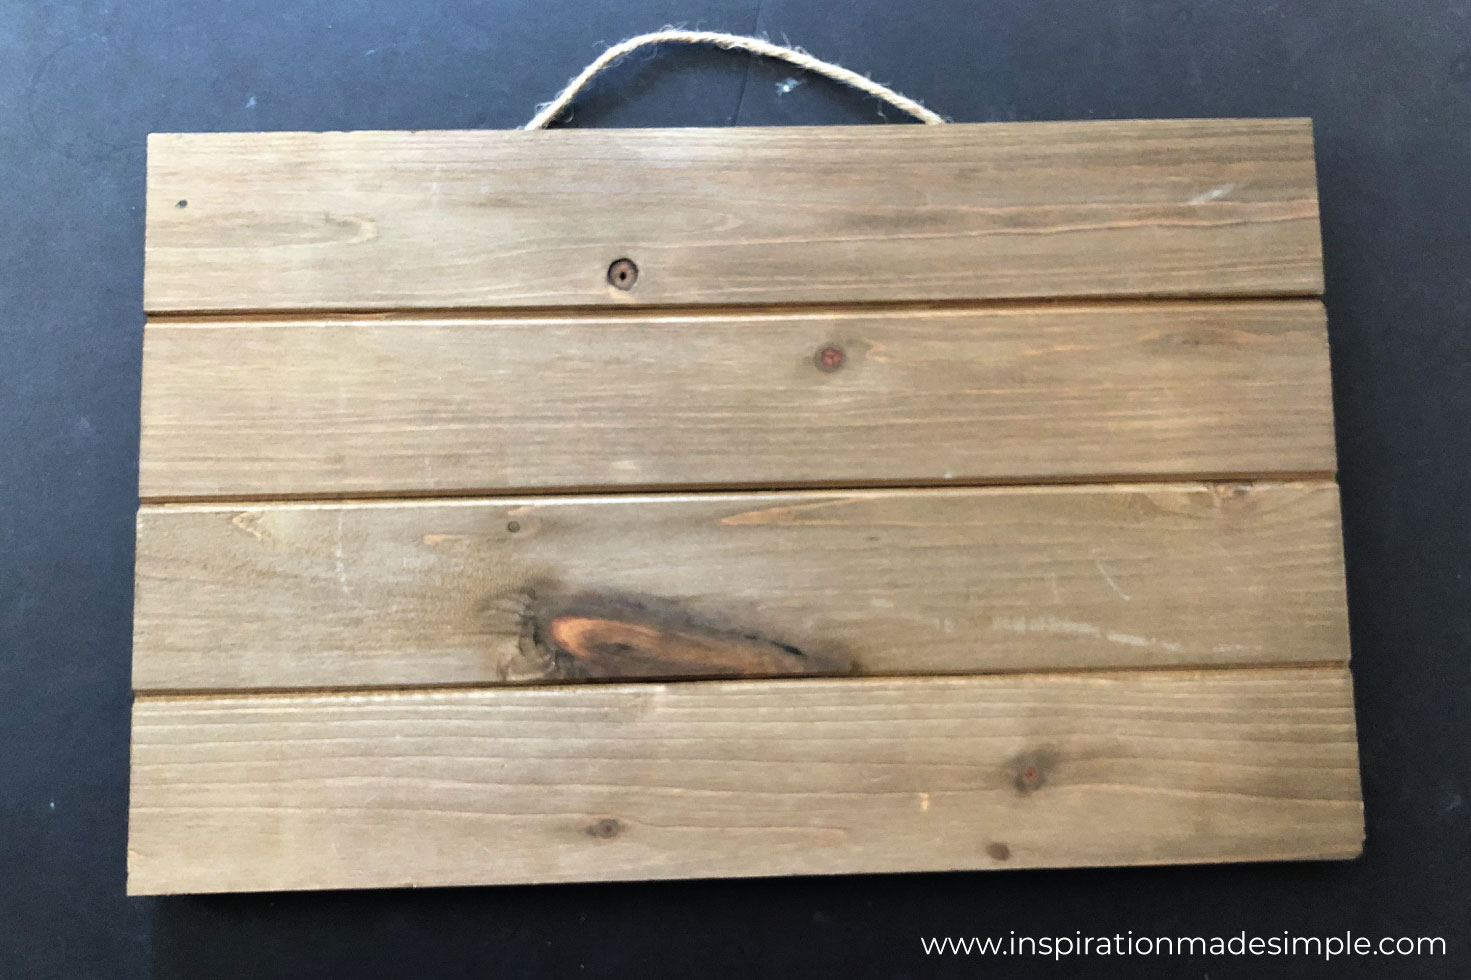
After weeding the vinyl, carefully adhere it to the wood sign.

Using a stiff brush, dip it into the paint of your choice. Stipple it a couple of times onto a paint palette or paper plate to remove access paint.
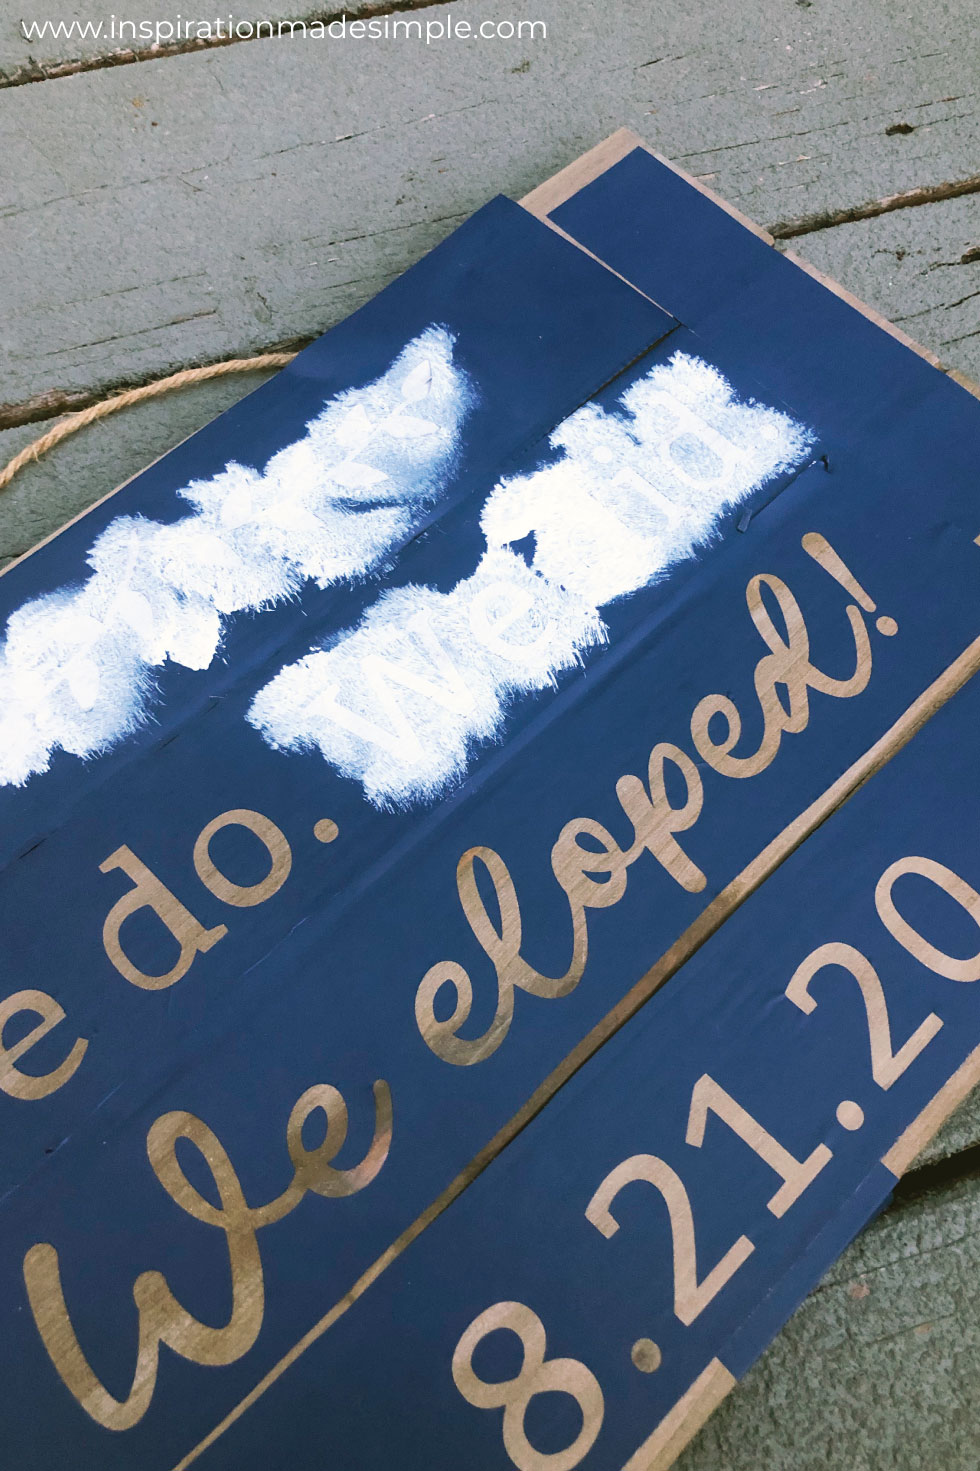 Dotting the brush up and down on the stencil, start painting. Don’t use strokes, keep stippling until the stencil is completely covered.
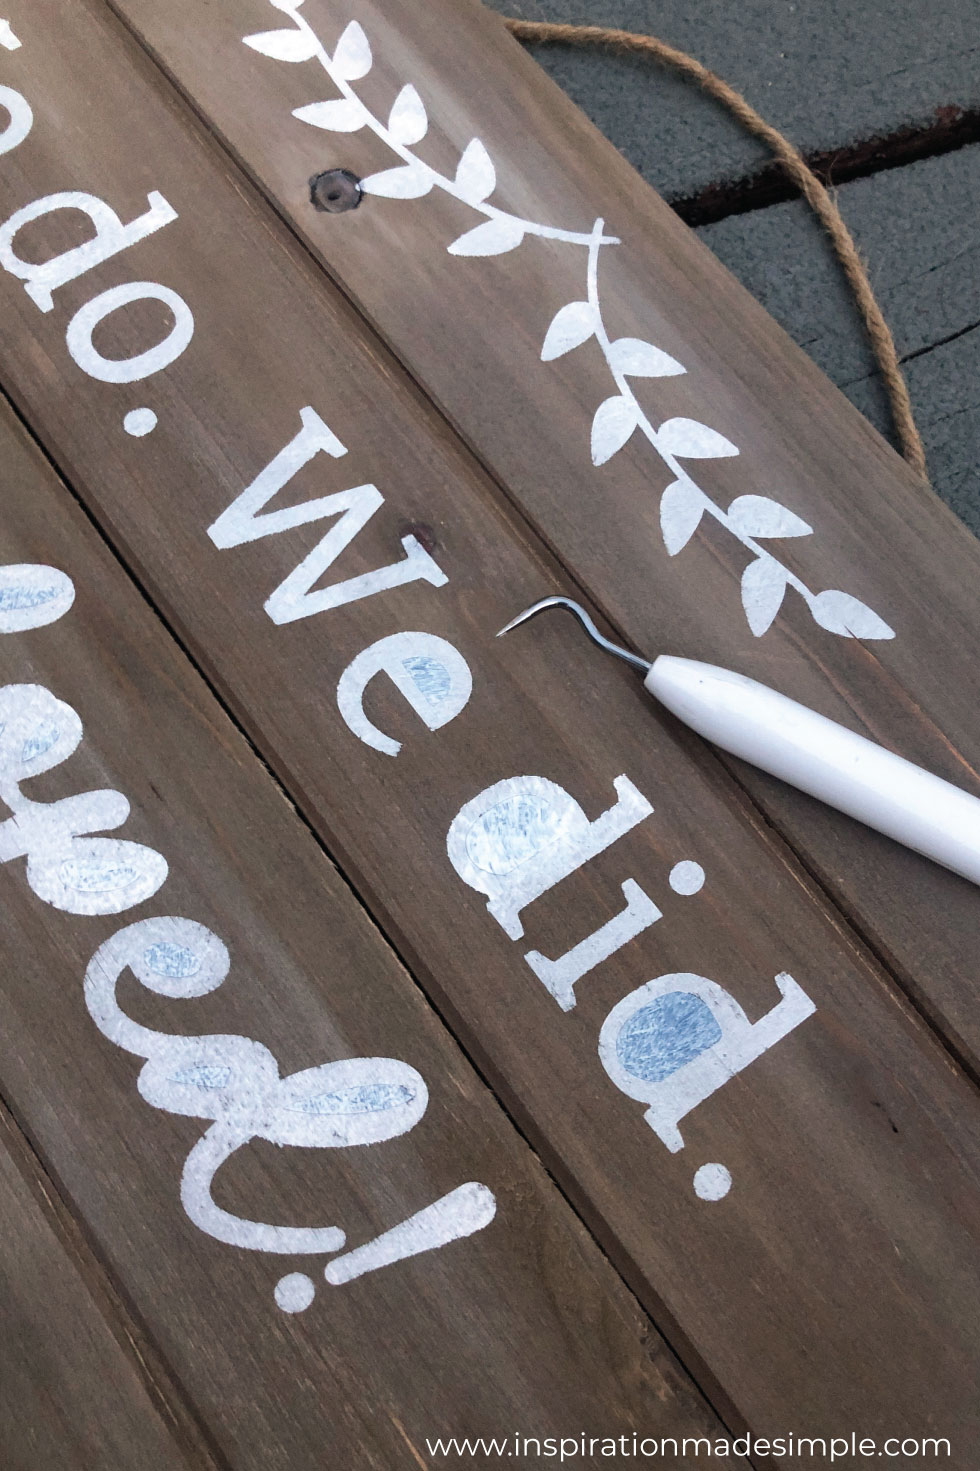 Once the stencil is done, carefully remove the vinyl from the sign.
 Set aside and allow to dry completely.
 That’s it! Your DIY We Eloped Sign is ready for your big day.
Download the We do. We do. We eloped. SVG file.
Personal use only. Do not alter.
Download the zip file and save it to your computer. Unzip the file. Upload the SVG file to Cricut Design Space and follow the directions above!


