
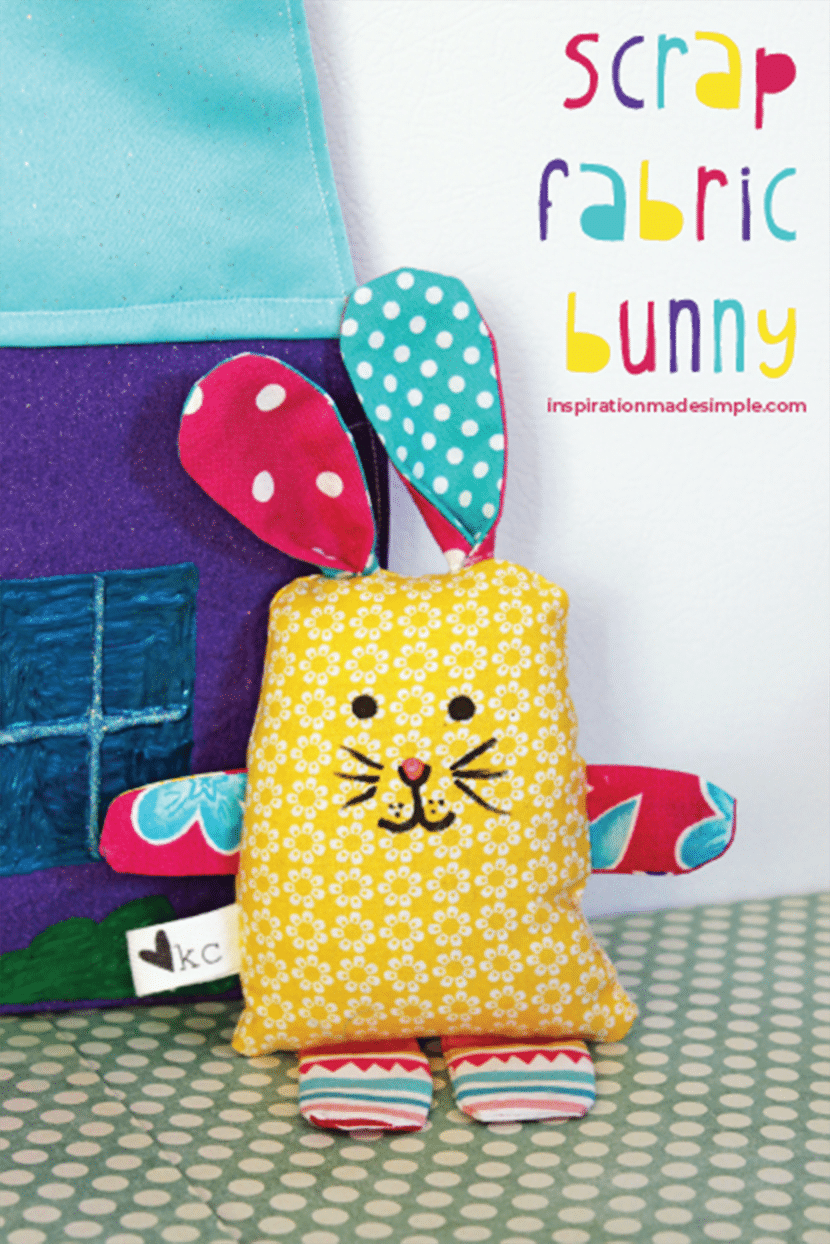
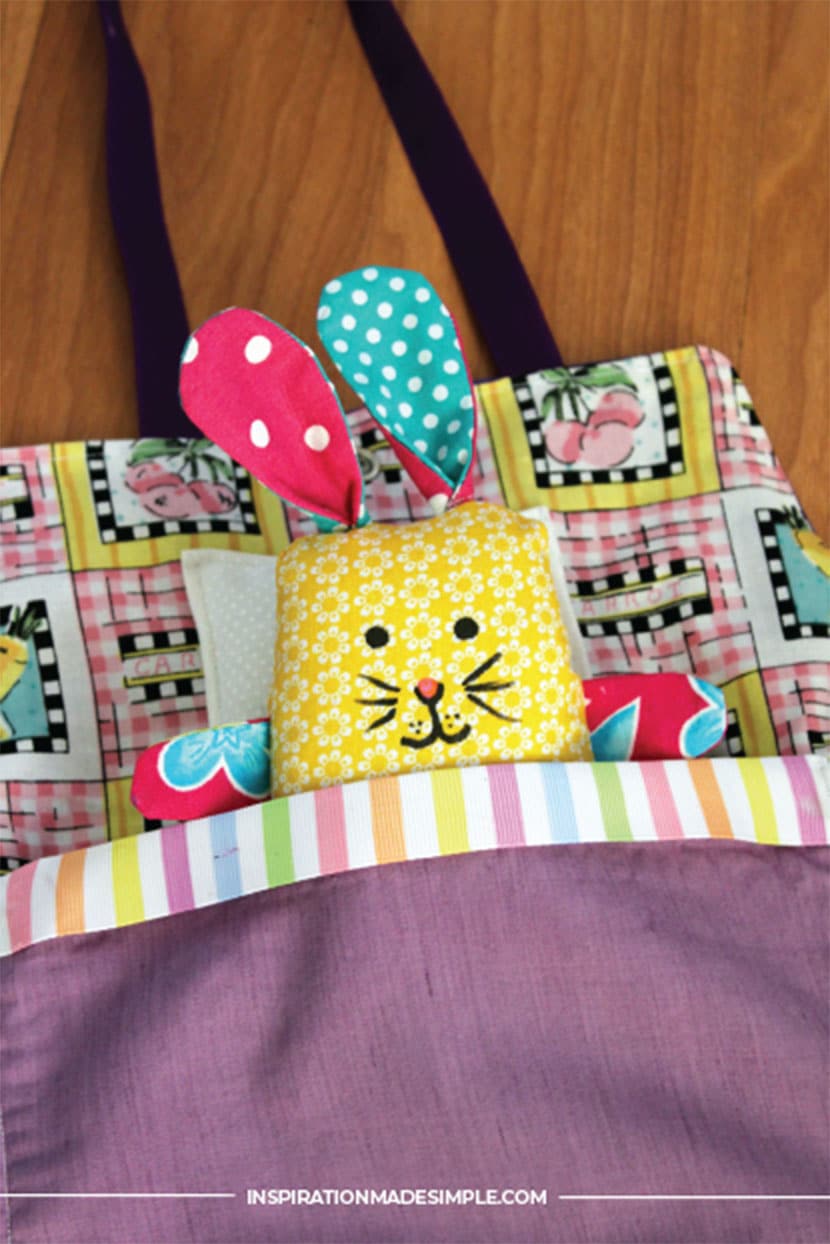
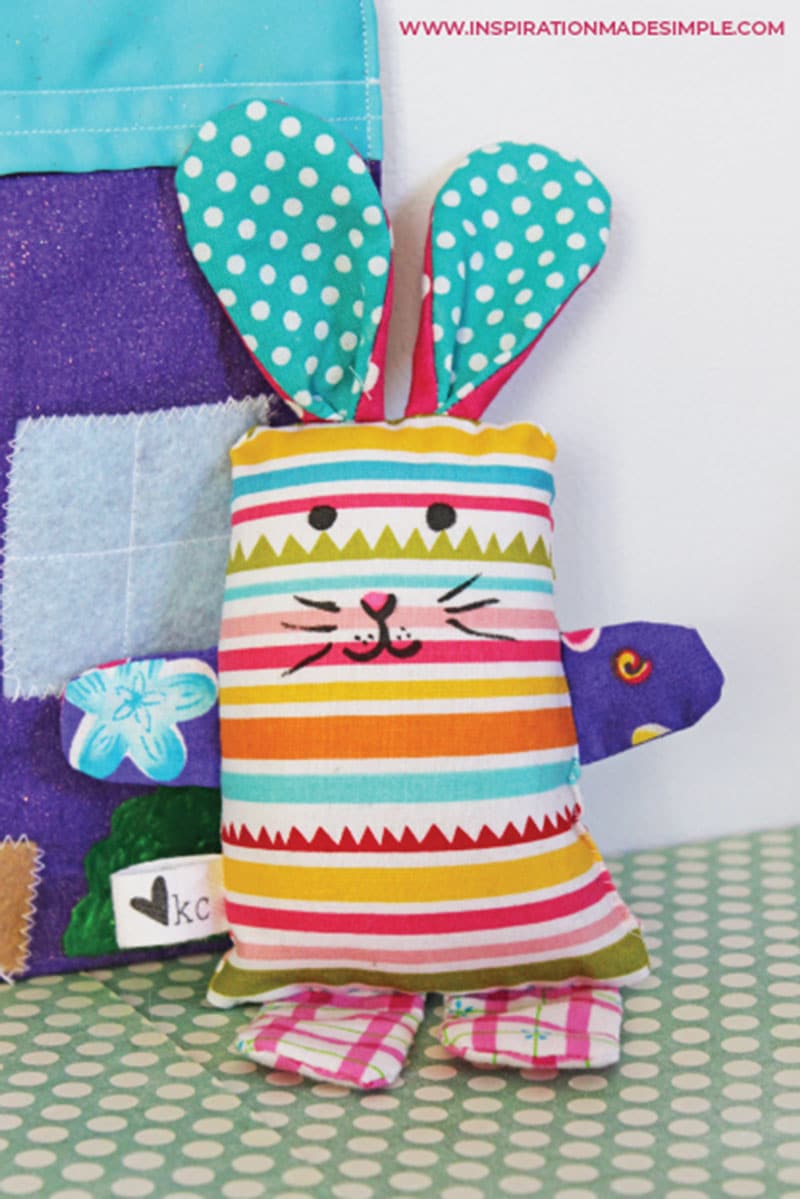
My close friend’s daughter is turning one this month. When I asked Krista what Everleigh needed, she said NOTHING. She honestly has everything. Of course, I couldn’t go to a birthday party and not bring a gift, so I made it my mission to make her something special. I started brainstorming and decided I had to use up some of my fabric scraps. I ended up picking out the book “How Much I Love You” which sparked the idea to create a bunny to go with the book. That spiraled into the bunny needing a home, so I created a bag to carry bunny and some accessories around – making it perfect for quiet play in restaurants, etc. So today I’m going to share with you how I made this super easy Scrap Fabric Bunny!
DIY Softie Tutorial
Supplies:
Scrap Fabrics
Stuffing
Sewing Machine
Scrap Fabric Bunny Pattern
Instructions:
Download and save the Scrap Fabric Bunny Pattern to your computer. Open it in Adobe Reader and print.
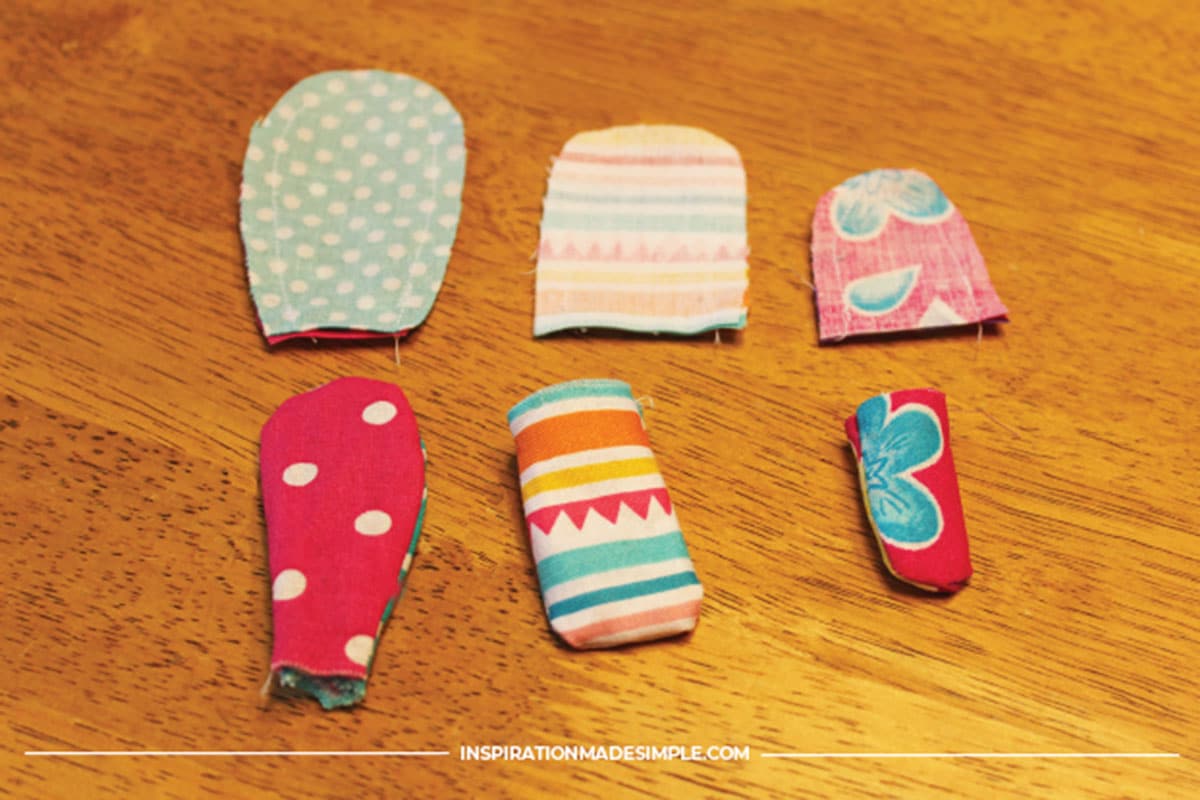
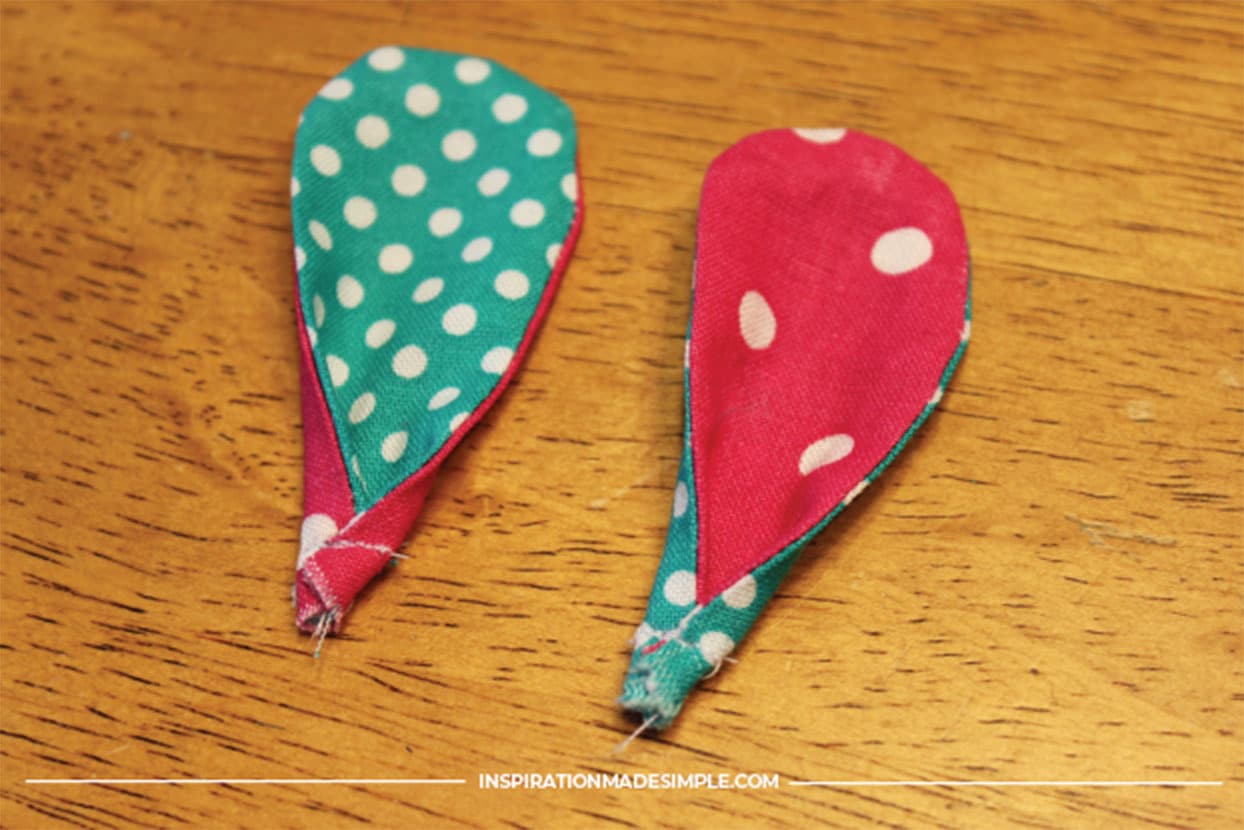
Sewing on the Extremities
Attaching Extremities and Sewing the Body
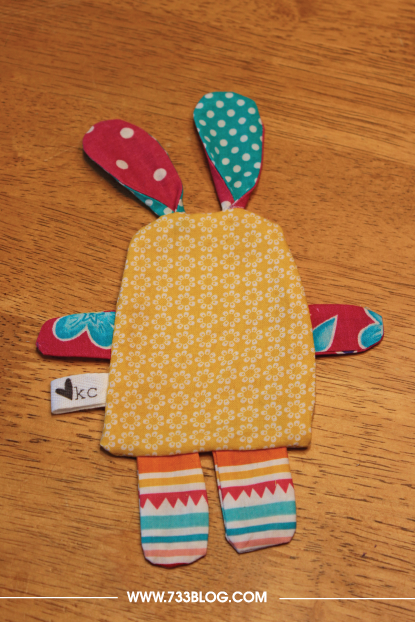
Now let’s create a Rabbit Sandwich!
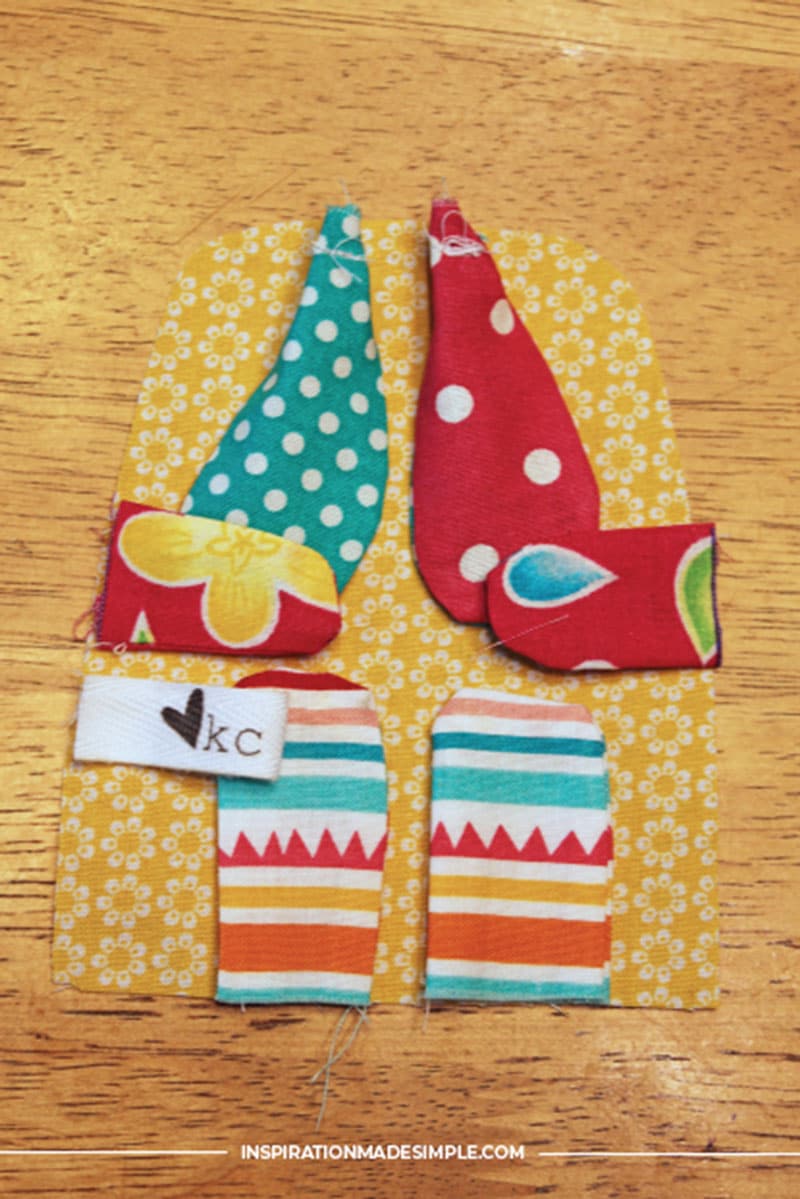
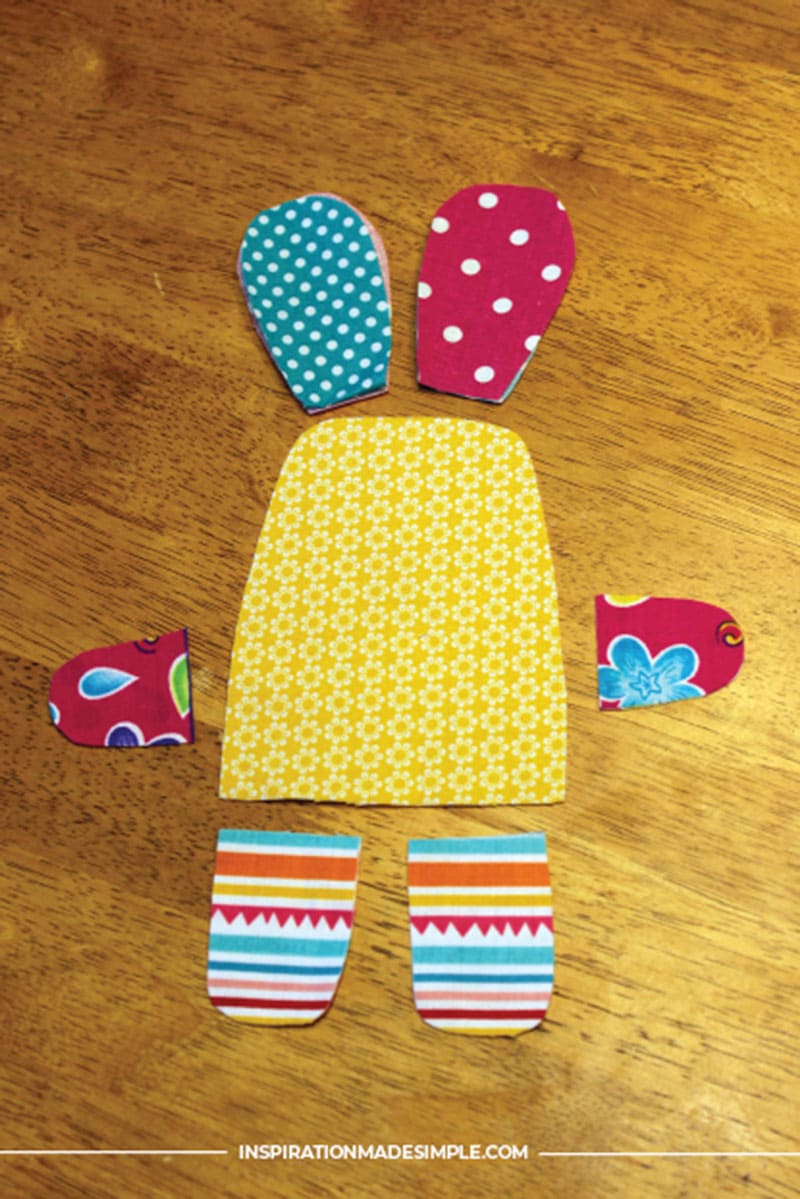
Place the body, right side up.
Set the ears at the top of the head, right side down, with about a 1/2″ space in between them.
Place the arms on the sides, making sure they are the same height from the bottom.
Last, place the legs with a 1/4″ space in between.
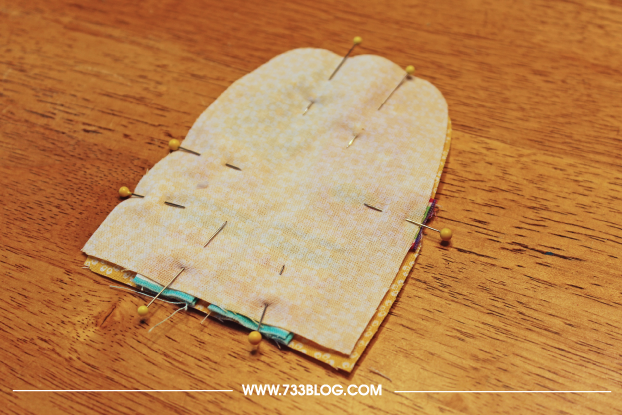
Place the second body piece right side down and pin all pieces into place.
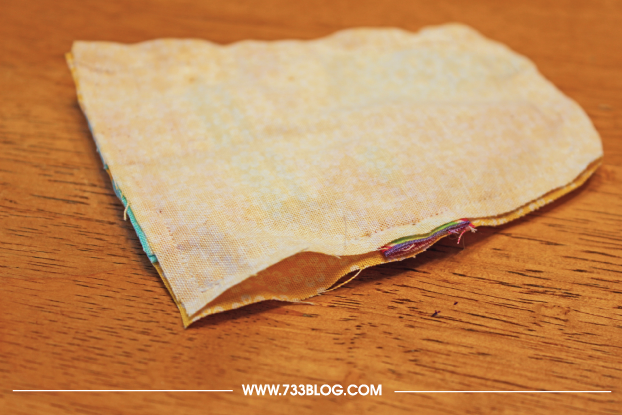
Starting at about 1/2″ from the bottom on one side, sew around the entire edge of the bunny using a 1/4″ seam allowance.
Leave a 2″ space for turning (I tend to end about 1/4″ below the bunny’s arm).
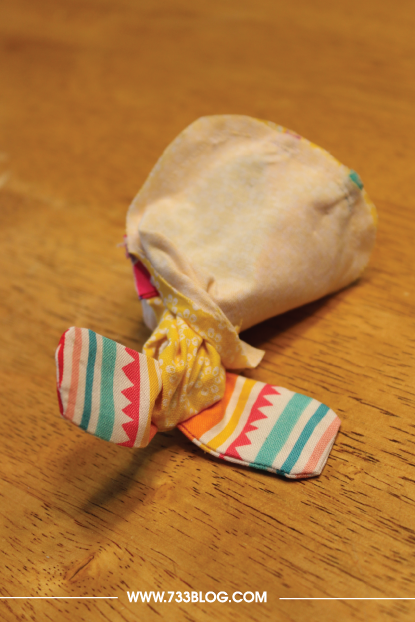
Flip the bunny right side out.

Adding a Bunny Tail
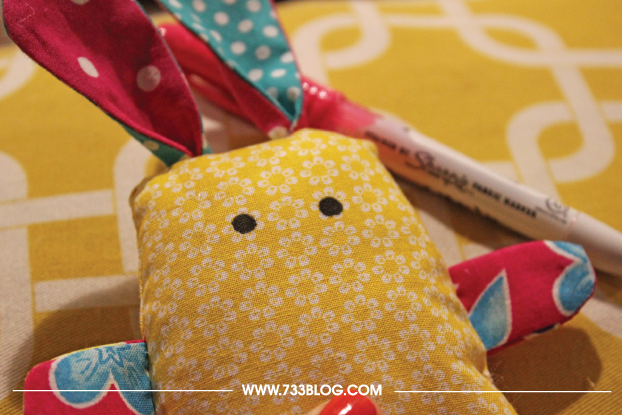
Adding the Bunny Face


he is sooo cute!!! I’ve got a Craft Gossip post scheduled for later today that links to your pattern:
http://sewing.craftgossip.com/free-pattern-scrap-fabric-bunny-softie/2014/03/09/
–Anne
I just make a small version, just have to fill it and embroider the face. I just looked at your pics and cut, my doggie will be happy with it. Now I know how so my gd can make a bigger one with me
https://www.facebook.com/photo.php?fbid=667265039978645&set=a.300329350005551.69167.100000854657593&type=1&theater
LOVE LOVE LOVE this! Pinning!!
Why yes, I will be making one of these. Thanks for the tutorial, it’s super cute! I can’t want to sit down at my sewing machine!
I would love to see your finished bunny! Feel free to share him over on my Facebook page: http://www.facebook.com/733blog
I will definitely try to remember to share it with you!
Thank you for sharing this with us, I love all things bunnies and I am going to make these for me to enjoy. 🙂
Merci de tout coeur pour l’envoi du tutoriel de Bunny
bonne soirée
Bienvenue!
I made a little bunny, thanks for the tutorial! One of the ears didn’t tuck in well enough but live and learn!
He’s quick enough where you can always make another! I’m sure whoever it is for will love him no matter what!!
Thank you so much, I made one for 1 grand daughter.
3 other grand daughters picket out their fabric of choice.
I am so sorry I cannot post a picture but I have to say, I love your little bunny and so do all my grand daughters.
I am so glad that you and your granddaughters enjoy them! I hope they treasure them forever!
Thanks so much for the adorable little pattern. I have 7 young great nieces and nephews that will love them for a little Easter treat.
Thanks for sharing this tutorial.
Can you tell me where you ordered those little labels you put outside the rabbit? They just what i need: little, folded and with a heart. Thanks from Portugal ????
I really wish I could remember… I got that about 5 years ago and I can’t remember what site I ordered it from! It’s just a printed twill ribbon.
OMG! The best bunny idea!!!! I want someone to make one for ME, it’s so cute. Kim, thank you for making it free!!
HAHA! Thank you Rebecca. I’m glad you like it!
Can’t wait yo have a go at this. Thank yo u so much. Pat
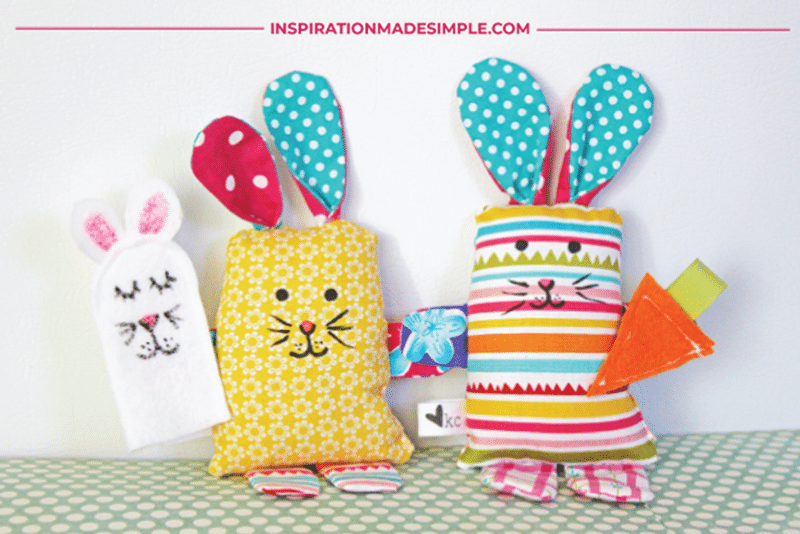
I love these little bunnies. What did you fill them with?
Just regular ole’ poly-fill!
Your Bunny and Cat is to dang cute🥰 I for sure need to make them for my great grand kids!
Today was far too hot to play outside but I had two kids with energy to spare, so we channelled it into a sewing lesson with your pattern. Both my 7yr old and 13yr old were able to produce very cute pocket bunnies using my scraps, so I have shared to my Facebook for others to have a go :). Thank you for sharing!
This made me ridiculously happy to hear! Thanks for sharing!
Am I correct in assuming you didn’t put any stuffing in the arms and legs?
That is correct