
For supplies, I used a total of 1.5 yards of the blue, sparkly polyester charmeuse fabric, and three yards of tulle. I also used some heat-set gems, beads in a bottle, and snowflake buttons for embellishments.
Keep in mind that I am not a seamstress and I know there is a better way to do this to get clean seams along the inside. But I was winging it and it worked out ok and looked good from the outside, so figured I would share for those that are like me!
Also take note: for my four year old I ended up just making a large band (22″ x 11″) as a top, rather than three separate pieces and it worked perfectly and was a ton easier to make!

Elsa Inspired Dress Bodice:
First you’ll need to take some measurements.
Measure under the armpits and just above the hips.
Divide the numbers by half.
For the front piece you’ll add one inch to each measurement.
For the back piece, add two inches.
Measure from the armpit to just above the hip to find the height of the bodice, add 1 inch.
My daughters measurements are included below.
The front piece looks like this, cut two of these:
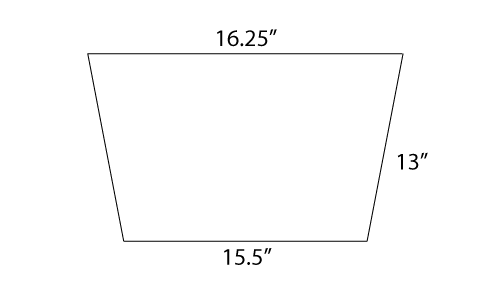
The back looks like this, again, cut two:
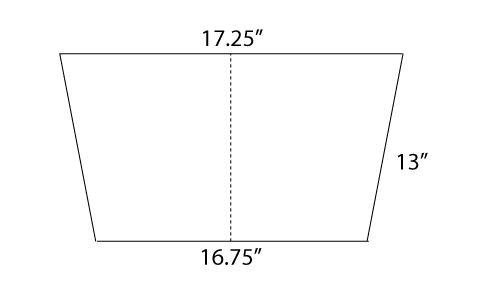
The dotted line indicates where you should cut both of the back pieces in half.
Go ahead and do that now.
For the straps, cut in half length wise the 3 yards of tulle.
Measure where you want them to lay on your child’s shoulder – I placed mine 4 inches in from the side.
This gets sandwiched between the two top pieces. With the two pieces right sides together, sandwich the tulle in between with the length of it hanging out the bottom:

The black dotted line indicates the first front piece, the blue is the tulle straps which are gathered to about 2″ wide, and the red is the second front piece, creating the sandwich.
Starting in the middle of the bottom, with the straps stuffed inside so as not to sew them, use a 1/2 inch seam allowance, go across, up the side, along the top, down the right side and about an inch onto the bottom, leaving a nice sized hole (at least 4″) for turning.
Turn right side out and top sew along the top and bottom of the piece.
Set this aside and grab your back pieces.
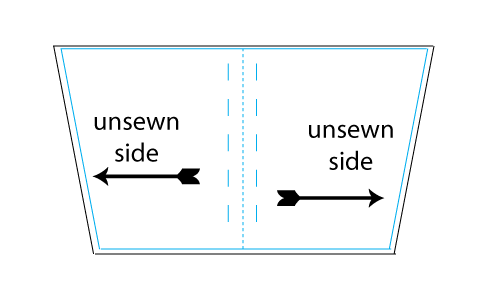
By this point you should have four back pieces. Two left and two right.
Grab the two left pieces, place them right sides together.
Sew a 1/2″ seam along the top, down the right side and along the bottom.
Leave the left side unsewn and turn right side out.
Grab the two right pieces, place them right sides together.
Sew a 1/2″ seam along the top, down the left side and along the bottom.
Leave the right side unsewn and turn right side out.
Now it’s time for the button holes.
I used my 4-step button hole presser foot to create my button holes.
Read the directions in your machine manual to find out how to do this (really simple, don’t be scared!).
I created 7 holes on each side. I made them 3/4″ tall to accommodate my 1/2″ ribbon and left a half inch space in between each hole. The holes go on the side seam that has already been sewn!
I then top stitched around the three completed sides.
Take the finished front piece and match the two back pieces to the front.
The two unfinished sides of the back should match up with the sides of the front.
Using a 1/4″ seam, sew up both side seams. Turn right side out.
The last step is to secure the straps to the back.
First lace the ribbon through the back, now have the person put on the top. Pull the straps up and over her shoulders and secure them to the back of the top with a pin. Take the top off and hand sew on two snowflake buttons to tack the shoulder straps in place. That’s it! Your top is done.
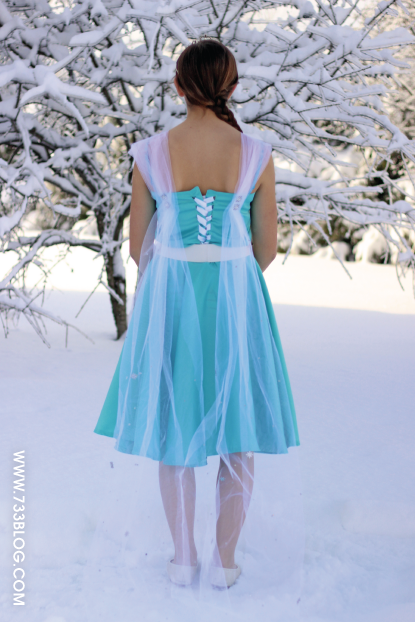
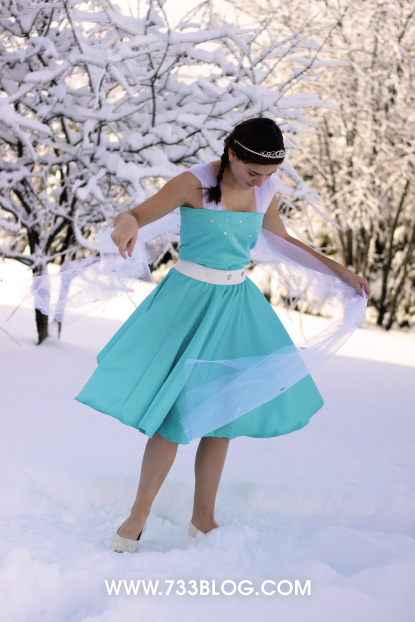
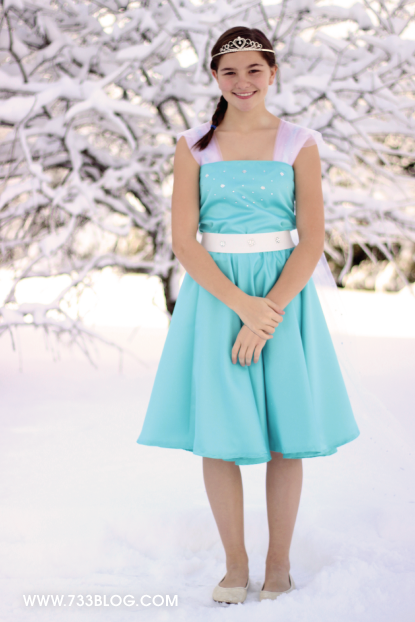
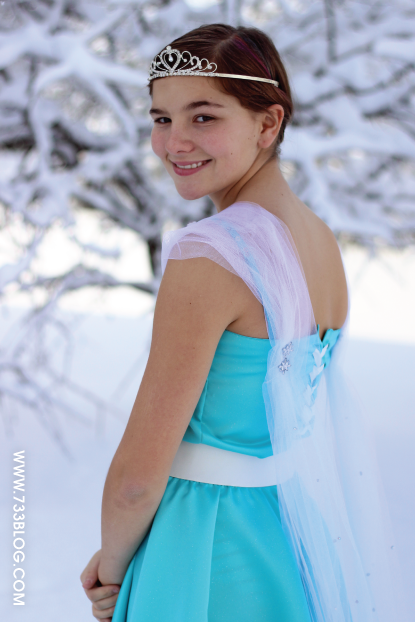
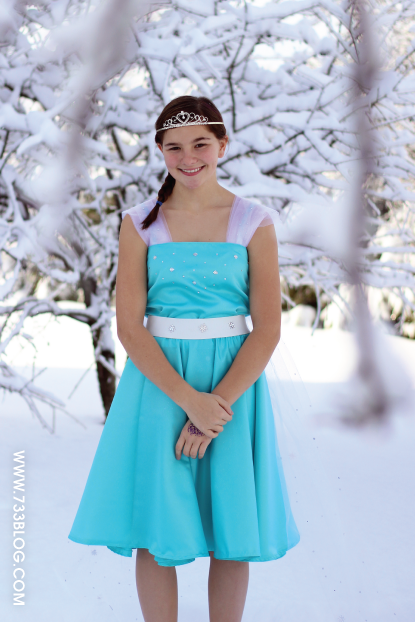
I also used some heat set gems to create a pretty pattern on the front of the top and to the tulle train, along with some more snowflake buttons and Beads in a Bottle. This isn’t necessary, but it gave the train some sparkle that catches and reflects the light as she moves. The Elsa Inspired Dress is now complete!


How perfect! Such a pretty snow princess for sure!! You did an awesome job on the dress!!
So pretty!
So sweet! I love this–all of it. The dress! How proud she is in it! Great job to both of you!
This is amazing! Great job and she sings really well also 🙂
hi kim !!!! what a great job, she looks like a princess, so i can tell that she feels like one also. great voice!!!!
Looks Fab gonna have a go making it for my 8 year old daughter Thank you for sharing!
The dress is amazing, and she sings really great!
Thanks Allison!
Beautiful! You did a great job – there is no doubt that she loved it!
Very lovely and stylish! A very interesting way of making this costume.
What size is this dress? Is there a guide for making it smaller?
Myra,
This isn’t a pattern. It is a guide. It explains how to determine your measurements within the post. The measurements I used were for about a size 12/14 girls.