
Ice Painting with Ice Cubes is a favorite summer activity at our house. Both of my younger kids love creating masterpieces with this simple paint technique. Ice paint is easy to make and fun to play with. I actually have my kids help me make the paints as well, so it is something they can do start to finish. Plus it only takes two household ingredients to make!
I’ve even brought Ice Paints to my daughters classroom and all of the kids were so excited to go home and show their parents how to make ice paints! Their very favorite way to paint with them was the straw blowing method. Read on to learn how to make your own set.
How to Paint with Ice
Supplies:
Food Coloring
Water
Ice Cube Tray
Plastic Wrap
Toothpicks
Directions:
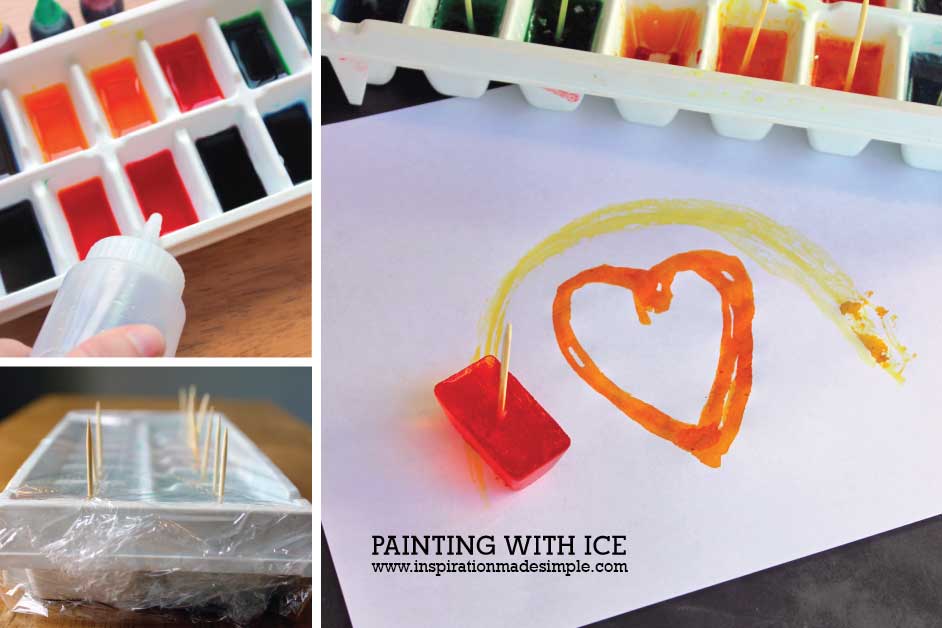
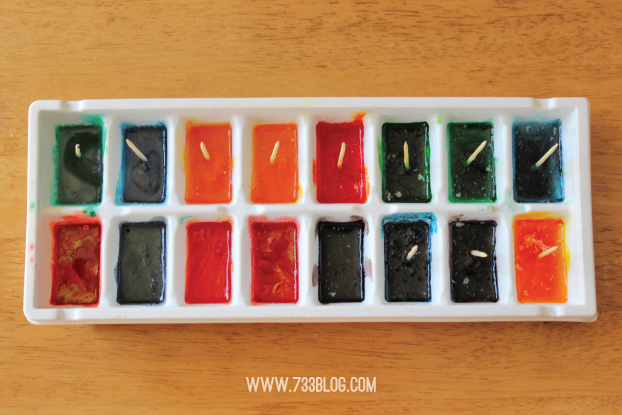
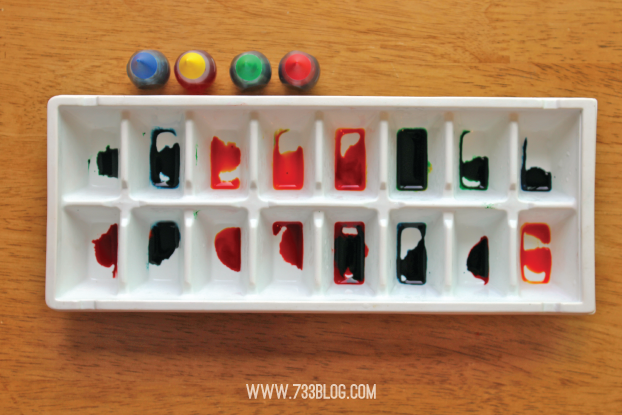 Add a couple of drops of food coloring to each section of the ice cube tray. Remember to mix the colors to get even more fun colors to paint with (add a drop of blue and a drop of red to make purple, etc!).
 Add water to the tray. I use a squirt bottle so that I can make sure to control the water flow so that my colors don’t get “muddy”.
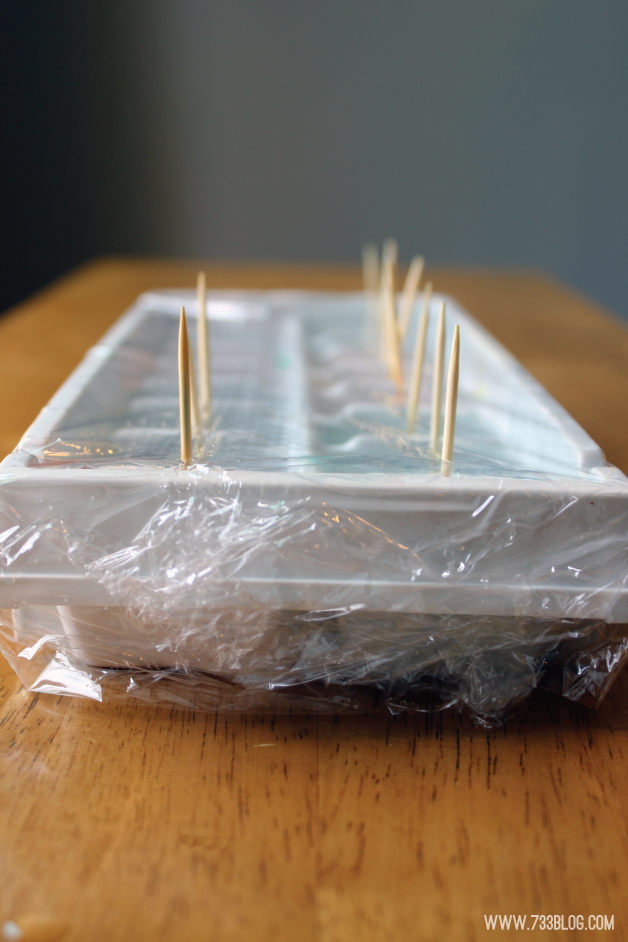 Cover the tray with plastic wrap and insert toothpicks (oops! As you can see, I ran out of toothpicks… could it be to the fact that my kids found them and decided to play a game of hide the toothpicks? Yea, we were finding toothpicks around the house for days!)
Place the tray in the freezer until the ice is frozen through.
TIME TO PAINT!
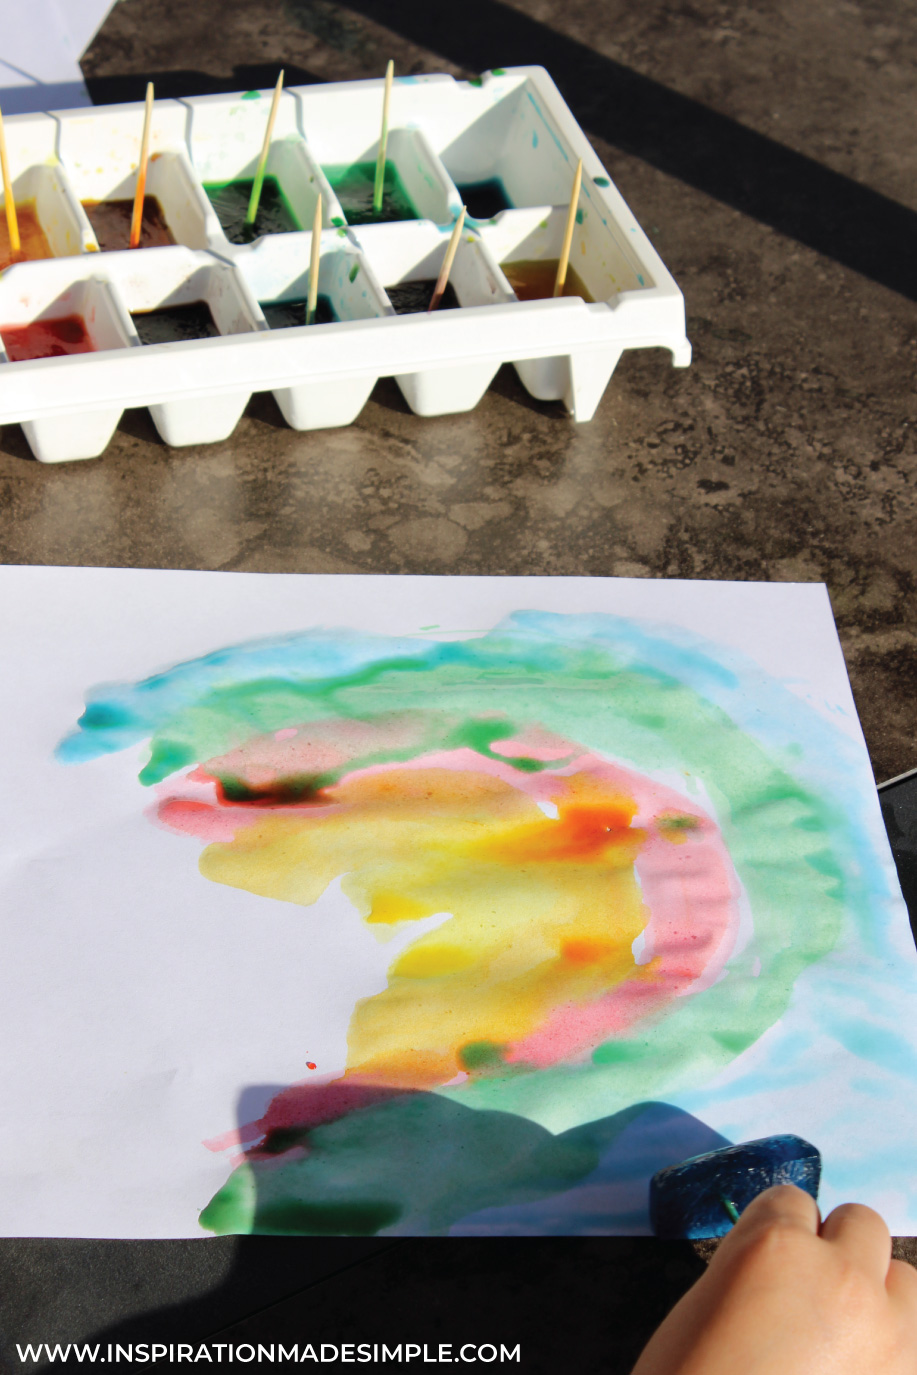
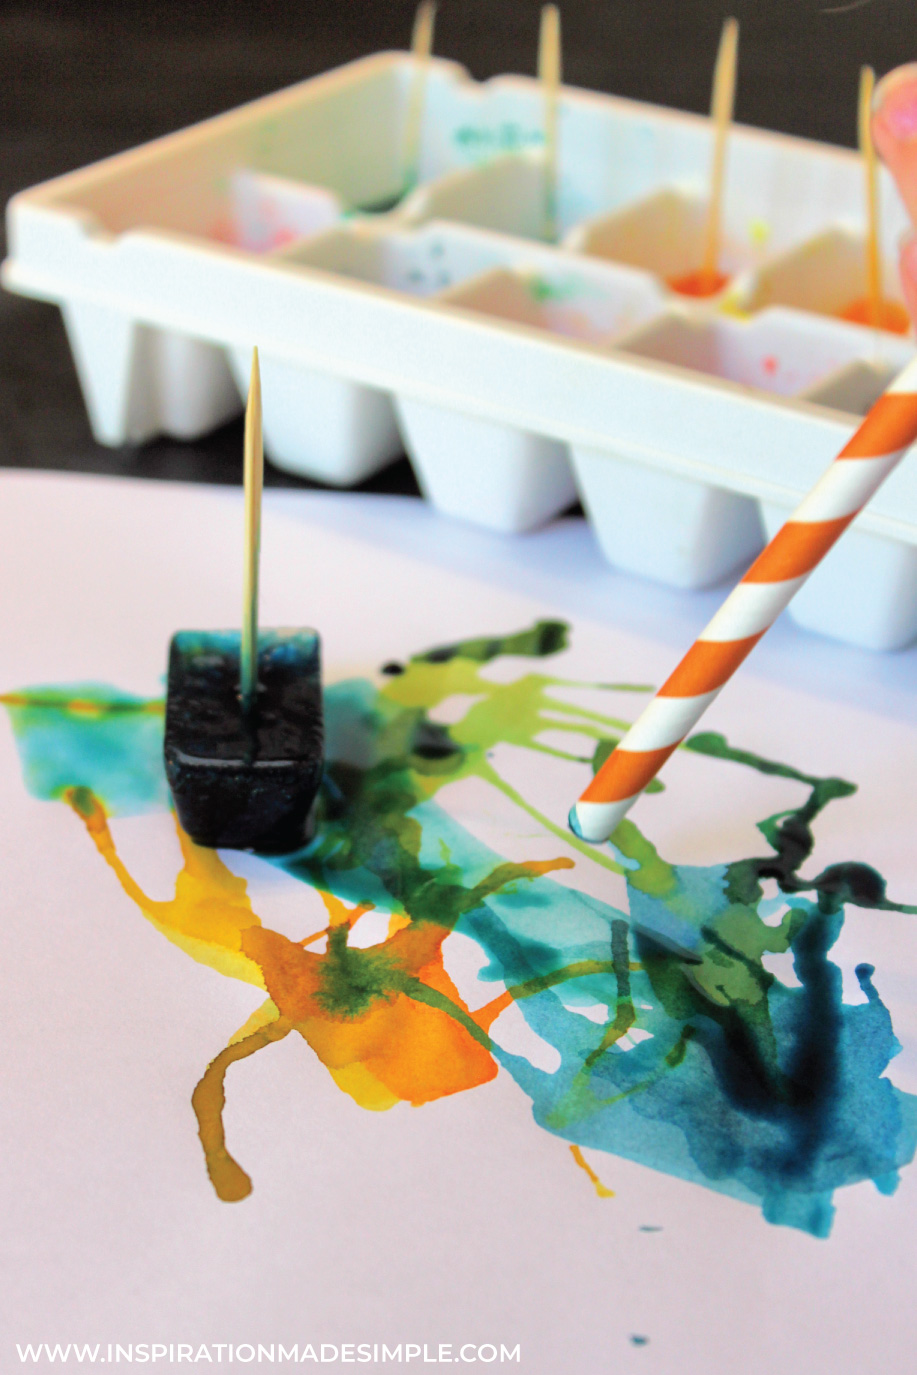
 Once the ice cubes are frozen, take them outside with some paper and get painting.
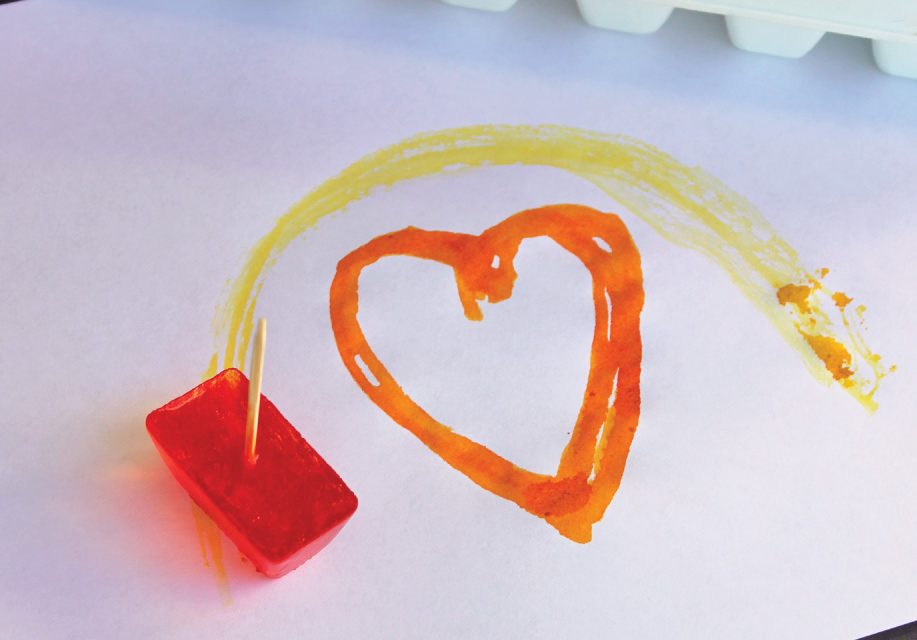
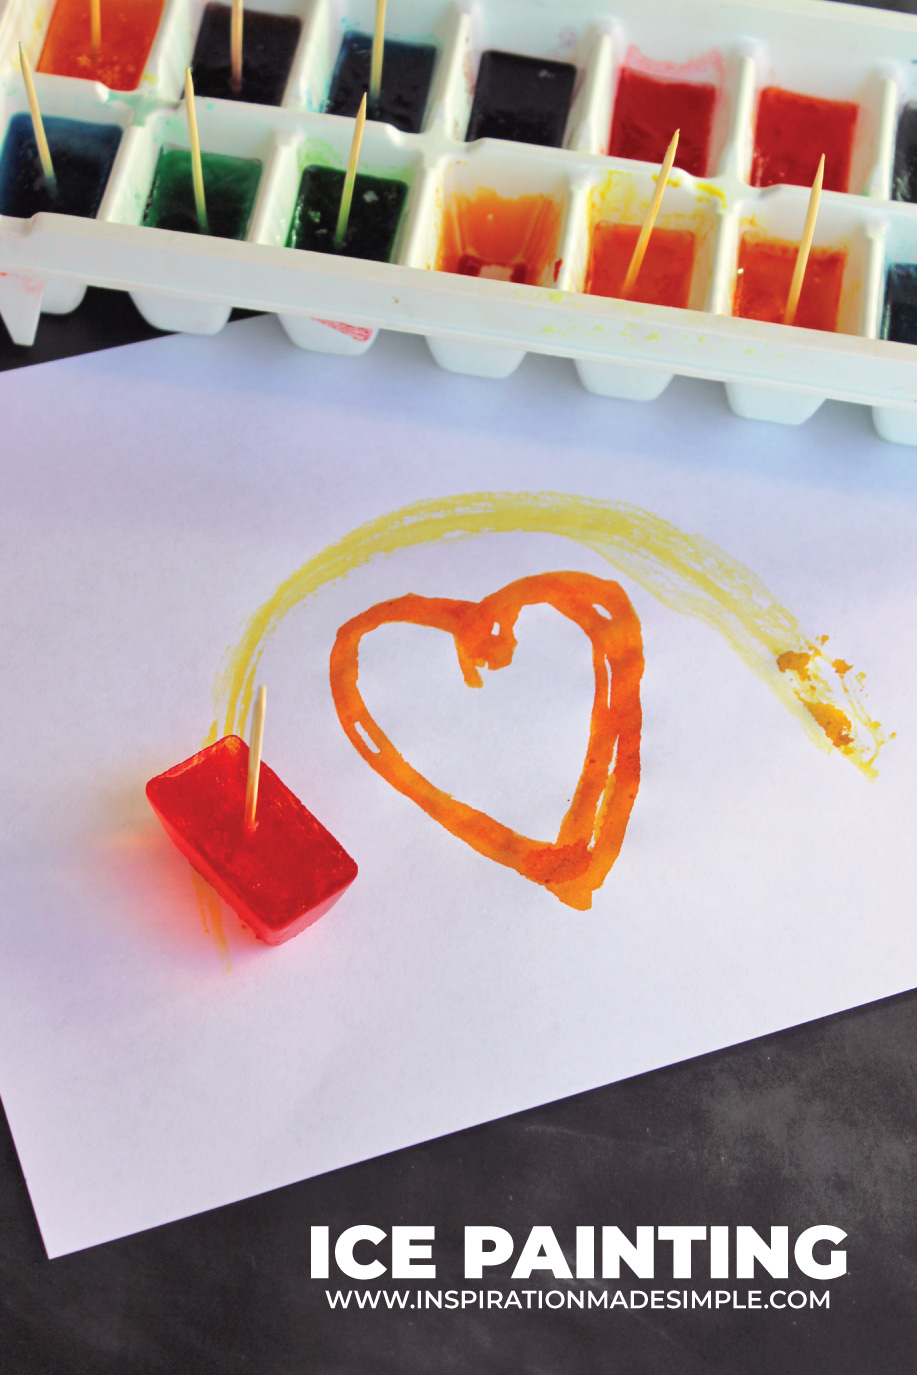 You can paint by holding onto the toothpick and drawing with the ice cube or you can let the paint drip onto the paper and use a straw to blow the paint around the paper. My youngest also likes to use her fingers.
The warmer the day, the faster the ice paints melt, so keep that in mind! If you have any ice left over after the child is done painting just put it back into the freezer to use on another day! Best part? The color stays vivid even as it dries. A lot of homemade paints seem to fade as they dry, but these don’t!
Originally shared on the Funner in the Summer Series at 30 Handmade Days


This is brilliant! My 3 yo is going to love this!