
This post brought to you by FloraCraft.
 For this months Make It: Fun Design Team Challenge, I received a box of FloraCraft® Make It: Fun® Foam Cones and was challenged to come up with something that put them to use. It just so happened that I was trying to think up a fun idea to gift my teen nephew with cash this Christmas. Once I saw the cones, I knew exactly what I could do: A Money Tree!
Supplies:
FloraCraft® Make It: Fun® Foam Cone – 2 7/8″ x 5 7/8″
Cash – Bills
Washi Tape
28 Gauge Steel Wire
Accents – Ribbon, Battery Operated Mini LED Lights, etc.
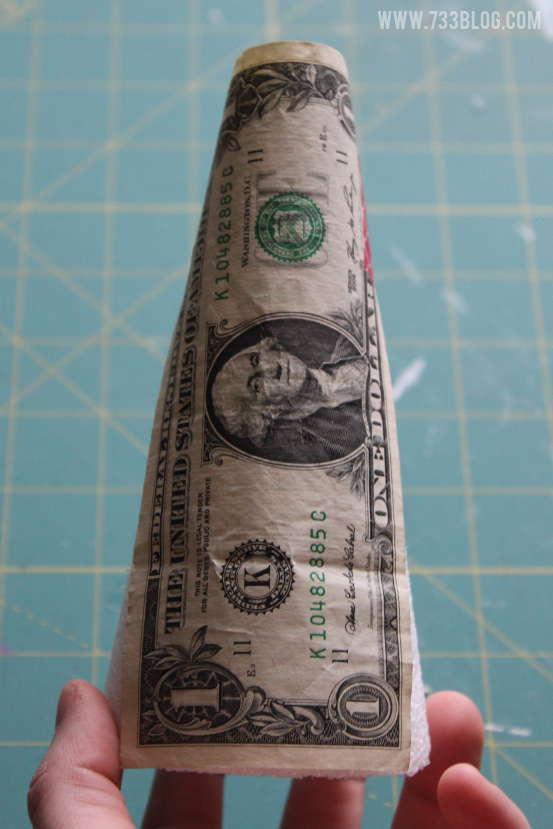 I used a total of $25 – 5 $1 bills and 2 $10 bills. Start with the $1 bills to cover the cone. I lined the bottom of the bill up with the bottom of the cone and laid it flat against the cone. I used a piece of washi tape on either side of the bill.
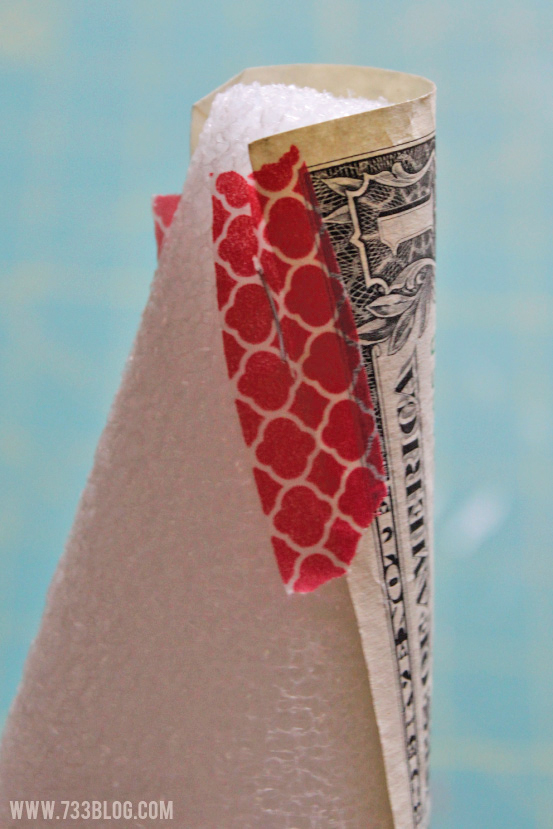 Unfortunately the tape won’t stick to the foam, so I used a bit of wire to pierce through the tape and secure it to the foam (as seen above).
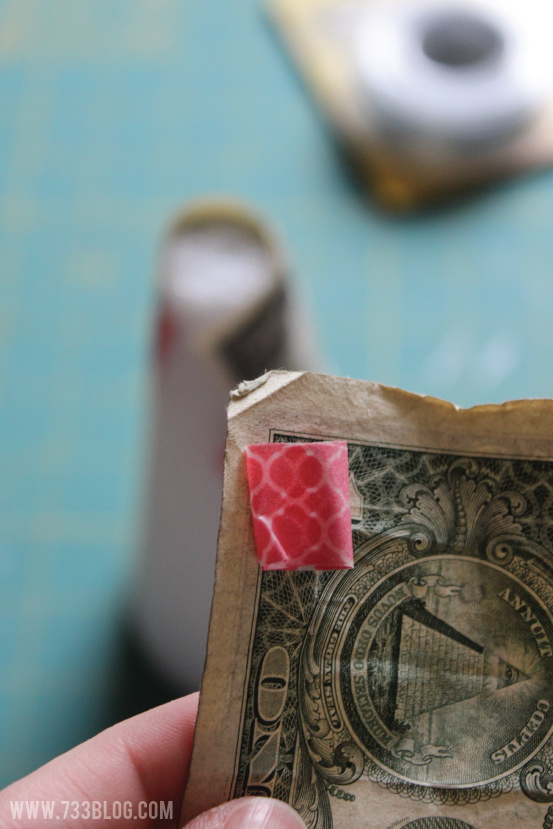 Continue doing this around the cone until it is covered completely. If you can’t use the tape/wire combo, then just roll up a piece of tape and stick it in the corners of the bill and then stick the bill to the one that is already covering the cone. Sometimes you’ll have to use the roll up tape method on one side of the bill and the tape/wire method on the other side. (Hopefully this makes sense – it sounds way more complicated than it is!).
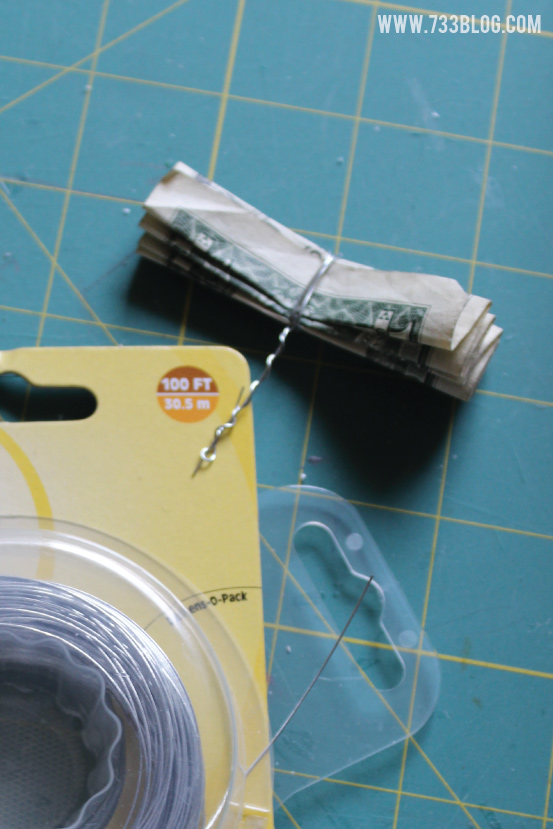 Once the cone is covered with the 5 $1 bills, it is time to make the tree topper. I used 2 $10 bills for this. Fold both bills accordion style (not sure what that means? Follow steps 1 and 2 of my Money Bouquet Tutorial and then come back here). Cut a 5″ length of wire and wrap it around the middle of the bill, leaving a length of about .75″ on one side.
 Match the ends and tape together with washi tape on the side with the excess wire (washi tape comes off without ripping the bill). Do the same for the other side, creating a flower. Create the second flower.
 Fold the wire on the flowers down and poke them into the top of the cone with the flowers facing in opposite directions.
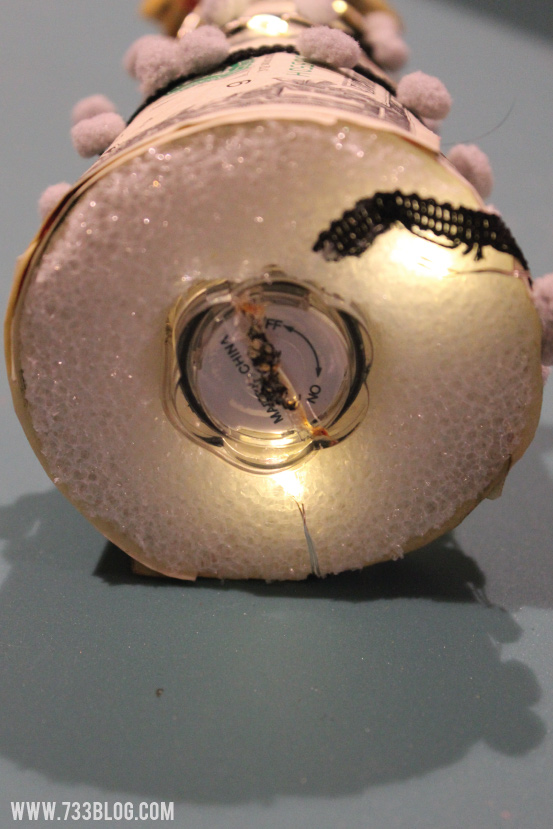
Decorate with ribbon by hot gluing the end of the ribbon to the bottom of the cone, wrap it around and around the cone until you reach the top and hot glue in place to the top of the cone (you can do this prior to adding the flower tops). If you’d like, add a strand of mini led lights like I did doing the same thing as the ribbon. To accommodate the battery pack, cut a hole in the bottom of the cone.

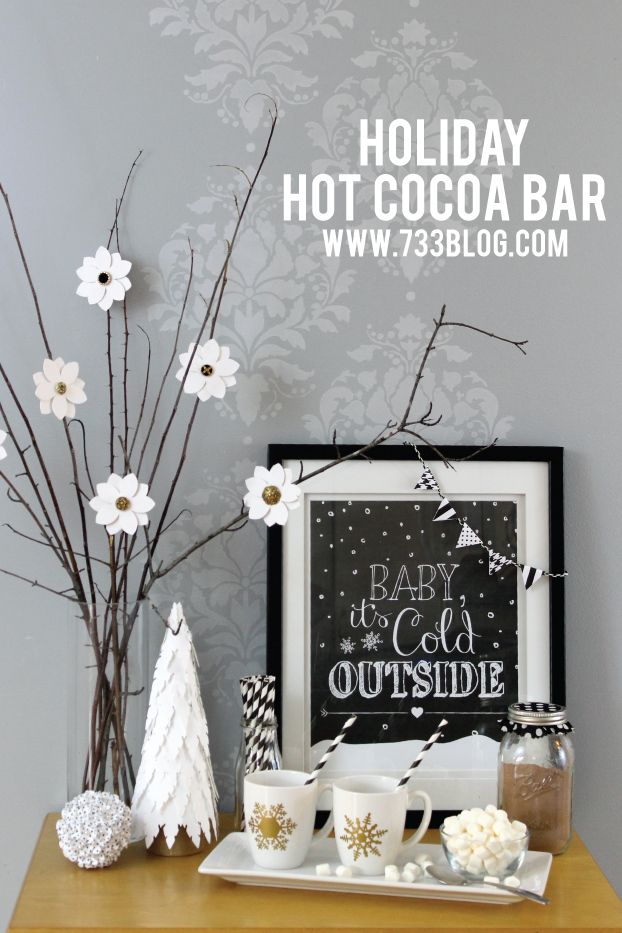
I also used a FloraCraft® Make It: Fun® Foam Cone in my Hot Cocoa Bar! Learn how to make my festive Feather Tree!
For more foam craft ideas visit the Make It: Fun site and follow FloraCraft on Pinterest and Facebook.
Check out what my Make It: Fun Design Team Members made with their foam cones:

Winter Wonderland Evergreen Trees by Tatertots & Jello
How to Decorate a Foam Tree by Love the Day
Paper Wrapped Trees by LollyJane via Tatertots & Jello
Glitter and Gold Christmas Tree Decor by Pink When
DIY Sequins Tree by Artsy-Fartsy Mama
Twine and Twig Christmas Ornaments by Create.Craft.Love
Sprinkles Christmas Trees by Uncommon Designs
Cupcake Liner Holiday Trees by Sugar Bee Crafts
Santa and Elf Hat Candy Jars by Club Chica Circle
Money Tree Gift Idea by seven thirty three
Glitter Foam Trees by Crafting in the Rain


This is so much more fun than handing over cash! (It’s sure on my gift list.) Thanks, Kim.