

I discovered how much fun clay can be as a medium last year and since then I’ve played with a few times. Last weekend I had a bit of free time and wanted to create something, so I pulled out my clay and came up with this Geometric Earring and Necklace Set. What do you think? Would you wear them? I love them! They have some of my favorite things right now – triangles, pale blue, gold!
Want to make a set for yourself? Let’s get started!
SUPPLY LIST (includes affiliate links):
Polyform Clay – two colors of your choice
Necklace Chain
The first step is to condition your clay. Roll it, twist it, warm it between your hands until it is easy to mold. I also laid a piece of wax paper over my work surface.
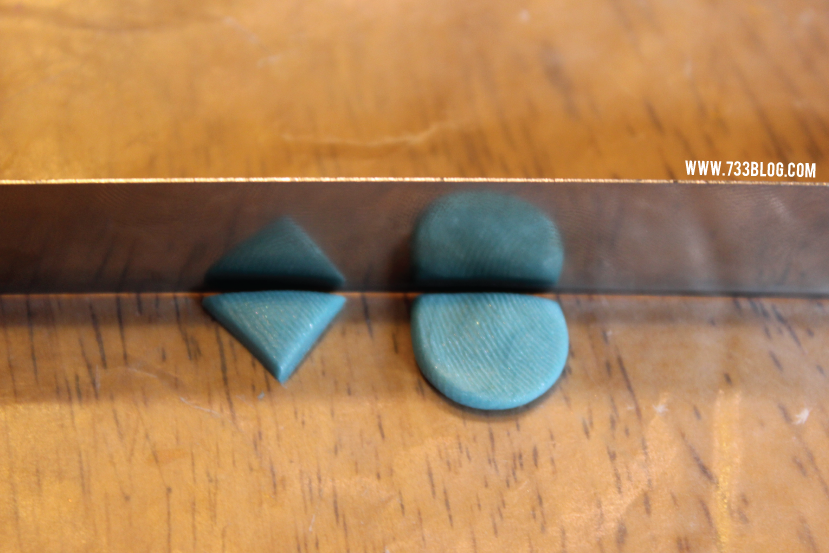
 Roll two small balls of clay – about 1/4″ in diameter. Now press them flat with your thumb – make sure to use the same amount of pressure on each ball so that they end up to be about the same thickness. From this flattened circle, cut a triangle. To make sure each are the same size, I placed the two flattened balls side-by-side and used my blade as a guide while cutting (see pictures above).
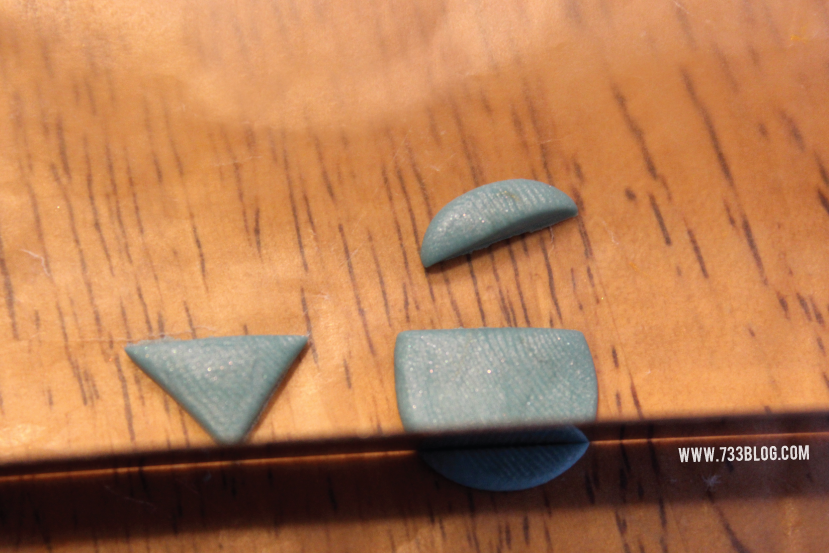
 Next, roll a ball of clay using your second color. It should be about 1/2″ in diameter. Go ahead and flatten this like you did before.
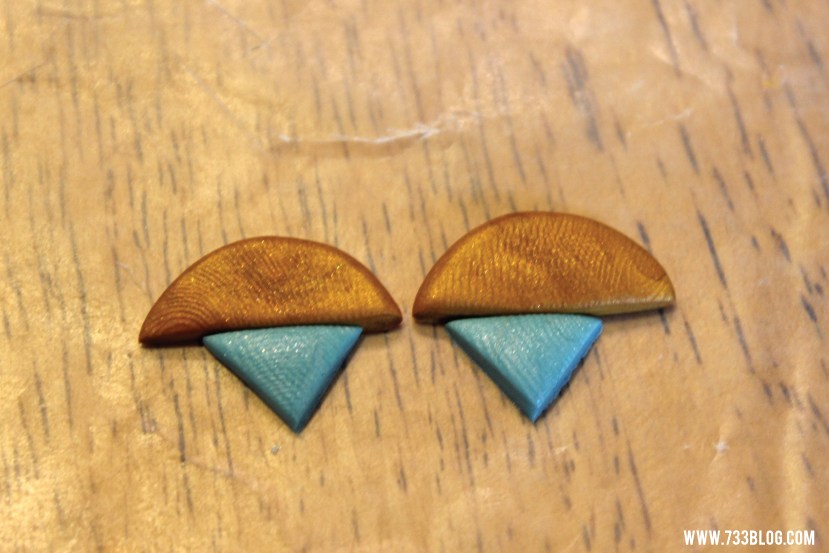 Cut the circle in half and place the straight edge up against the top of your triangles.
 Using a rolling pin, lightly roll across the crease of the two clays so that they meld together. Don’t worry if you’re triangle gets a smidge warped – we’ll fix it in the next step.

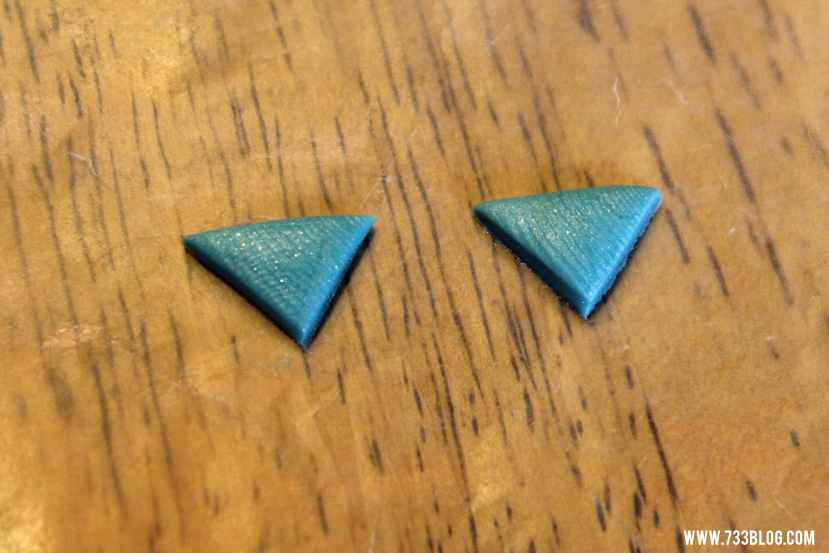
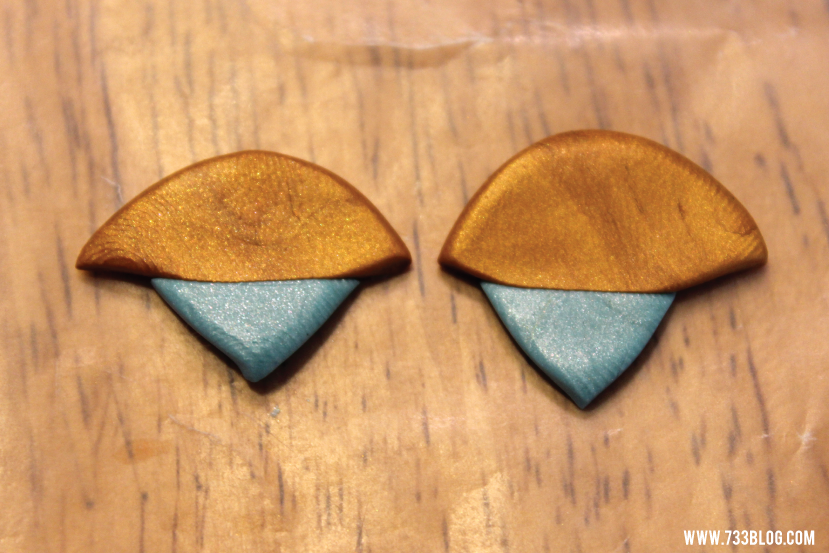
 I fixed my triangles by trimming off a small amount on the sides and then cutting straight across the gold to form the finished triangle.
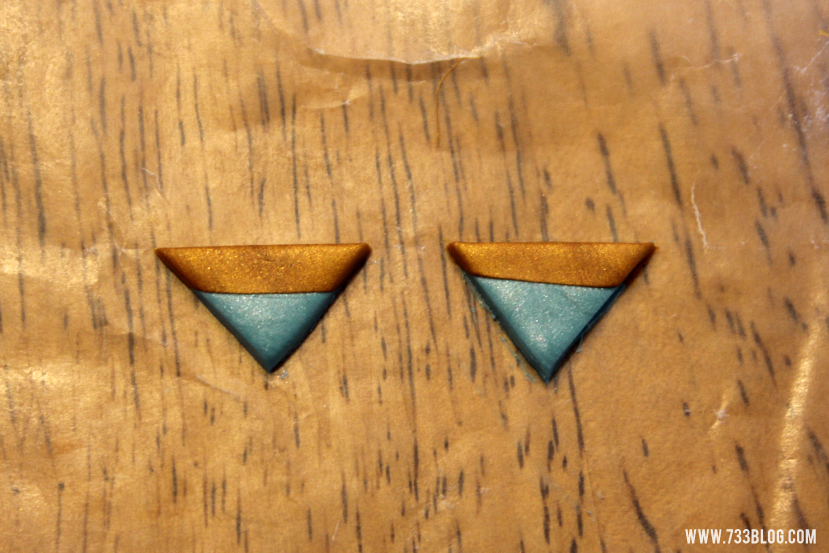
Now it’s time to bake! Follow the directions on the box – mine went in for 1/2 hour at 275 degrees.
After the earrings were done baking, I pulled them out of the oven and let them cool. I then used Super Glue to adhere the gold earring findings to the back. Let dry and your done!
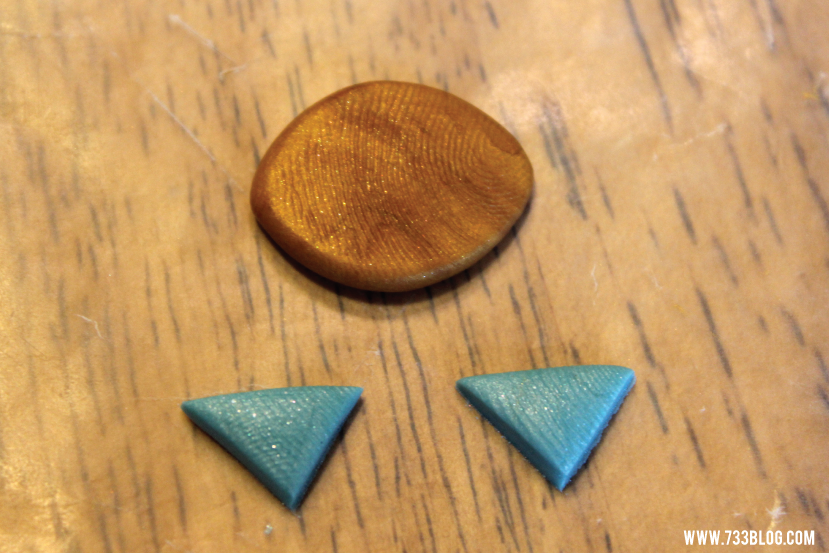
 To make the pendant I followed a similar process – sorry, no pictures… I accidentally deleted them! Can you believe that? I made a 1/2″ round ball of gold and a 1″ round ball of the blue and then pressed both flat. I trimmed straight across the bottom of the blue and straight across the top of the gold. I placed the trimmed pieces butt up against each other and then used the rolling pin to meld the two pieces. After that, I cut out the rectangle shape and added a hole at the top. Bake and cool. I then added a jump ring and attached to a chain and I had myself a pretty cool geometric earring and necklace set!

