
This post brought to you by Cricut.
Thanksgiving is approaching, which means time of thanks, of giving, and huge, delicious meals. And if you’re in my home, it’s laughing while I make my daughter pull the stuff out of the bird, because I won’t reach my hand inside! Whether you’re hosting a large gathering, or an intimate affair, setting a gorgeous table doesn’t have to be hard. And if you’re going the a la paper route, it doesn’t mean you can’t fancy things up a bit? I’m going to share with you two simple and inexpensive ideas that are sure to wow your guests!
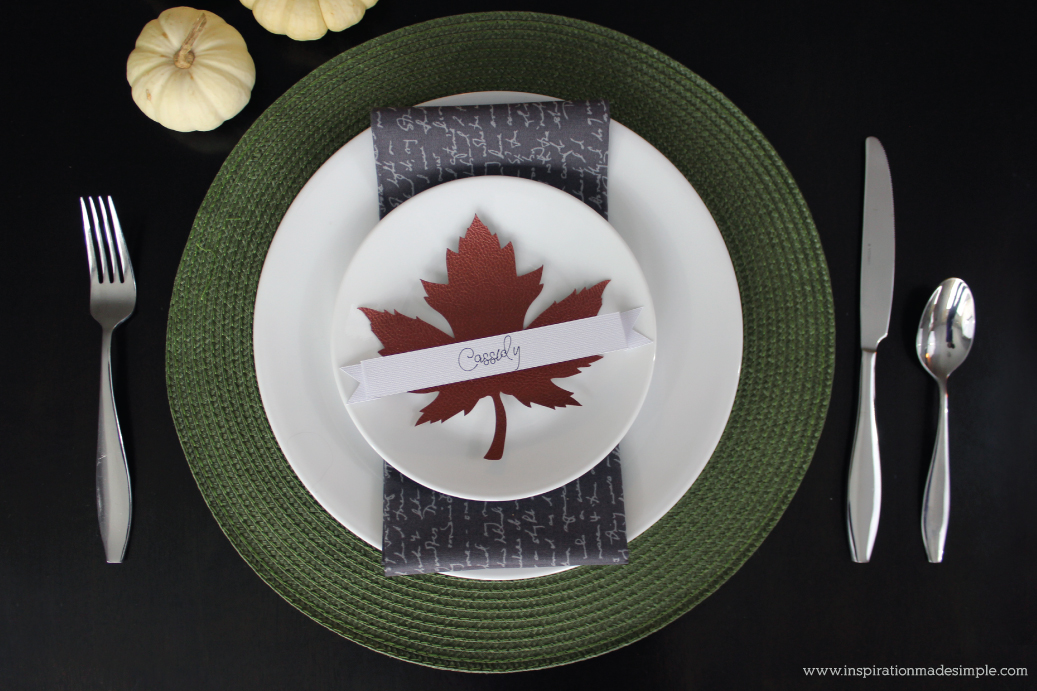
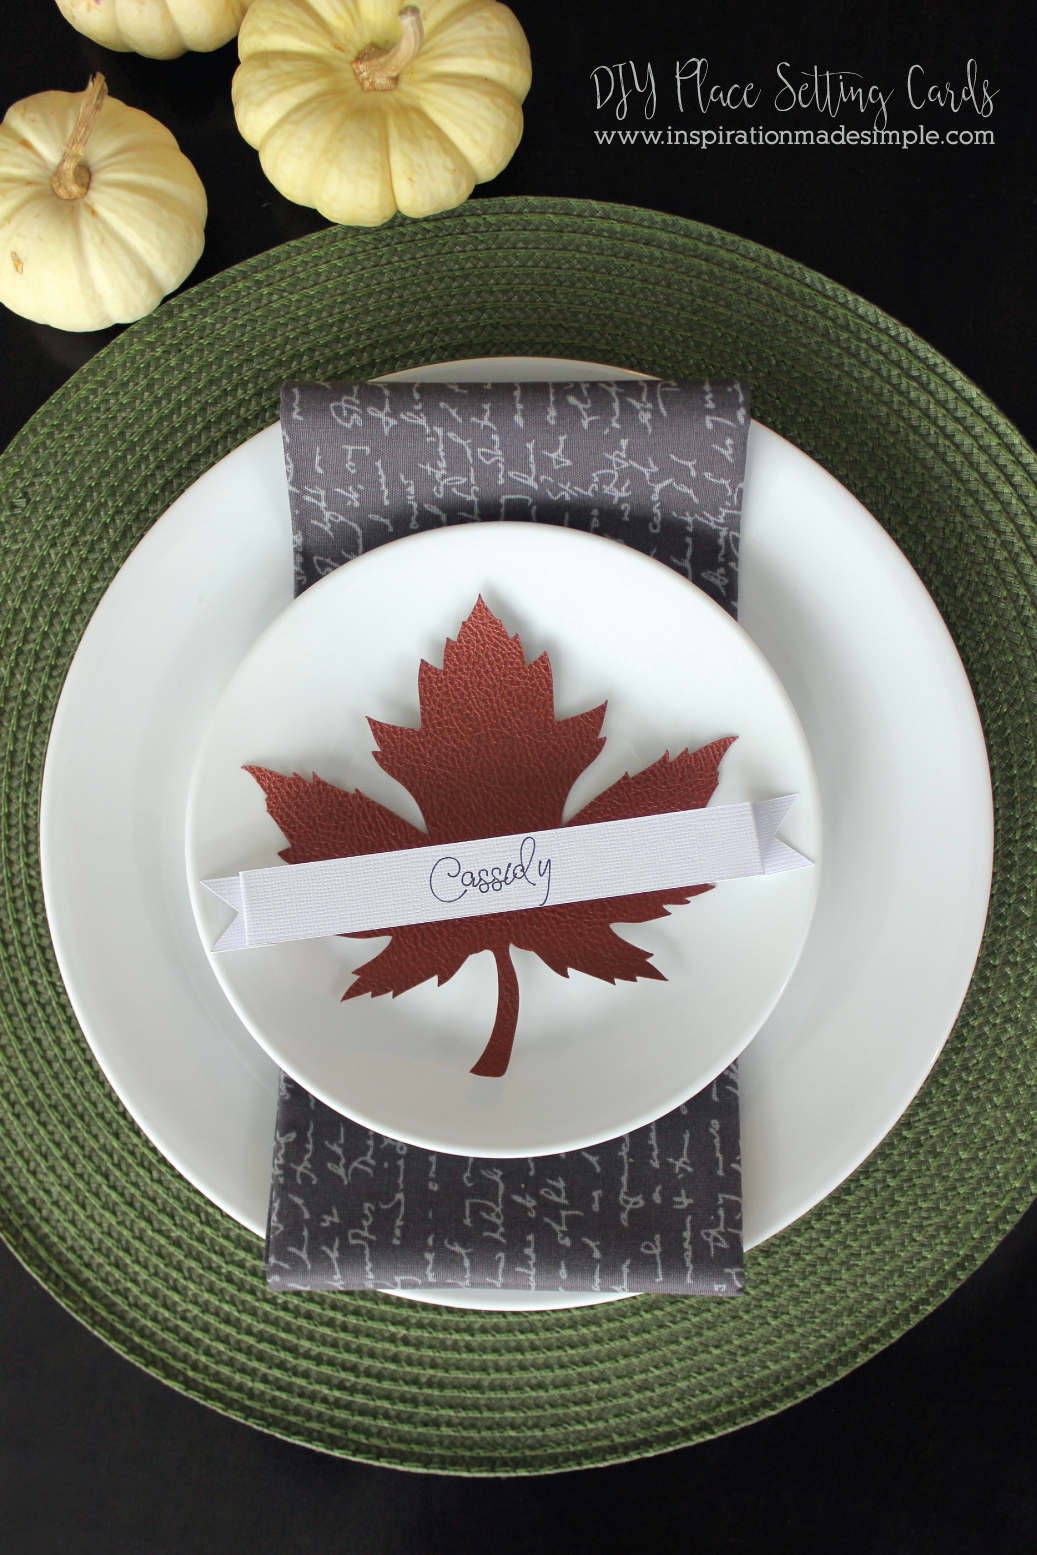
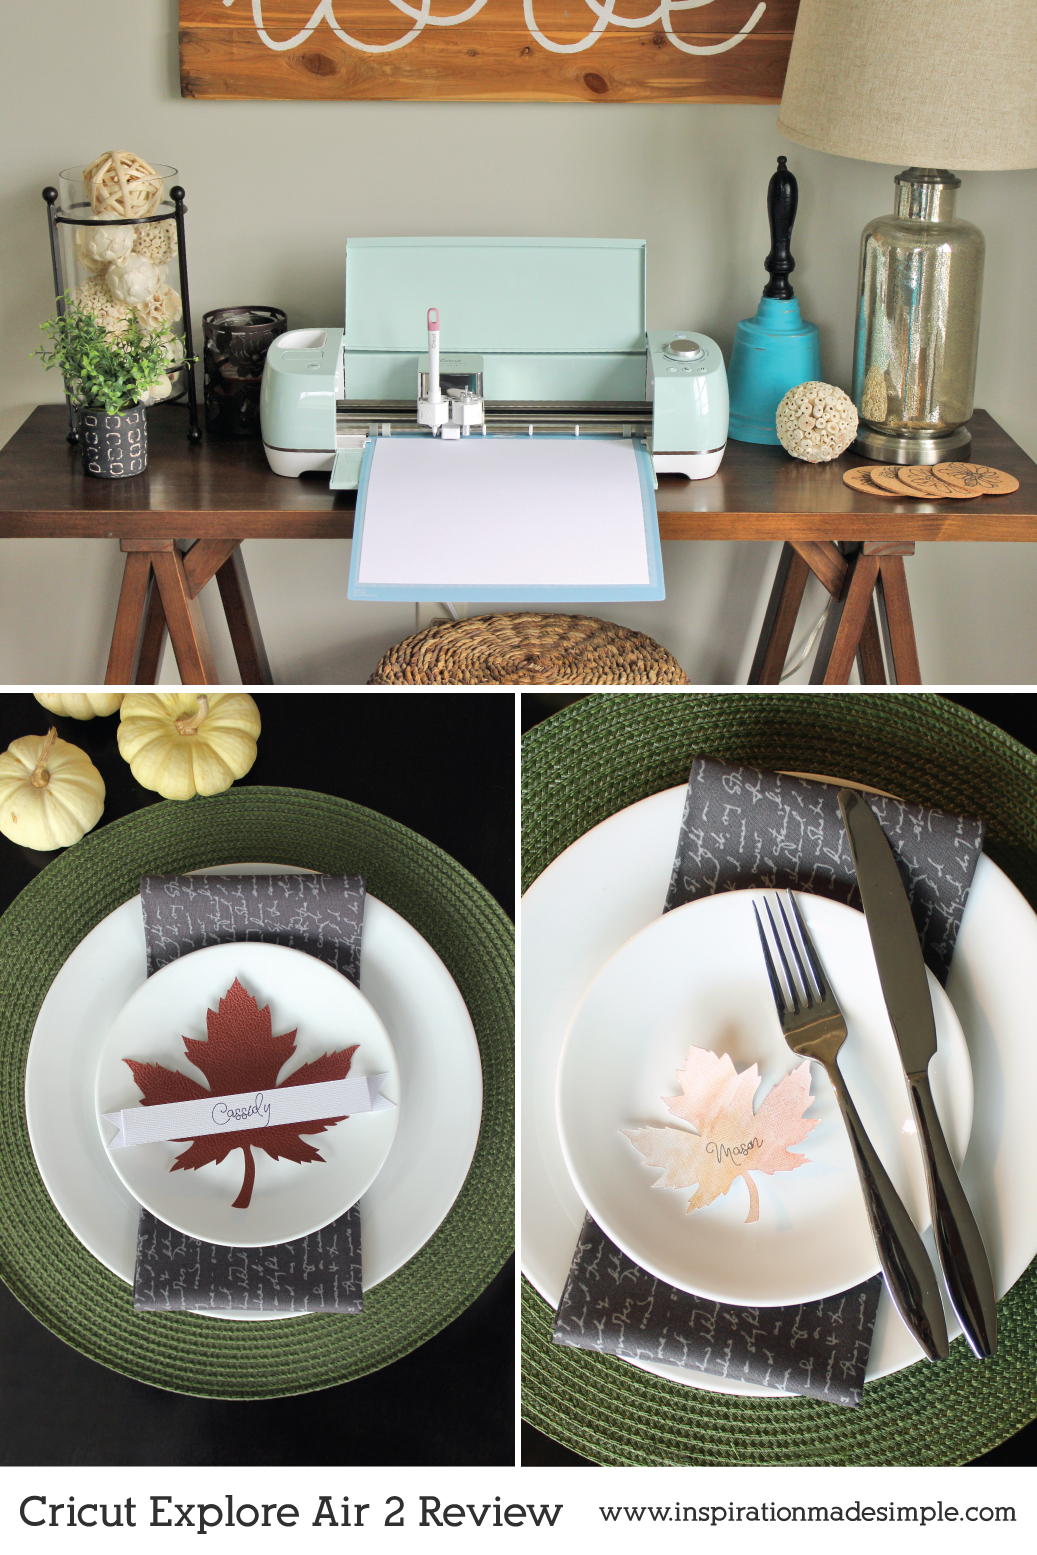
First up for t is this stunning Leather Leaf Place Setting – I love the simplicity of the leaf, paired with the banner on top. Want to learn how I made it? Cricut recently sent me their brand new Cricut Explore Air 2, which I used for this project. I am loving the new machine – the mint color, the built-in bluetooth and the option for fasting cutting, which works spectacularly!
SUPPLIES: Affiliate links included for your convenience.
Cricut Pebbled Faux Leather
Cricut Explore Machine
White Cardstock
Cricut Pen
DIRECTIONS:
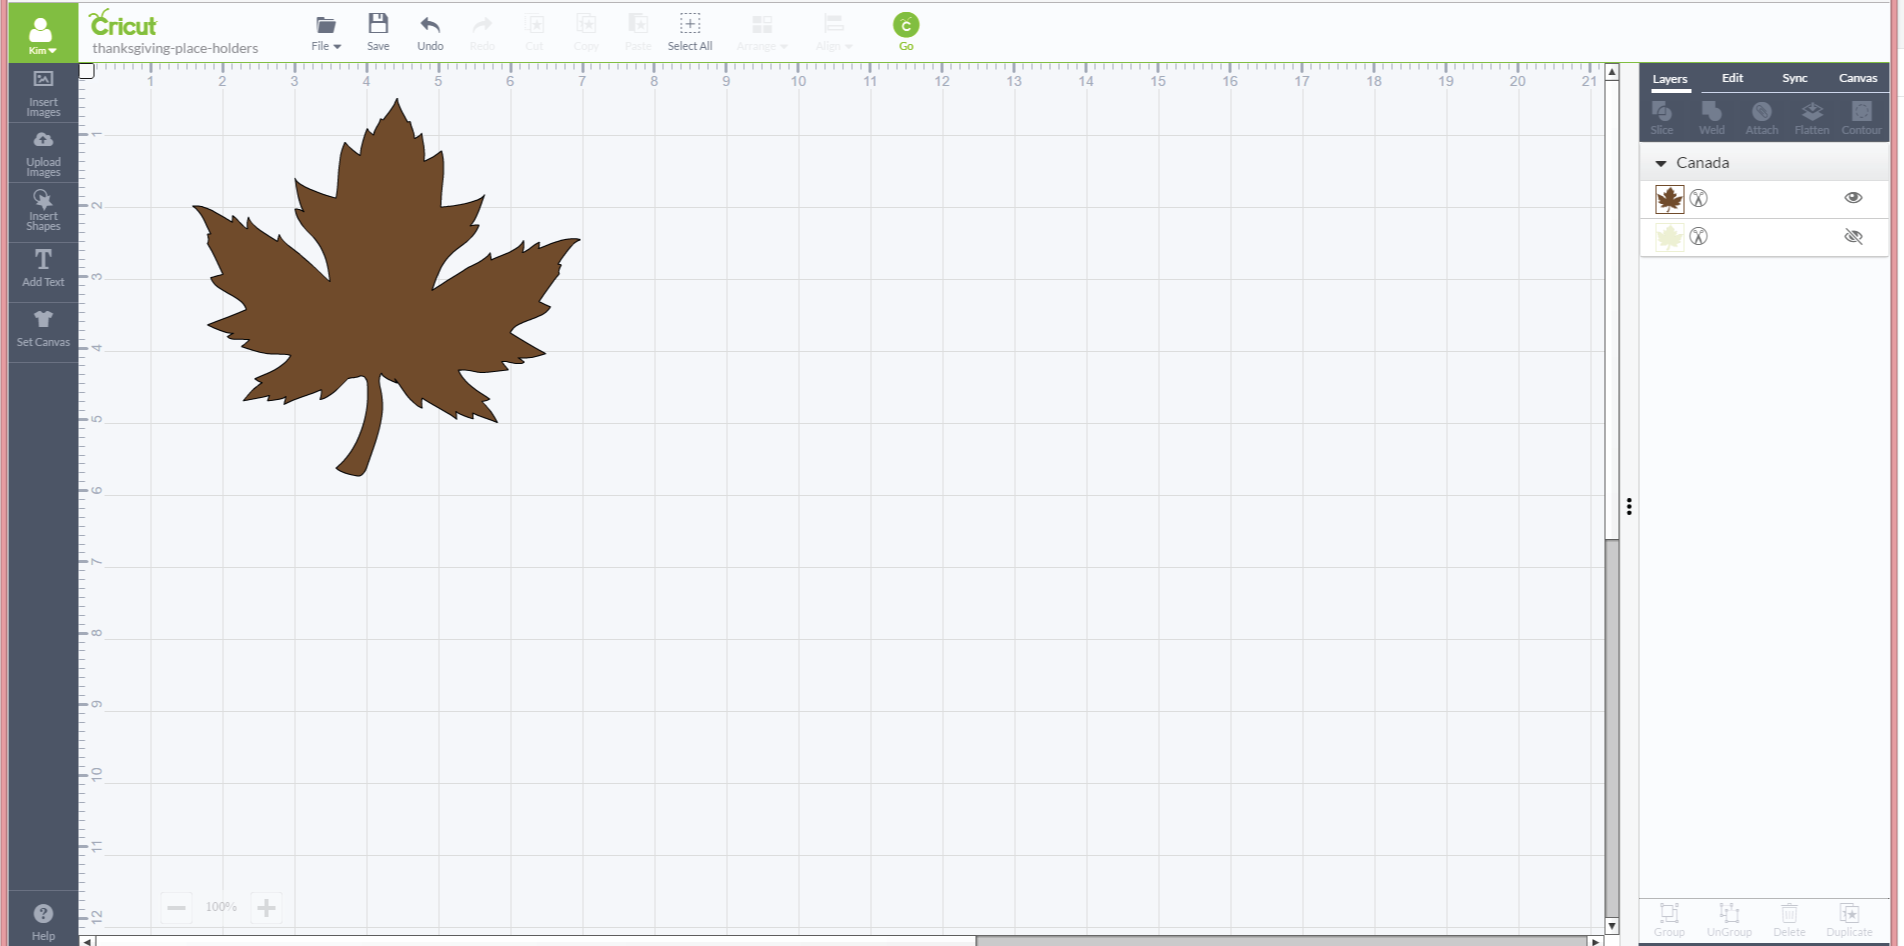
Open Cricut Design Space and search the Image Library for a leaf image of your choice. I went with a Maple Leaf since we’re Vermonters and Maple is everything in our state. Insert it onto your mat and size it however you desire.
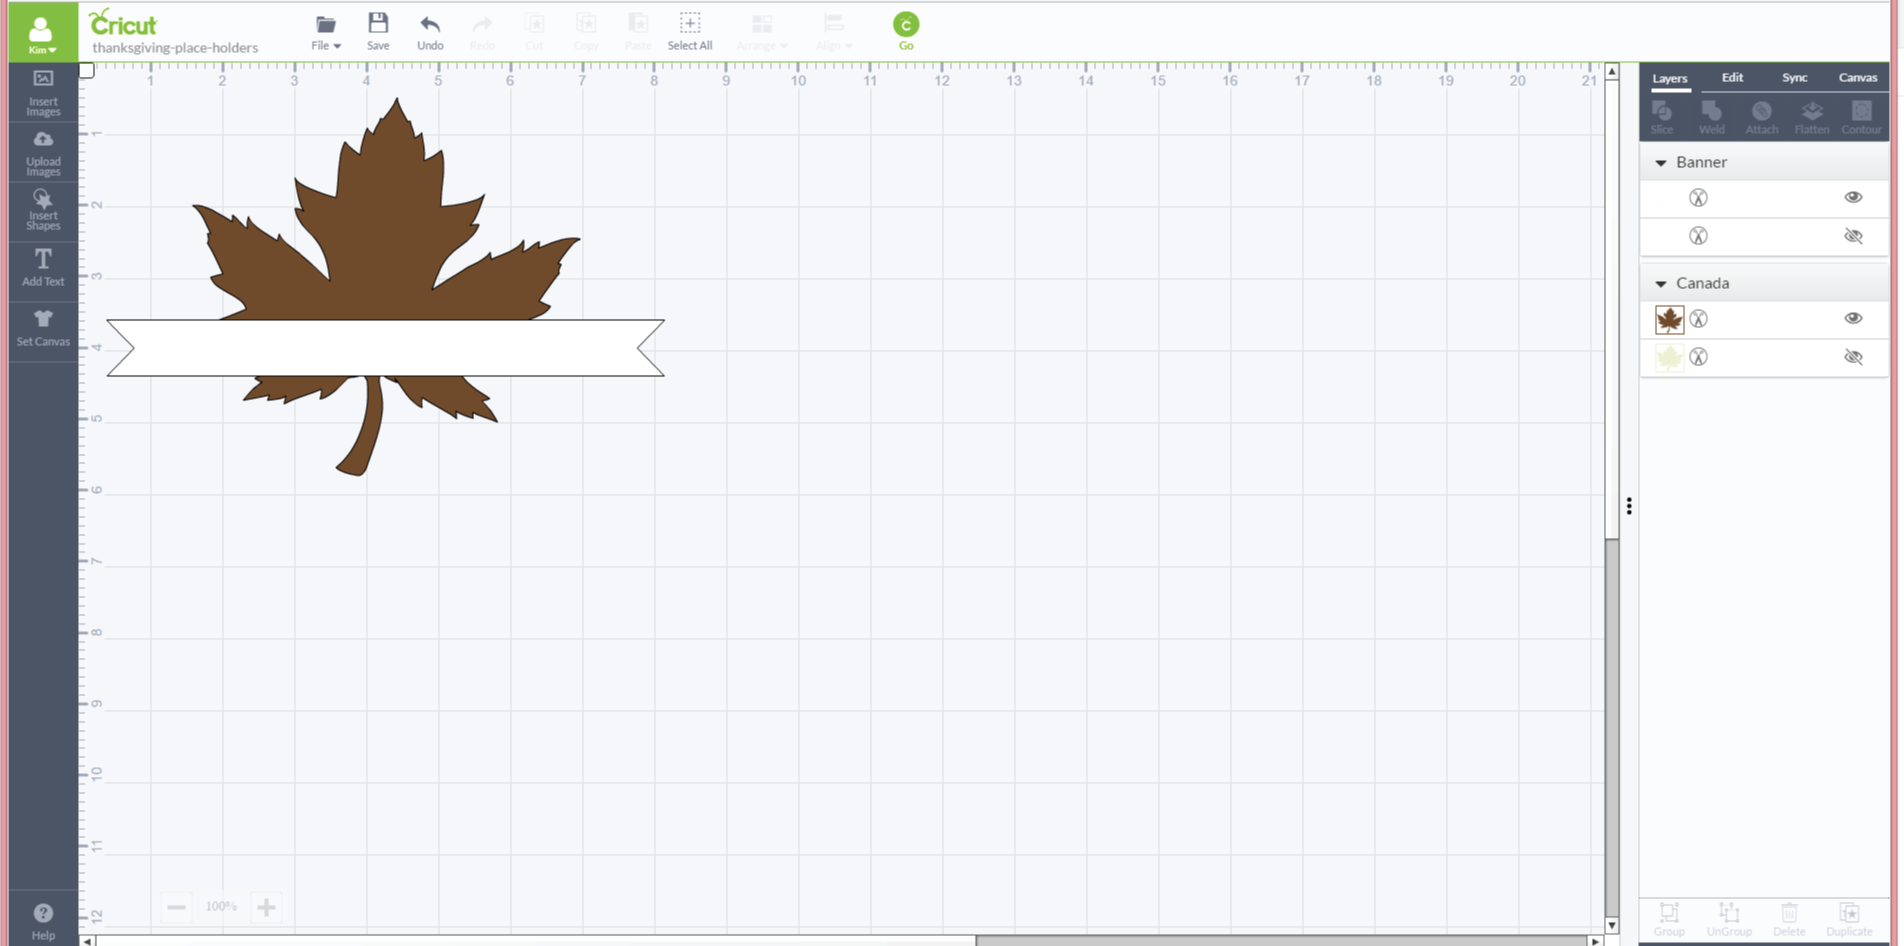
Next, search the image library for a banner image and insert into onto your mat and size.
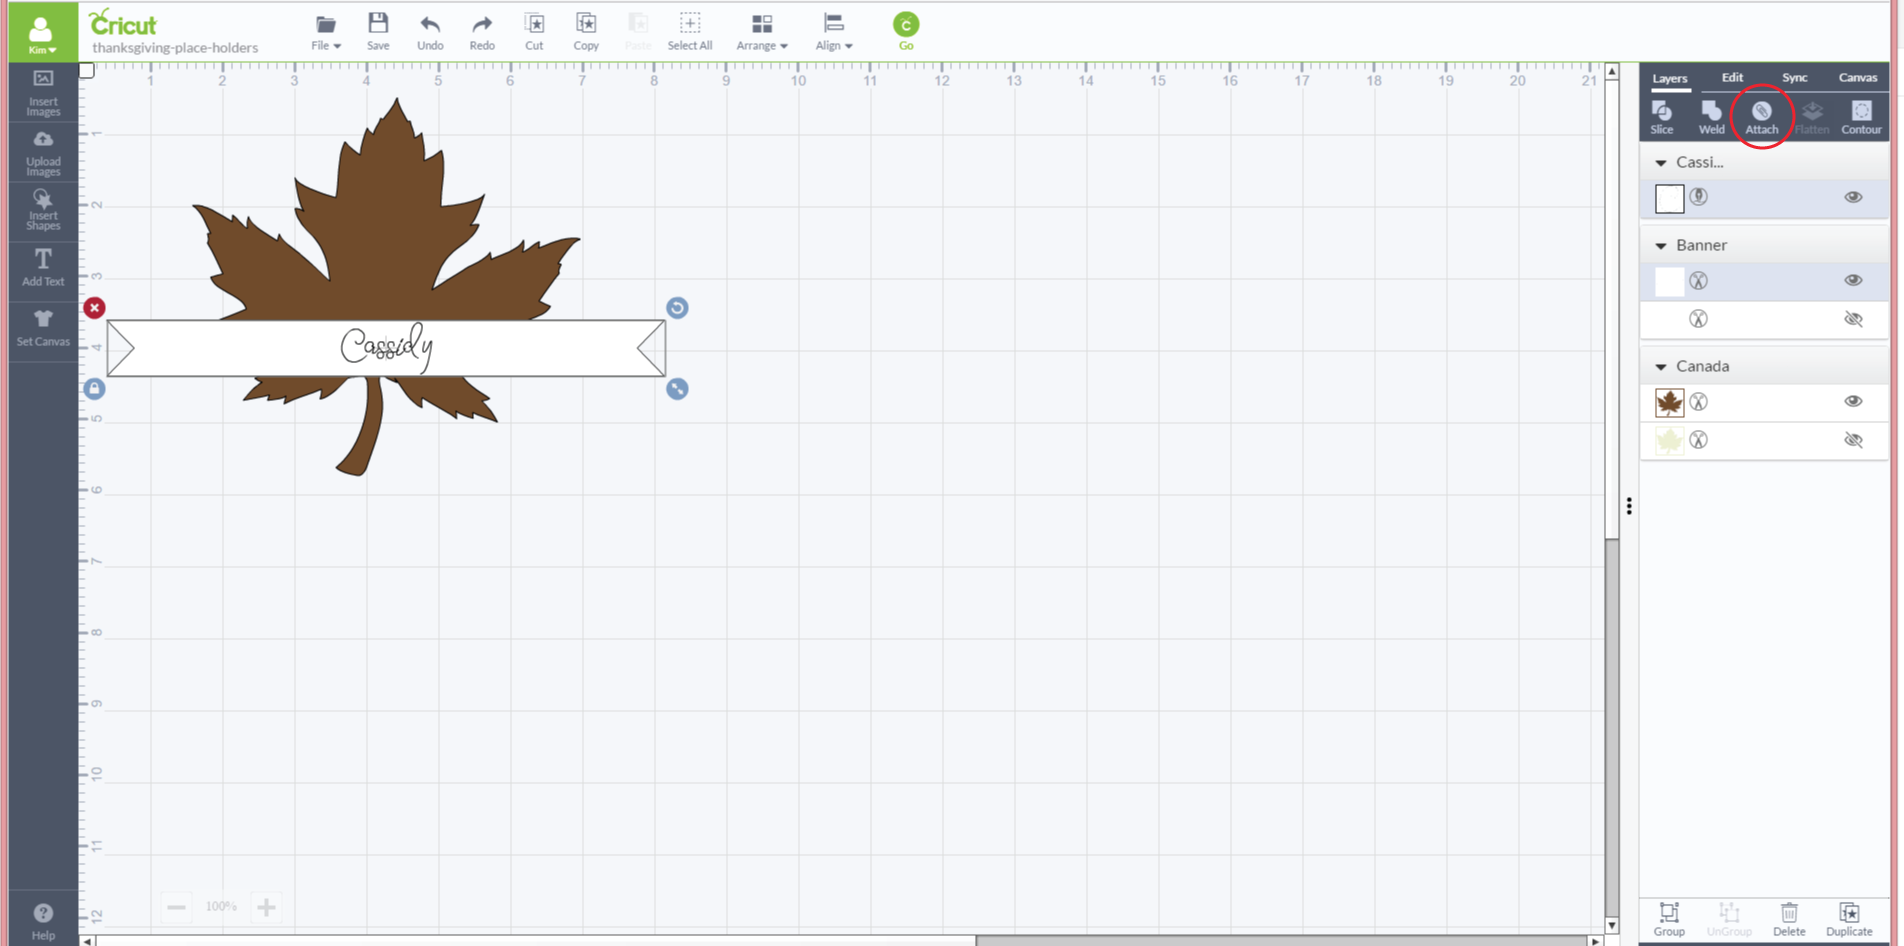
Add a text box, type in a name and place it over the banner. Select the banner and the text and click “attach”.
Lastly, send the project to your Cricut. Make sure the Cricut marker is inserted all the way in the accessory port.
The awesome thing with Cricut’s new faux leather sheets is that it doesn’t take a special deep-cut blade! Simply set your machine setting to fabric and it will cut through the leather like butt-ah!

Want to skip all of the steps above? Simply open my Leather Leaf Cricut Design Space file, change the name and you’re ready to cut!
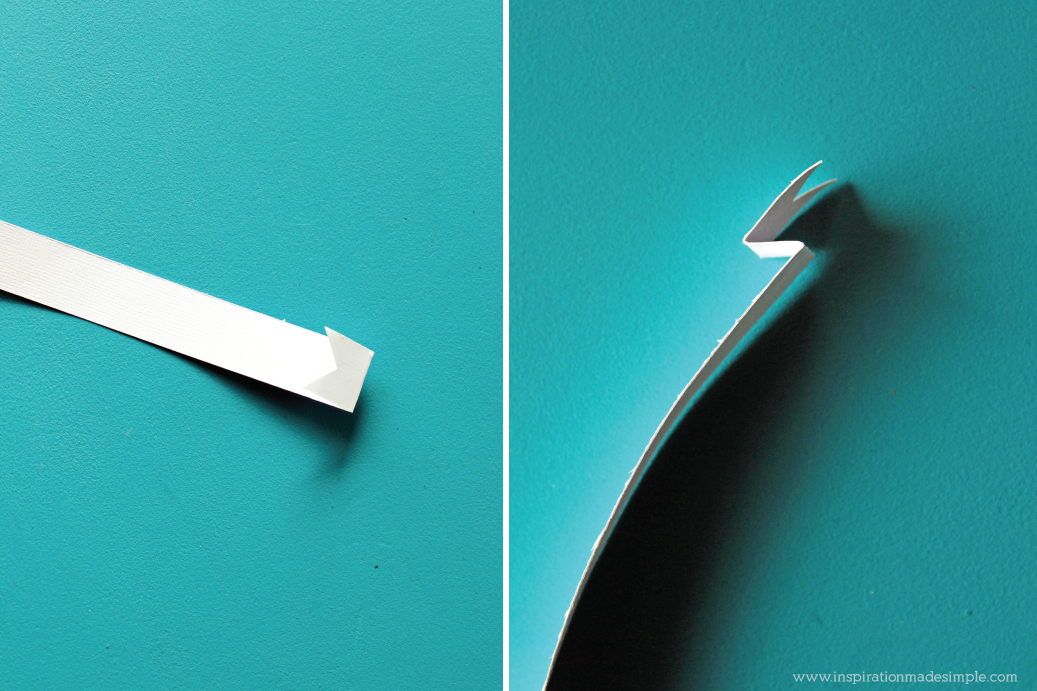
Once the leaf and banner are cut, remove them from the mat. Fold the ends of the banner over and press flat. Bend again so that the banner is 3D. Follow the pictures above for reference.
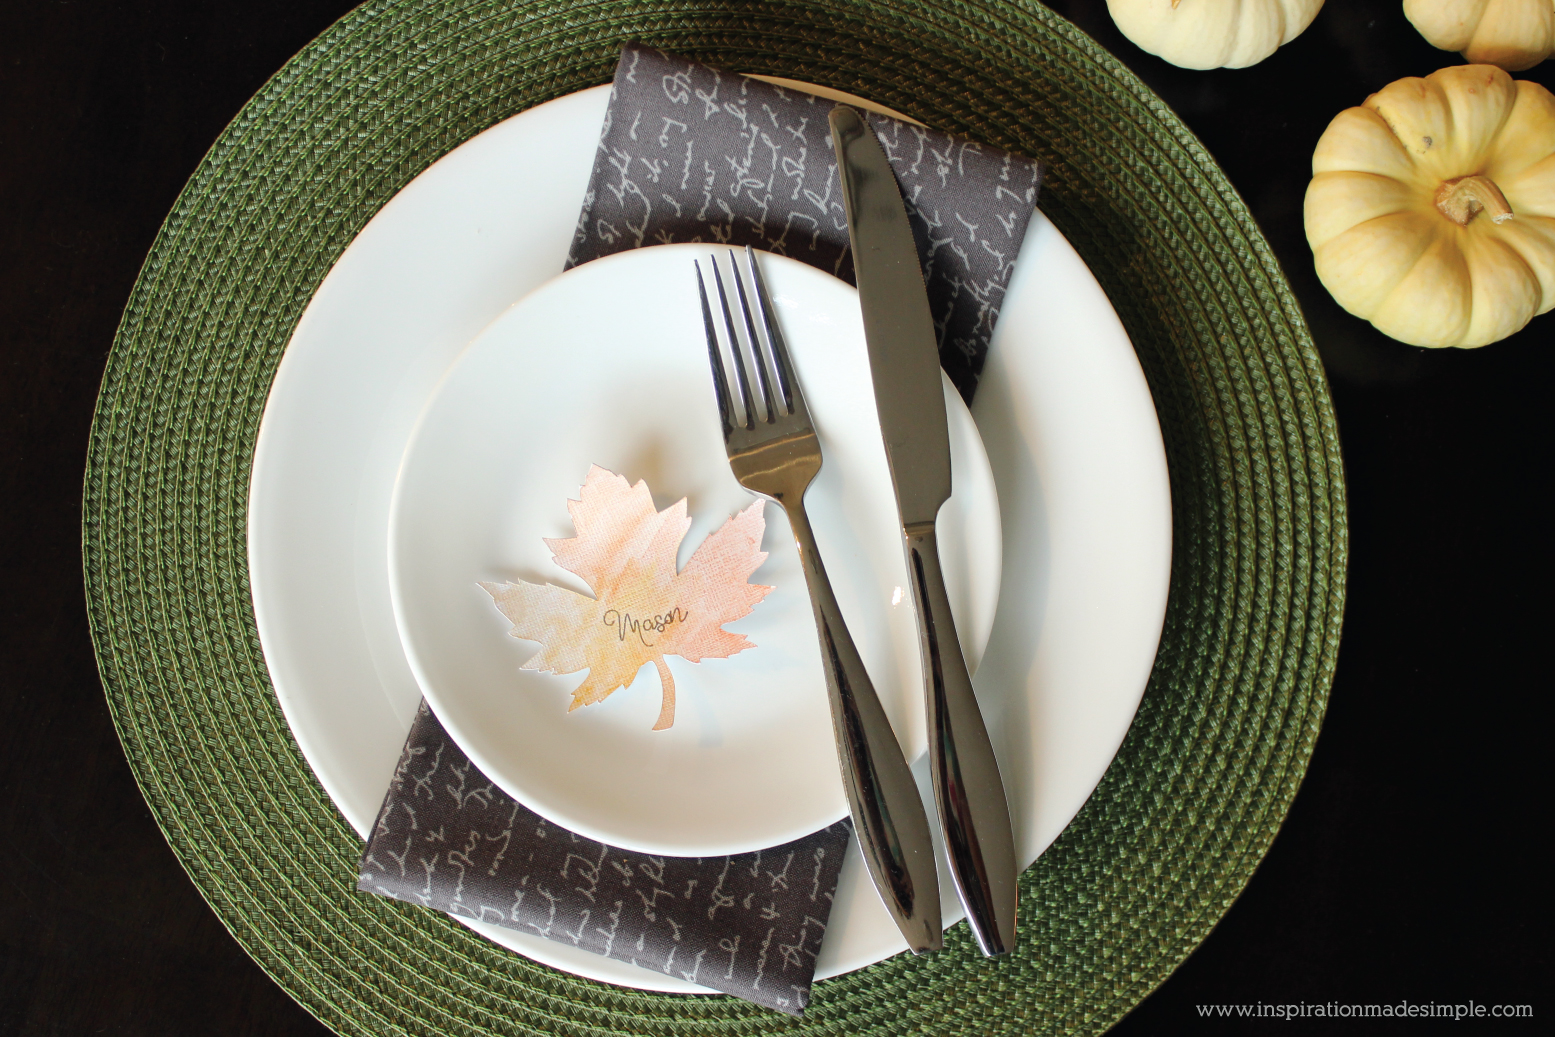
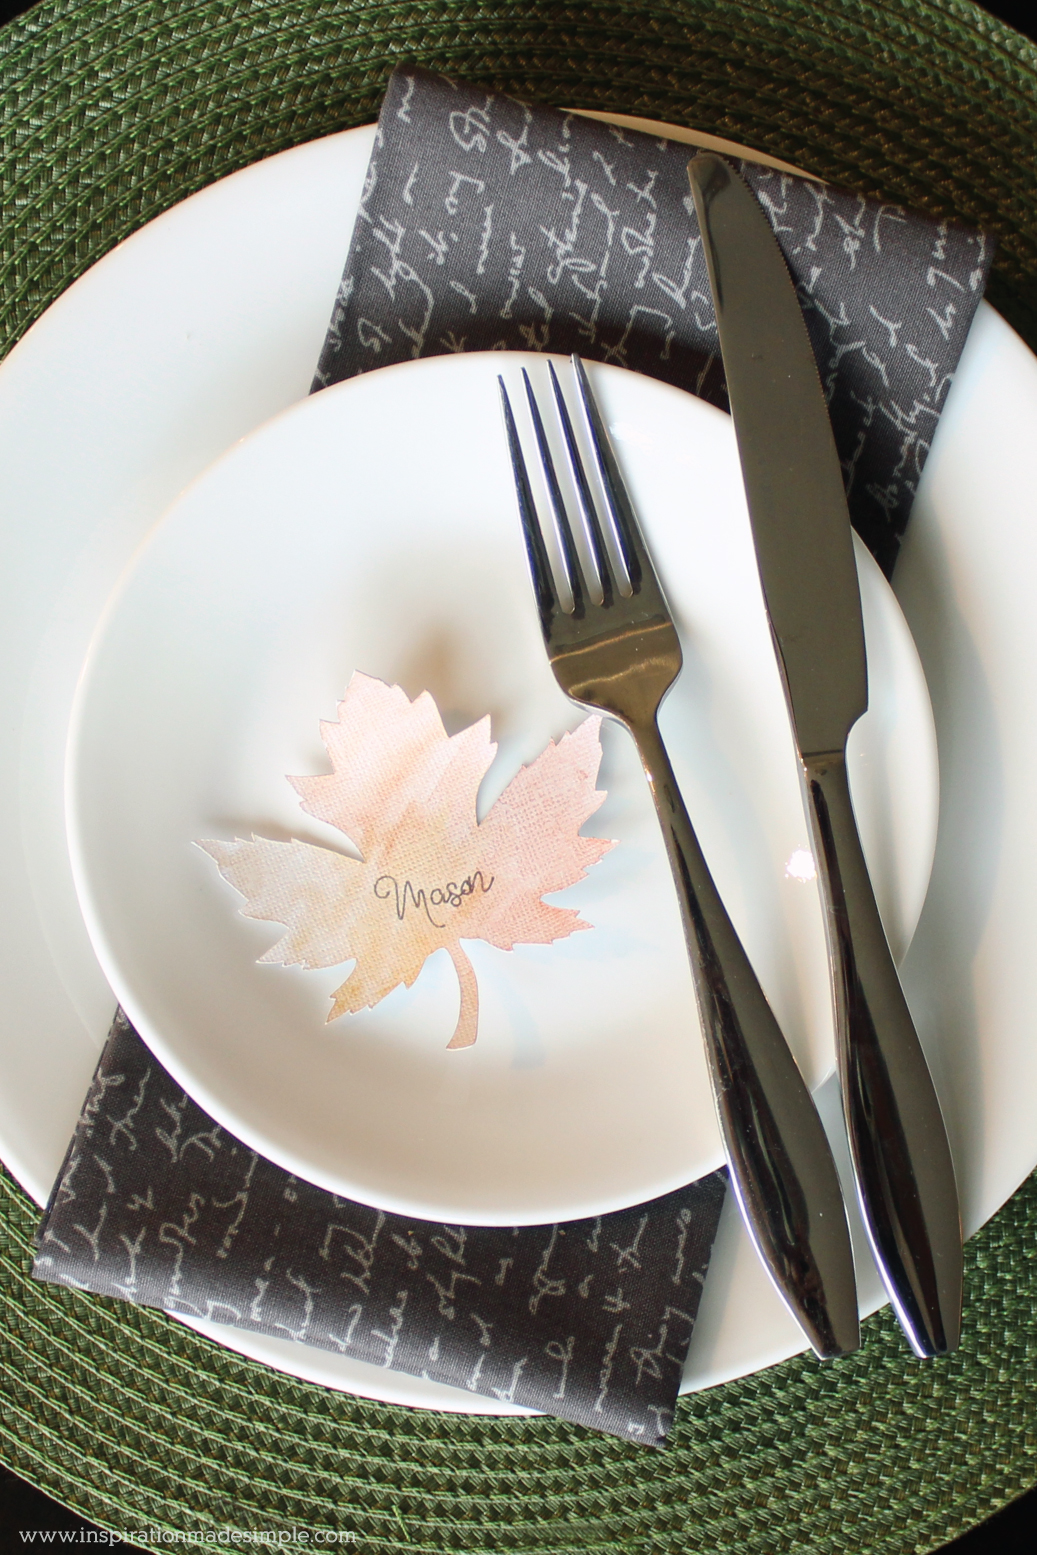
The watercolor leaf place setting card is even easier, if you can believe that possible!
When creating this place setting idea, I thought it would be perfect for the kids table! It could even be turned into an activity, where you put out some watercolor paints and let the kids paint their own leaf to take home. But it is still sophisticated enough to do as a placesetting for the adult table too.
SUPPLIES:
Cricut Explore Machine
White Cardstock
Cricut Pen
Watercolor Paints
DIRECTIONS:
Open Cricut Design Space, search the Image Library for a leaf image of your choice and inert onto your mat. Size it however you desire.
Add a text box, type in a name of a saying and place it over the leaf. Select the leaf and the text box and click “attach”.
Send the project to your Cricut, making sure the marker is inserted completely in the accessory port.
Want to skip the steps above? Simply open my Watercolor Leaf Place Setting Cricut Design Space file, change the text to the word or name you want, and click go!
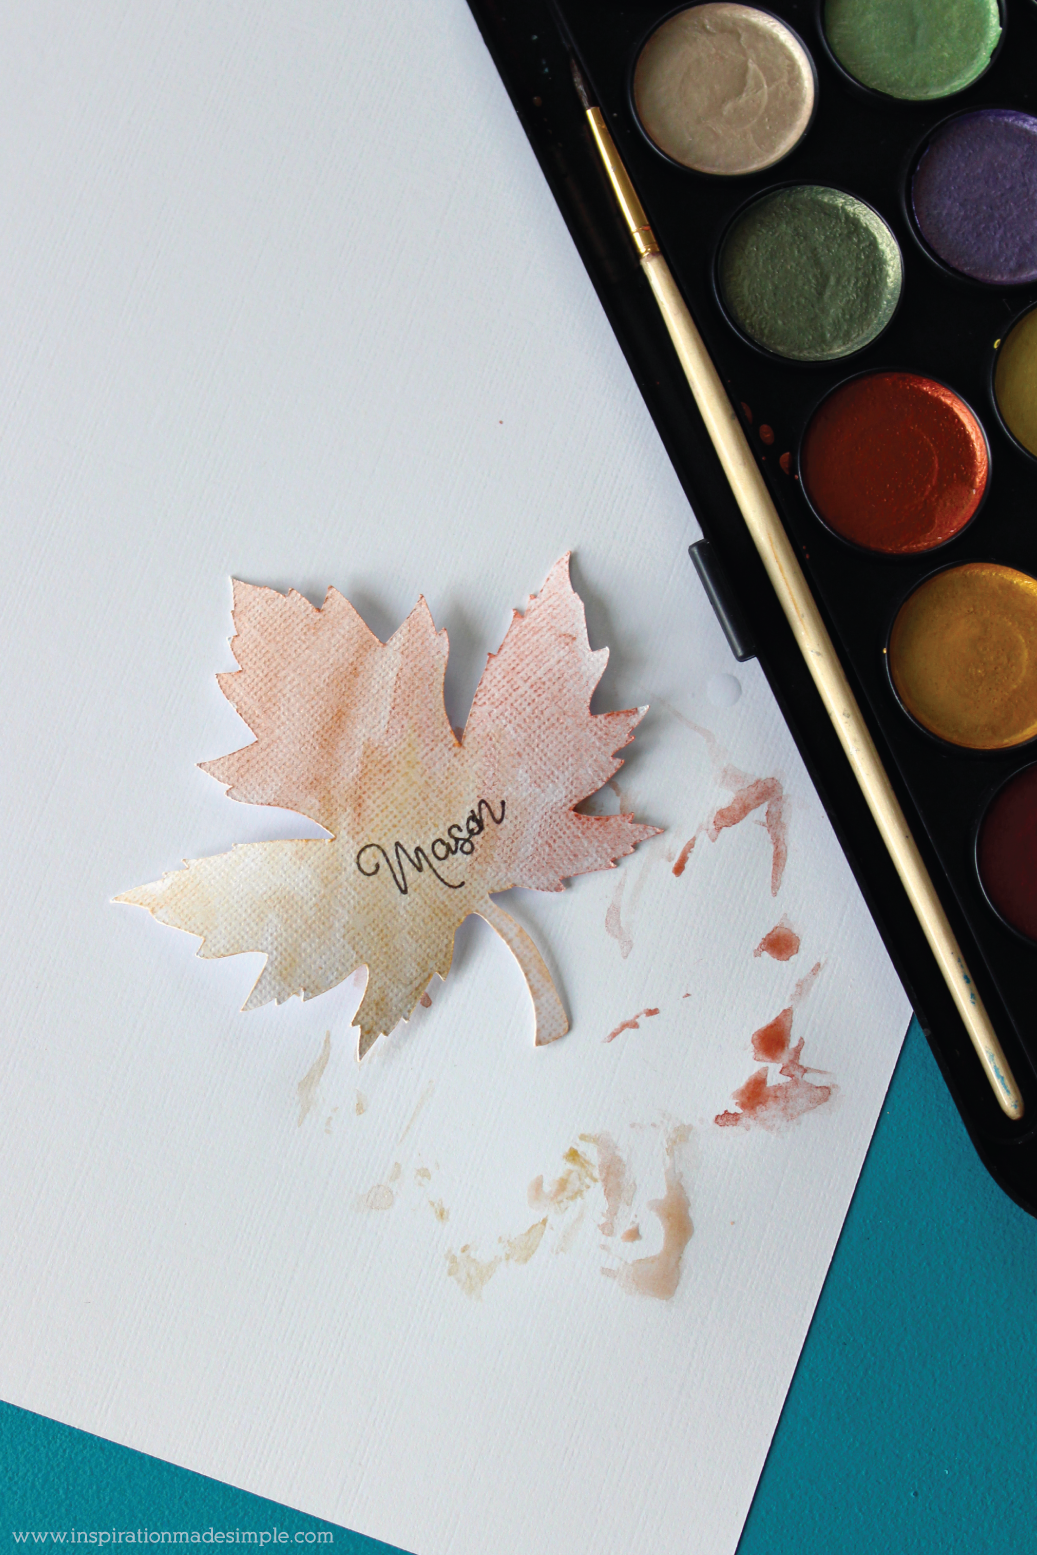
Once the leaf is cut, take it off from the mat and using watercolor paints, paint as desired.
That’s all there is to these super simple, yet super classy Place Setting Cards!
Want to see the new Cricut Explore Air 2 in action? Watch the video below to see how quick it is create these picture perfect place setting cards!
Do you have a Cricut Explore? What is your favorite Cricut project you’ve ever created?

I can do this on my maker, right?
You sure can!