
I recently shared that I left my full-time job and started my own business, Inspiration Media Solutions. Because of that, my craft room needed a makeover. Setting up a home office isn’t hard, but I had specific needs that I needed to address – storage for my craft supplies, a large two-person desk that had lots of space for crafting AND work, and I wanted it to be pretty. Hey, I am working out of it full-time, so it had to be a blend of form and function! Keep reading to see how I made my 8′ Butcher Block Top Desk for only $400 and to see the rest of my DIY Home Office Decor.
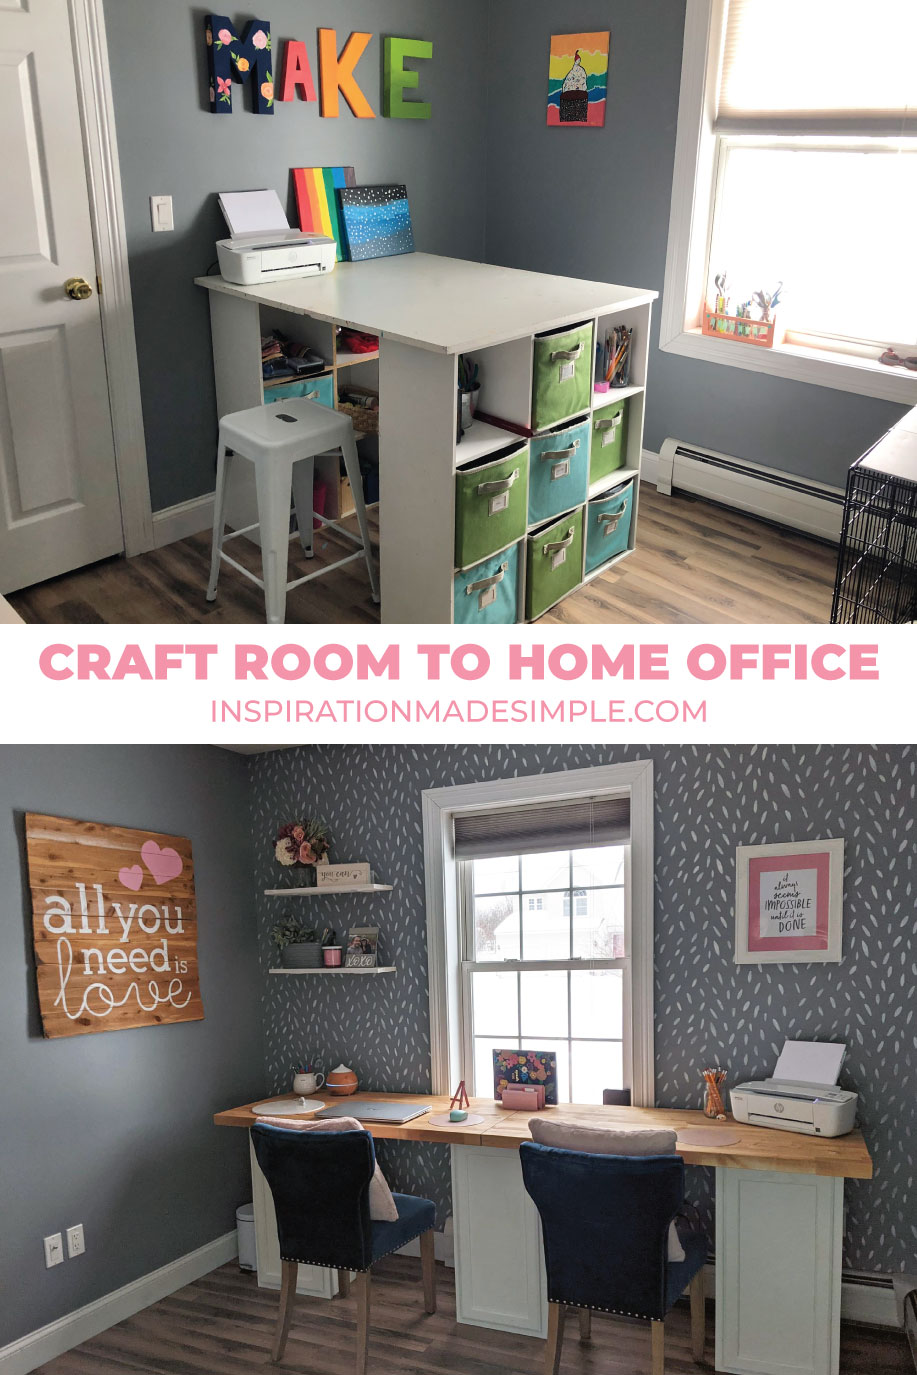
Are you ready to see my new home office? Well first, let’s look at what it looked like before:
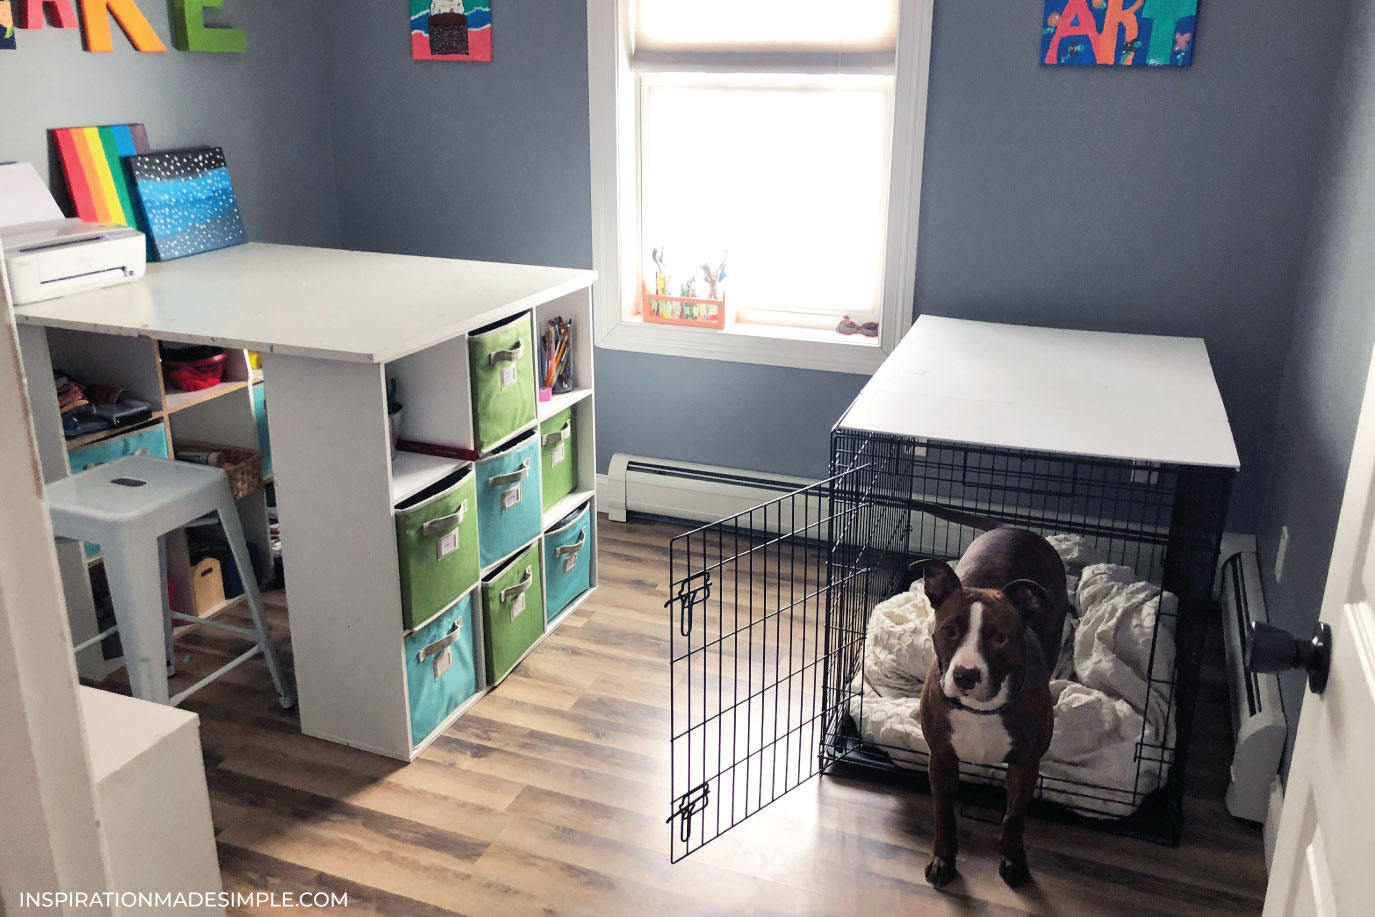
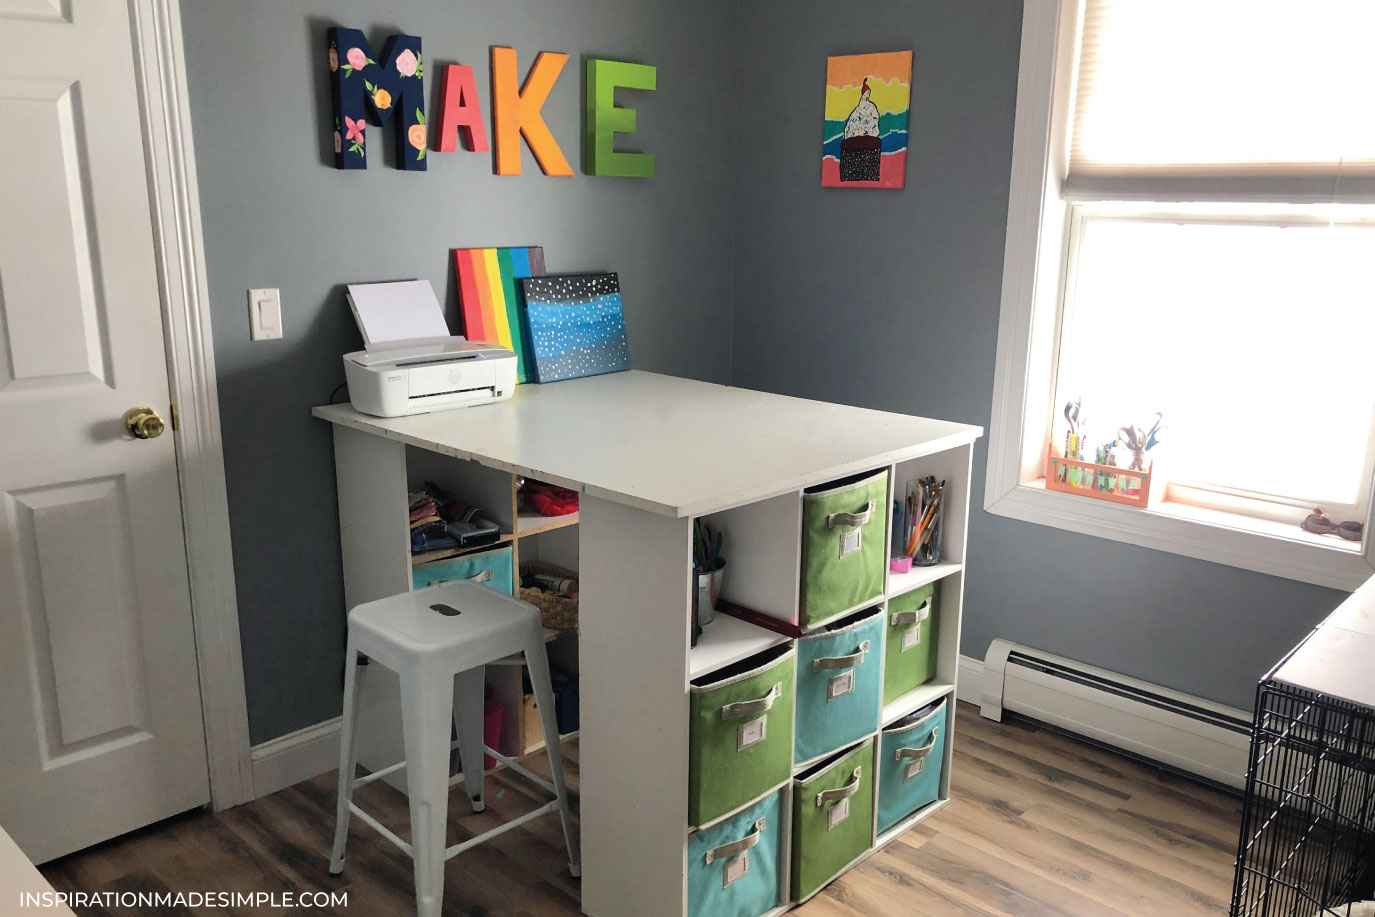
To be honest, the craft room was a bit of an eye-sore. It’s a small space, the room is only 8×10, so the table only really fit one way, plus we had the dog crate from when we adopted Owen, our Pibble. Neither of our dogs use it anymore, so it definitely had to go.
Alright, so that’s the craft room before… are you ready to the new office setup?
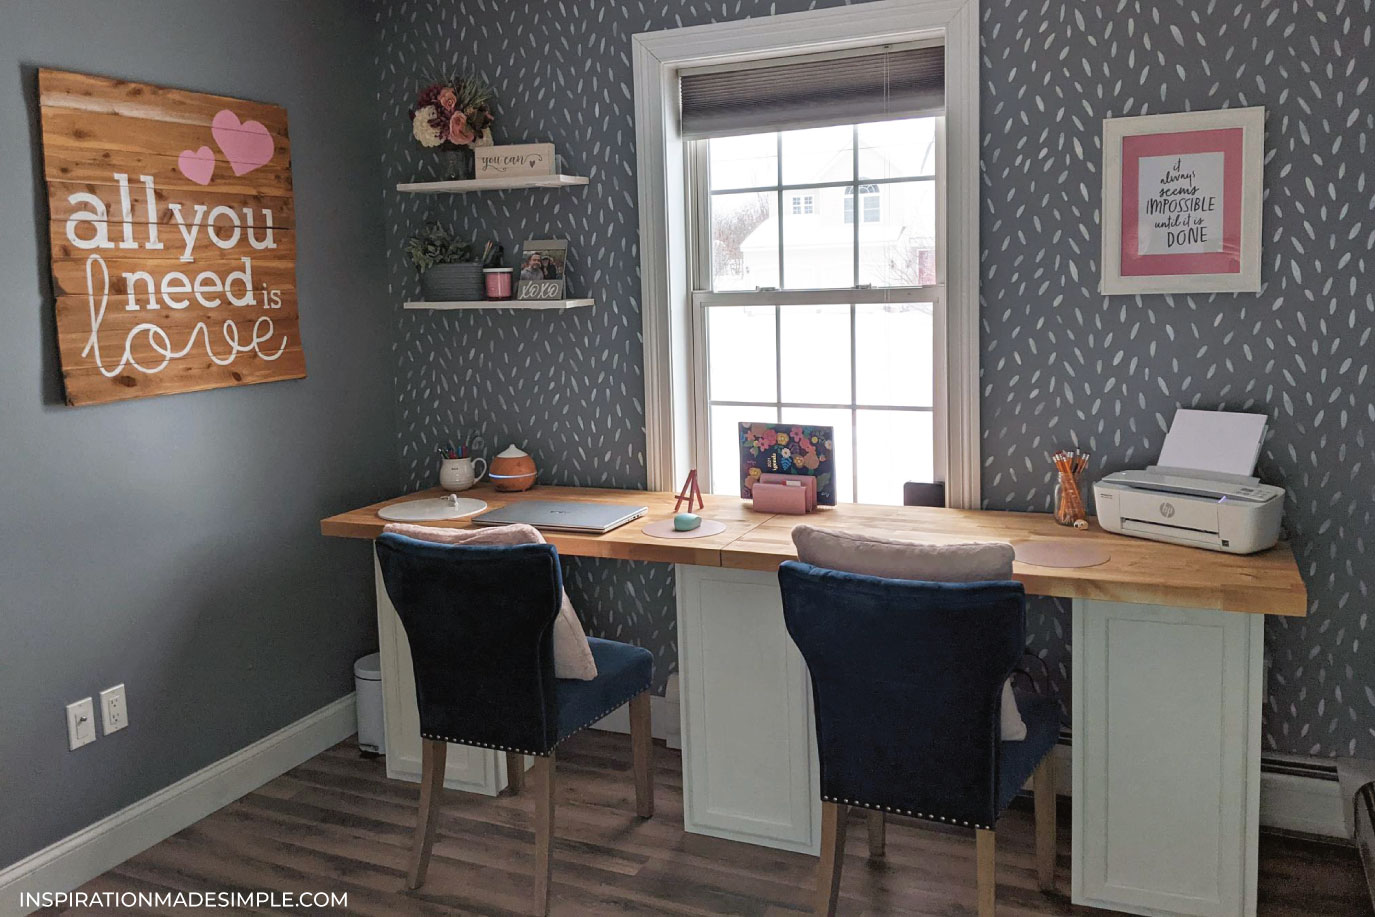

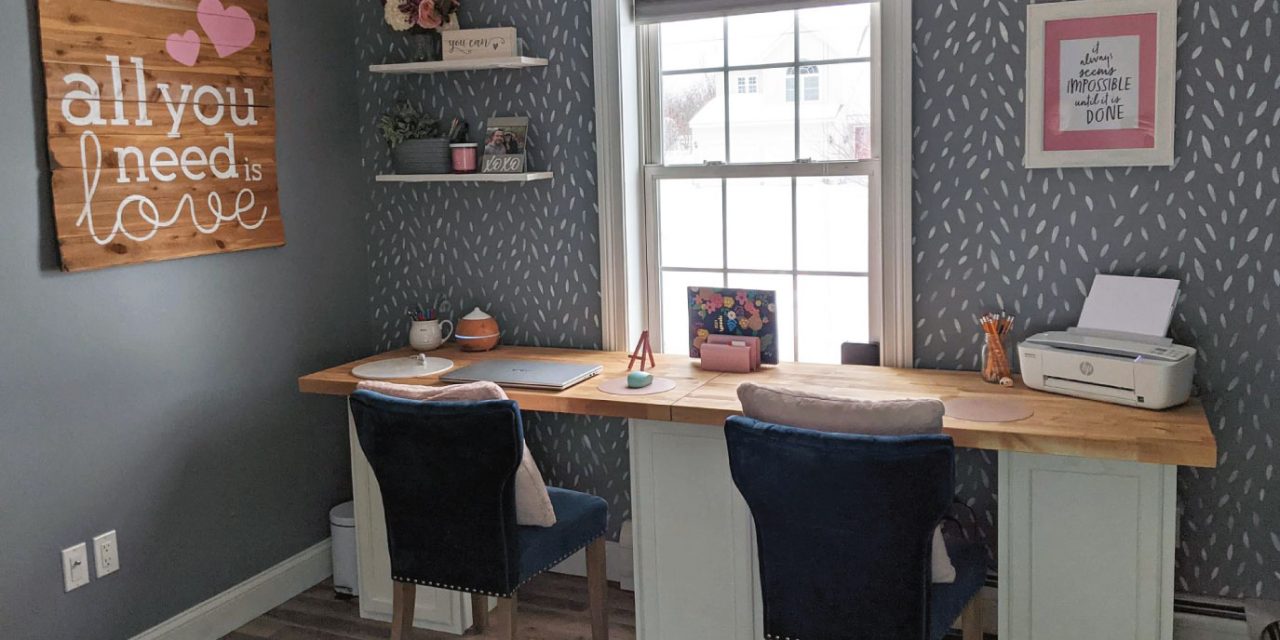
So good, right? I absolutely love the end result! It’s comfortable and has everything I need – tons of storage, tons of workspace, and a great, feminine vibe for a woman-owned business!
Let’s get to the details of the room, shall we?
Wall Stenciling
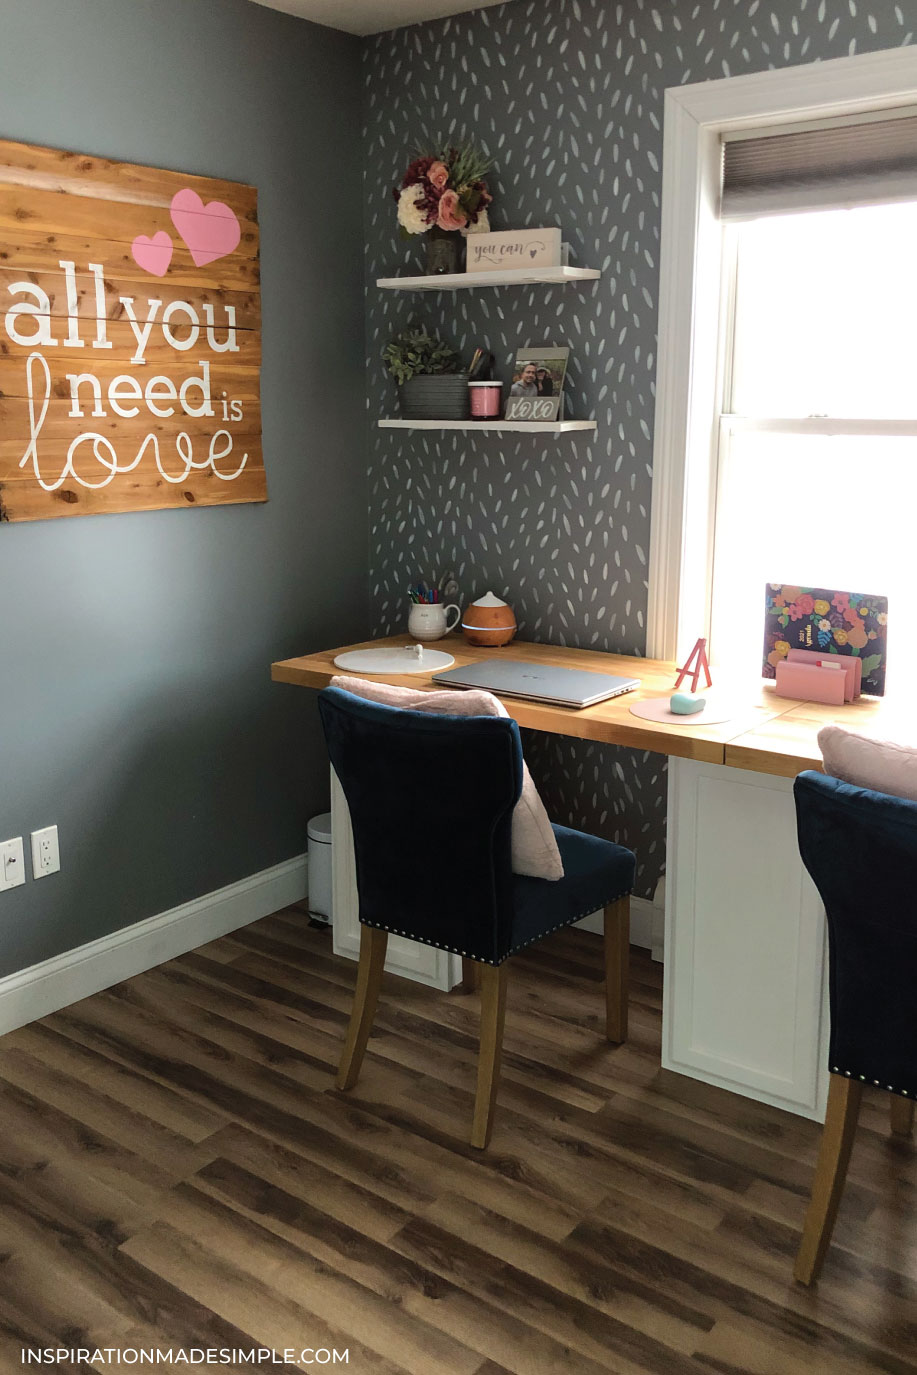
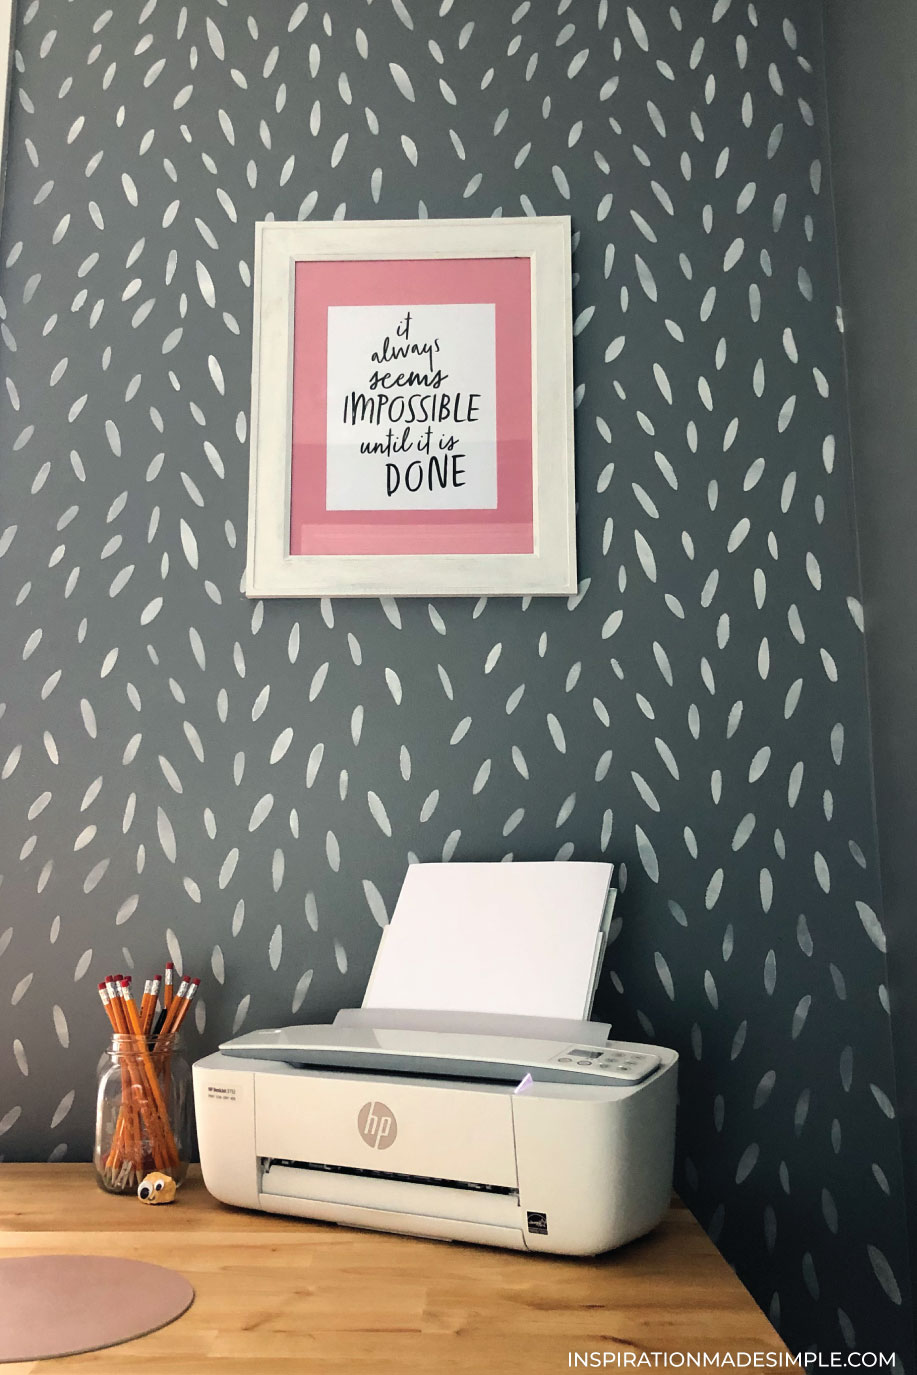
I had contemplated painting the room, but I actually really love the gray-blue color that it was already painted. So instead, I created a gorgeous statement wall using a wall stencil that I found on Etsy. I love the geometric, graphic style – and it also meant I didn’t have to be super precise with the stencil – bonus!
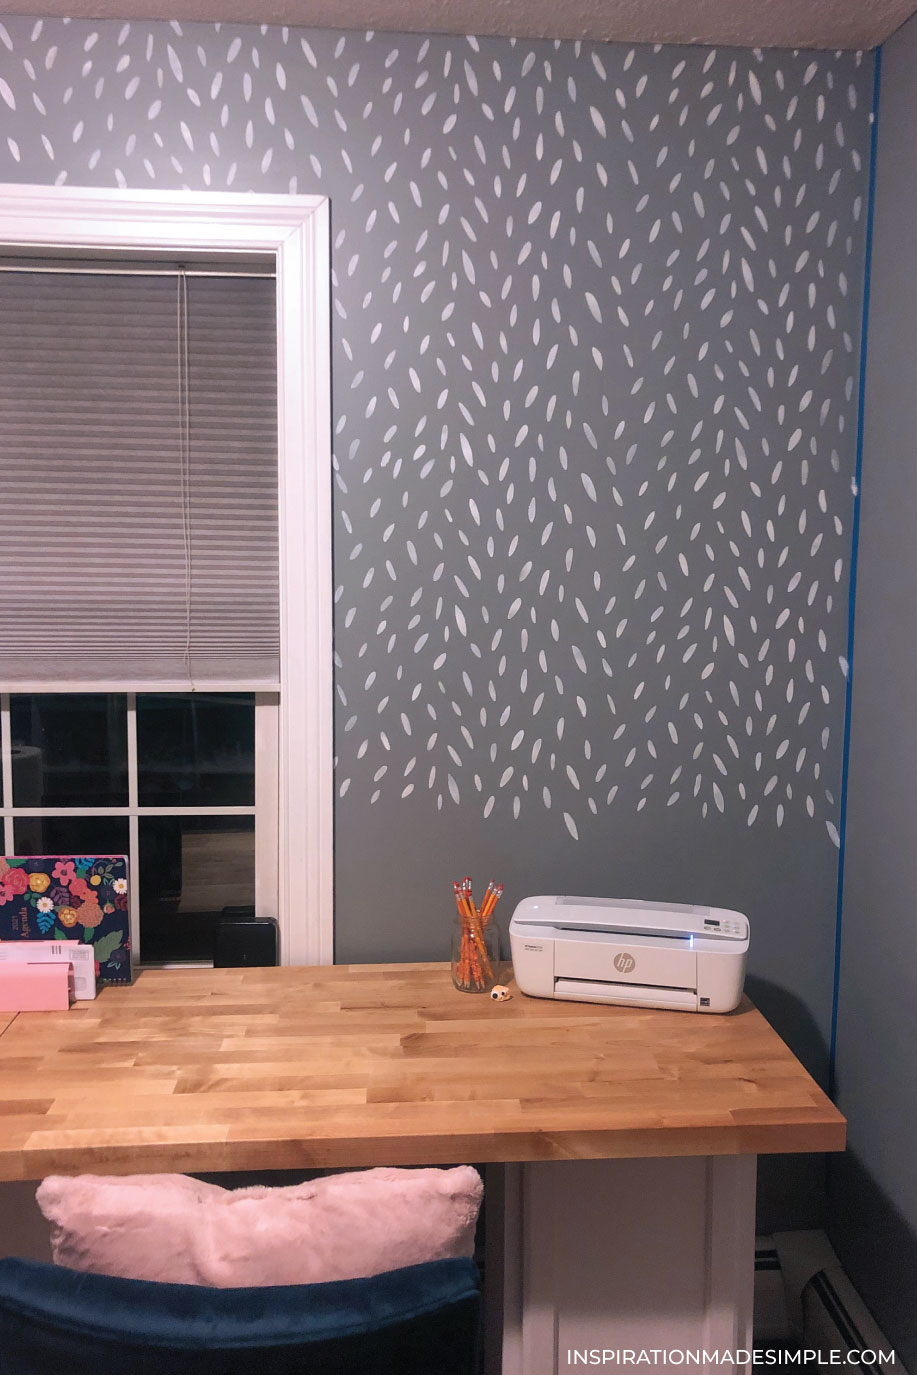
Using a foam roller and semi-gloss latex paint, I got to work on the wall. The trick to stenciling is to not over-saturate the roller. You want to use thin coats of paint.
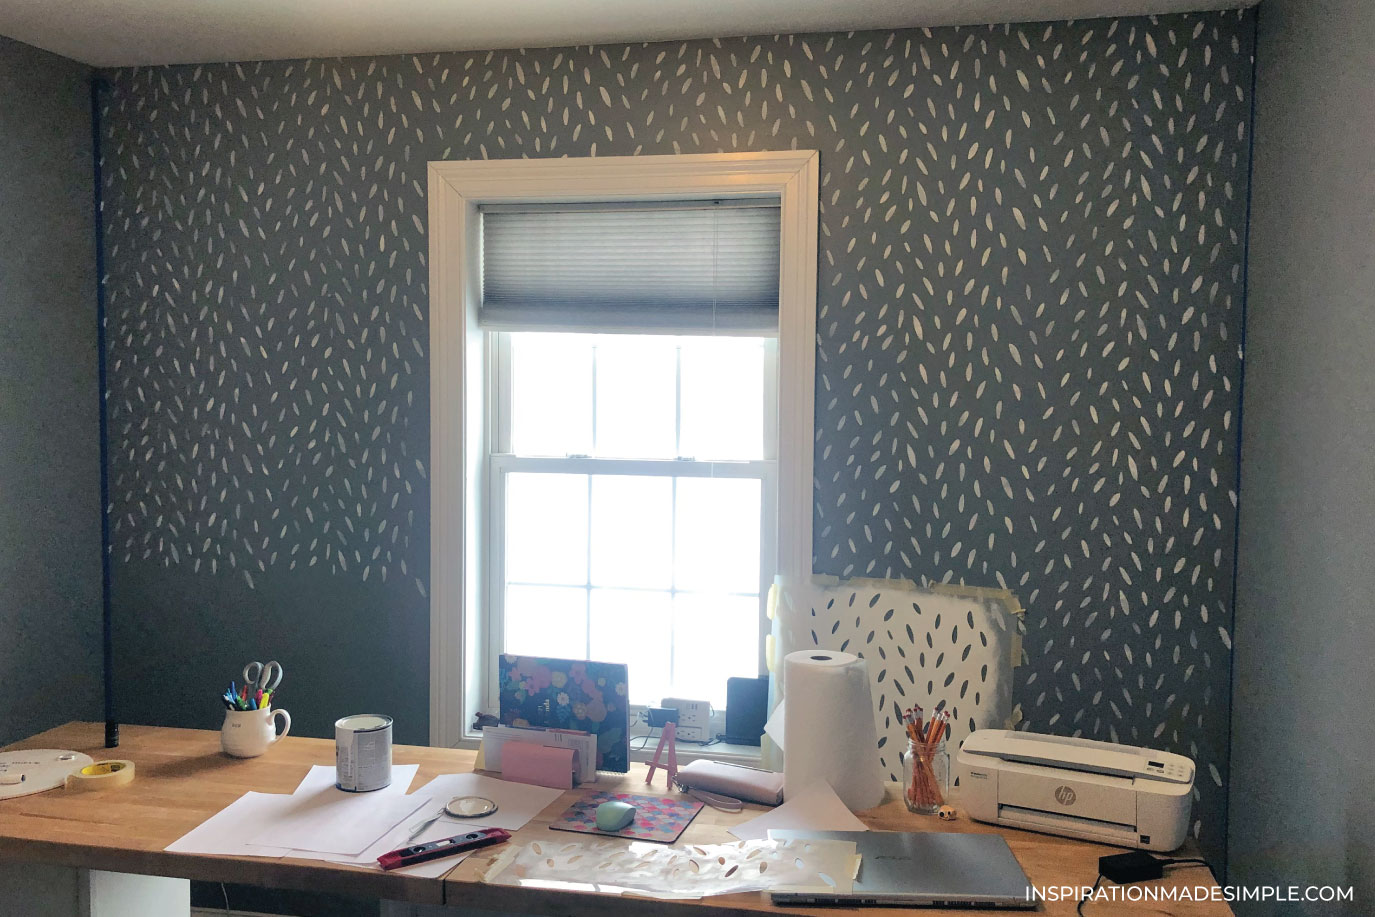
I did two coats – by the time I finished the bottom of the stencil, the top was dry and I would go over the whole thing again.
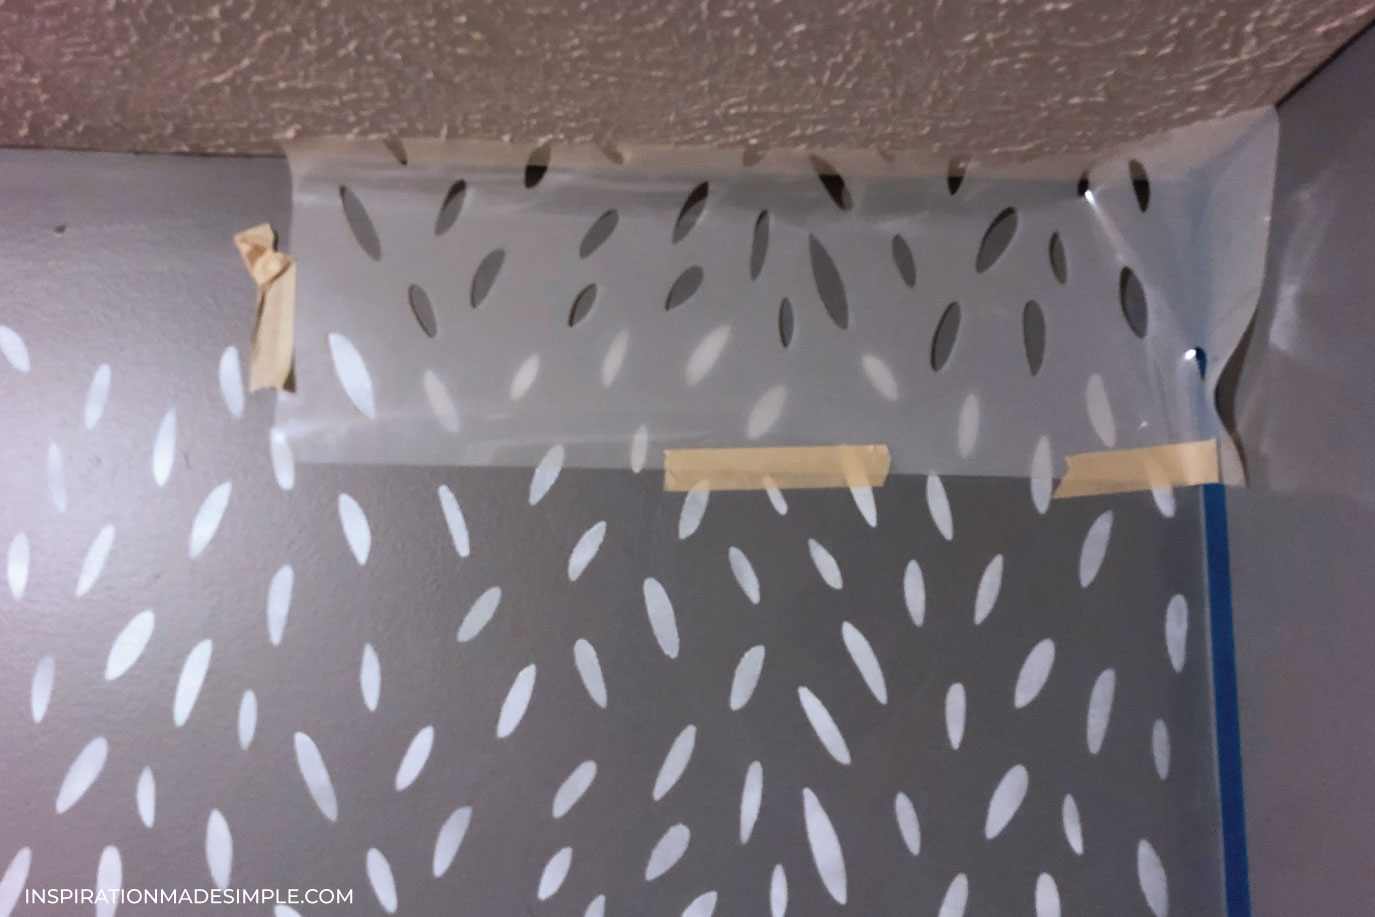
The large wall stencil came with a ceiling section- so I got a nice finish along the top. I went in along the edges of the window and the walls and added a few extra “leaves” here and there so that it looked complete. If there was a hard to reach space, I used a foam brush and “stippled” the paint on.
The whole wall took about 4 hours – so not a speedy project, but definitely worth it! I absolutely love that I have an interesting office background for videos and photos.
DIY Office Desk
Next up is the DIY Butcher Block Desk. I originally planned on an 8′ butcher block, but quickly realized it wouldn’t fit in my Jeep, so ended up with two 4′ sections. I knew I wanted a natural finish so chose a Butcher Block Conditioner. If you’ve never used it, it couldn’t be any easier!
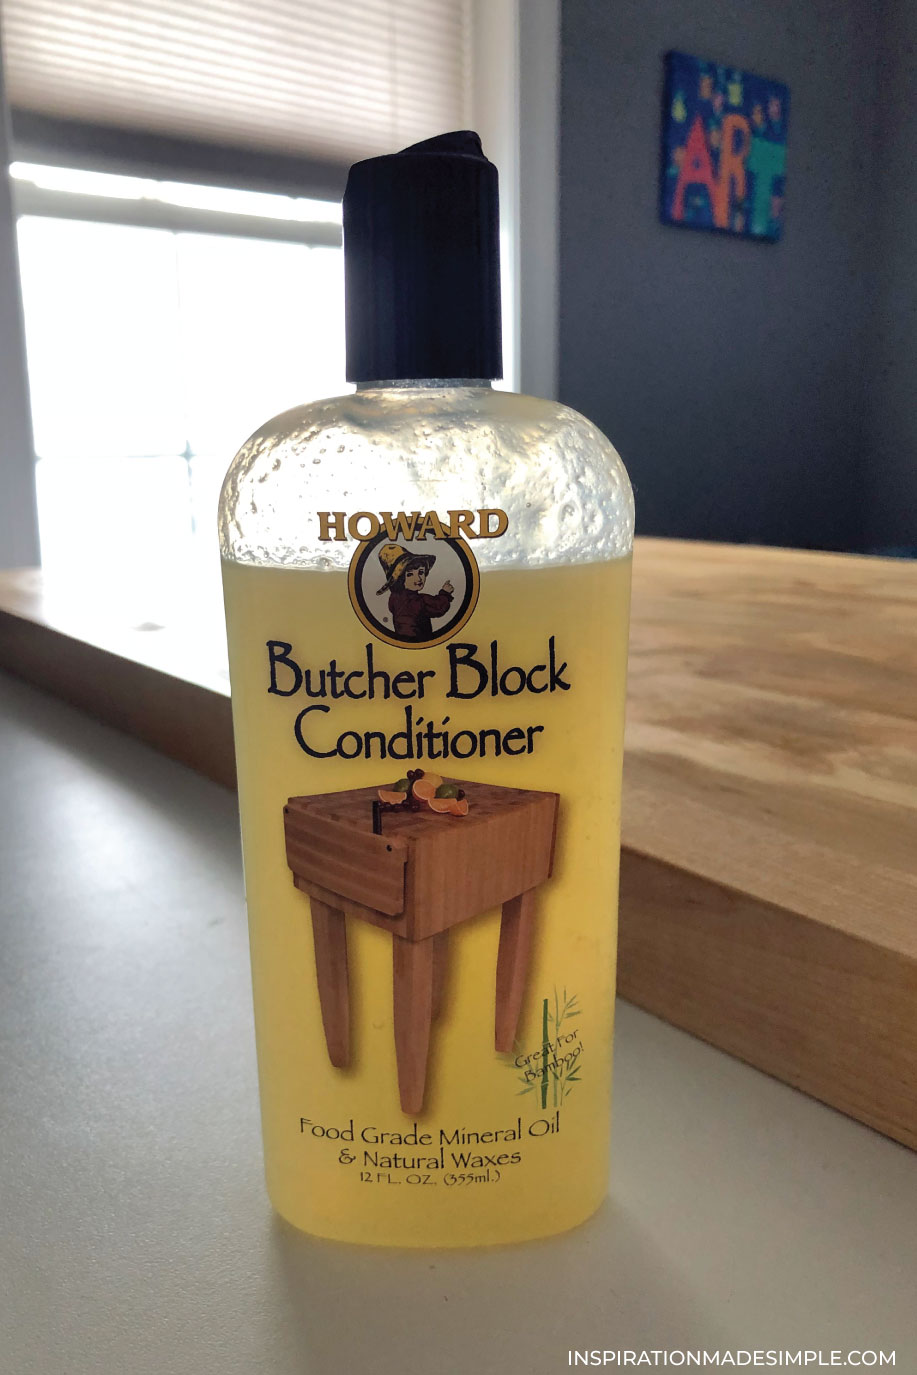
Simply squeeze some conditioner onto the butcher block, and with a latex glove on your hand, massage it into the wood. After completely covering the top and sides, let it sit for 20 minutes, and then using a clean cloth, wipe it off.
After one coat there was an immediate color change:
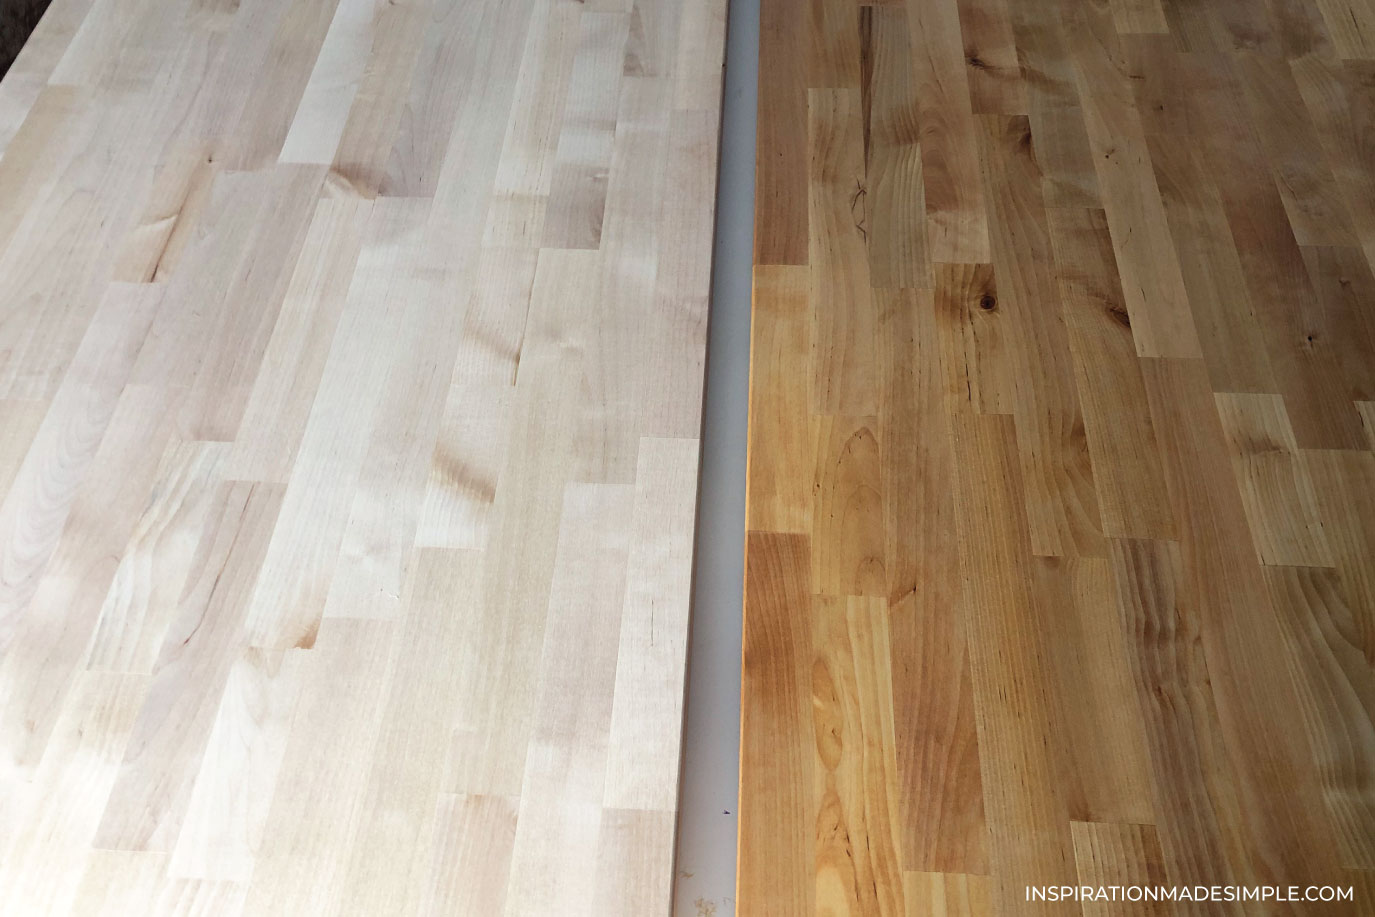 I did 3 coats and had plenty leftover, so one bottle goes a long way!
For the base of the DIY home office desk, I originally ordered three 27.5″ file cabinets from Walmart. After two weeks of waiting, and three phone calls with the assurance that they were on their way, I received an email saying that they weren’t sure where the cabinets were and didn’t know when or if I’d receive them.
Needless to say, after that email I said, “to heck with that!” and we started looking around. Being in Northern Vermont means there aren’t a lot of store options, so we headed to Lowe’s in the hopes they’d have something… and we scored! While browsing I saw some unfinished wall cabinets that were affordable and looked to be about the right size. I purchased three for about $50 each, brought them home, and painted them with white chalky finish paint and a foam roller.

After allowing the cabinets to dry overnight, we placed them into the office and put the butcher block tops on. Once the desk was where I wanted it, I used industrial strength Velcro to attach the top to the cabinets. It’s how I had attached the top on my DIY craft room table 7 years ago, so I knew it would hold up. For $400, a little elbow grease, and no power tools, I ended up with a DIY two person 8′ desk that I love!
Inside the desk cabinets are file bins and folders for my work stuff, notebooks, and other necessary items. Perfectly stored out of sight but within reach.
The desk is probably my second favorite part of the whole room. I couldn’t be more excited with my office furniture! The chairs were a cool find at a local discount store. They literally only had two, so I feel like it was made to be! They’re a beautiful blue velvet and are comfortable to sit in all day. I added a pink pillow to each to tie in the rest of the decor.
Office Storage

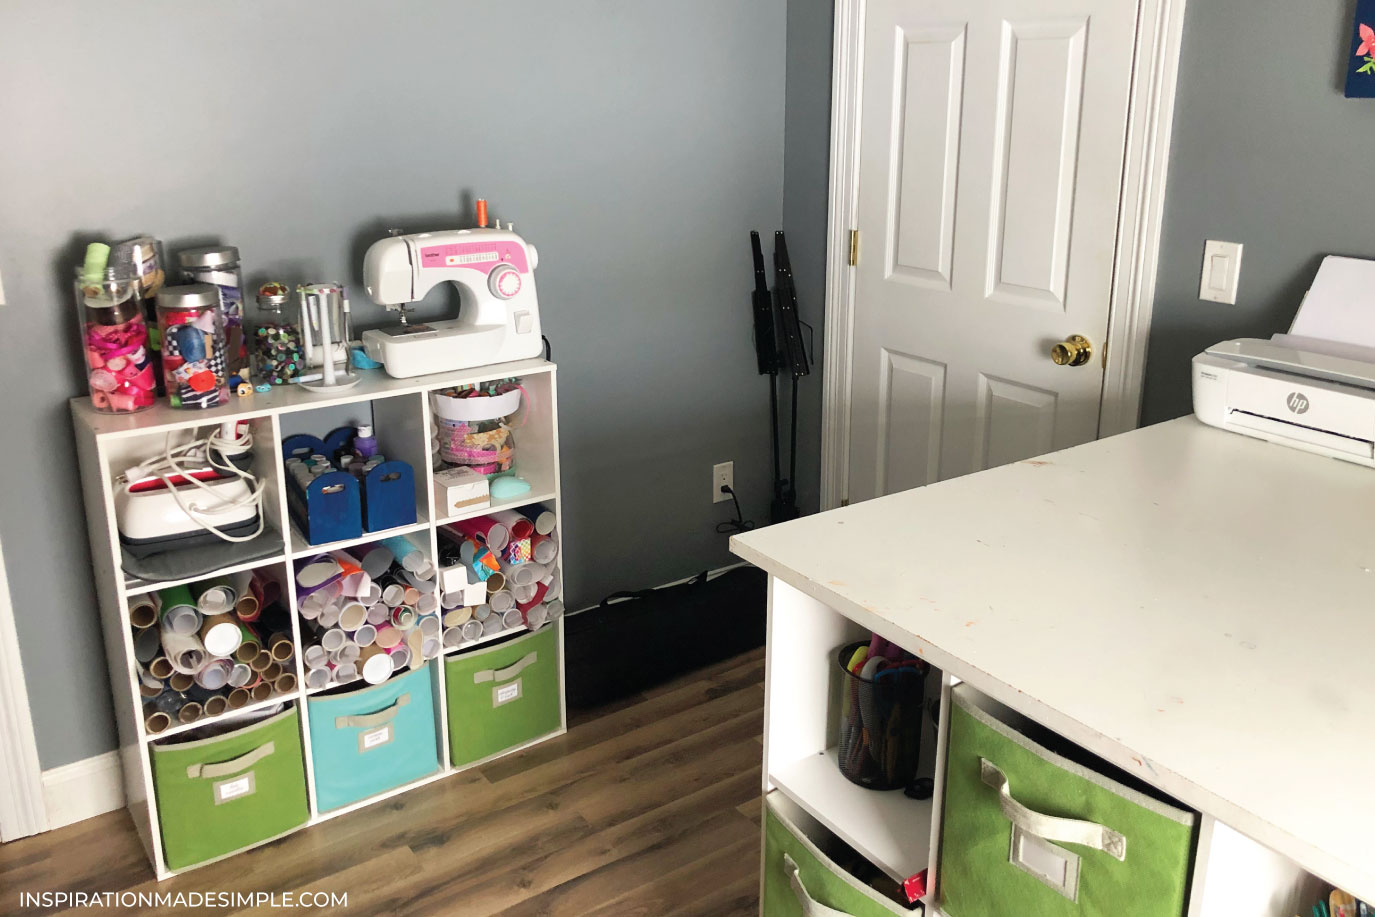
The other side of the office is all storage. I reused the storage cubbies from my old craft table and made a wall of storage. I purchased new, coordinating fabric bins to hide the majority of craft supplies in. Jars and tin bins from the dollar store were used for supplies that could act as display pieces. Office supplies that I want readily available, like paper and cardstock, are also in the cubbies. Simple office storage that looks great too!
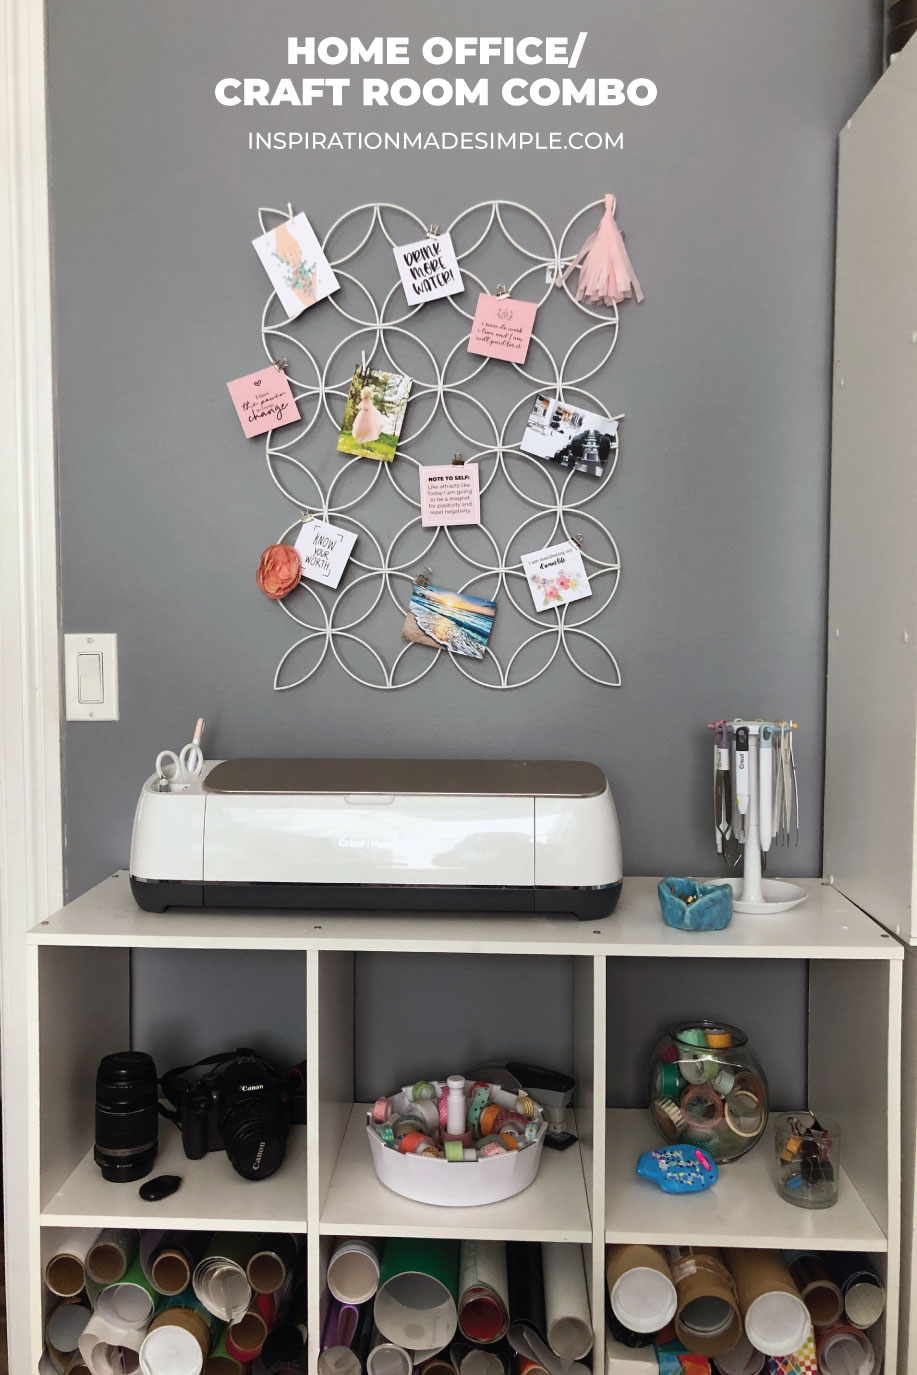
The blank wall space above the Cricut Maker was filled with with a vision board. I figured that going out on my own was a great time to start putting out into the world my expectations! The board is filled with quotes to remind me of my goals, as well as some other personal reminders. I kept the vision board color-coordinated with the rest of the room which fills me with so much happiness!
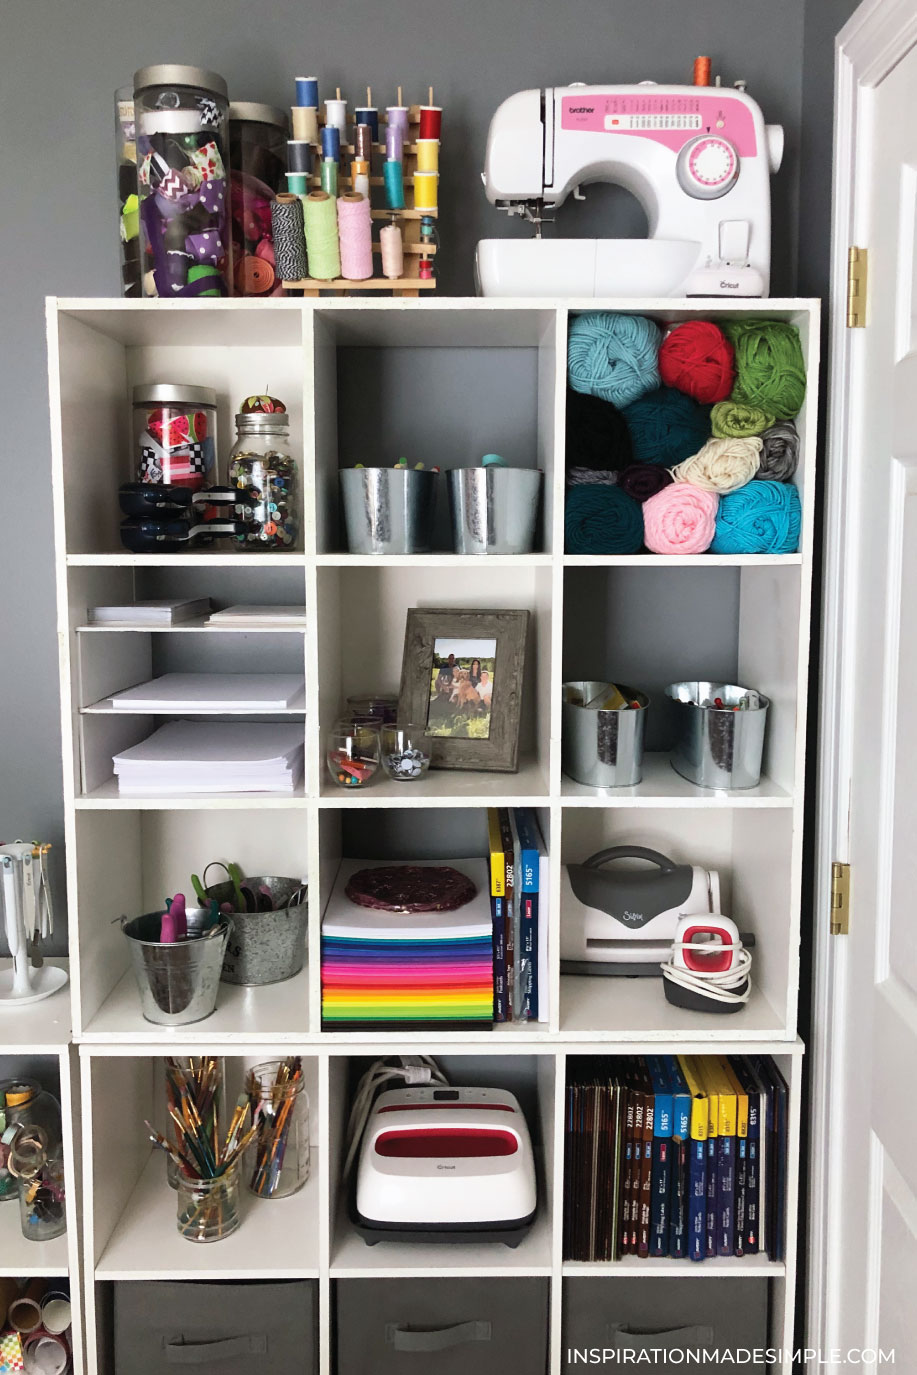
The cubbies are a bit smaller than others I’ve seen, so finding paper trays to fit inside them just wasn’t happening. Instead, I got creative and used foam board to turn one of the cubbies into a 3-tier paper holder! Everything has a place and it doesn’t look messy or overstuffed. I was a little nervous about stacking the storage cubbies, but in the end, it worked out perfectly. I don’t have young children so am not concerned about anchoring them to the wall, but if you do, I’d definitely recommend doing so.

There was a lot of purging and sorting during this makeover and the closet definitely thanked me! So much easier to get to the stuff inside it now!
Office Wall Decor
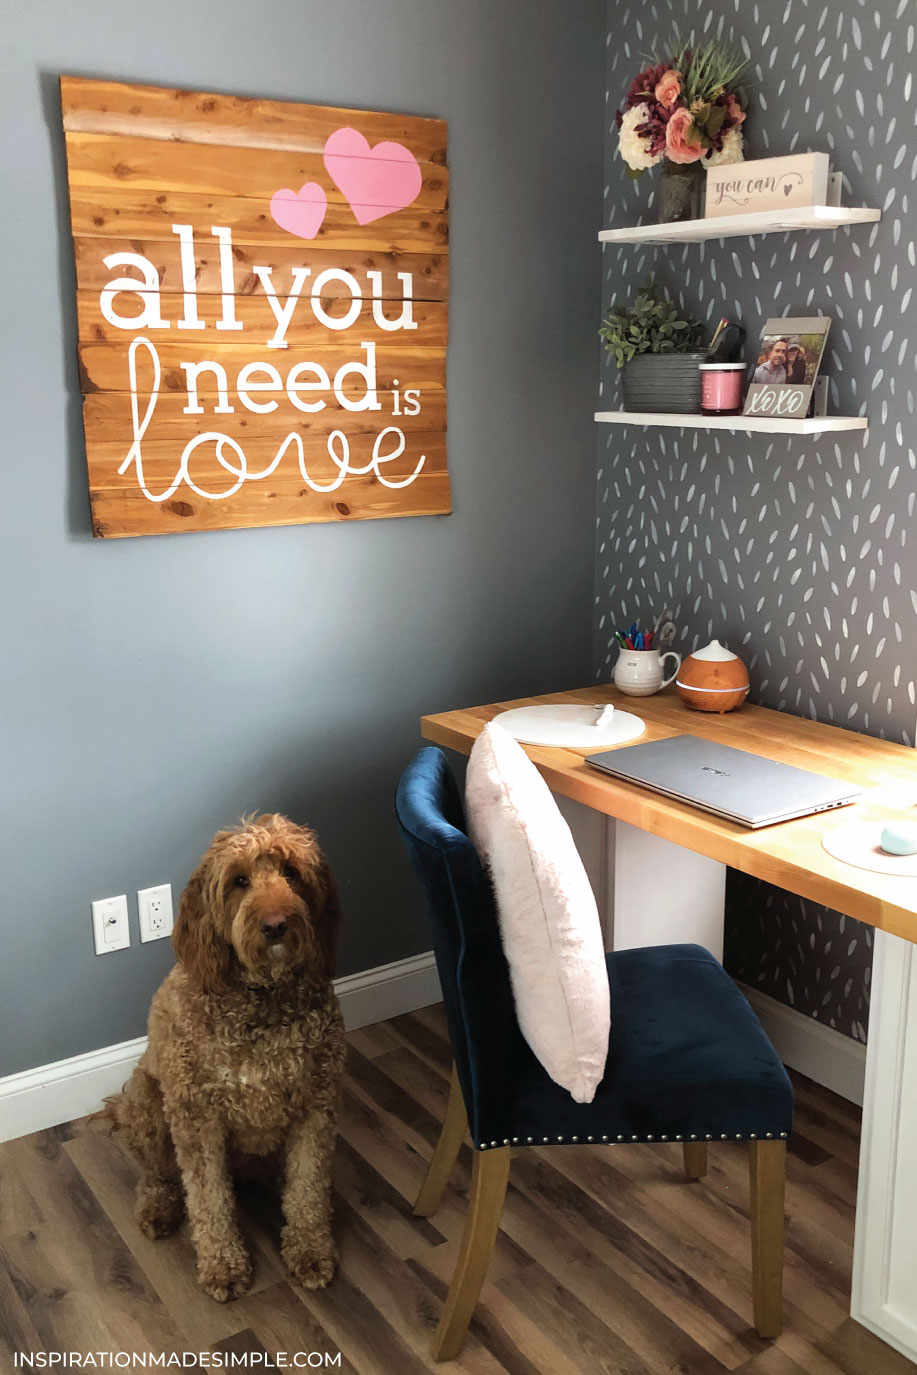
If you’ve been an Inspiration Made Simple reader for a while, you may recognize the cedar plank wall sign. It got a slight update by changing the hearts to a pink color. If you’re interested in making the DIY Floating Shelves, I shared the tutorial last week!
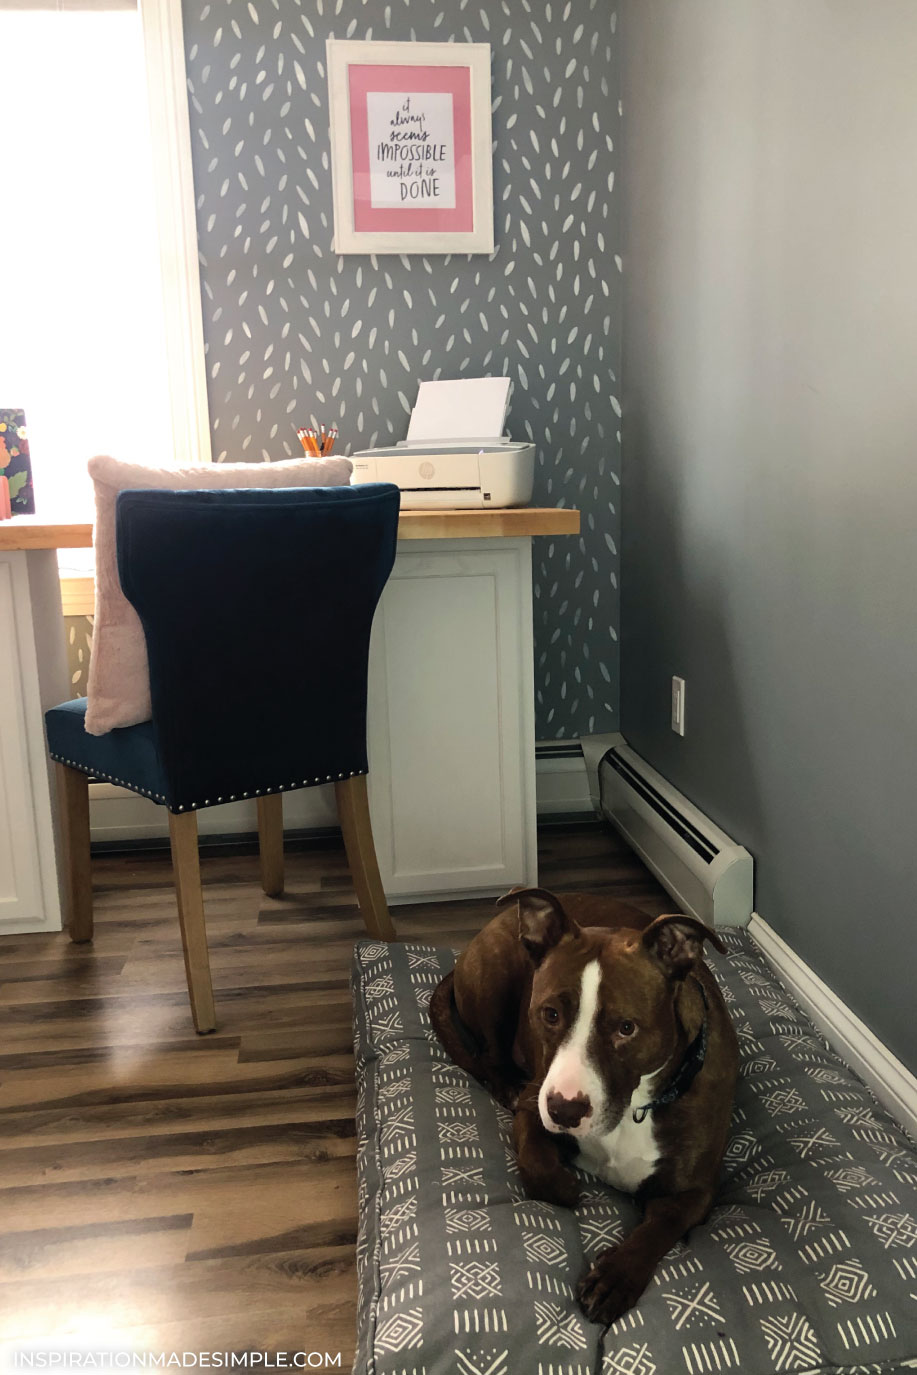
And as you can see, I have the best co-workers! Did you notice the print on the wall? It was a quote that seemed fitting, so I created an 8×10 print and framed it. Originally I purchased a frame that matched the rest of the ones in my home, but I didn’t love it in the office, so I painted it white with chalky finish paint. I painted the picture mat pink to match and then added the quote that was printed on my HP Deskjet 3752.
Thanks for reading and checking out my new home office! If you’re setting up an office space, I hope you found some inspiration.


My sweet hubby surprised me with this fun plaque, which fits perfectly on my shelf!


I love how your craft room turned out. I am especially in love with your desk. I can envision my own craft room in a nice deep purple wall color and do some stenciling like you did. But really WOW to your new craftroom.
Thanks Monika! I love when the project comes together so nicely. The stenciling is definitely one of my favorite parts. I love that I have a cool place to shoot video with an interesting background. It’s the little things, right?