
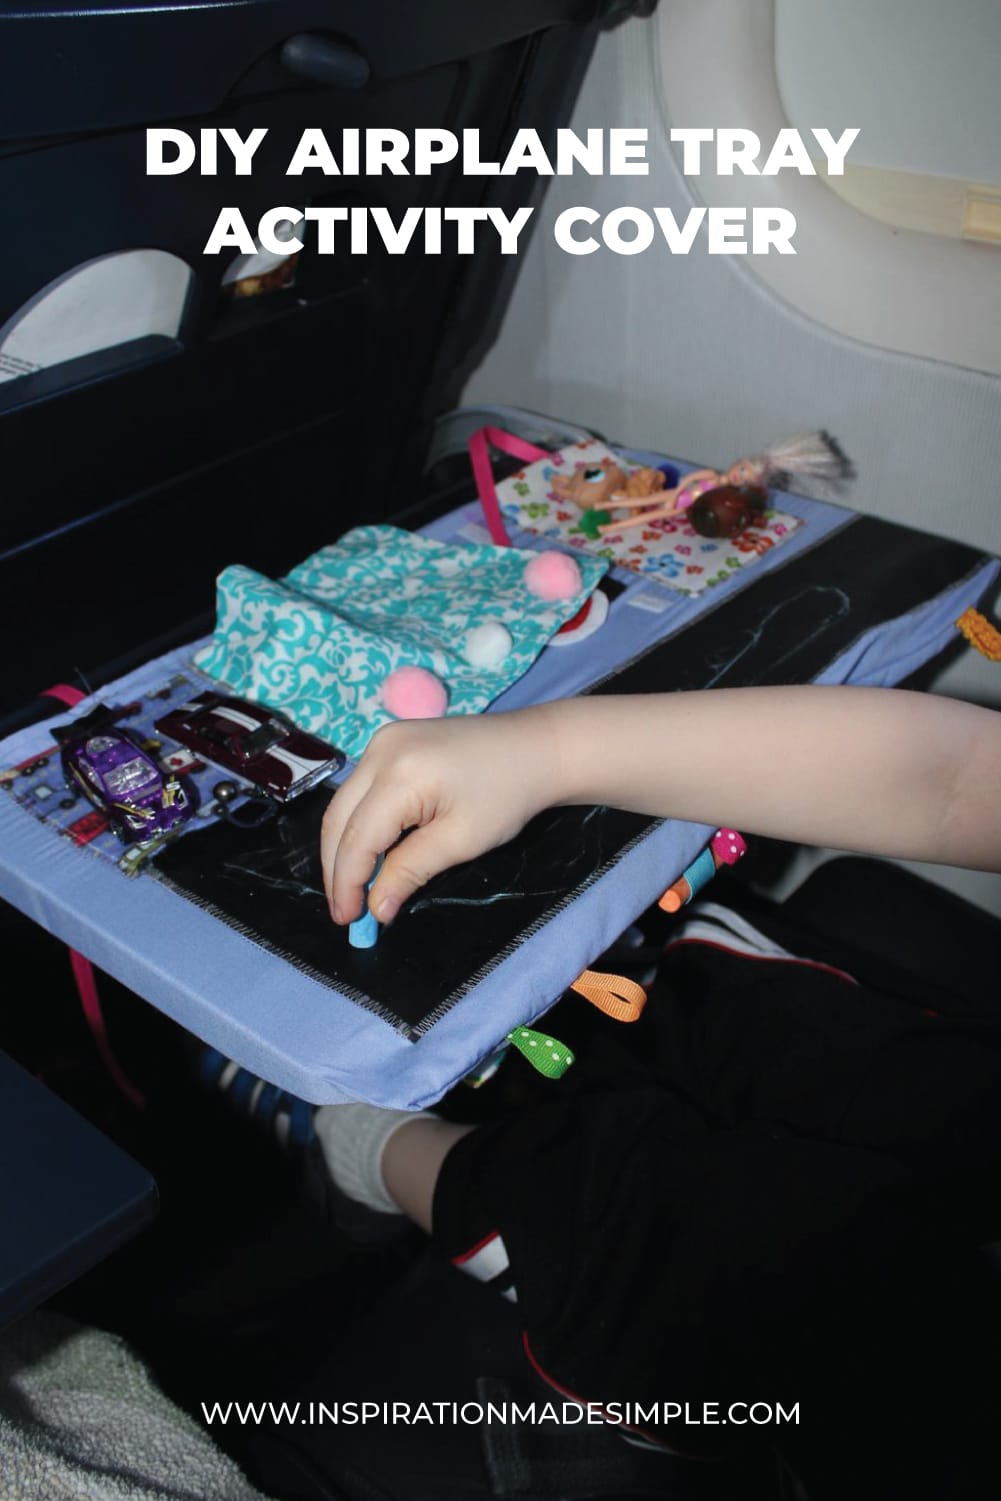
Traveling with young children can be a challenge, especially on long flights. Keeping them occupied and happy can feel like a constant battle. This DIY Airplane Tray Cover is a creative solution to transform that tray table into a fun and engaging play space! We’re headed to Florida for a family vacation, and I’ve been scrambling to make sure I have enough things to keep my 20-month-old and 3-years-old entertained.
After a bit of brainstorming, I ended up with this fun activity center that is perfect for busy toddlers who crave constant stimulation! The DIY Airplane Tray Cover provides a dedicated area for their favorite toys and activities, all within easy reach. Plus, it’s a great way to save space in your carry-on by utilizing the tray itself as part of the play zone.
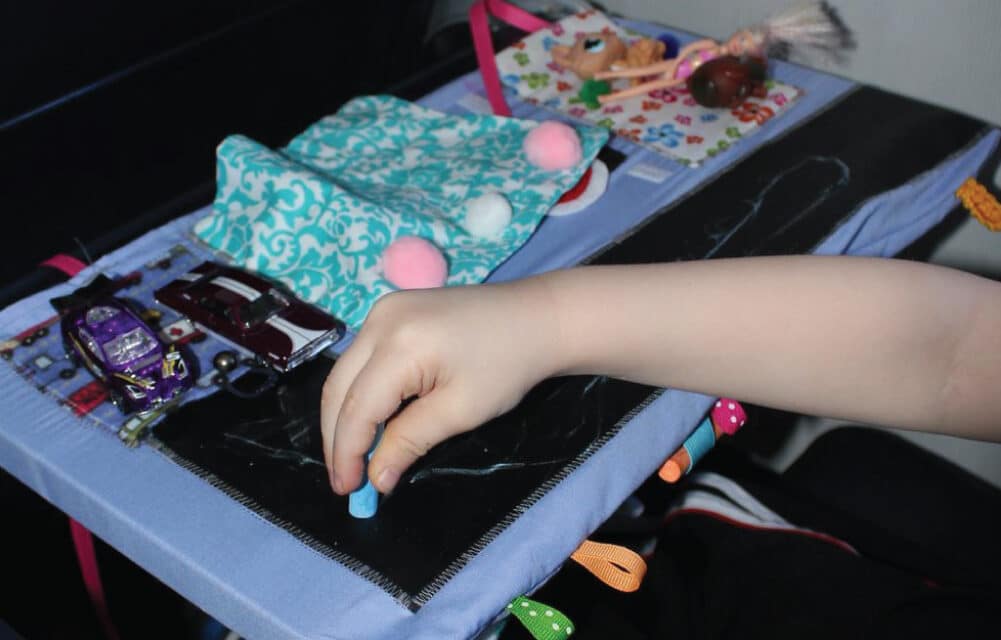
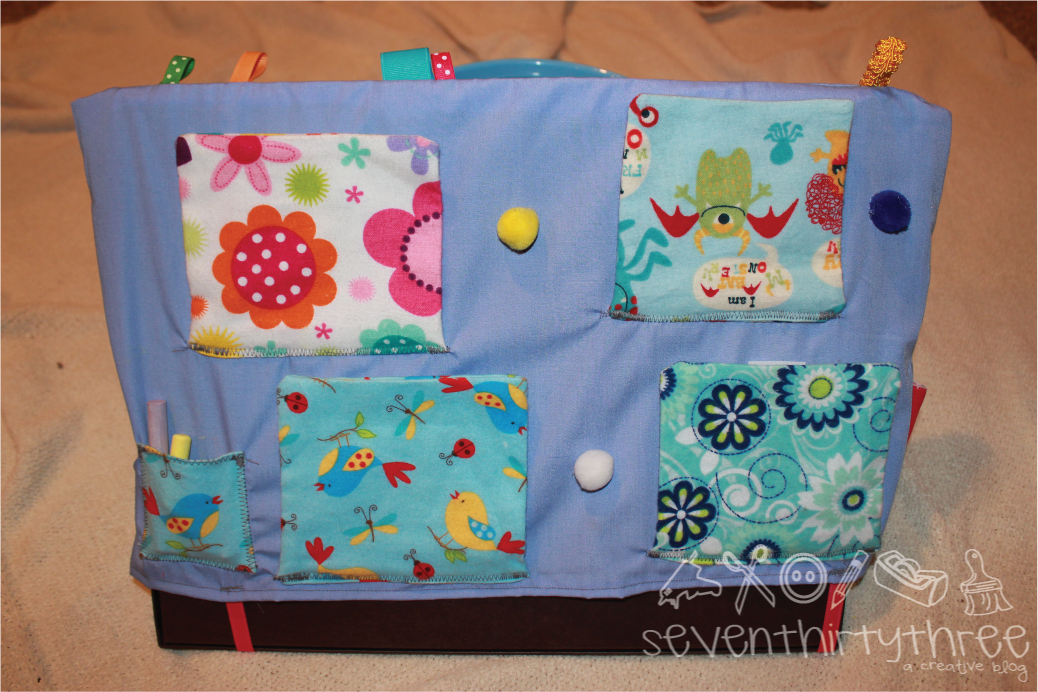
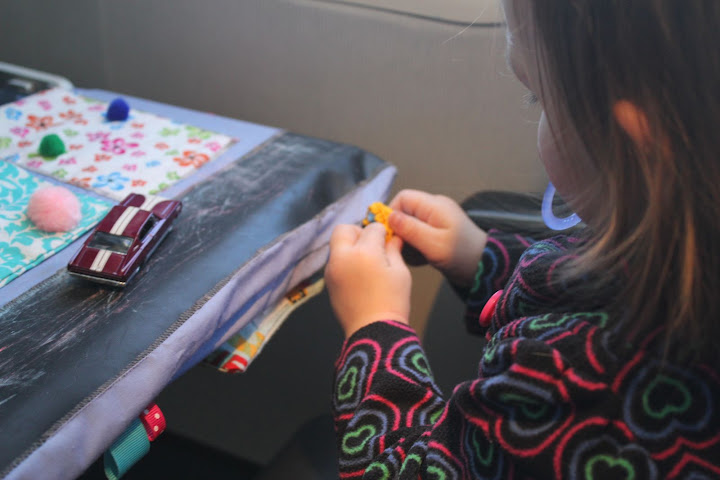
Front of my Airplay Tray Cover for Kids:

Two Matchbox cars are parked in the garage pocket and can drive on the chalkboard fabric road.
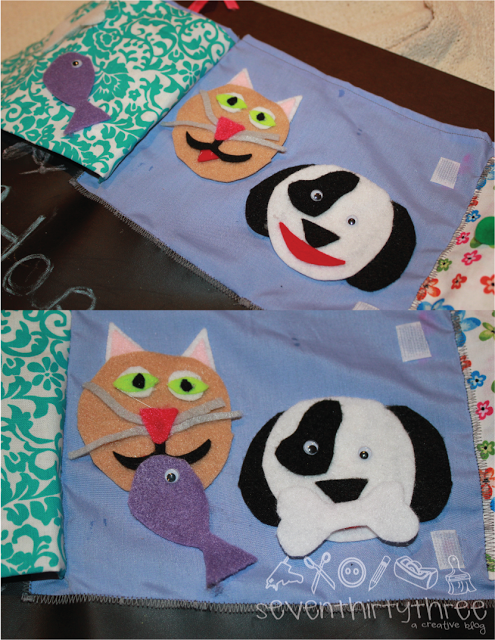
The middle door with pom-poms opens to reveal a felt cat and dog that can play with a felt fish and bone.
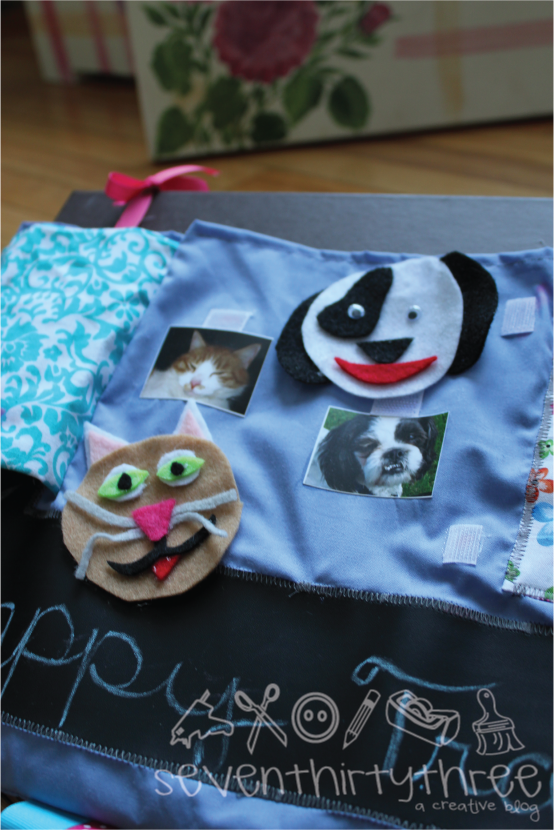
When you remove the dog and cat, they reveal pictures of our two furry family members that we had to leave at home (adhered to the fabric with Mod Podge)! Lastly, there is a velcro closure pouch to hold a few smaller toys such as a Polly Pocket and a couple of Littlest Pet Shops.
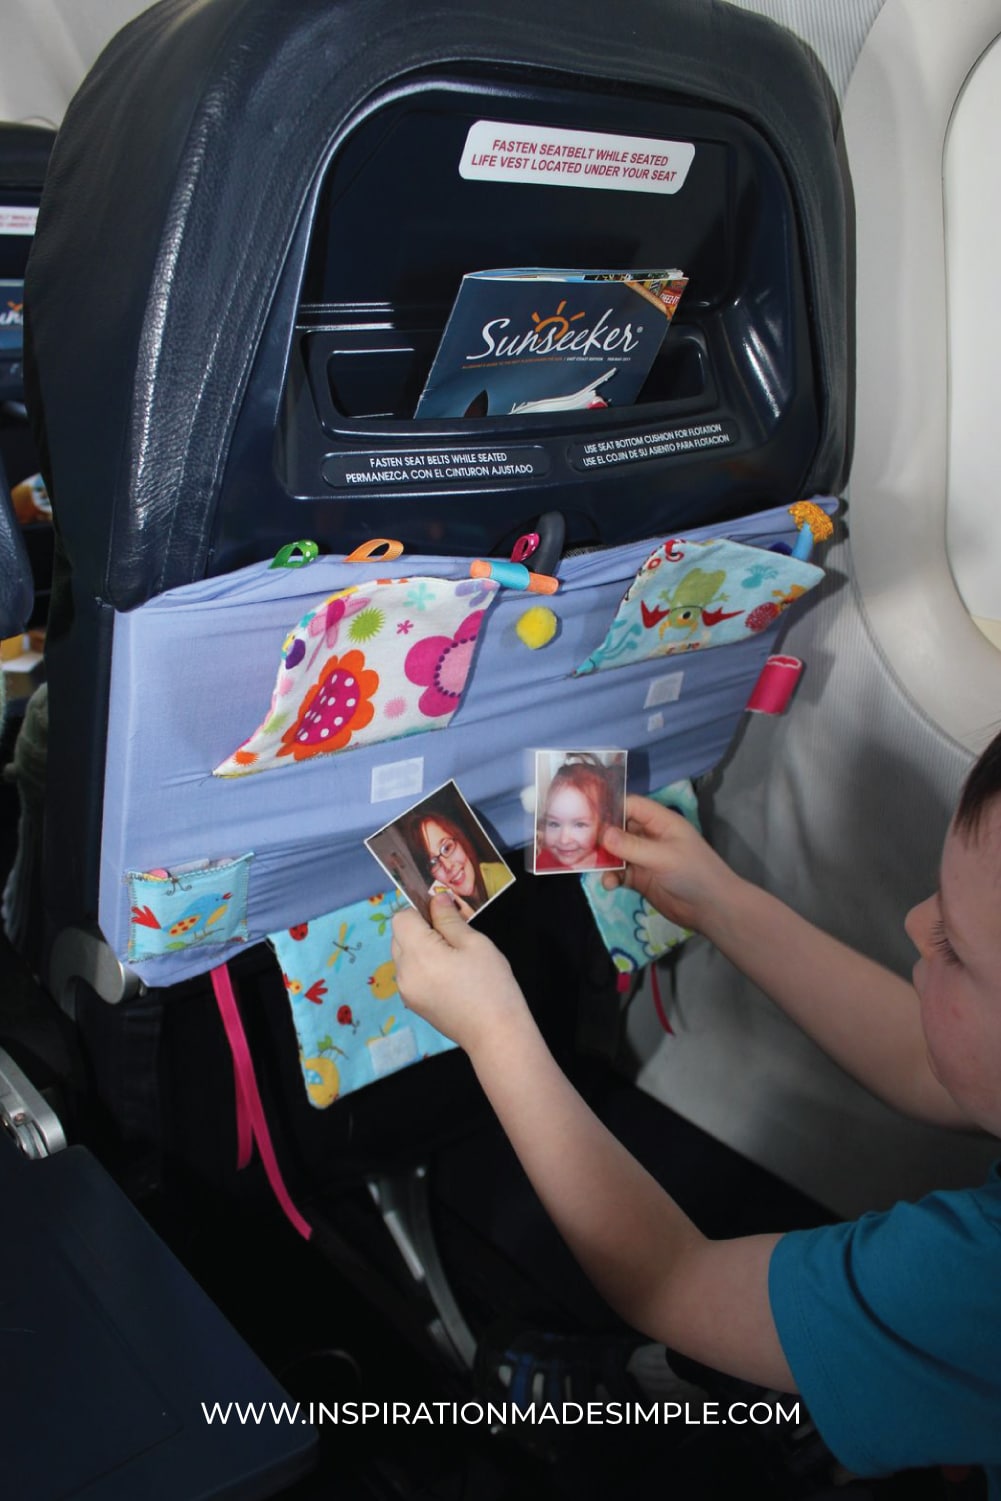
Back of the Airplane Tray Cover:
I messed up on the back – but was halfway done when I realized it, so I just went with it. The flaps were supposed to flip UP so that no velcro was necessary to hold them shut – and I still recommend you make it that way if you choose to make this!
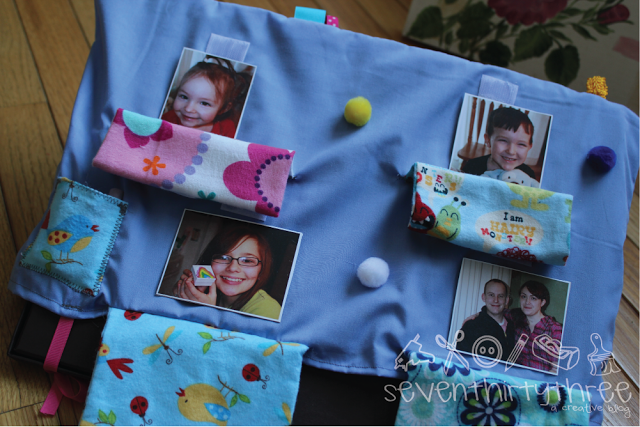
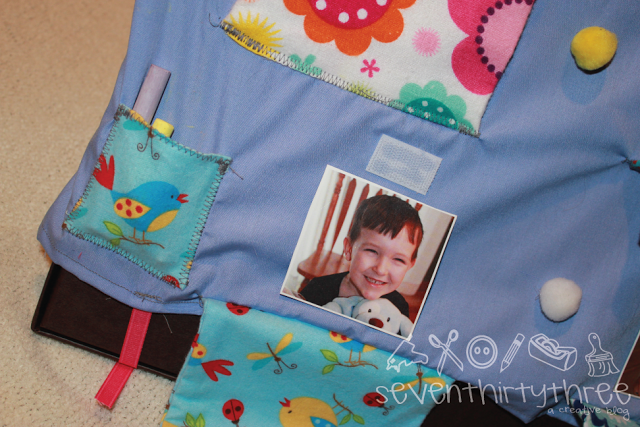
Getting past my goof – flip the flaps down and a picture of each of our family members are revealed! The pictures were printed on Xerox machines so the ink will not run if these get wet. I glued the images to a thick cardstock and then added velcro to the back so that the images can be moved around for a fun game of hide ‘n seek! I also added a velcro closure pouch to hold chalk.

With a little planning and creativity, you can transform a simple airplane tray into a fun and engaging play space for your little traveler. This DIY Airplane Tray Cover is a lifesaver for long flights, keeping your kids happy and occupied while you enjoy a more relaxed travel experience! I’ve even leant it out to friends with toddlers and they loved it as much as my children did!


very creative
What a fantastic idea! Hope your trip goes smoothly. I think your tray cover will really help on the flight.
~Kimberlee
http://www.TheSpunkyDiva.com
Good luck on your trip! I made one of these this past summer (http://servingpinklemonade.blogspot.com/2010/07/airplane-tray-cover.html) but I love your addition of the chalkboard mat!
Super cute!! Love it!!
Love what you wrote about your husband’s comment. I’m traveling in 2 weeks time as well and made a busy book for my 18 month old daughter…when I showed my husband the pages and demonstrated the activities to him…he said ‘ you seem to be enjoying the book more than she probably will’ Well I guess husbands are the same no matter where you are 🙂
This is so genius. I never would have thought of making something that actually went on the tray itself. Thanks for sharing, Sarah
What a great idea! I am going to have to keep this one on the to-do list! Thanks for sharing!
That is a great idea!
Super idea! We travel back and forth between the US (family) and Hong Kong (where we live) at least 2 times each year. The trip is 15 hours each way, so I’m always looking for anything to keep and 2 year old and his smaller brother interested. I made a quiet book last year before our summer trip back.
http://nap-timecreations.blogspot.com
this is awesome. I’m loving that chalkboard cloth and am off to find projects to use it on.
This is an amazing idea, nothing seems to keep my boys attention for more than 2 minutes, hope this works for your little one!
This is such a great idea! Good work : ) I’ve tried mannny activity ideas for long car trips, but not this. We’ve avoided the airport w/ our family of five so far. Hope it helped on your trip!
craft-interrupted.blogspot.com
love it what a great idea the pictures look amazing and it looks as if a lot of time could be spent being entertained with this
This is awesome. I’ll be traveling next year with my to be 4 yr old daughter and to be 21mth old son. I will definitely have to keep this in mind for my Sons interest for sure!
Thank you for your very inspiring idea! I will travel with my 1 year old by plane very soon and I made a tray cover. Hers’s mine:
http://creatiefbezig.blogspot.nl/2013/04/vliegtuig-vermaak.html
I hope it will give us a lot of joy!