
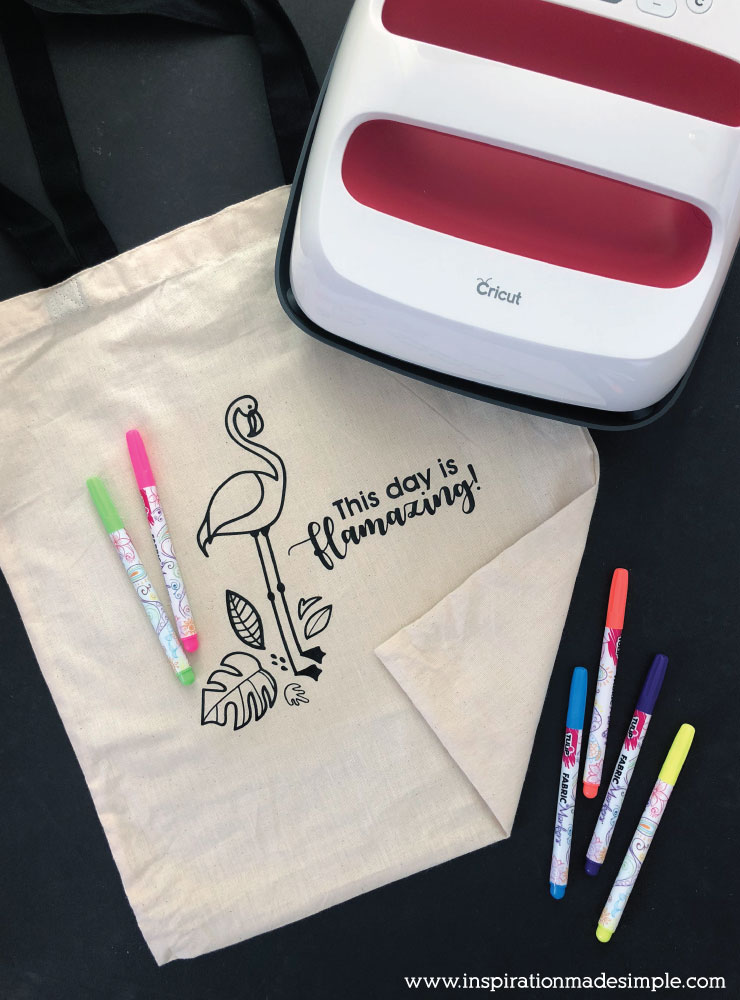
My daughter and I had so much fun making her DIY Unicorn Coloring Tee that we decided to make a DIY Flamingo Coloring Tote for her teacher for back to school using black iron-on vinyl and fabric markers.
To make this DIY Coloring tote, you will need:
Flamingo SVG file (Personal use only. Do not alter.)
Cricut Maker (or other Cricut cutting machine that uses Cricut Design Space)
Cricut EasyPress 2
Cricut EasyPress Mat
Iron on Vinyl
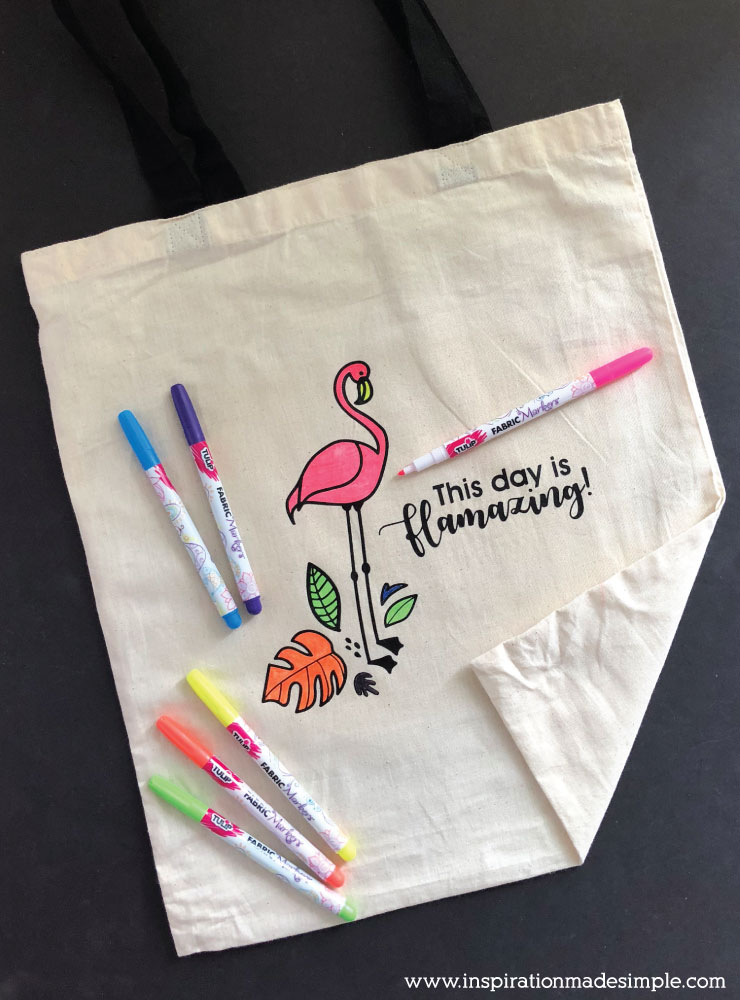
Fabric Markers
I designed a fun flamingo in Adobe Illustrator and have exported it as an SVG file so that you can also make this fun DIY coloring tote! Use it for grocery shopping, carrying books, snacks, clothes or more. Download the SVG file from the supply list above. Once it is saved to your computer, open Cricut Design Space.
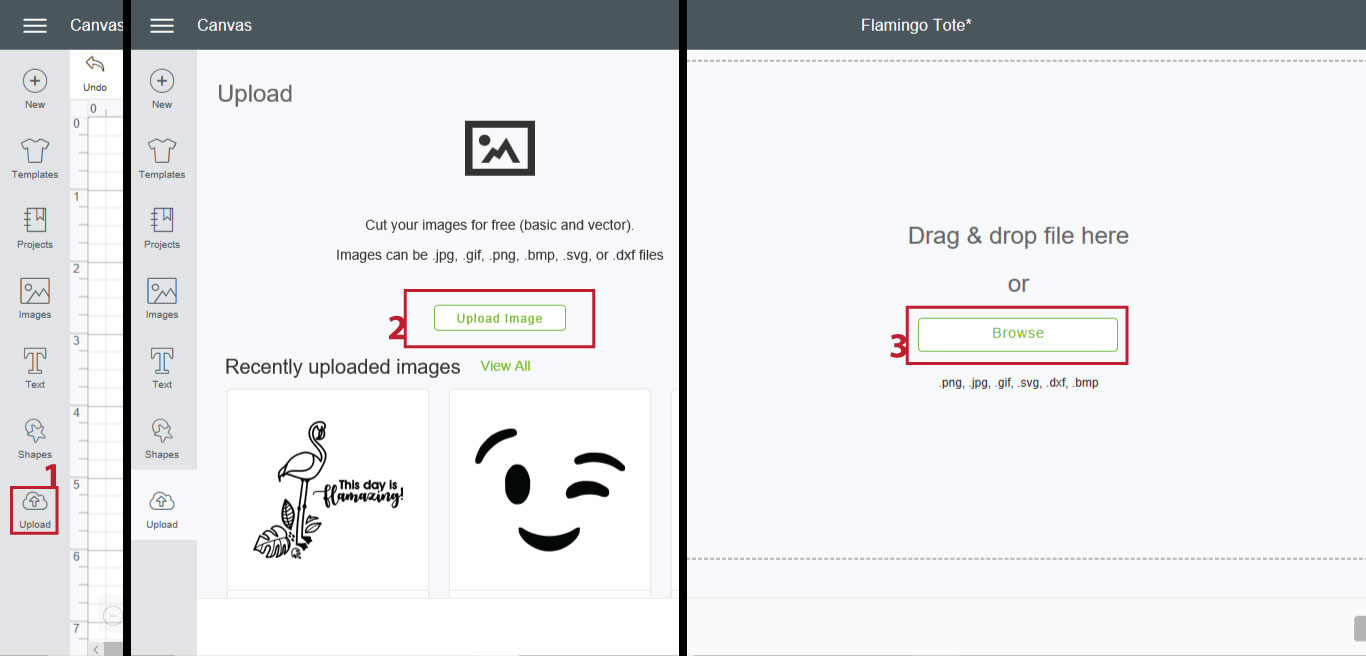
Create a new project. In the left hand column click on UPLOAD. Click UPLOAD IMAGE. Click BROWSE. In the new dialog box, locate the Flamingo SVG file that you saved and open it.
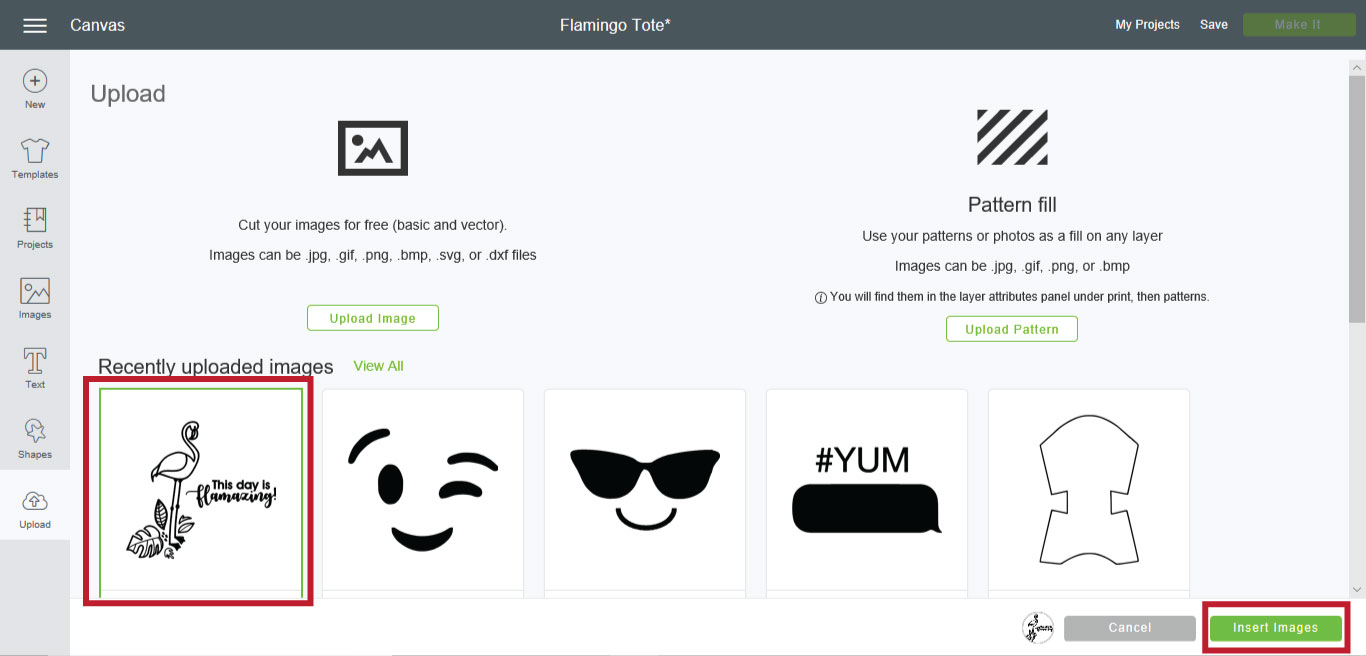
Now that the file is uploaded into Cricut Design Space, select it and then click INSERT IMAGES.
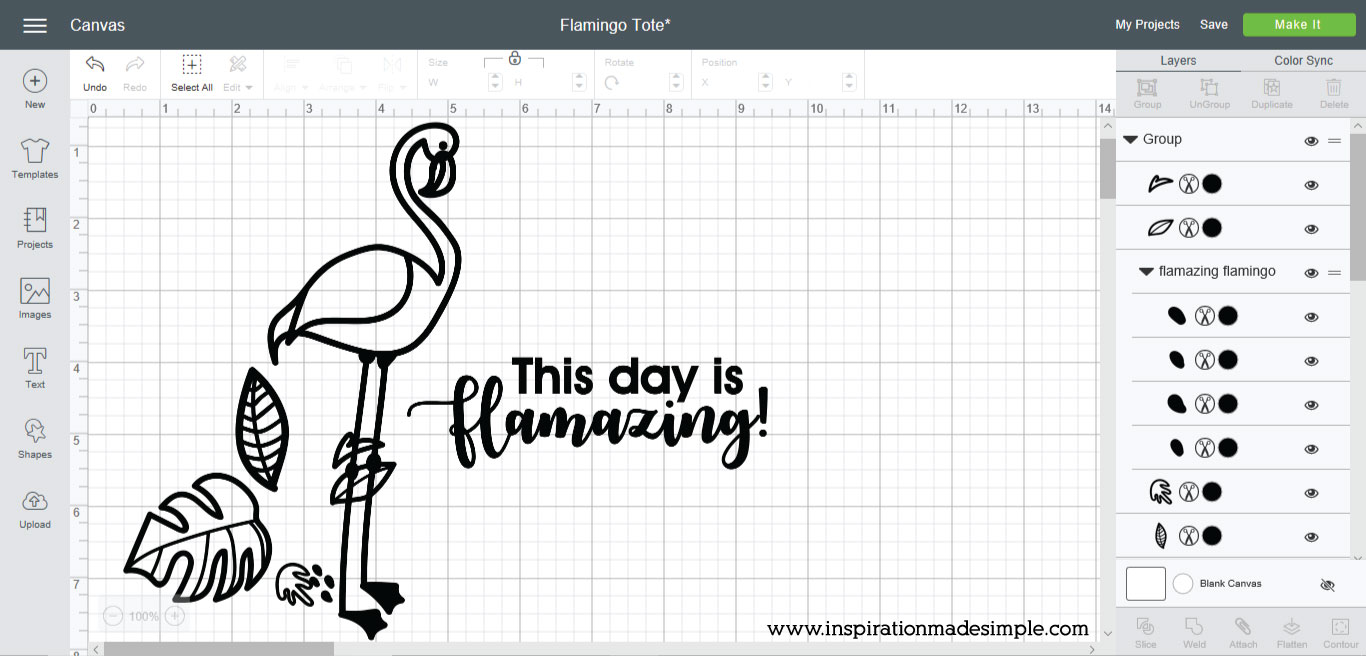
If the SVG imports a bit wonky (see leaves in picture above), click it and then right click and select UNGROUP. Click each leaf and adjust it to the correct position.
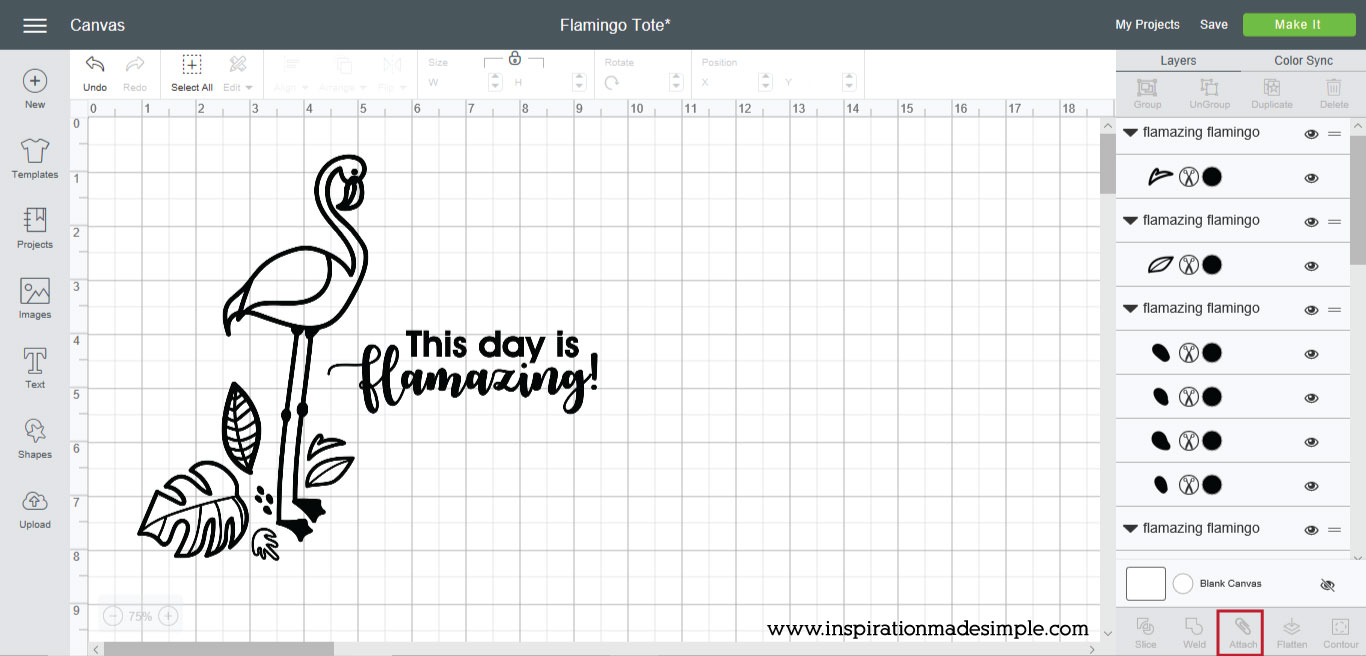
Select all of the items on the artboard and then click ATTACH. This ensures that it will stay in this layout when you send to your Cricut.
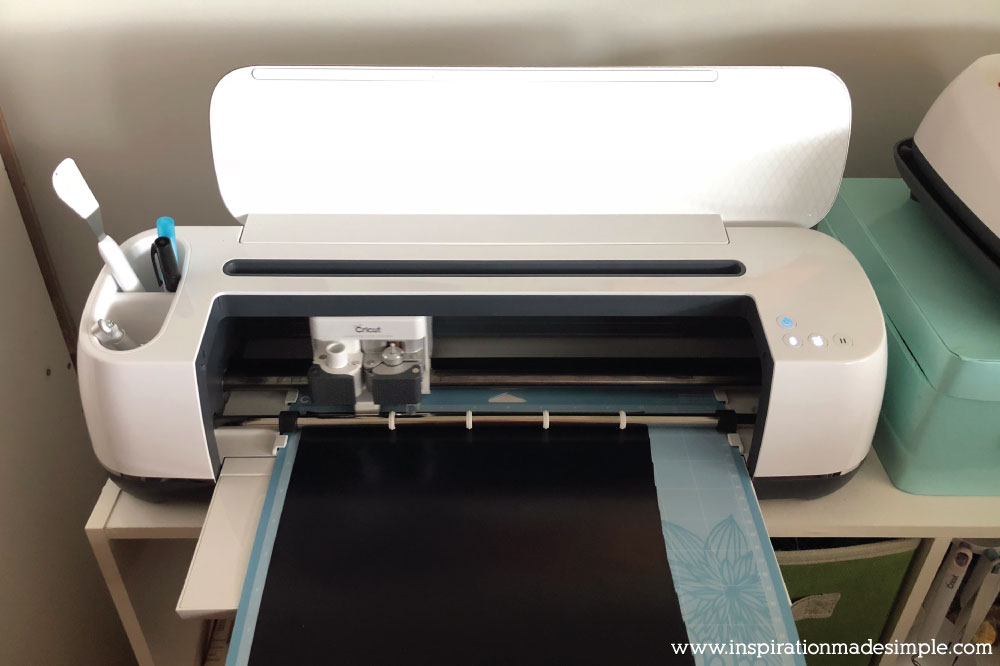
Adhere the iron on vinyl to the Cricut mat, following the directions on the packaging. Insert the mat into the machine and then press MAKE IT in Cricut Design Space. Make sure to MIRROR the image before sending to the machine.
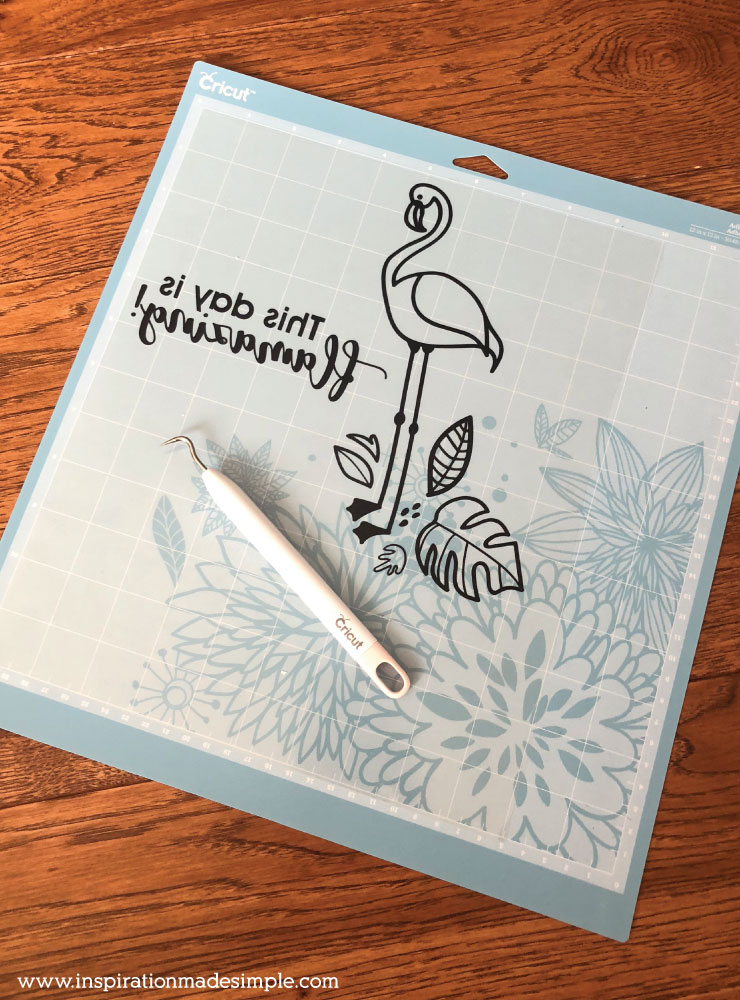
The machine will cut out the design. Once complete, weed the extra vinyl out. Once you are done weeding, turn your EasyPress 2 on and allow it to heat up. Consult the Cricut EasyPress recommended settings chart to get the proper settings for your material. Insert the Cricut EasyPress Mat into the tote.
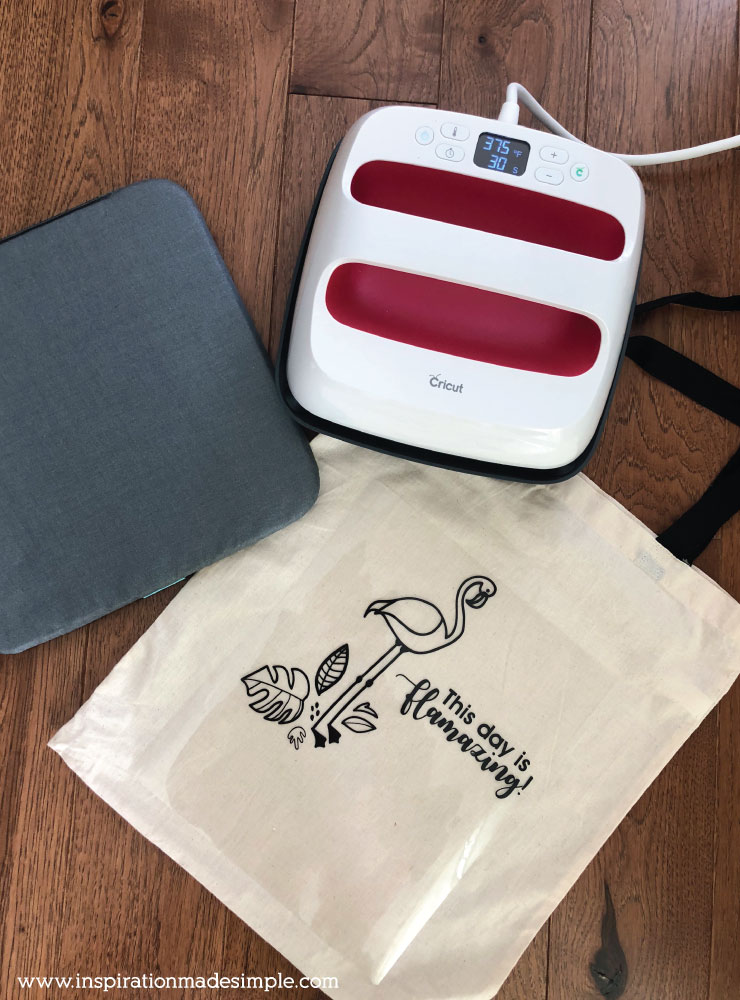
Once the EasyPress 2 is warmed up and set, do a pre-warm up of the tote as instructed then place your iron on vinyl onto the tote with the plastic coating still in place. Simply place the EasyPress 2 on top of the iron on vinyl, press the little Cricut button and add slight pressure. When the time is up, the machine will beep. Remove from the tote and place the EasyPress 2 back in its base.

Remove the mat and place it on your work surface. Lay the tote, iron on vinyl side down, on the mat. Follow the recommended heat settings and repeat for the back.
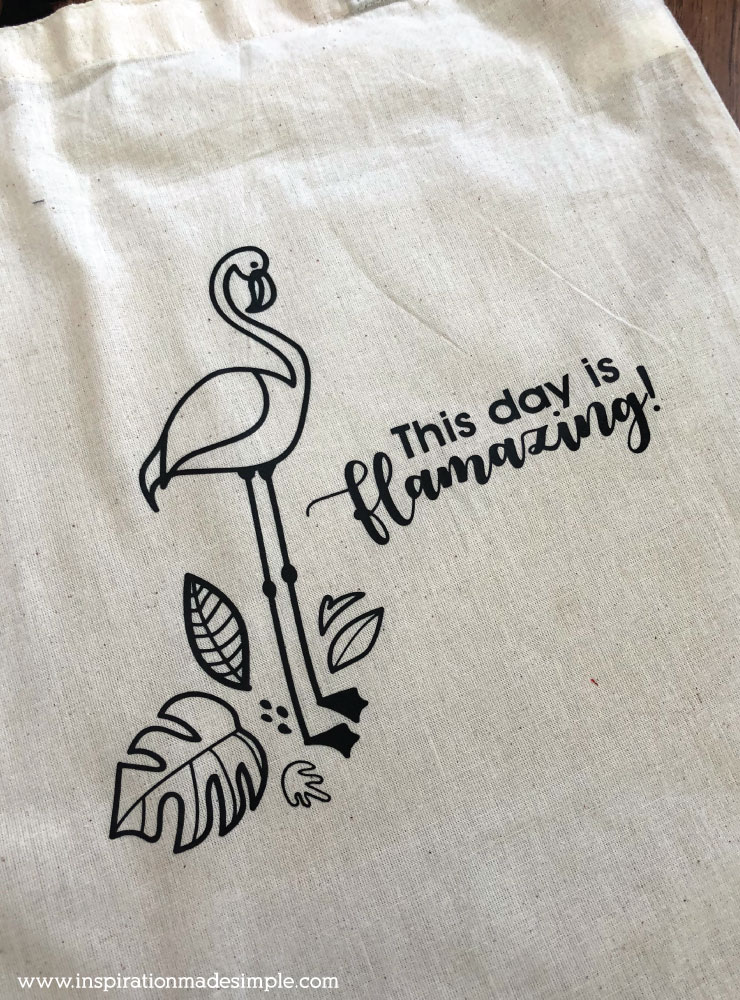
Remove the plastic film from the iron on vinyl while still warm. Carefully peeling it back.
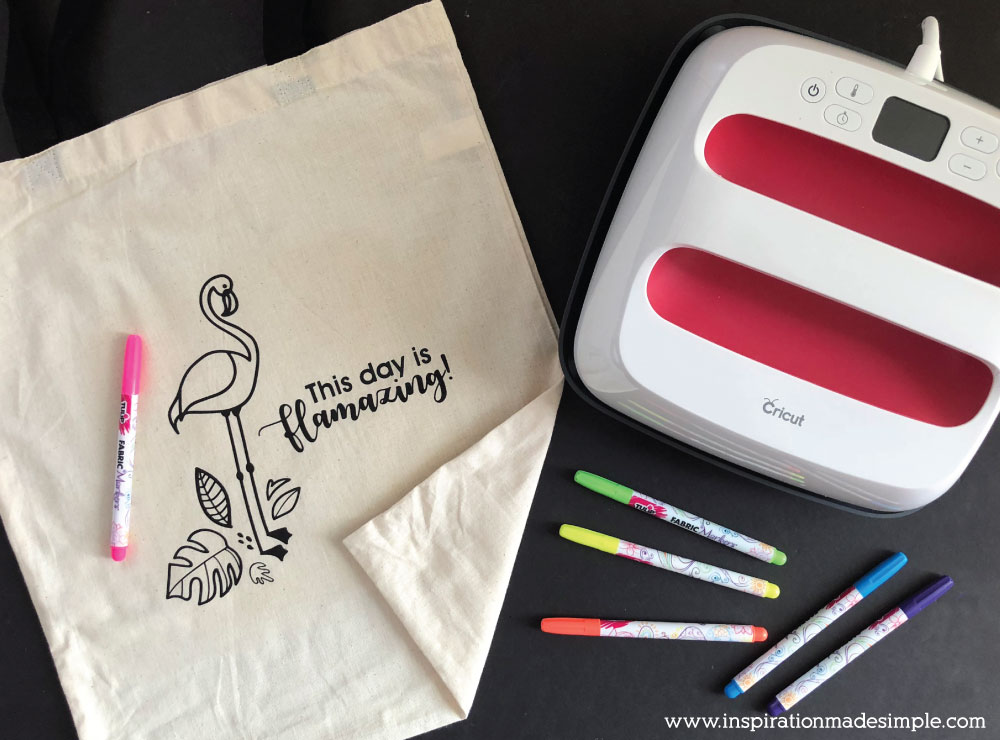
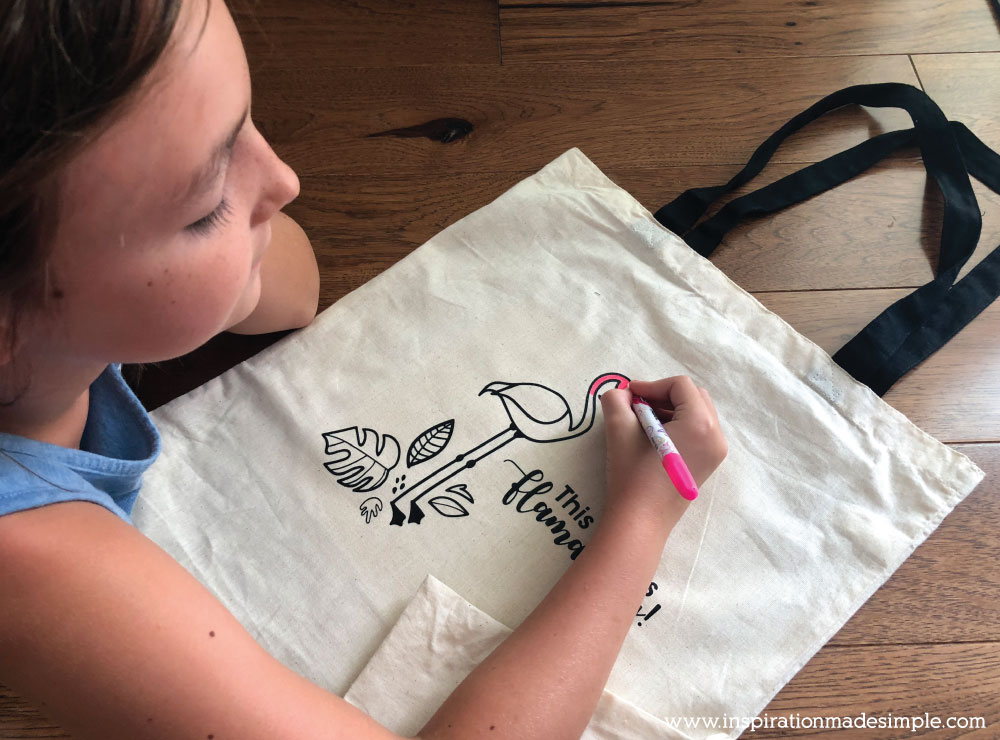
That’s it! Grab some markers and get to coloring your fabulous new DIY Flamingo Coloring Tote!


