
I decided that my kids needed a puppet theatre for all of the fun finger puppets that they had been making. I didn’t want to buy or build anything, so I took the easy way and constructed a cardboard box puppet theatre!

As you can see, it is nothing fancy, but boy do they enjoy it!
I cut a window on the front of the box and added a wood dowel along the top to hold a curtain made of red scrap fabric. I left the back flaps on the box so the kids can hide inside the box. I also added a small flap that I cut off the box, which I folded over the bottom of the front opening to create the “Now Playing” flap where the kids can tape their Play Posters!
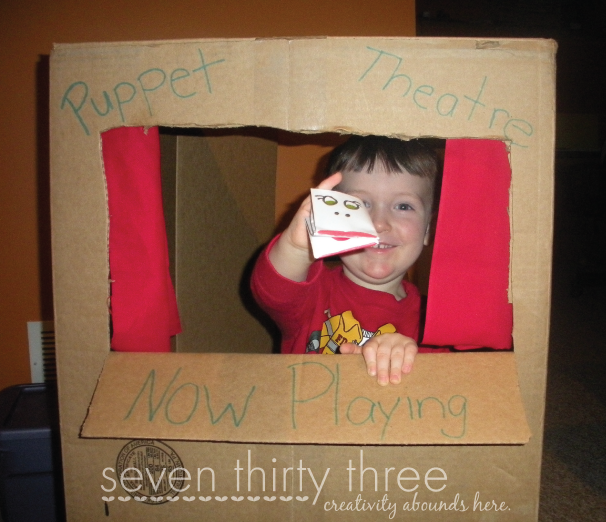
My kids haven’t had a chance to decorate it yet, but I know it will look super special once they have! In less than 15 minutes you can make your kiddos a puppet theater and puppets! I also thought of laying the box on its side and cutting out the hole so more than one child can fit in. Then all you have to do is lay it on its side on a table and voila!
Learn how to make the fun finger puppet you see above!
Happy puppeteering!


wow this would be fun doing with the kids.