

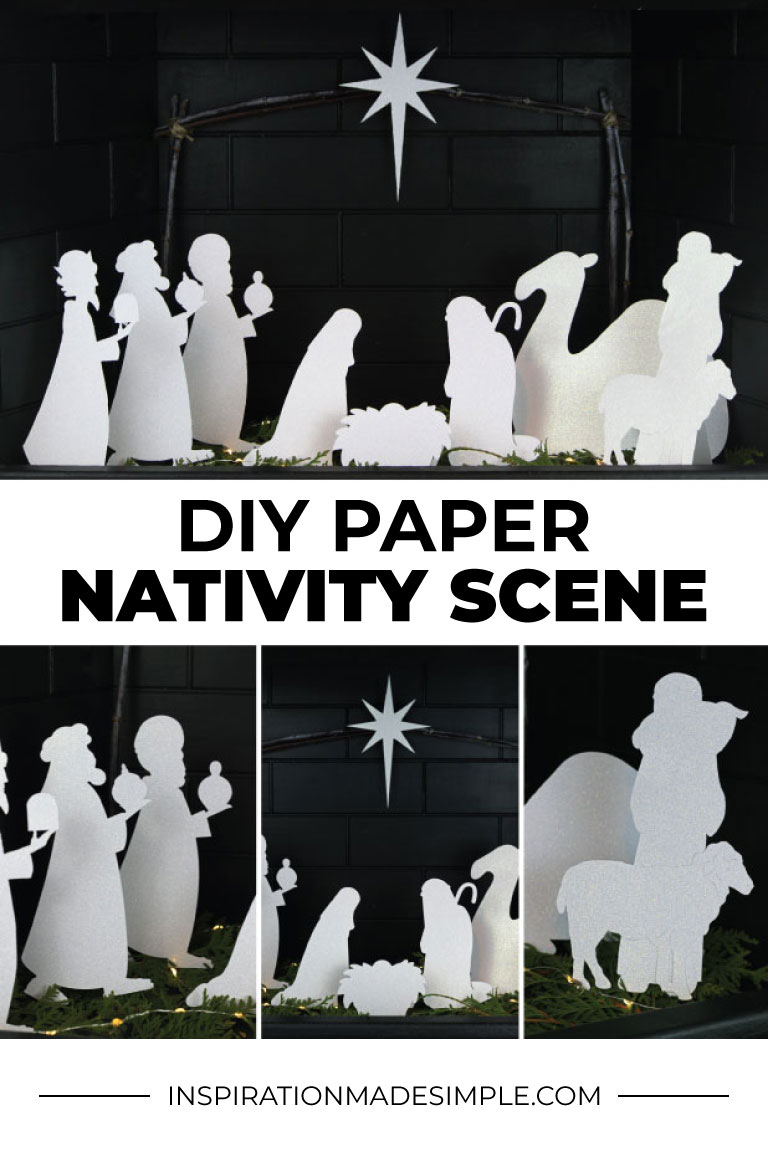
One of my all-time favorite crafting tools is the Cricut Explore, a personal cutting device. It allows me to create some really fun and personalized DIY projects, from home decor to clothing. Recently I created a simple Paper Nativity Scene that fits into the Dreamy White Holiday category. This was so simple to make using sparkly white paper and natural elements from my yard! The project is inexpensive to make and looks stunning in my unused fireplace!
Post contains affiliate links for your convenience.
Are you interested in making a Paper Nativity Scene for your home this Christmas? If you have a Cricut Explore, it couldn’t be any easier. Simply open Cricut Design Space and create a new workspace. Search the Cricut Image Library for the different nativity pieces. I did have to make a few simple changes to some of the silhouettes to make them the way I wanted them.
To make sure the scene fit the space I planned on using, I measured the fireplace space to determine the size of each figure.
Once all of the figures are in Design Space and sized accordingly, send them to the Cricut Explore to cut the figures out of the cardstock.
Once the figures are cut, the next challenge to tackle is making them stand up. My solution was to cut 1″ wide strips of paper that I hot glued to the back of the figure. I then folded the bottom half of the strip so that it created a little stand. Easy peasy!
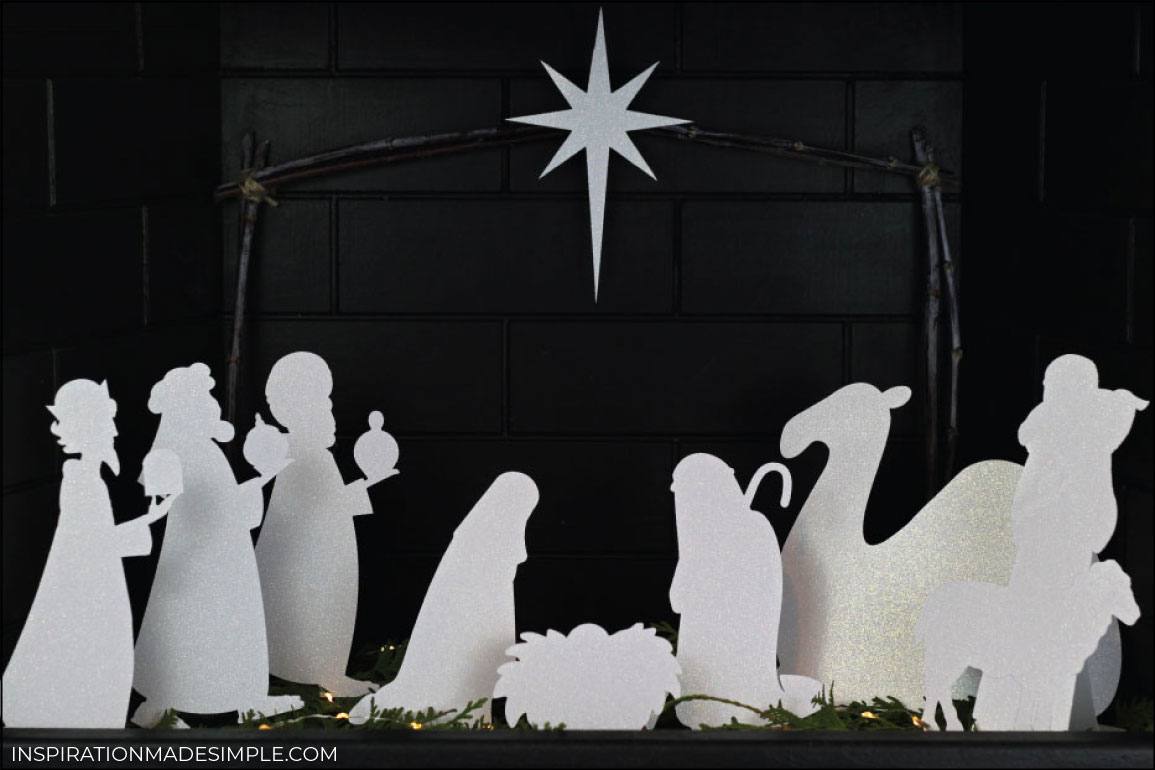
I added some pine branches to the bottom of the fireplace and cut some branches off from leafless trees in the yard. I tied those together with twine to create the manger. Lastly I hot glued the North Star in place.
Do you display a Nativity at Christmas? Would you give this paper version a try?


i love your nativity its beautiful and simply wonderful
I cant find how to download or instruction cant finf could you please show me how to get this I love this
Jeannie, If I am picked for the Top 10 and win, the file will be made available in Cricut Design Space! I did give a brief outline of how I created it using my Cricut Explore in the post above. I’m glad you liked it!
Great job Kim! This turned out awesome.
I love your 3D nativity and would like a copy of the svg file. I want to fix it for my church,
Unfortunately I don’t have the SVG file. I simply used images that were included in the Cricut Digital Library to create each piece. If you own a Cricut, this is very easy to replicate by searching for “Nativity” in the image library.