Have you ever made Thumbprint Reindeer? Each one is unique and looks absolutely adorable. During the holidays I love using thumbprint reindeer to make custom note cards, gift tags, and ornaments.
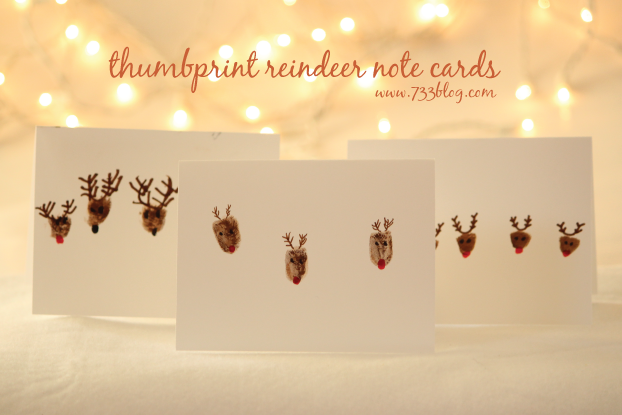
To make the thumbprint reindeer on the cards and gift tags, simply color yours or your child’s thumb with washable markers and immediately place the print onto the paper.
Draw in some antlers, a nose, and some eyes and you have a sweet little reindeer head!
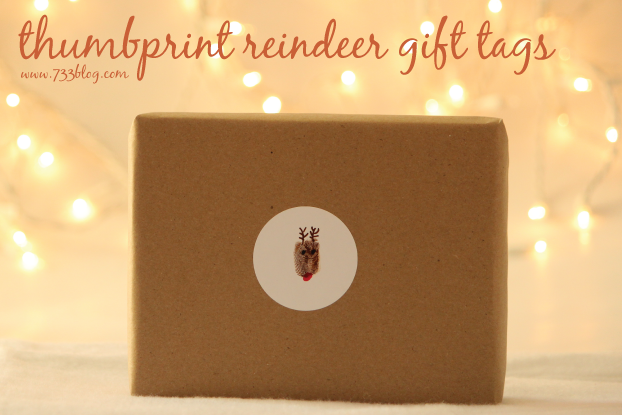
For gift tags, I use round Avery labels. I place the thumbprint in the middle of the label so that there is room to add the recipient and gift-givers names. I love using the round sticker labels for this purpose!
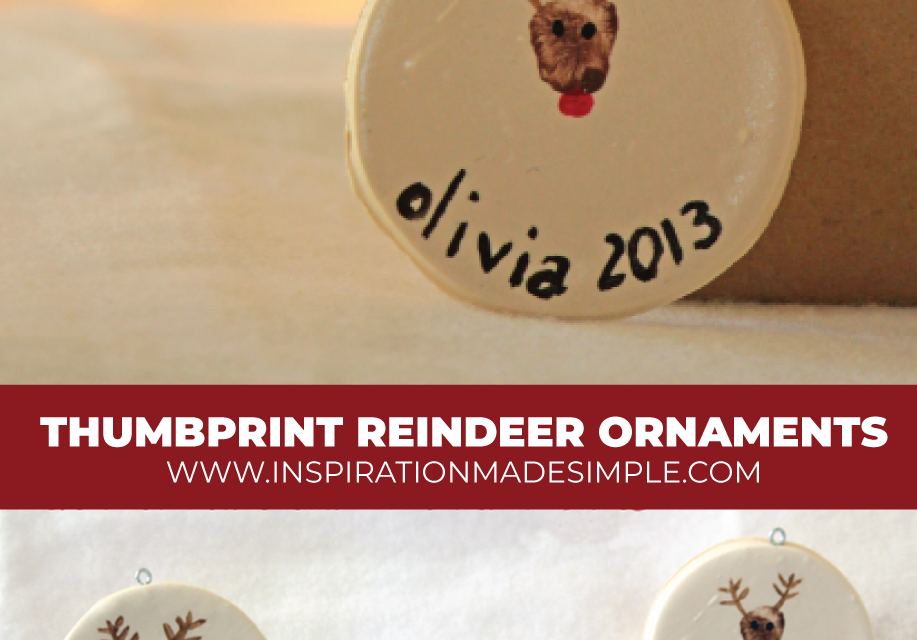
Lastly, each year we make Christmas ornaments as keepsakes. Back in 2013, we made Thumbprint Reindeer Ornaments that we still have today, and I treasure them. They are actually attached to the children’s stockings. Want to make your own? Keep reading!
DIY THUMBPRINT REINDEER ORNAMENTS
Supplies:
Sculpey Clay
Rolling Pin
Cookie Cutter
Acrylic Paint
Clear Coat
Paint Brush
Eye Hook
Directions:
Roll your clay to about 1/4″ thick and use a circle cookie cutter or a cup to cut out your ornaments. Bake according to the directions on the box.
After the ornament is finished baking and cooled, it is time to decorate.
Dip the child’s thumb into brown acrylic paint and roll it onto the ornament – we found it best to start at the base of the thumbprint and roll towards the tip.
Using a small paintbrush add black eyes, light brown antlers, and a red nose with acrylic paint.
I also added the child’s name and the date along the bottom.
After the paint dries, spray the ornament with a coat of clear acrylic gloss.
When my children are older and married I will send these ornaments along to their home to hang on their trees!
Kim is a Marketing Specialist with Inspiration Media Solutions by day and Blogger by night. She's a wife, mom of three beautiful children and two fur-babies, a Goldendoodle and a rescued Pibble. For even more Inspiration Made Simple, like her on Facebook and Instagram+.
My name is Kim, founder of Inspiration Made Simple, and I'm really glad you have stopped by!
I'm a mom, wife, fitness and fashion enthusiast. I love sharing simple and affordable ideas that help make your busy life easier, including craft tutorials, affordable fashion, printables, recipes, party ideas, and fun family activities. Learn more about Kim...
Weekly Newsletter
Fashion inspiration in your inbox, never miss a post!
Thanks! Keep an eye on your inbox for updates including a free gift!
Manage Cookie Consent
To provide the best experiences, we use technologies like cookies to store and/or access device information. Consenting to these technologies will allow us to process data such as browsing behavior or unique IDs on this site. Not consenting or withdrawing consent, may adversely affect certain features and functions.
Functional
Always active
The technical storage or access is strictly necessary for the legitimate purpose of enabling the use of a specific service explicitly requested by the subscriber or user, or for the sole purpose of carrying out the transmission of a communication over an electronic communications network.
Preferences
The technical storage or access is necessary for the legitimate purpose of storing preferences that are not requested by the subscriber or user.
Statistics
The technical storage or access that is used exclusively for statistical purposes.The technical storage or access that is used exclusively for anonymous statistical purposes. Without a subpoena, voluntary compliance on the part of your Internet Service Provider, or additional records from a third party, information stored or retrieved for this purpose alone cannot usually be used to identify you.
Marketing
The technical storage or access is required to create user profiles to send advertising, or to track the user on a website or across several websites for similar marketing purposes.