
Calling all crafty parents and party planners! Are you looking for an engaging and adorable activity for a kids’ gathering? Look no further than these simple DIY woodland creatures felt masks! Perfect for a camping-themed baby shower, birthday party, or even a rainy afternoon playdate, these masks are a fun way to spark children’s imaginations and keep them entertained.
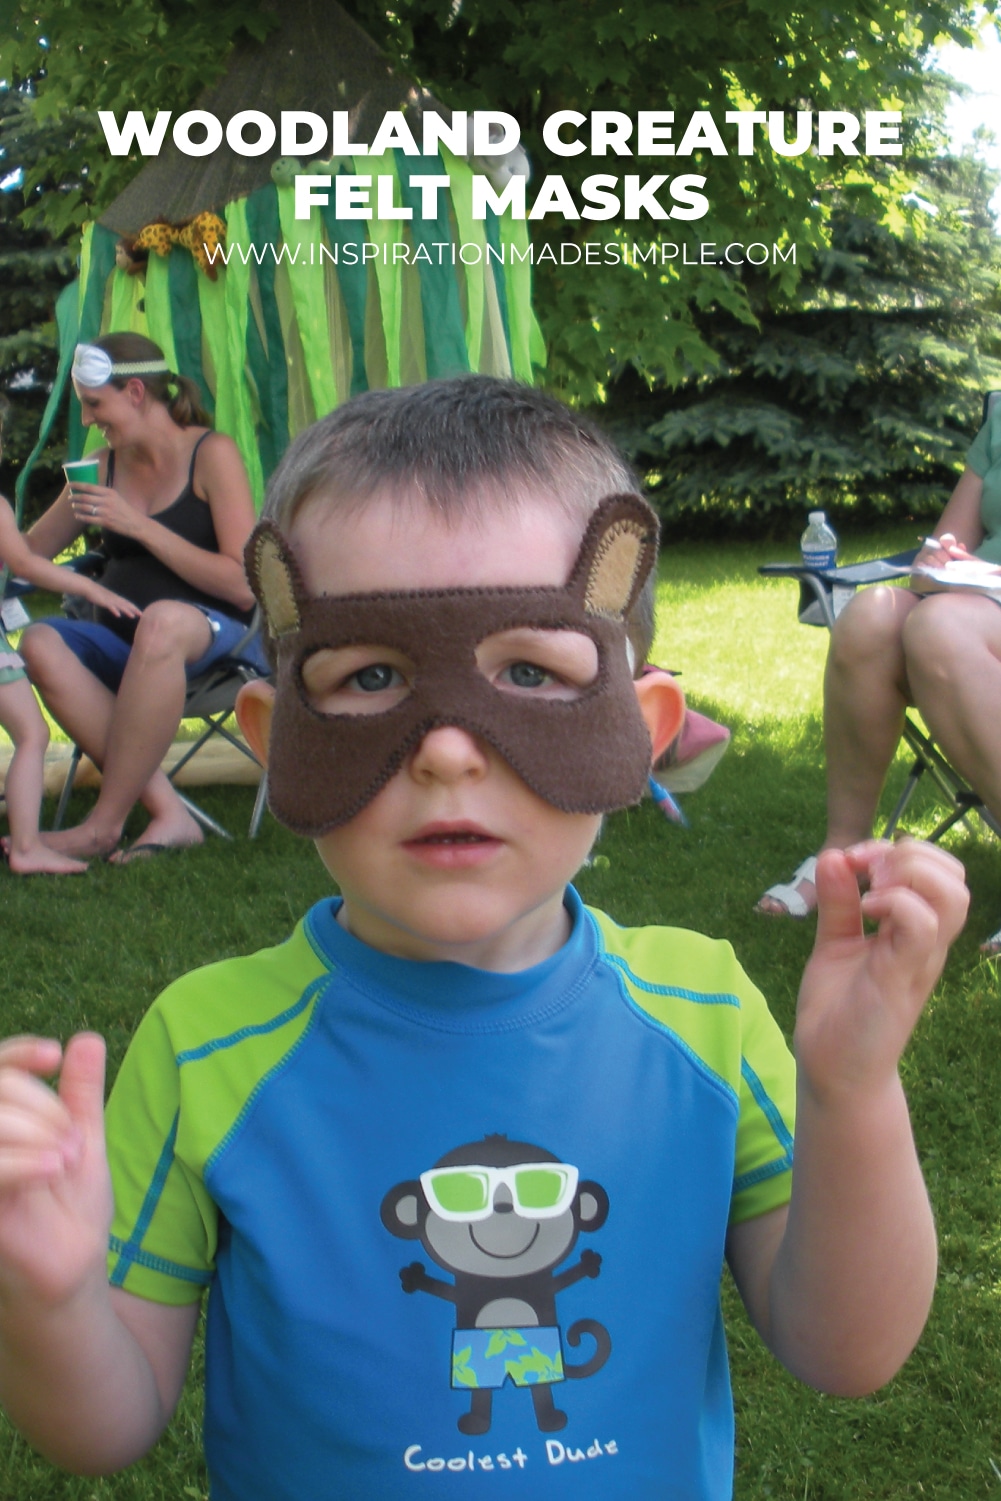
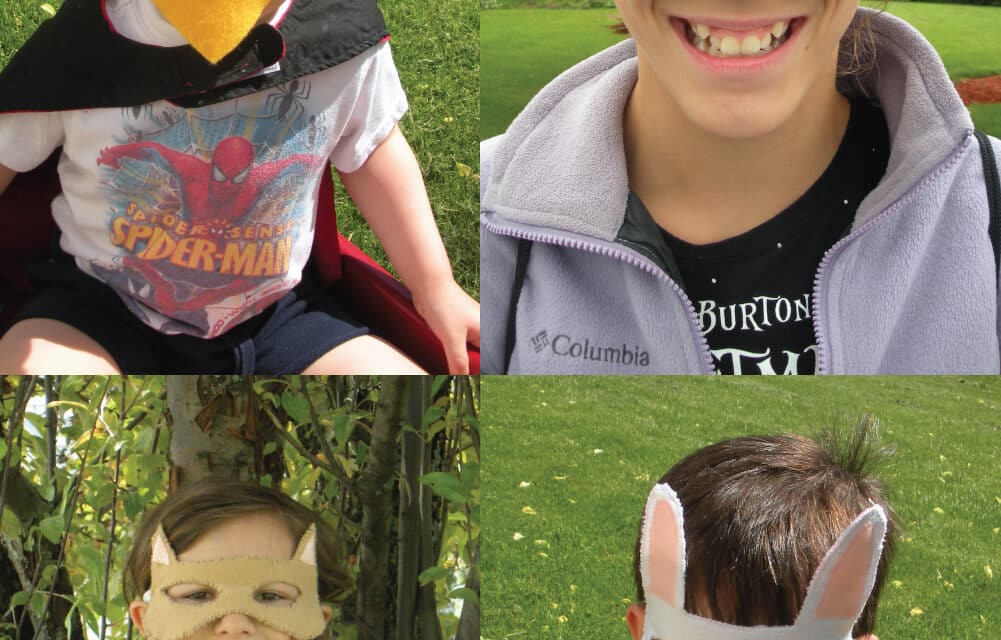
I am hosting a camping themed baby shower for my sister-in-law and what camping trip isn’t complete without an animal or two? The younger kids invited to the party will fill the part nicely with these adorable woodland creatures felt masks. The tutorial below shares how to make a Bear Mask, but as you’ll see in the pictures below, there are plenty of other creatures to make!
All of the felt masks were created the same way with tweaks here and there to the shape of the face or ears. With a few basic materials and some creativity, you can create a whole menagerie of woodland friends.
Making the Masks
MATERIALS NEEDED:
Felt sheets in various colors (brown for bear, white for bunny, etc.)
Scissors
Elastic cord
Sewing Machine (or needle and thread)
Fusible web – optional, for added sturdiness
Paper to create a template
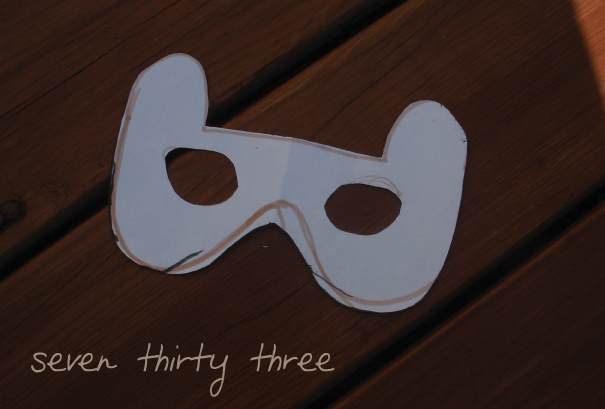
First, create a template on paper. I chose to freehand mine. Cut out the template, keeping in mind that it should be sized for children. I measured the mask template against my son’s face to make sure it fit.
Mark the eyes and cut those out.
Next, iron fusible web onto one of the pieces of felt. The interfacing will create a sturdier mask, but note: I only used it on two of my masks and didn’t have a problem with any of the others.
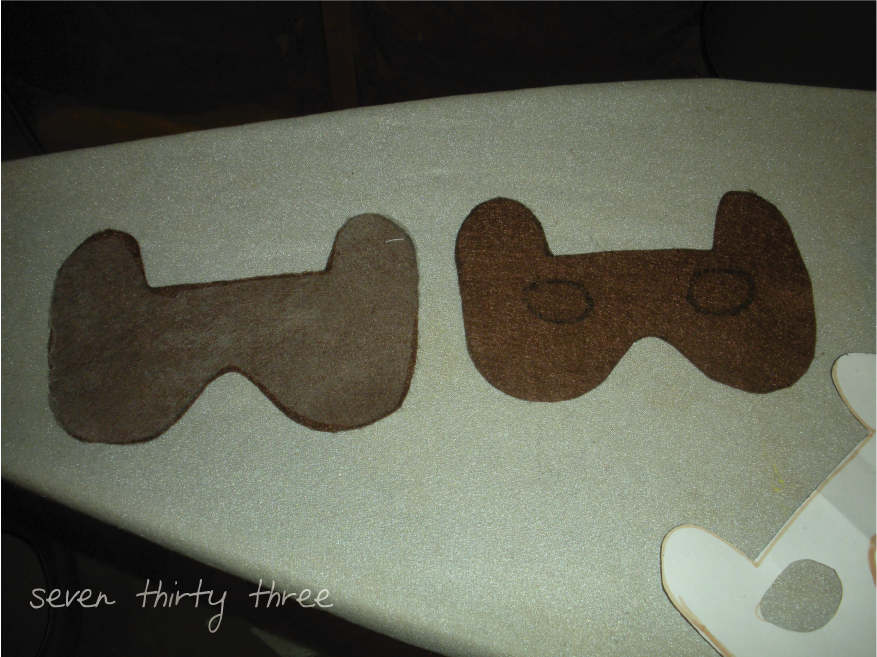
Using the paper template, cut out two identical mask shapes from the chosen felt colors.
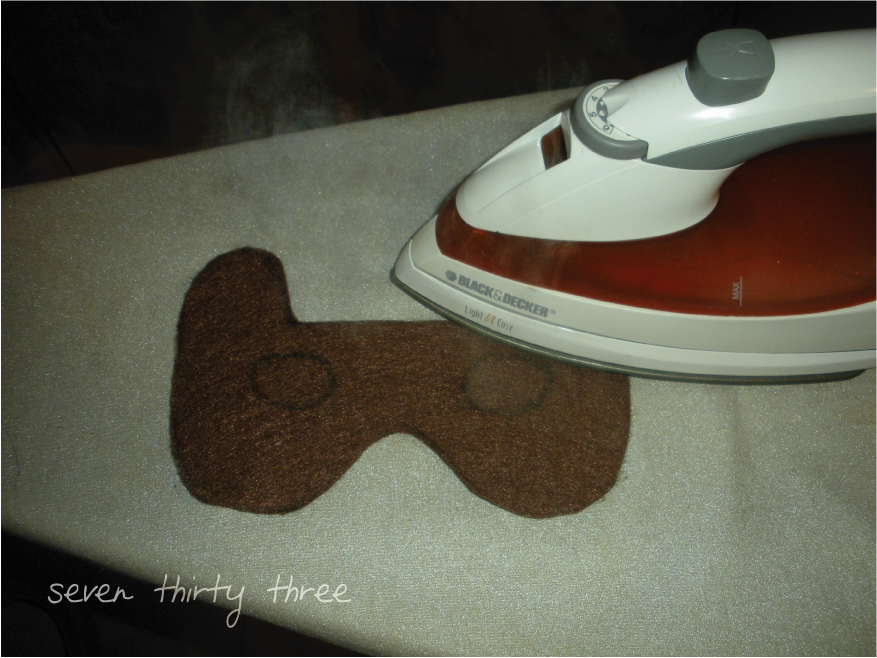
If fusible webbing was used, iron the two mask pieces together.
On the back of the mask (the part that will touch the child’s face) trace the eyes.

Cut out the inner ear pieces in a coordinating felt color.
Sew the pieces onto the mask with a zigzag stitch.
Note: you can do this BEFORE you iron the two pieces together if you don’t want to see the stitch on the back of the mask.
Cut out the eyes and zigzag stitch around those as well.
Cut a piece of elastic to fit comfortably around a child’s head. Securely sew the elastic onto both sides of the mask, ensuring a snug but comfortable fit.
FYI: I did add the elastic before sewing the edges, as well, but I didn’t mind seeing the elastic on the back of the mask since it doesn’t show when the child is wearing it and doing it after is just easier.

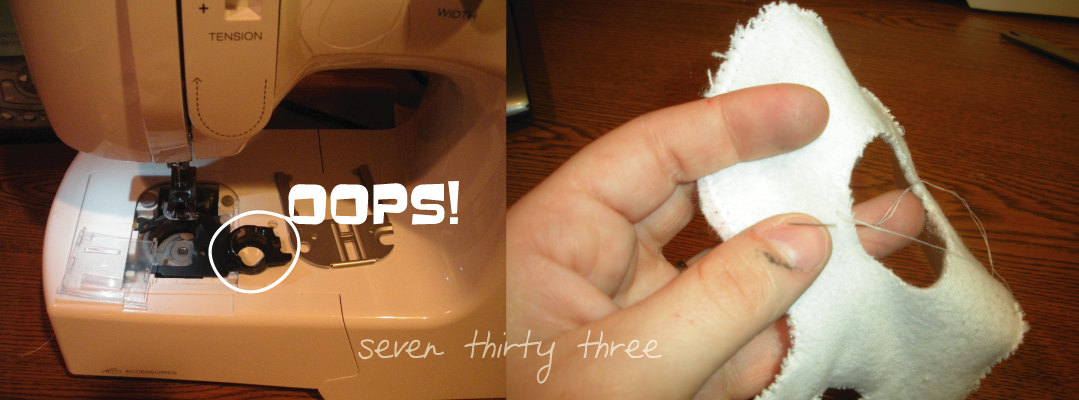
I managed to break my bobbin holder halfway through making the woodland creature masks so switched to hand sewing… although it took longer it was still just as easy – so no machine required!
For the duck and bluebird masks, I cut out a triangle for the beak and inserted it between the two pieces of the mask at the nose curve and just sewed around the edge of the mask as normal.
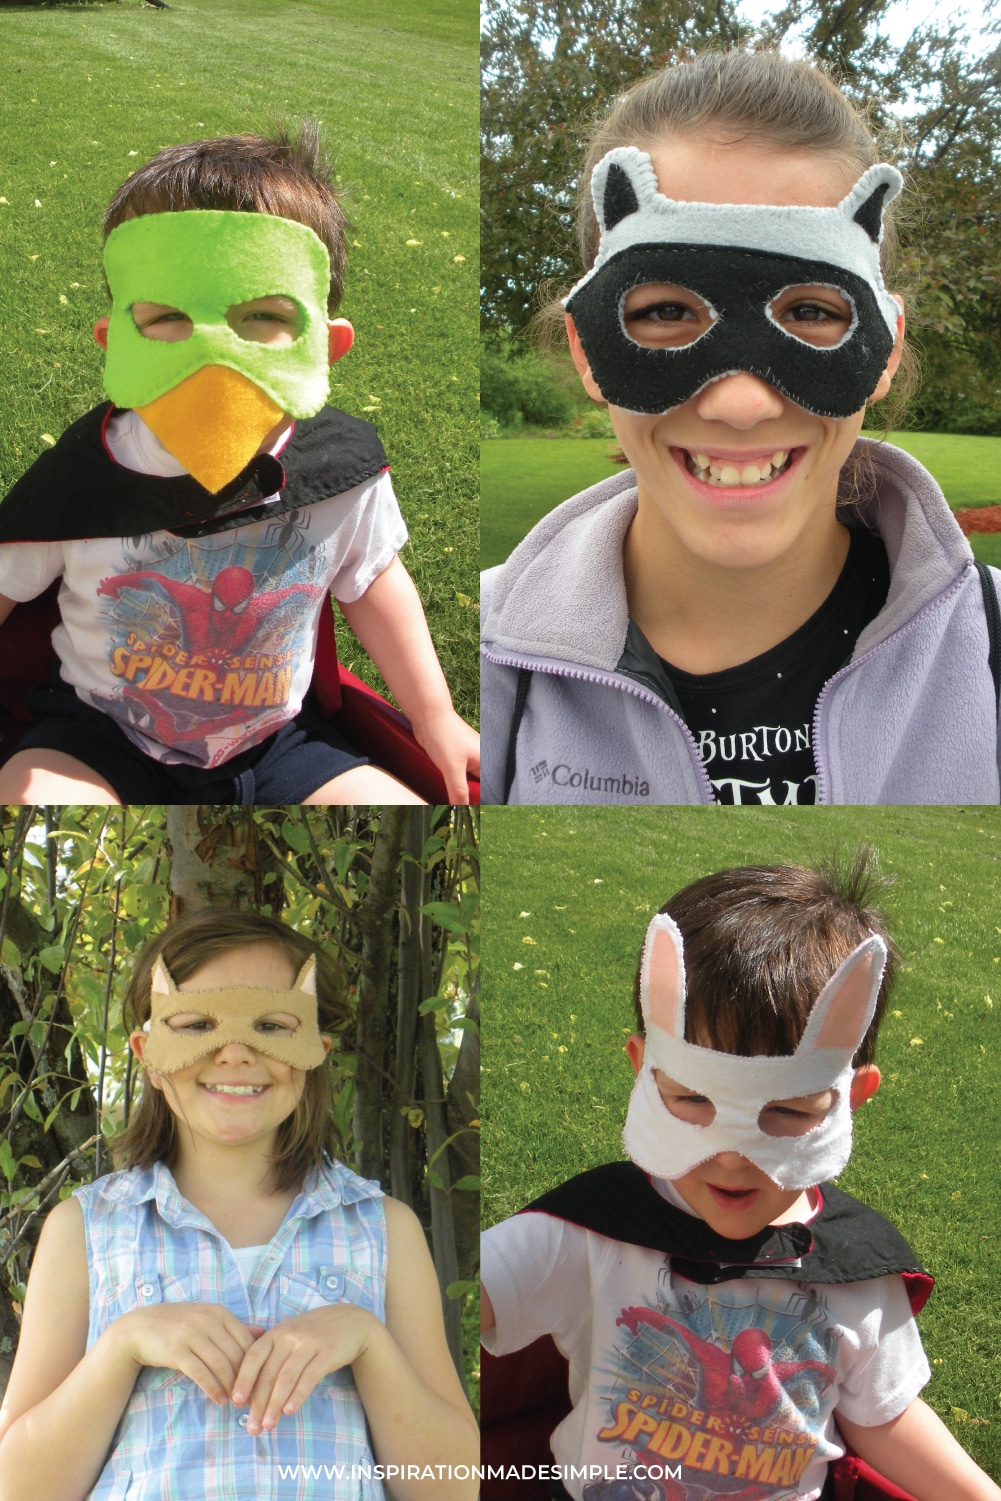
With your adorable DIY woodland creatures felt masks complete, it’s time for the real fun to begin! Watch as your little ones transform into playful bears, cunning foxes, or wise owls. The possibilities are endless!


Great masks!! I can see my kids loving these!
This project made me heart go pitter pat. Well done.
Love the masks! Thanks for linking @Creative Itch’s “Sew Cute Tuesday”!
What a fun and easy project! I am going to have to make these for my son and his friends! Thanks chickie for linking up to Hoo’s got talent!
I am so jealous of Janel… And those masks are awesome.
Awesome!!
Thanks so much for linking up to Pajama Party at Life In My Pjs!!
~Ela
so cute 🙂 I’m featuring this tomorrow for MMM! Be sure to come on over and link up more great ideas!
I hope you noticed I featured this today! My oldest has already put in her order of a doggy and a elephant mask… Too much fun! Thanks for linking up!
Vanessa @ Craft Envy