
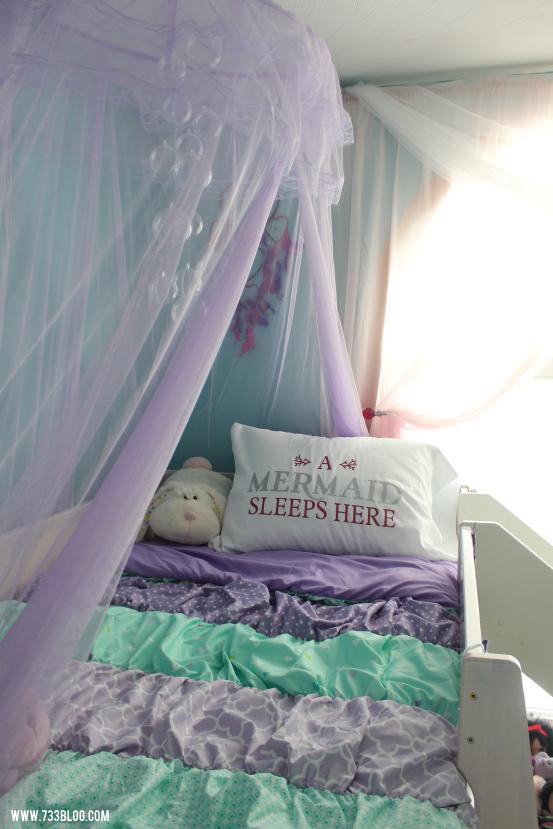
Back in January I participated in the finals for the Cricut Design Star contest. For my project I redid my daughters room with a Mermaid theme. One of the projects that I did that I never shared a tutorial for was her DIY Bubble Chandelier. It was super easy to make, only requiring plastic Christmas Ornaments and fishing line, and cost a total of $8. I’ve received multiple requests to share how I made it, so I whipped up a quick tutorial. It really is simple and anyone can pull this off! No special skills required.
 Ready to get started?
SUPPLIES (Affiliate links for your convenience)
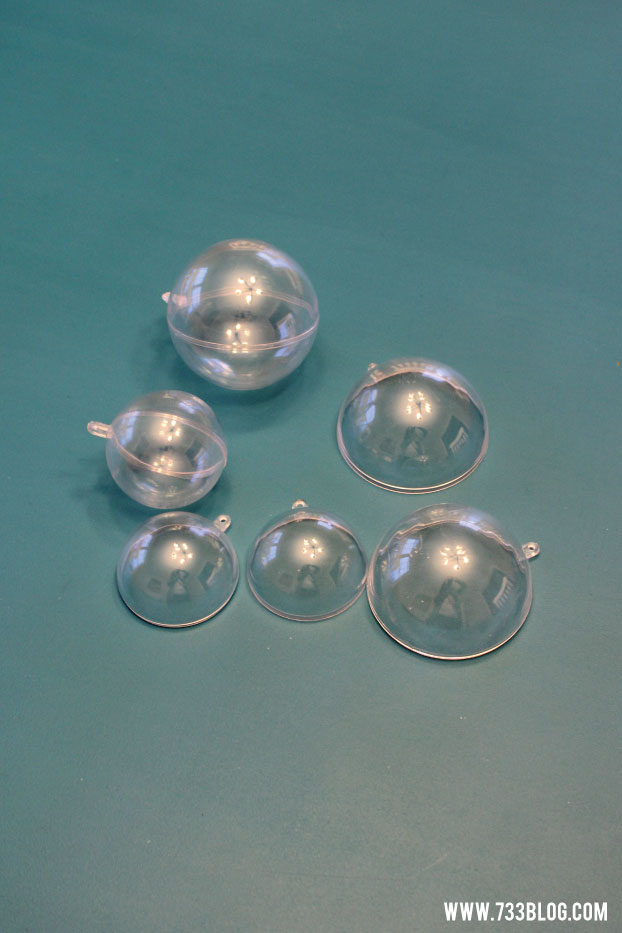 Approximately 15 plastic Christmas Ornaments of differing sizes – I had about 6 large ornaments and 9 small ornaments
Fishing Line
INSTRUCTIONS
I created three string of ornaments to form my chandelier. Two strings had 5 and one had 6.
 Cut two lengths of fishing line around 35″ long that will hold 5 ornaments and a third that is about 42″ and will hold 6 ornaments.
Now we’ll string the ornaments onto the fishing line. I used red thread in the photos so you can see what I did! First, string the line through the top loop of your first ornament and pull most of the length all the way through, leaving about 8 inches at the top.
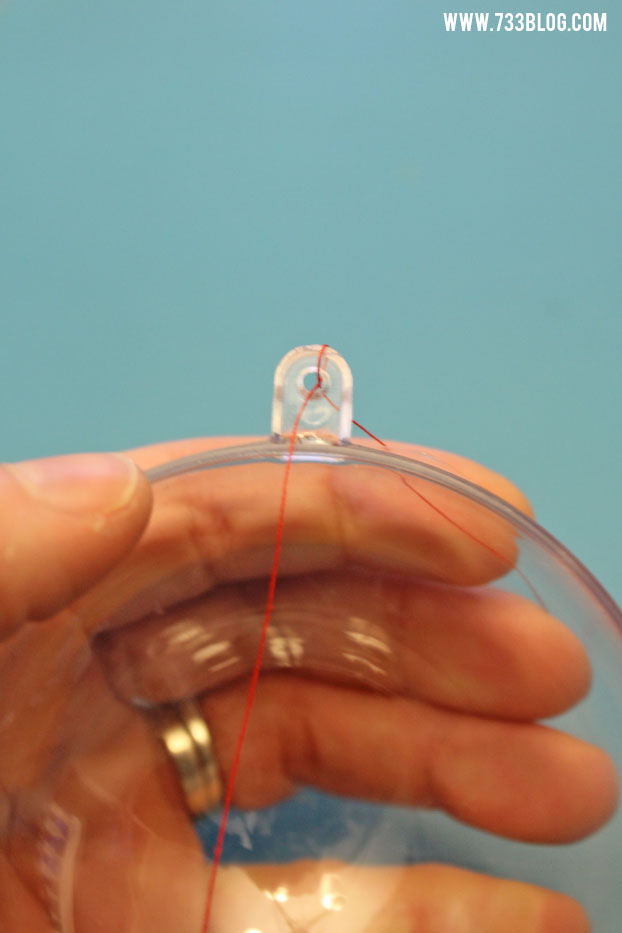 Go over and back through the loop to help secure the ornament to one section of the fishing line (this just helps keep them from moving up or down the line a lot).
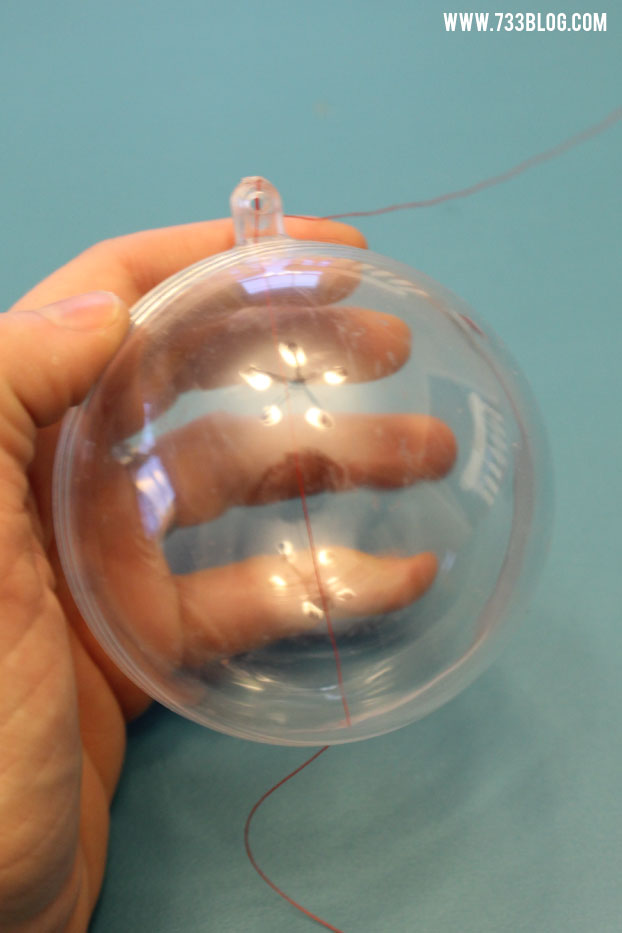 Lay the fishing line over the open half of the ornament and then place the second half on top, clicking the ornament closed and securing the fishing line.
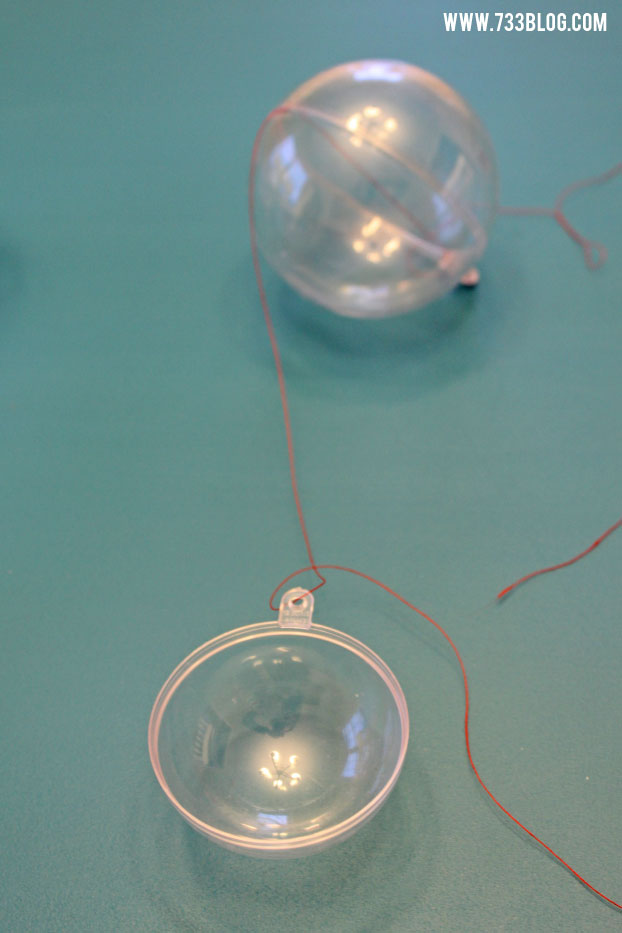 String the line through the next ornament the same way you did the first, making sure to leave about anywhere between 3-6″ in between (make sure your strands vary that way the ornaments aren’t all at the same spot along the three different strands – it will look fuller when they are staggered). Continue until you finish the strand. Repeat the next two strands.
Once all of the strands are finished, match up the top of the strands and knot them all together, creating a loop so that it can be hung from a hook and you’re done!

If you give this a try, I would LOVE to see where you hang it!


IMG_0117.JPG
IMG_0128.JPG
Thank you so much for the inspiration!
Hello there, I run a podcast called Babes of Wonderland (www.babesofwondlerland.com) our next episode is on the Little Mermaid and I was wondering if you would give us permission to feature this craft. We would of course credit you verbally during the podcast and provide a link to your page in our show notes (http://www.fancypantsgangsters.com/show-category/babes). Let me know! Thanks 🙂
Laurel, Of course! I would love for you to feature my Bubble Chandelier, as long as proper credit is given. I’d love for you to share a link to the podcast once it is available as well. Thank you! Kim
Love the Mermaid room. Did you dye the netting? If so, how?
I did not dye the netting. I bought it that color.
May I ask where you bought it I can’t find a purple one anywhere
I found mine on Amazon.
Beautiful room! Where did you get the bedding? I can’t find it on target website. Thanks!
I don’t believe they sell it anymore. This was a few years back.
I was trying to figure out how to make bubbles for an upcoming ocean transformation for my classroom without using latex balloons. Your ideas and steps made it very simple to make strings of bubbles. Thank you for sharing this!
I’m glad you found the tutorial helpful! <3
Love this bubble chandelier idea I’ve been working on transforming my nursery into an underwater paradise/mermaid theme, pick up ideas here & there as I go! I have had these plastic bubble bulbs laying around I got at a thrift store trying to figure something i could use them for, as her closet door is covered in clear bubble covering! I’m curious if u know of any way that u can add some sort of lights to the bulbs so it actually lights up like a chandelier? I’m thinking maybe mini strands of battery Christmas lights or mini battery tea light candles!?!? Suggestions or ideas would be great! Tia