I love to use flowers as embellishments. There are so many great ways to make flowers out there, and I just came up with one more, so keep reading to learn how to make this braided ribbon flower!
Very simple, versatile, and most of all, cute!
HOW TO MAKE A RIBBON FLOWER
SUPPLIES
Ribbon of varying widths, or as I used for this tutorial, scraps of fabric cut into strips – mine were 1/4″ wide x 14″ long. For a bigger flower, cut them wider/longer
Hot glue or fabric glue
Button – optional
DIRECTIONS
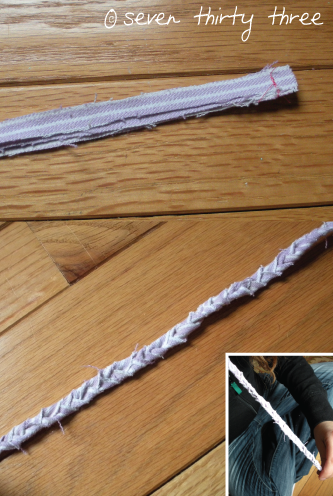
Layer 3 strips of ribbon or fabric, one on top of the other.
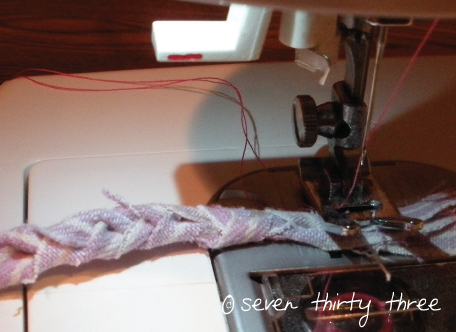
Sew across the top to hold the pieces together. Braid the three pieces like you would a hair braid.
You can tape down the end of the ribbon to prevent it from moving as you braid.
Sew across the end to secure the braid in place.
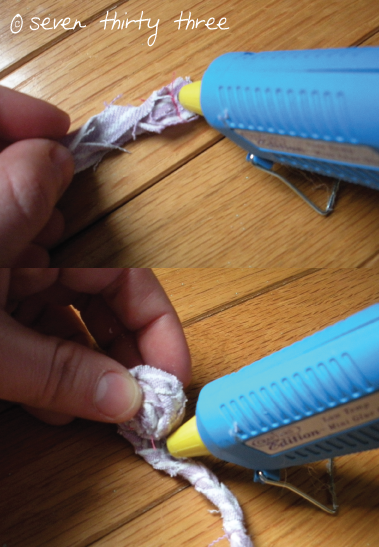
Add a dab of glue to the end and begin to roll the braid, adding glue as you go.
Glue the final end to the side of the rolled ribbon, add a button embellishment to the top center and you have a sweet little flower. (oops! Got ahead of myself and forgot to take a picture, but easy enough to figure out).
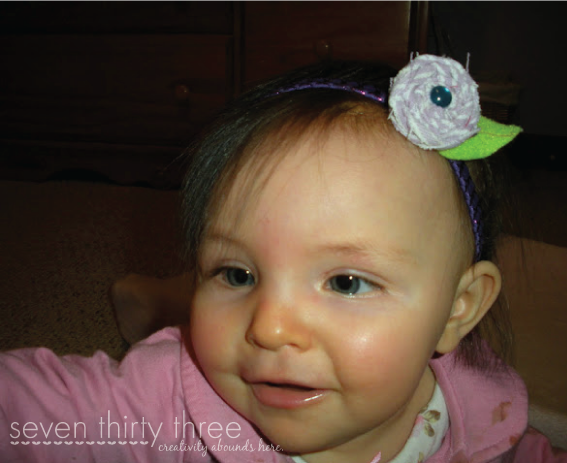
I added a braided ribbon flower to a pre-purchased headband with a green felt leaf. But there are so many ways you could put these to use!
- Adhere a braided flower to your gift wrapping for an extra special touch.
- Create multiple braided flowers in various colors and sizes, then hot glue them onto a wire wreath base for a beautiful and whimsical door decoration.
- String several braided flowers together to create a charming garland for your mantelpiece or wall.
These are so quick I think I’m going to go whip up some multi-colored ones for all of the little girls in my life!



That is a really great look, I love it!
So pretty!! 🙂
Adorable!! 🙂 I love a good tutorial, especially for things involving ribbon and sewing. 🙂 Love the ring version!! I’m visiting from Kimba’s party. Here’s my link from the party:
http://serenitynow4amanda.blogspot.com/2010/02/preserving-your-memories-without-losing.html
Cute idea! Thanks for sharing with Made it Monday! Jules
These are so cute! I love the little flowers right now and want to make some out of ribbon!
Thanks for posting your link to your couduroy purse on my blog! I love that you linked up!!
GREAT idea 🙂 those could be use to adorn pillows too 🙂
Cute flowers!! Thanks for linking @Creative Itch’s “Sew Cute Tuesday”!!
Thanks for posting! LOVE THESE and so simple!
I have been wondering how to make these – it is so simple. Thanks!
What a fun and simple idea made into an adorable flower. Thanks for the idea and tutorial. Some friends and I are getting together to make various flower pins and I will tell them about idea too! Thanks
Wow! I love it!
Thanks ladies! 🙂 I am using these on an upcoming spring project – make sure to check back soon to see what I did!
This is so fun! I love it! VERY CREATIVE 🙂
how did you know that i found some lovely cheap pearl necklaces at the thrift store? I love this little twist on the flower. Great idea! I will definately be trying this! Thanks for the inspiration! please, stop by sometime and say hello!
Those are great Kim! I love that they are hot glued! That looks like fun! Thanks for linking! I love having you on Creative Cats!
oh so darling! I can see some many wonderful uses. ,my head is spinning now!!!
I featured these at somedaycrafts.blogspot.com. I saw these a couple of days ago and am finally getting to them.
Love, love, love fabric flowers! I enjoyed being able to see how you braided it. Nice job and now there are so many fun ways to use them!
When I braid something like this, I frequently use a safety pin and stick it to a pillow or the couch or pin it to my knee or some such. Works great!
Super cute idea, by the way. :>)
I love this idea! I featured it on my blog today, featuring 3 dozen flower tutorials. Here is the link:
http://oopsey-daisy.blogspot.com/2010/04/wednesdays-wowzers-3-dozen-flower.html
THANKS!!!
Brilliant… I cannot wait to try it, thank you so much for sharing your idea with us…. 🙂
love your creation. thanks for the tutorial too.