
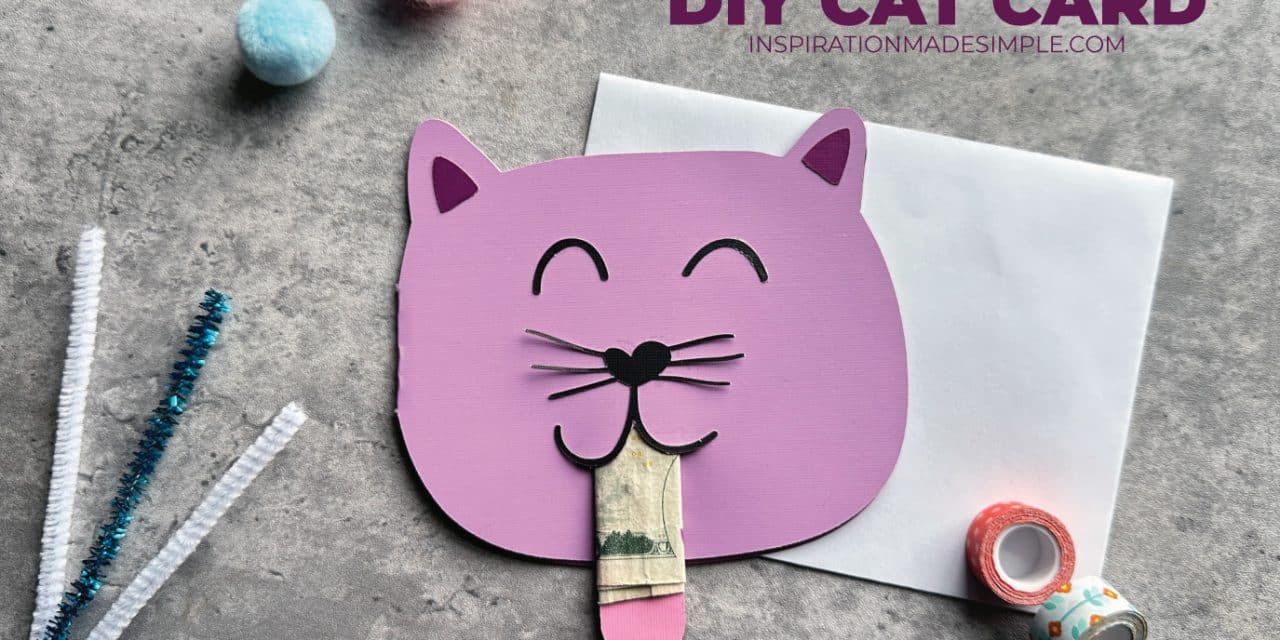
I haven’t come up with a fun and creative piece all on my own in a long time now… so when this DIY Cat Card with a pull tongue money holder popped into my head, I HAD to make it! My brother and his wife are expecting a boy in April. Their 9-year-old daughter, Adelie, is a huge lover of cats. I wanted to give her a small gift during the baby shower since adding a baby brother to the family is obviously going to be a big change for her.
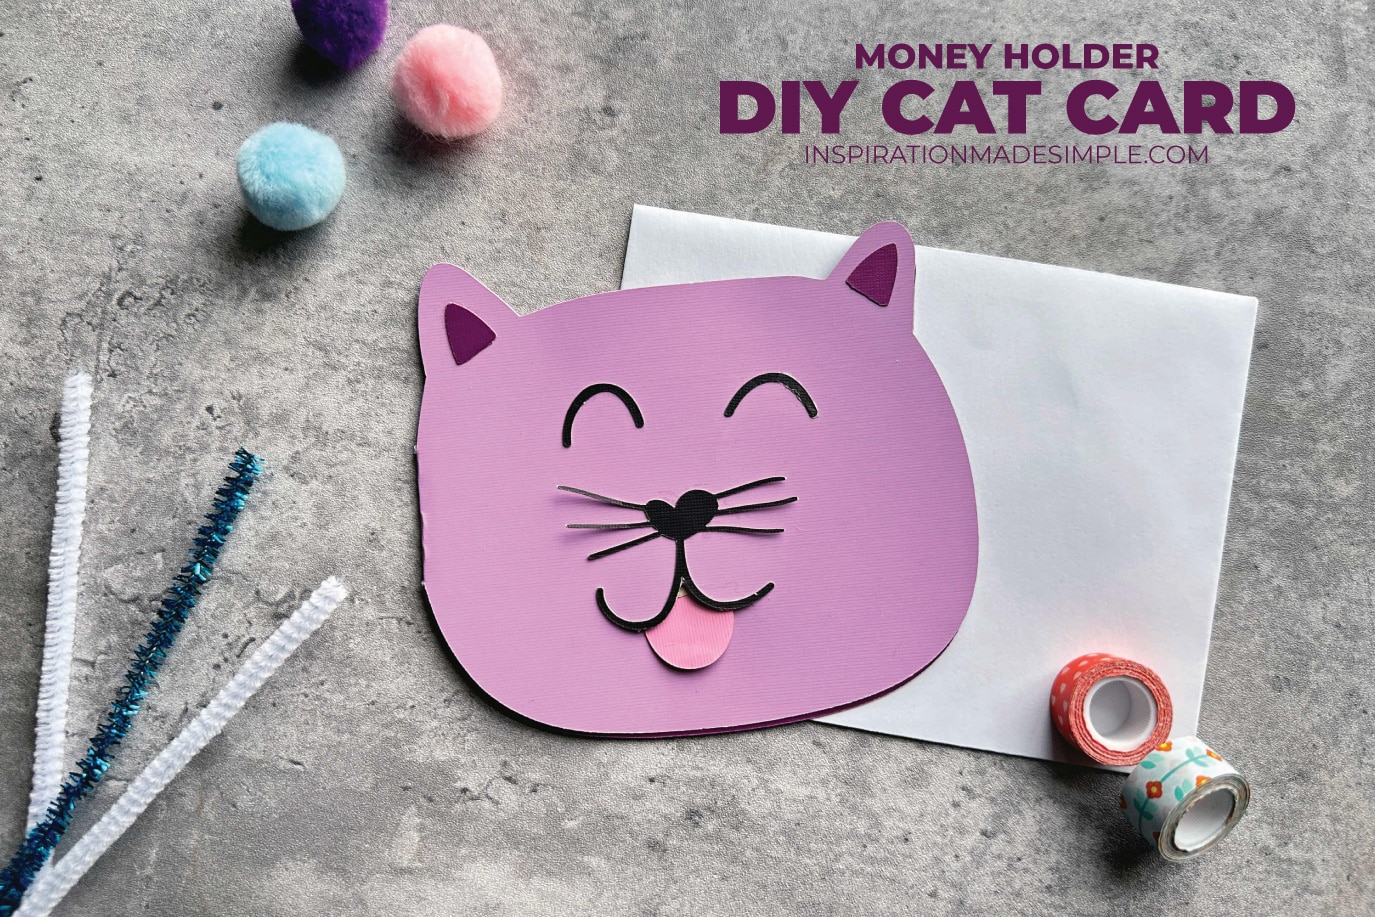
This DIY Cat Card can be customized with whatever colors you’d like, and you can choose to add money to the pull tongue, or just leave it plain. So let’s get into how to make it!
I designed the cat in Adobe Illustrator and exported it as an SVG. You can use that file to upload into a craft cutter software to cut out the pieces. If you have a Cricut, I’ll be sharing a link to the Cricut Design Space file so it will be all set up for you.
SUPPLIES:
Card SVG File or Cricut Design Space File
Cardstock – 4 colors
Glue Stick or Spray Adhesive
Exacto Knife
Cricut or other craft cutter
Putting together the Money Holder Card
Open the Cricut Design Space File or import the svg file into your cutting software.
Change each piece of the cat to the color you would like and then send to the machine. I’ve shared lots of Cricut tutorials over the years, so for more details on how to do this, visit my Cricut archives.
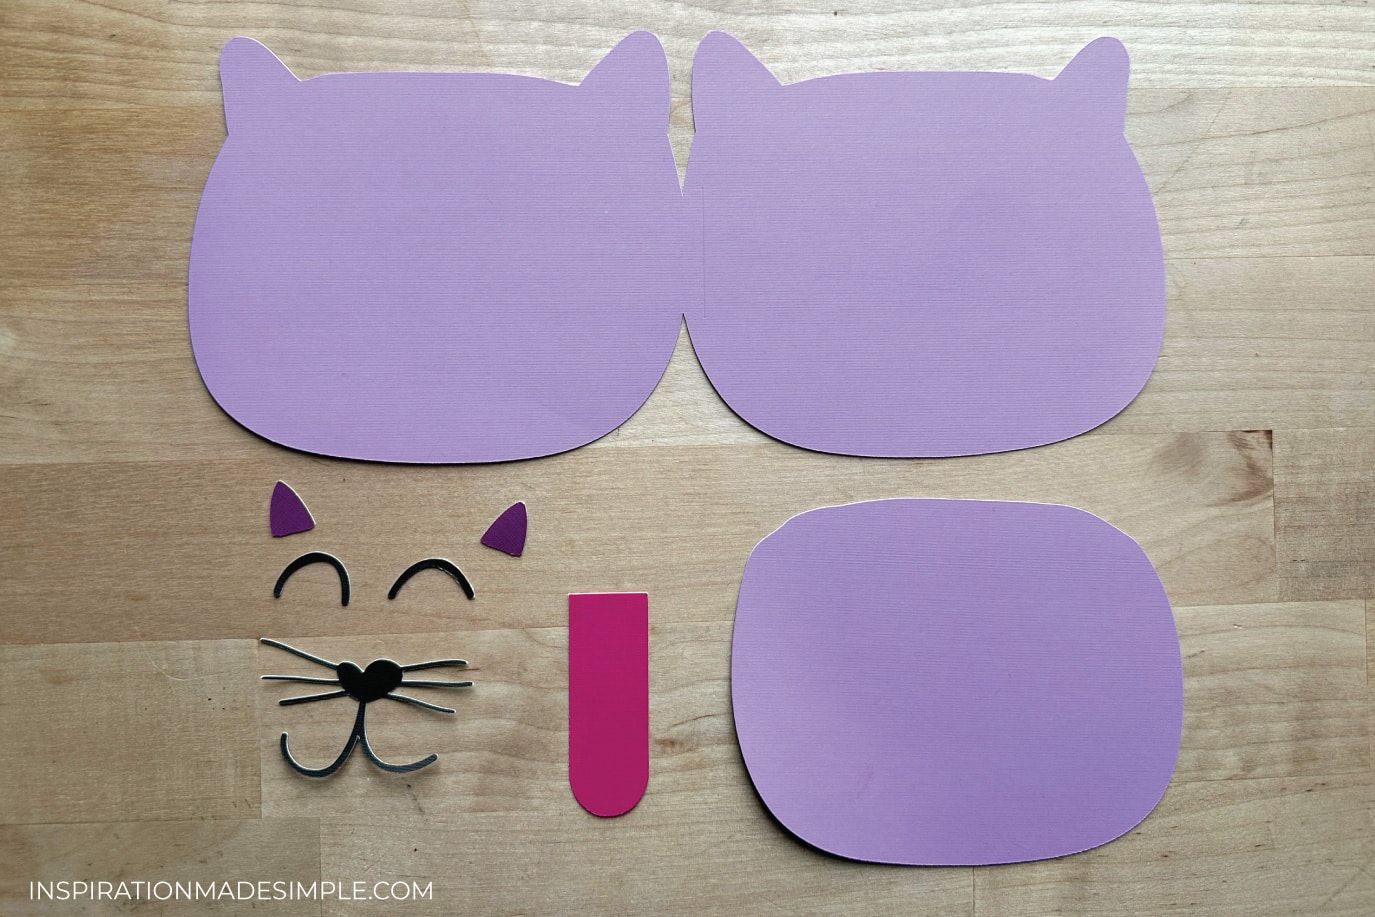
Once all of the pieces are cut, it is time to assemble the DIY cat card!
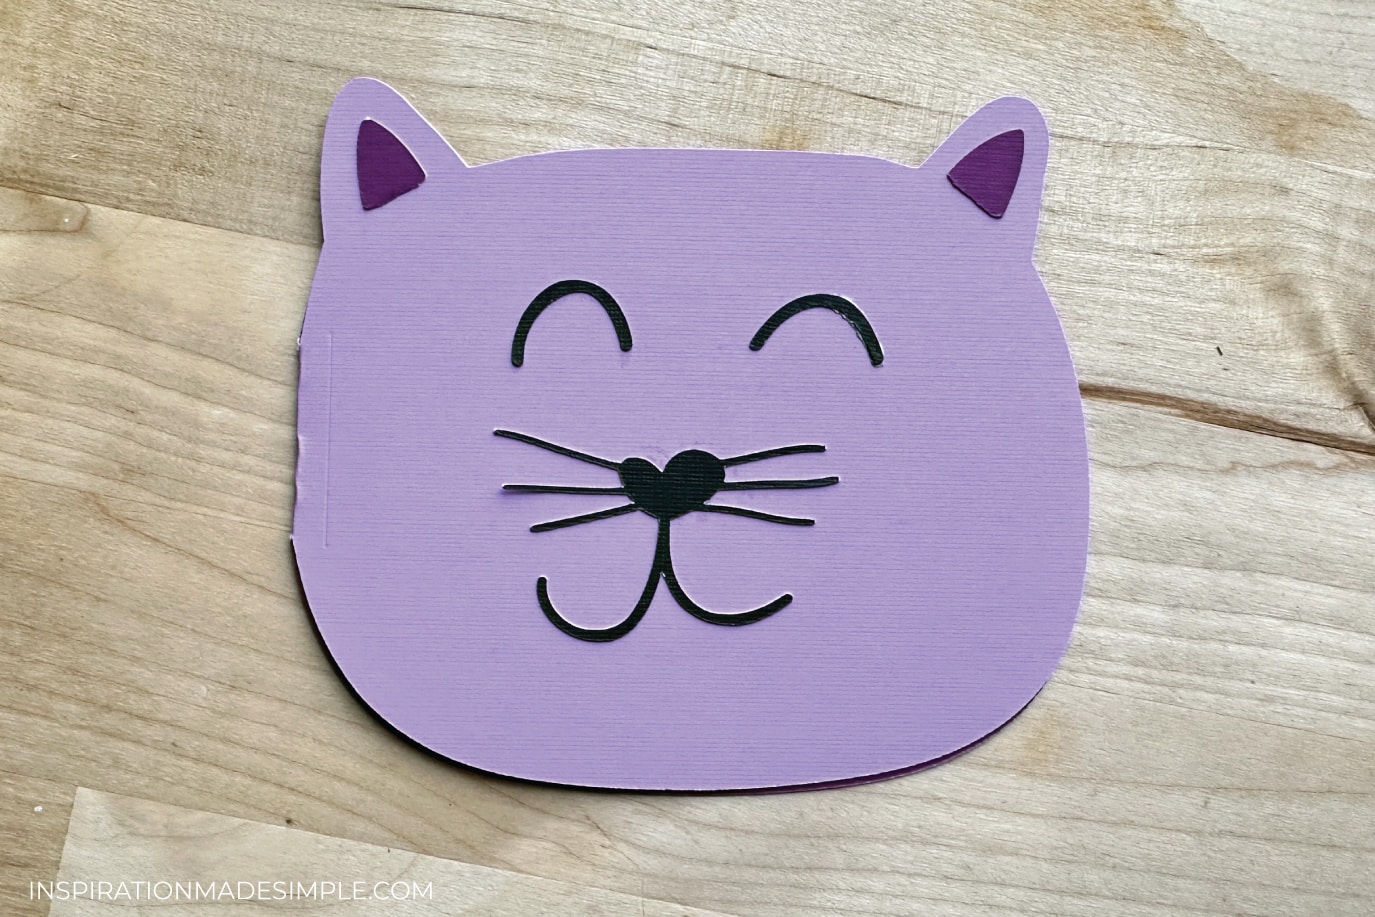
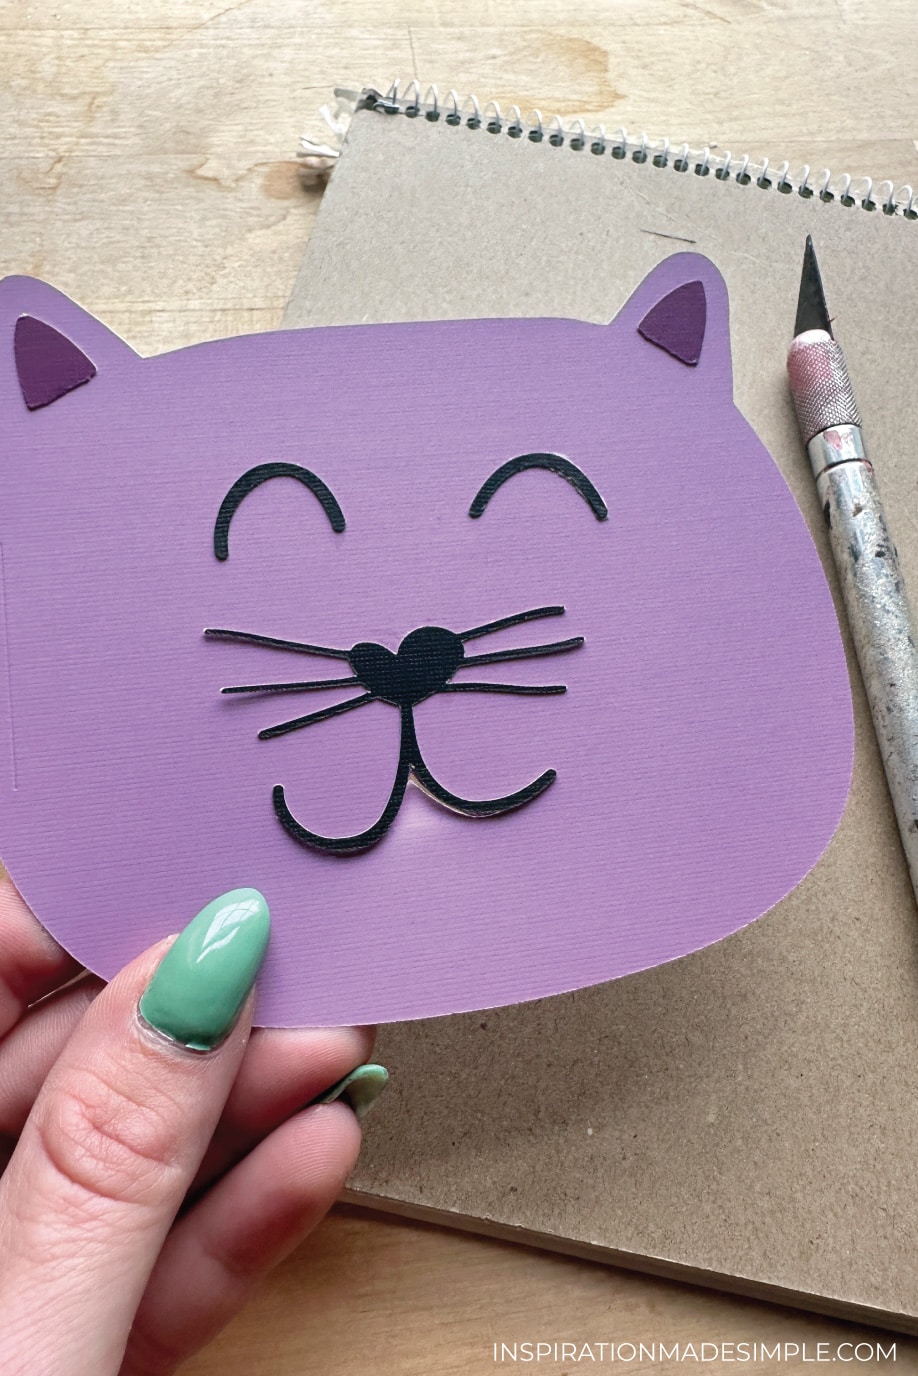
First, using a glue stick, adhere the facial features (not the tongue!) and ears to the front of the card. Make sure the mouth is low enough that you’ll be able to insert the tongue with money on it and it won’t go past the top of the card.
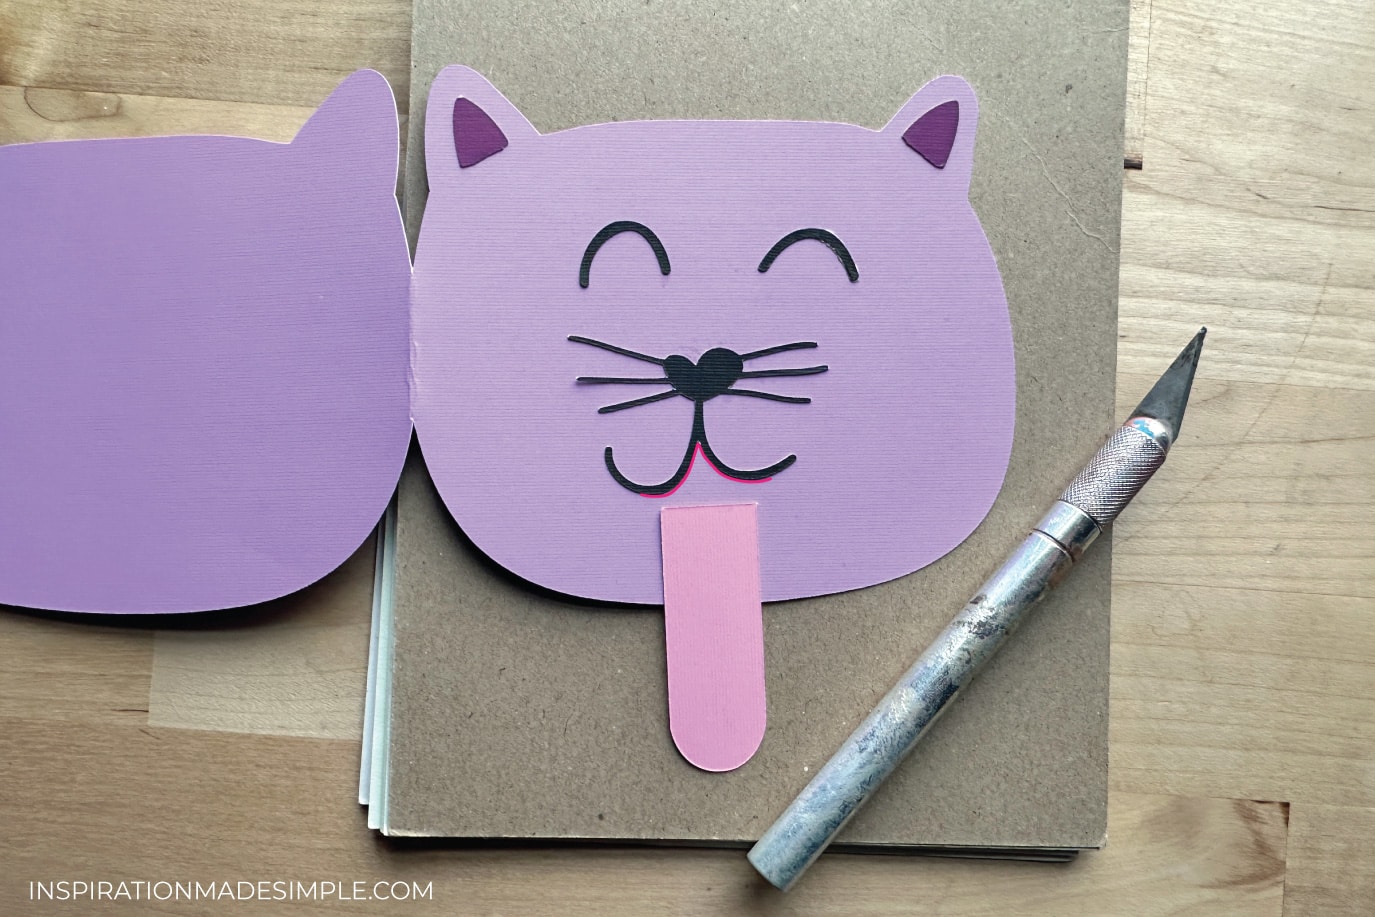
On a cutting mat (I couldn’t find mine, so I used the back of a notebook), use an Exacto knife and follow the edge of the inside of the mouth (see pink line on above photo for reference).
Make sure that you cut a bit bigger than the width of the tongue.
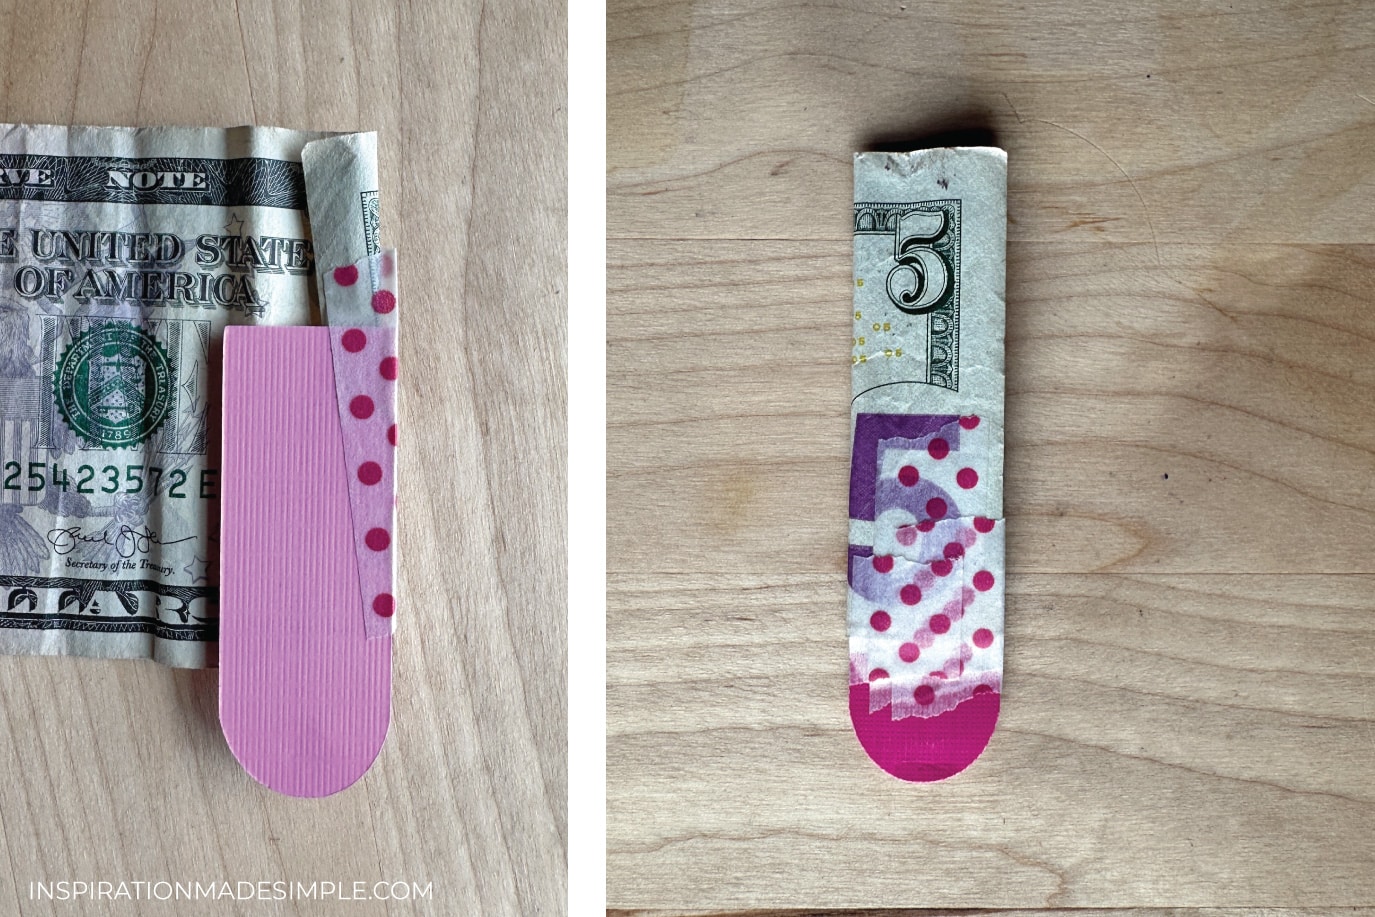
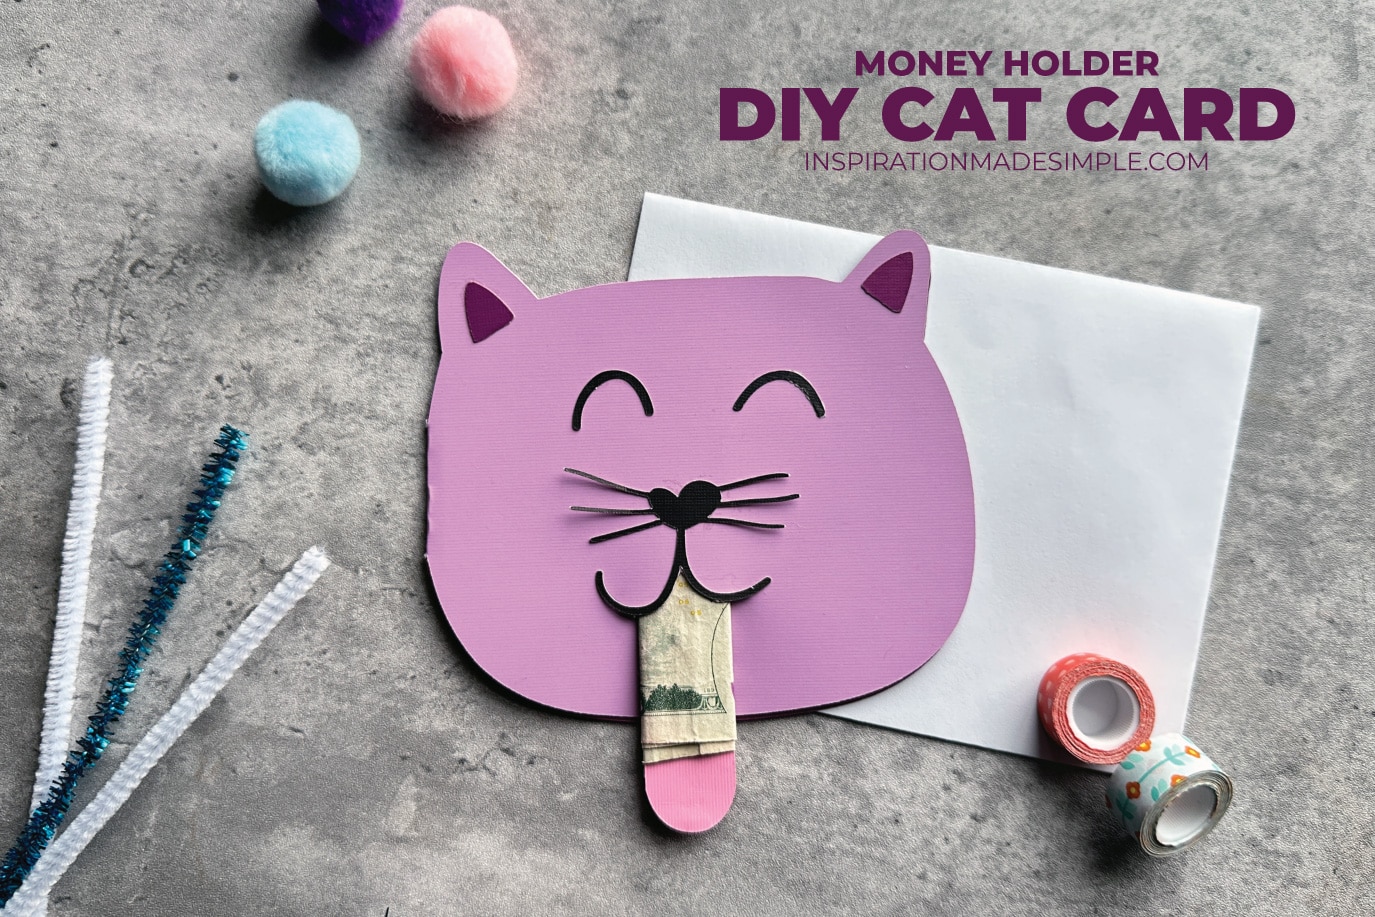
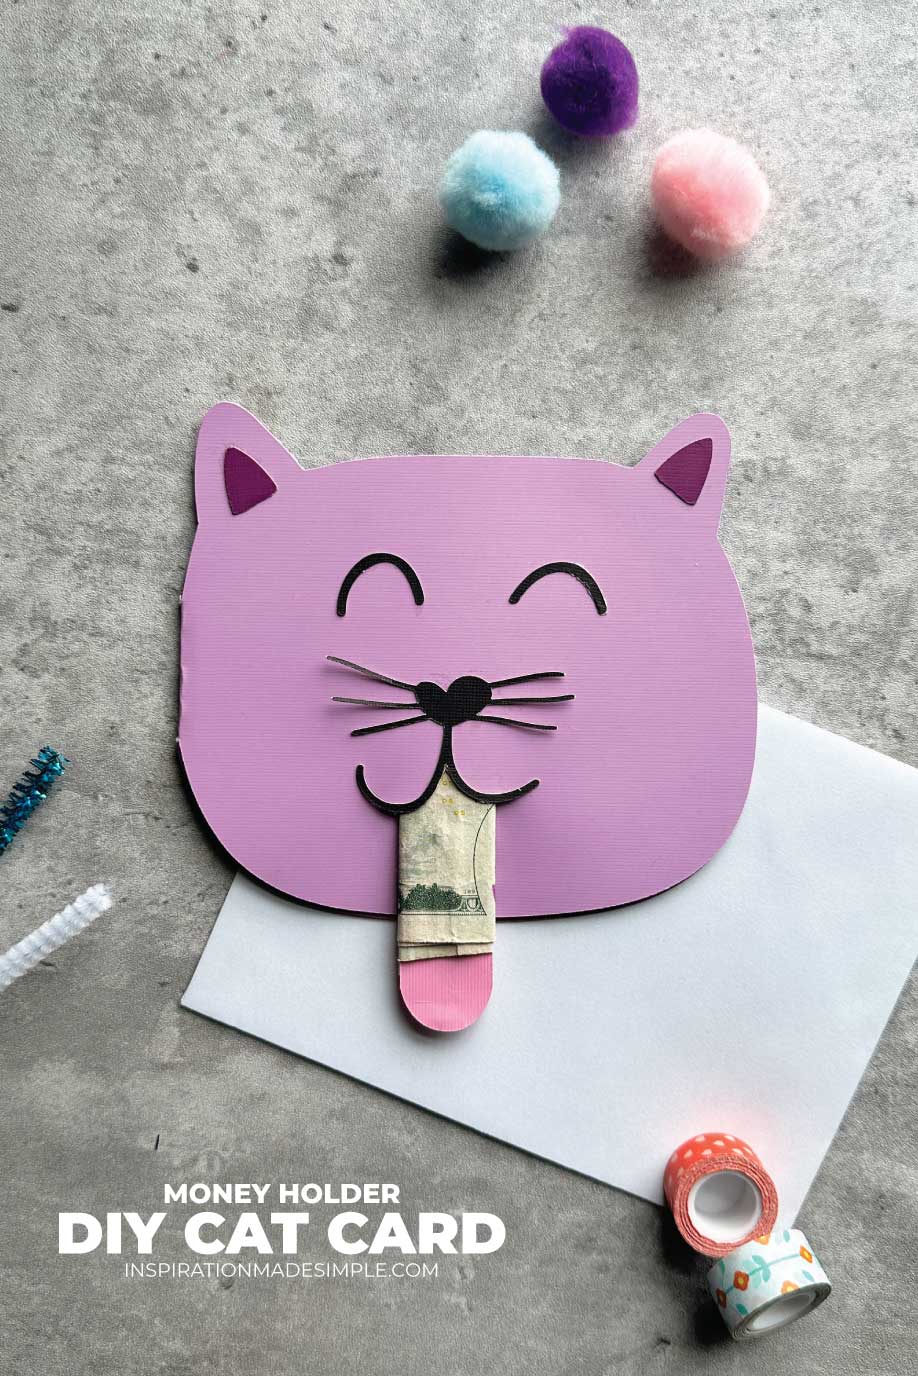
Next, we’ll wrap a bill around the tongue. This step is optional. If you don’t plan on adding money, you can skip this step. Secure the money to the tongue with washi tape and then tightly wrap it around. Secure it closed with washi tape. The right side of the above image is what the back of my cat’s tongue looks like. This ensures the money won’t get stuck as the receiver of the card pulls out the tongue.
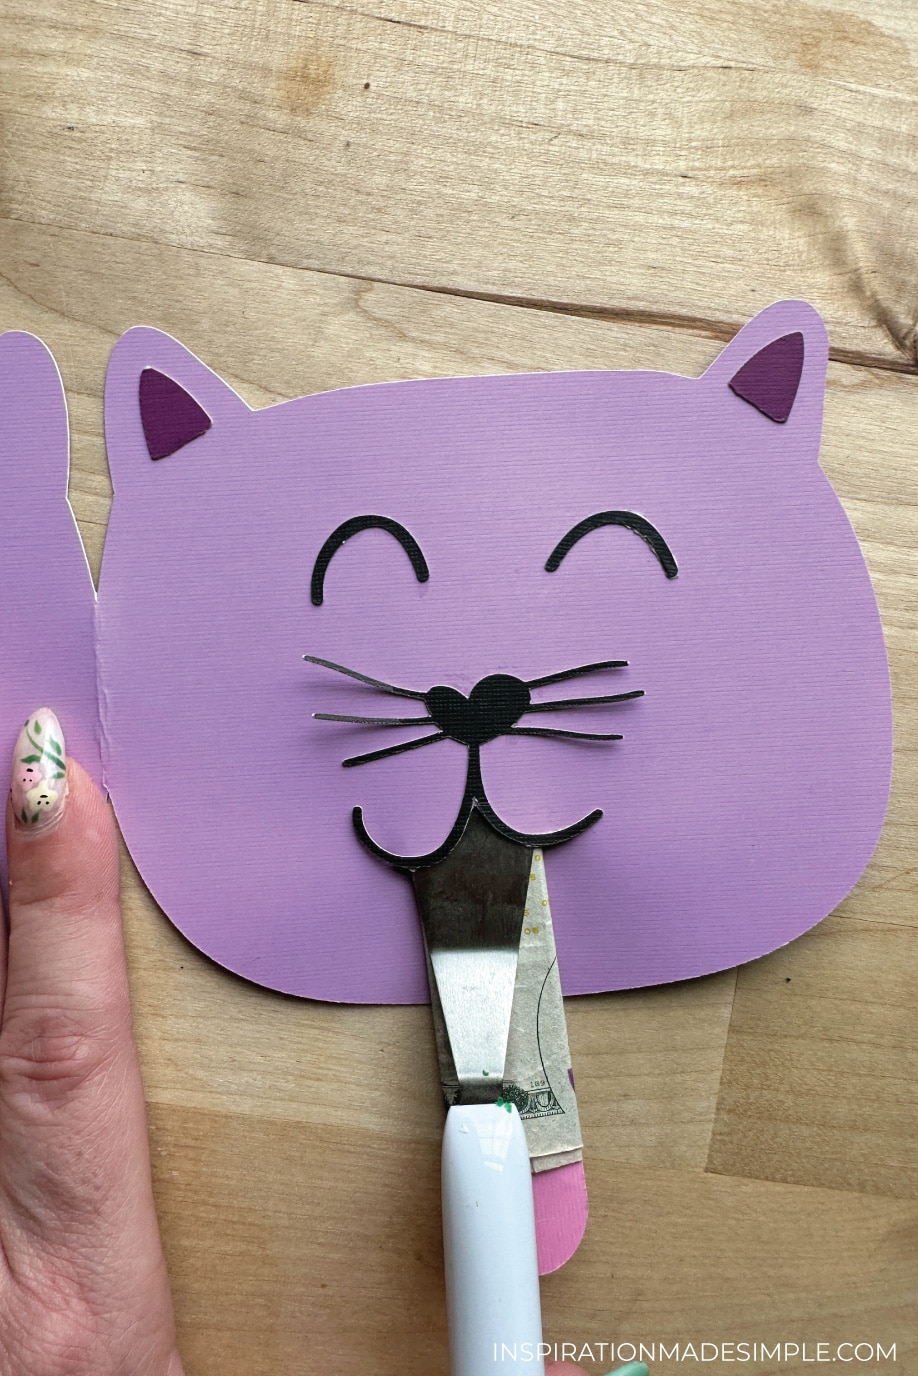
Insert the tongue into the cats mouth. I used my Cricut spatula to help with this process.

Now that the tongue and money is in place, let’s cover it up!
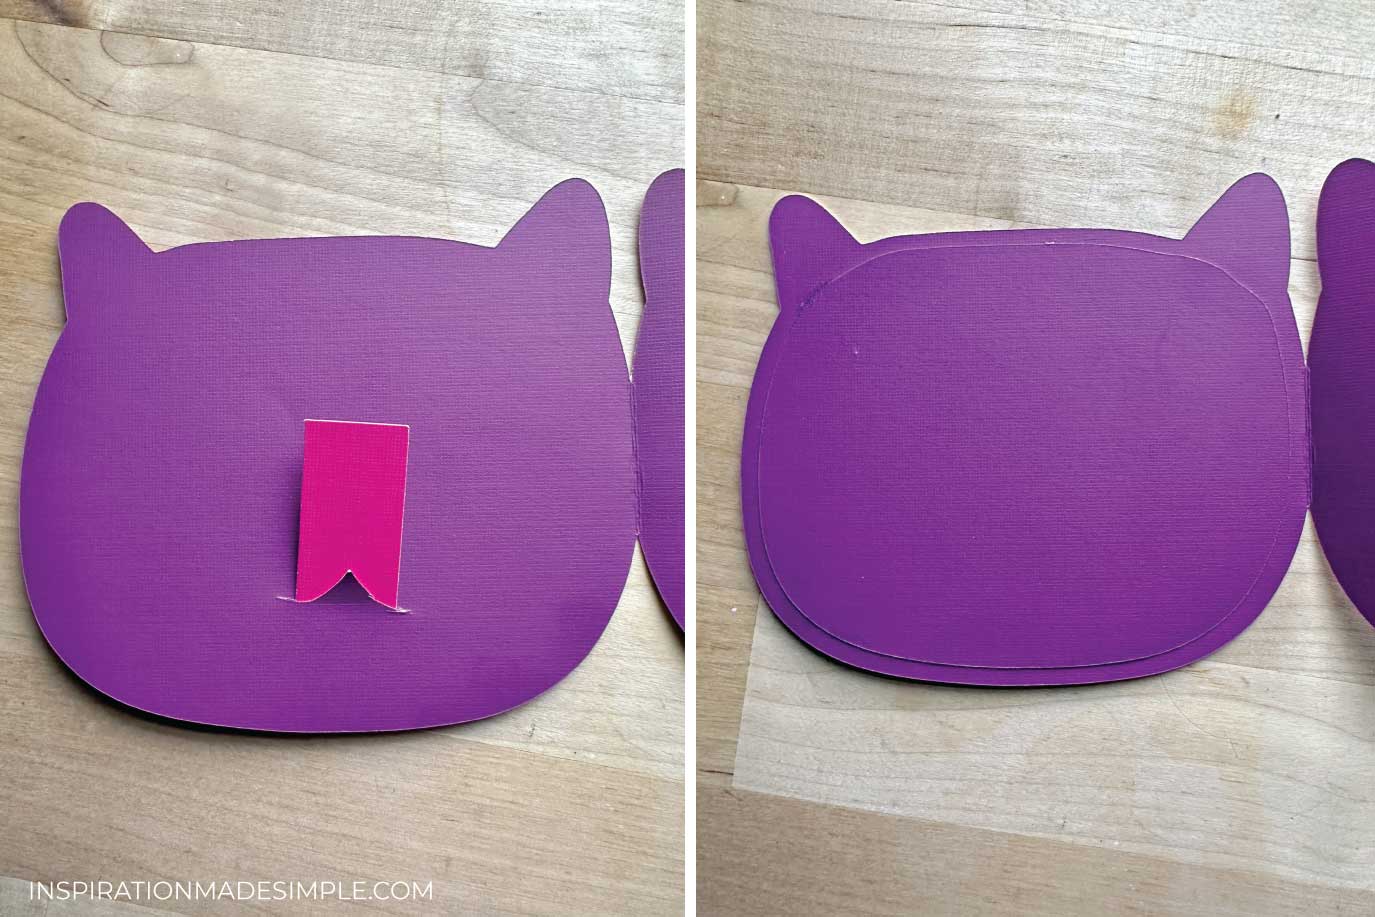
Flip the card over, and using the last cat head piece, add glue just to the edges of the piece that you want to face the money. You may want to leave the top open in case the mouth placement was a little high (I had to do so). Adhere to the back of the front of the card – covering the tongue and money. (I did this BEFORE wrapping the tongue with money and don’t recommend it. Save this step until the tongue is all set!
If you are not adding money and you don’t want the tongue to move, simply glue to tongue to the card and then cover it up as noted above.
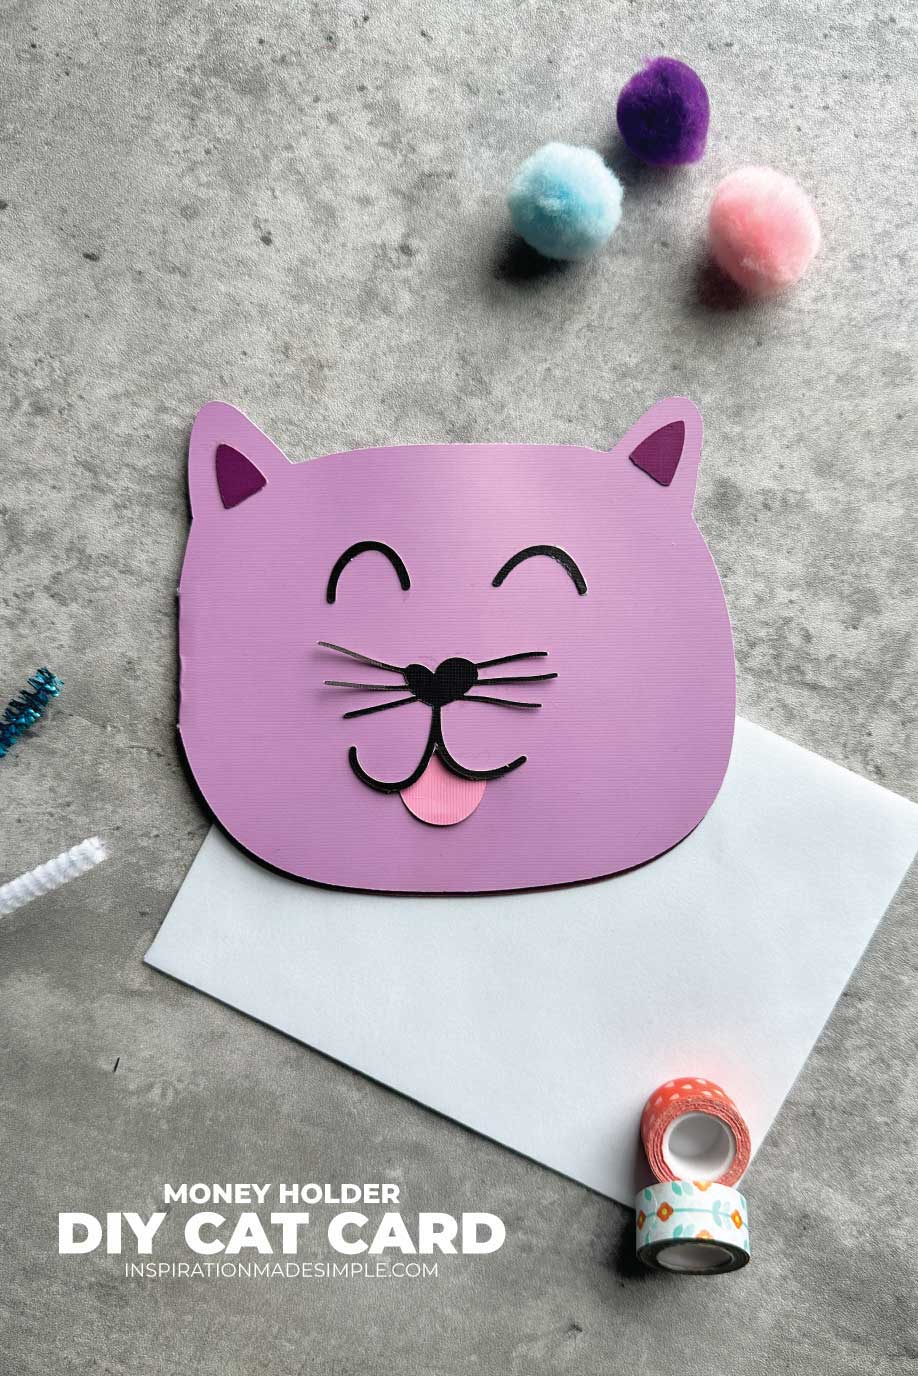
Lastly, fold the card in half. Write a sweet little message inside and it is ready for gifting!
I hope you enjoyed this DIY Cat Card with Pull Tongue tutorial! If you make it, feel free to share pictures with me over on the Inspiration Made Simple Facebook Page!
