
My son and his cousin competed in the Kids Adventure Games in Stowe, Vermont this past weekend. It is a 3.5 mile obstacle course designed for kids and it was amazing! Held at the gorgeous Trapp Family Lodge (the Trapp family were made famous in The Sound of Music), the kids, in teams of two, ran, biked, zip-lined and more through the course. The Kids Adventure Games has events throughout the USA, so if you have adventurous kids, I definitely recommend checking it out.
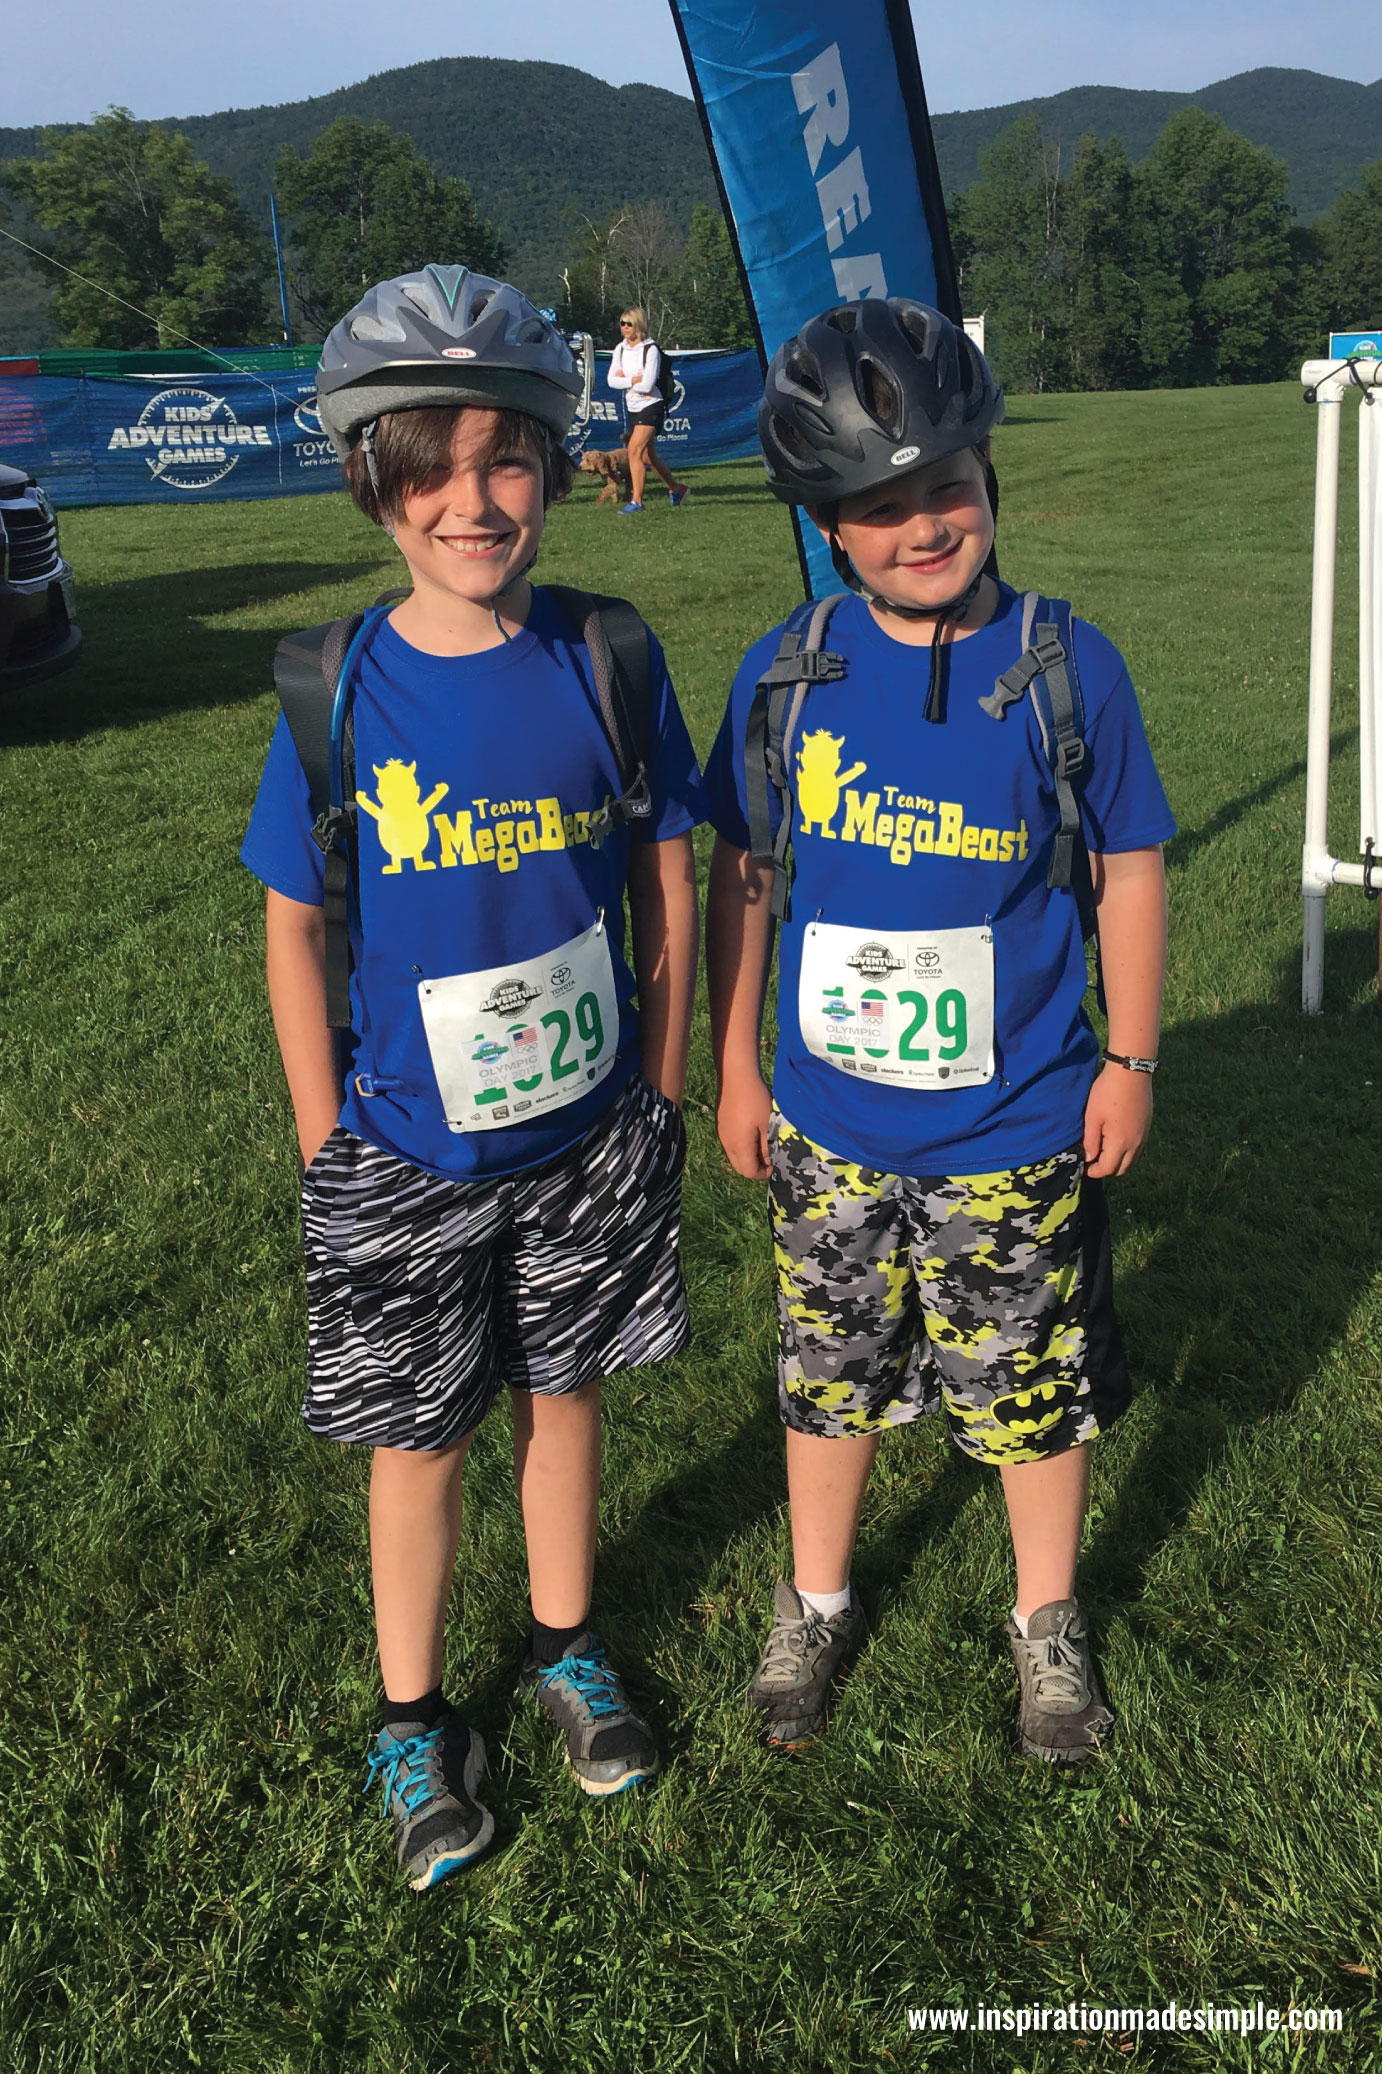
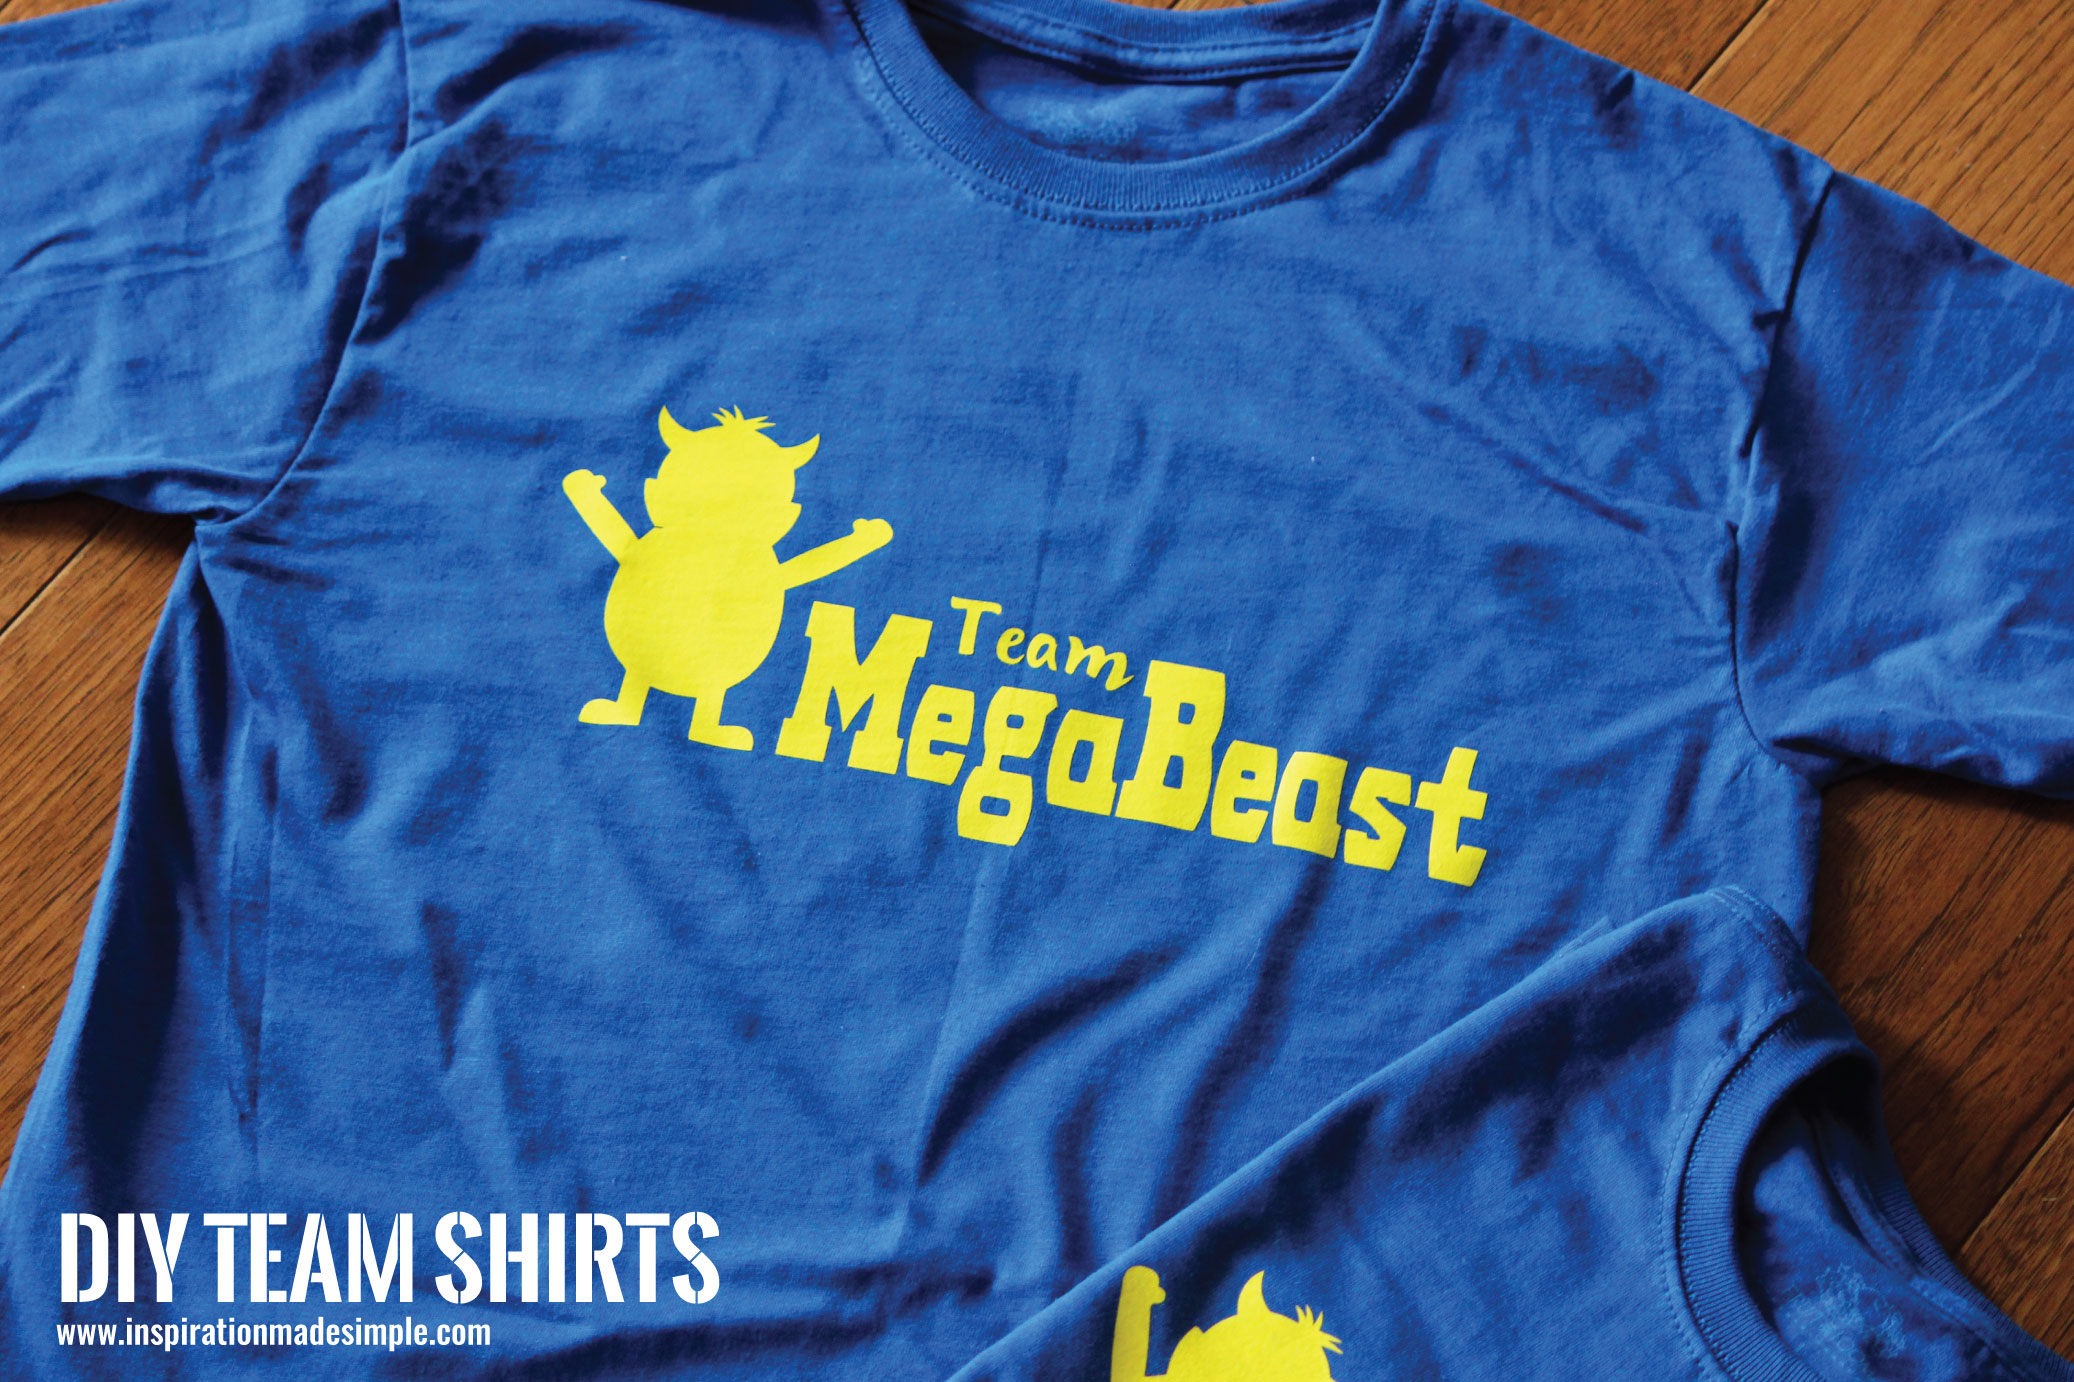
My son and his cousin are totally showed that they are 10 year old boys when choosing their team name: Team MEGABEAST! Being the crafty mama that I am, I knew I needed to make them a team shirt to wear on race day. And thanks to my Cricut Explore, I was able to create them in under an hour.
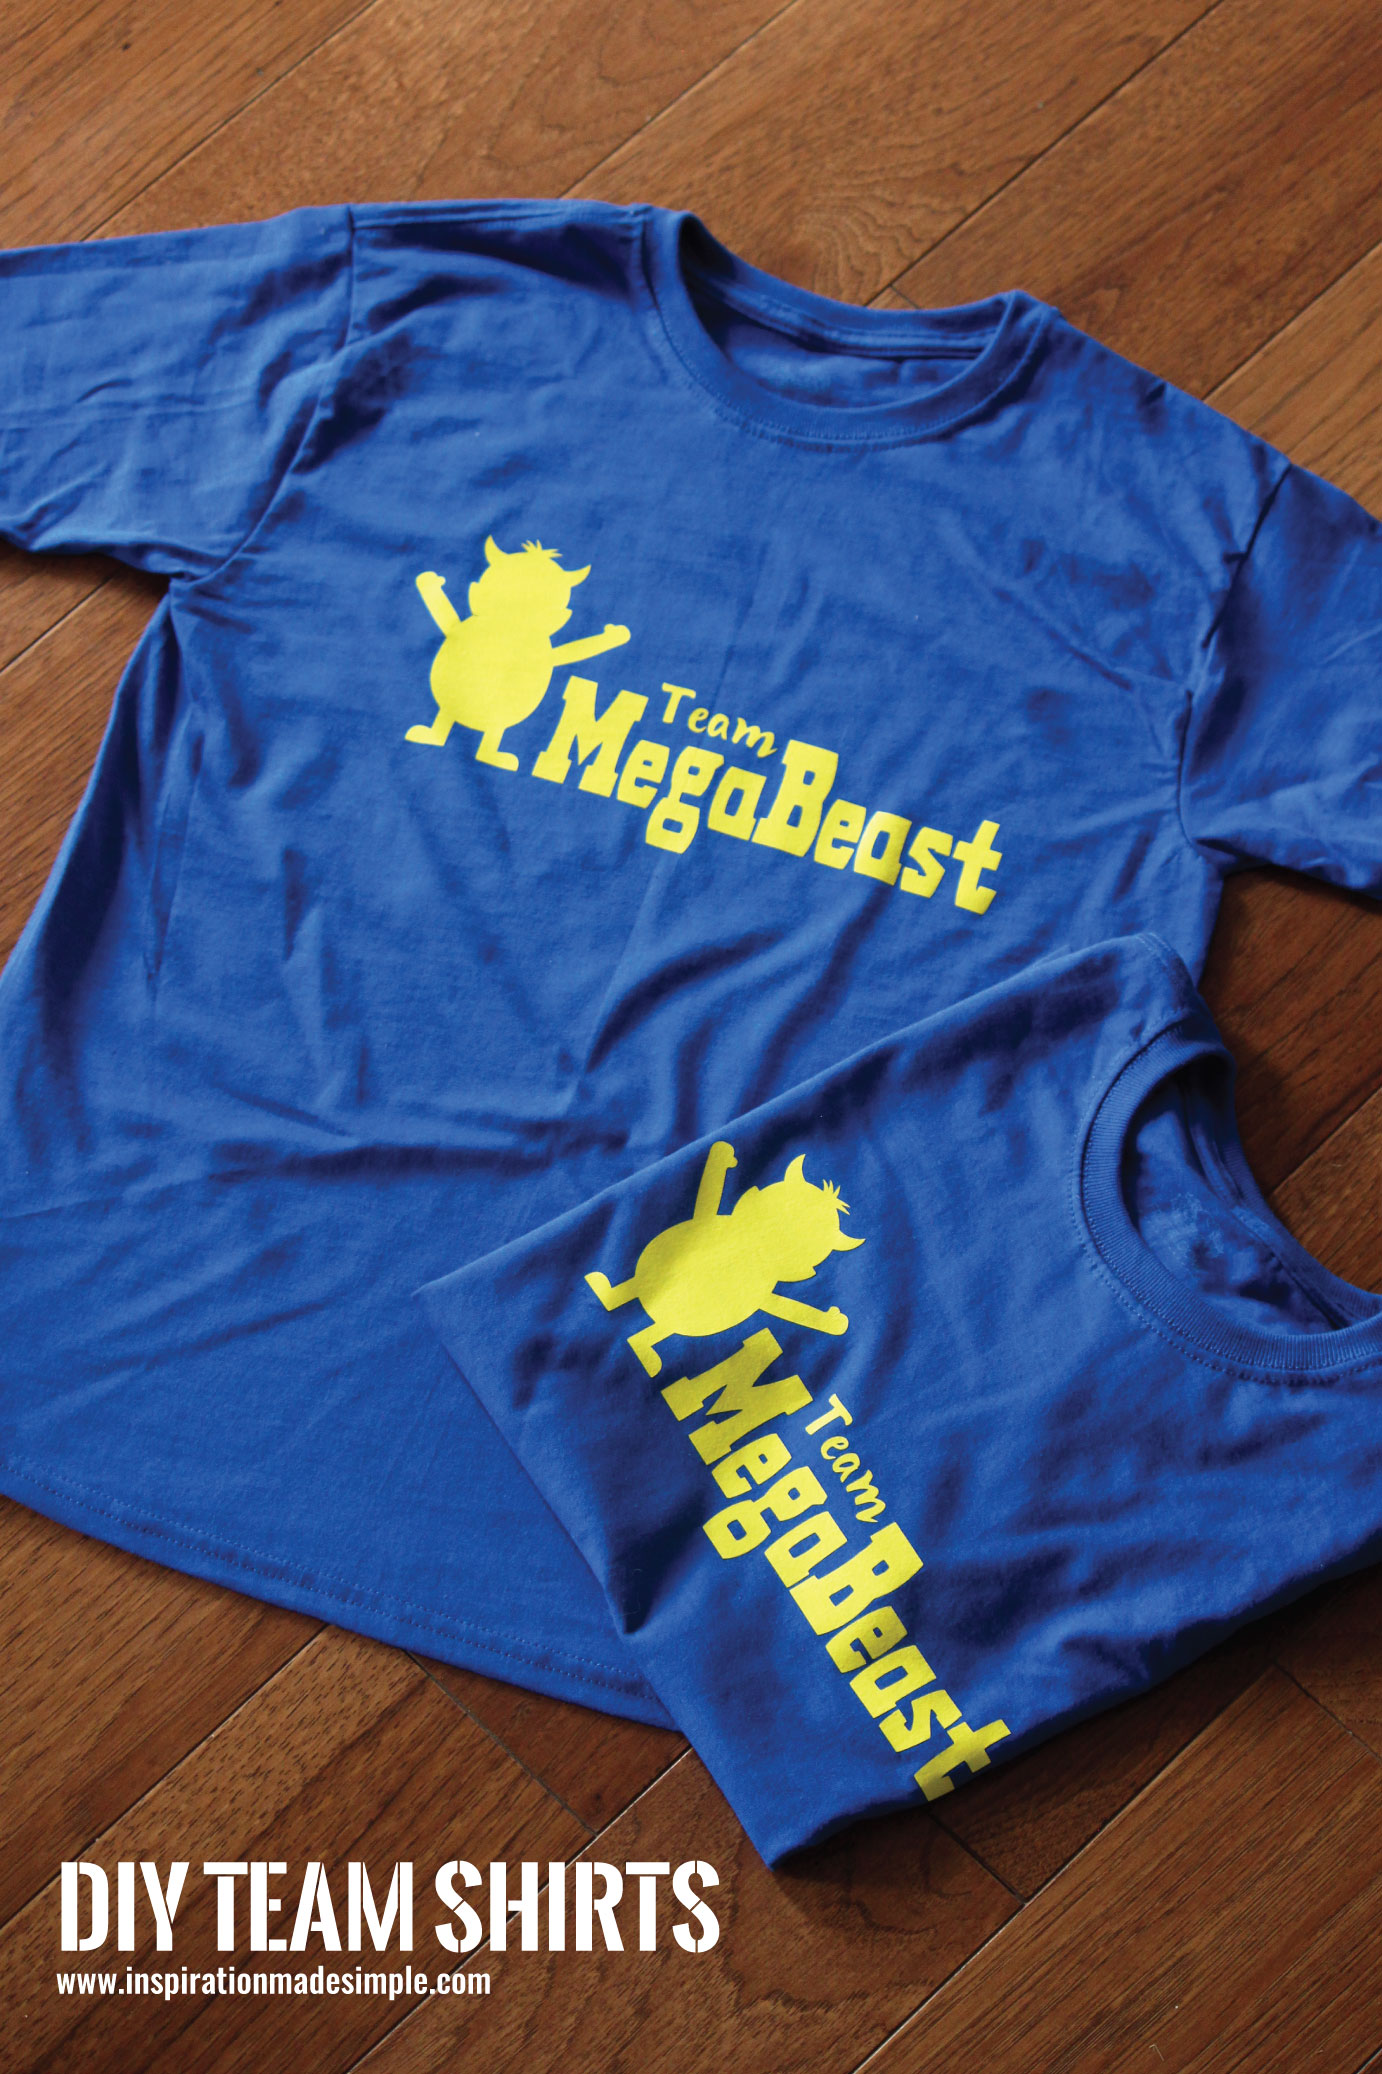
I purchased t-shirts from Walmart for $3 each and then headed home to design their team insignia. Not a designer? No worries, Cricut Explore has thousands of images that you can use in Cricut Design Space, which is how I created the cut file for this shirt!
SUPPLIES NEEDED (Affiliate links for your convenience):
Cricut Explore or Maker
Cricut Cutting Mat (I like the LightGrip Mat)
Cricut Design Space
Iron On Vinyl
Iron or Cricut EasyPress
HOW TO:
Open Cricut Design Space in your browser.
Click on New Project in the top right corner.
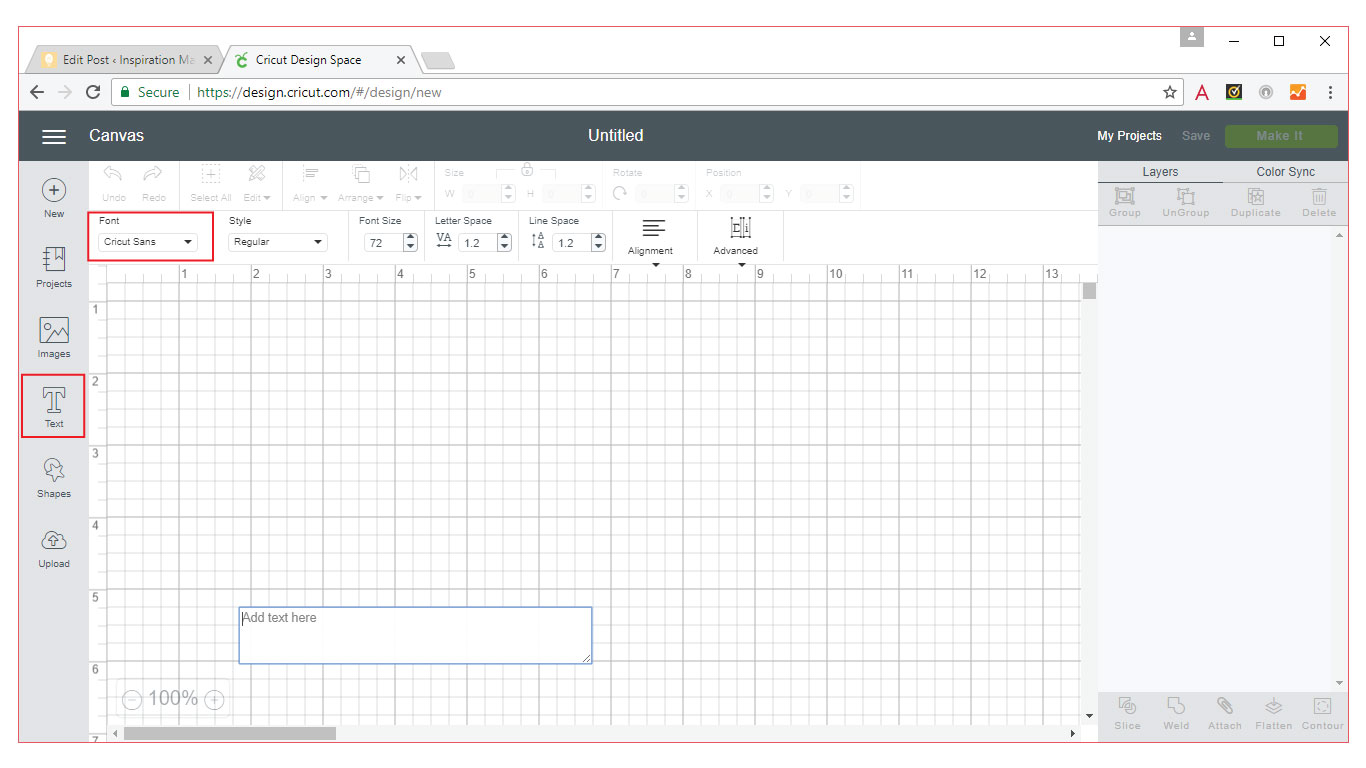
Now it’s time to get designing. I started with the text. Simply click the “Text” button on the left hand side, which will create a new text box. You can choose your font by using the box at the top of the mat. You can use both Cricut Fonts and fonts that you have on your computer, which is what I used.
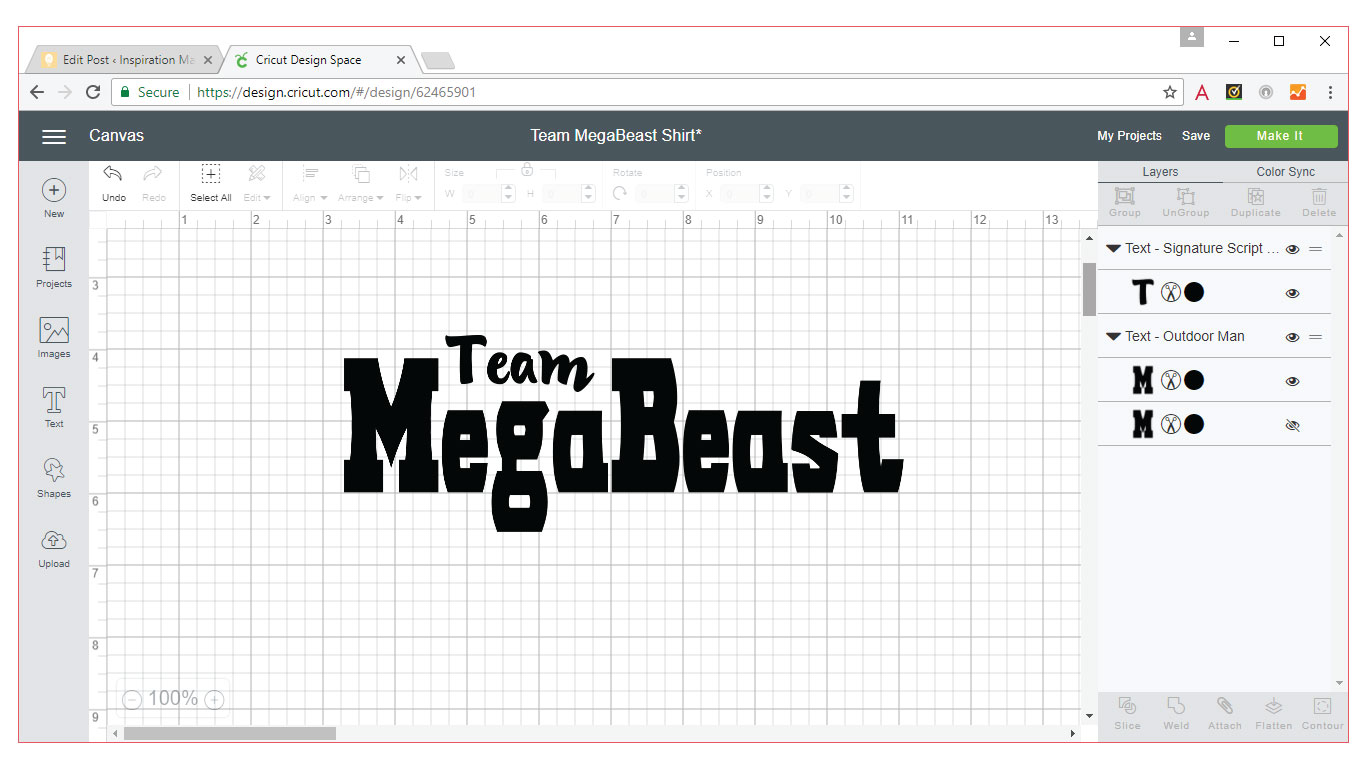
I typed MegaBeast first, and then created a second text box for “The”. I resized it and moved it to where I wanted it to lay.

Next, I clicked on image on the left hand side and searched through the Cricut Image Library until I found a monster that I liked. Select the image you want and click on Insert Images.
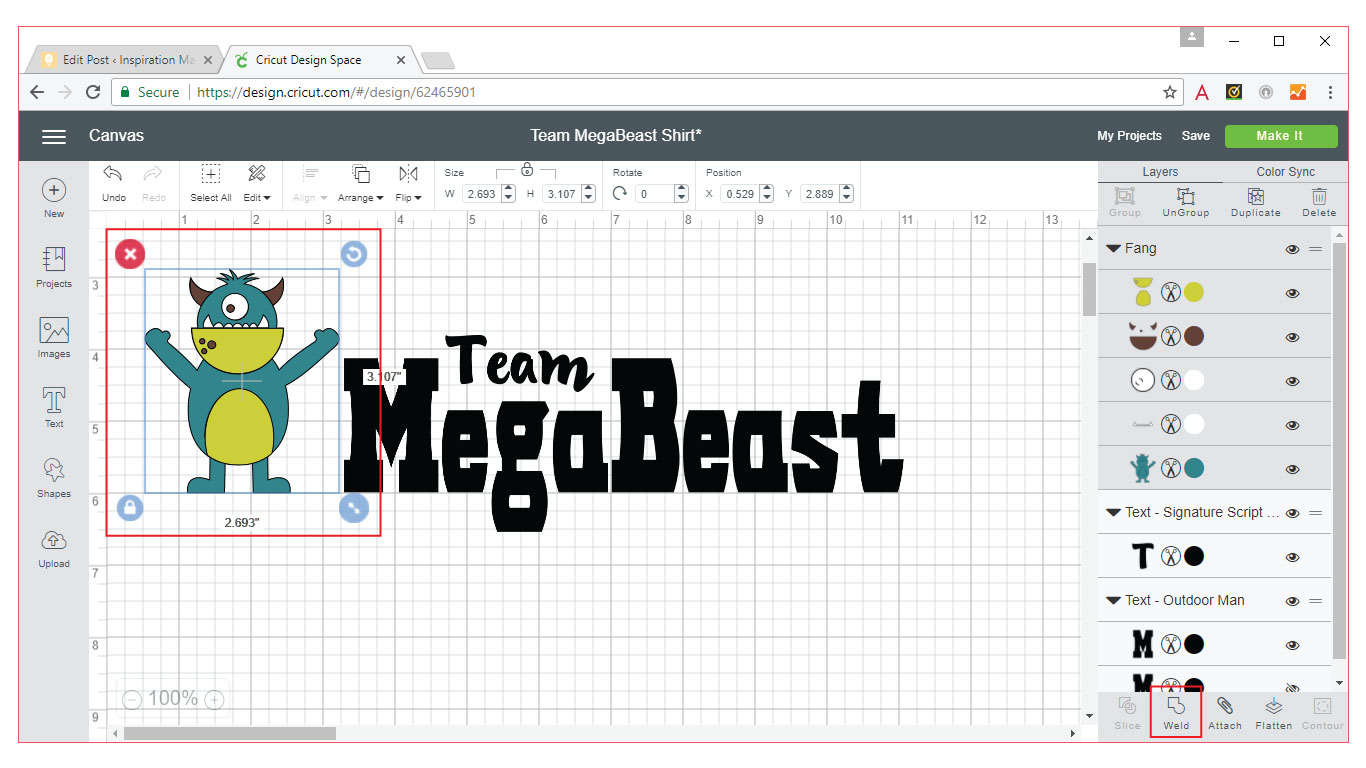
The image I chose was made of multiple pieces, but I just wanted the silhouette. To turn the image into a silhouette, simply click on it and then click on weld. This will merge all the layers into one.
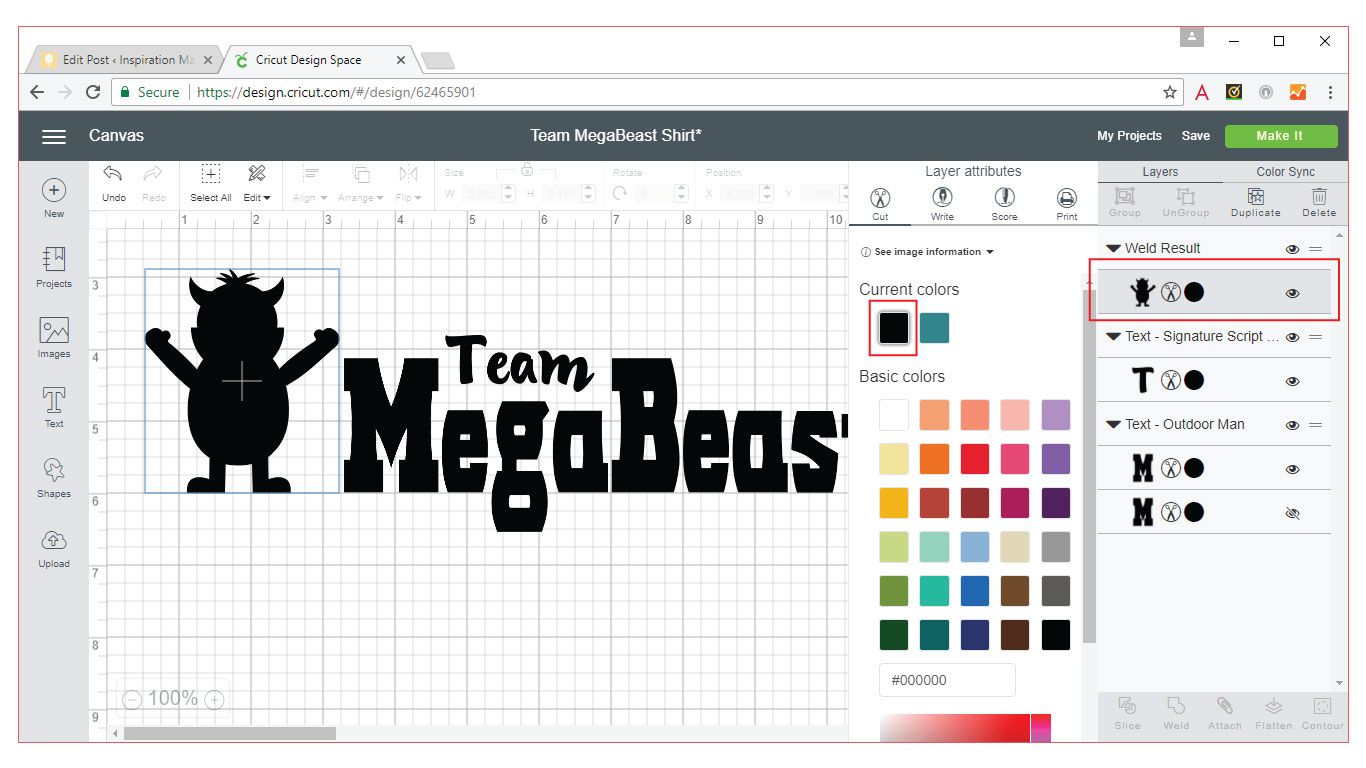
Since I wanted my entire design to be cut out of the same piece of vinyl, I turned the welded monster black, to match the text. To do so, locate the monster layer in Design Space and click on it. Choose the color you desire.
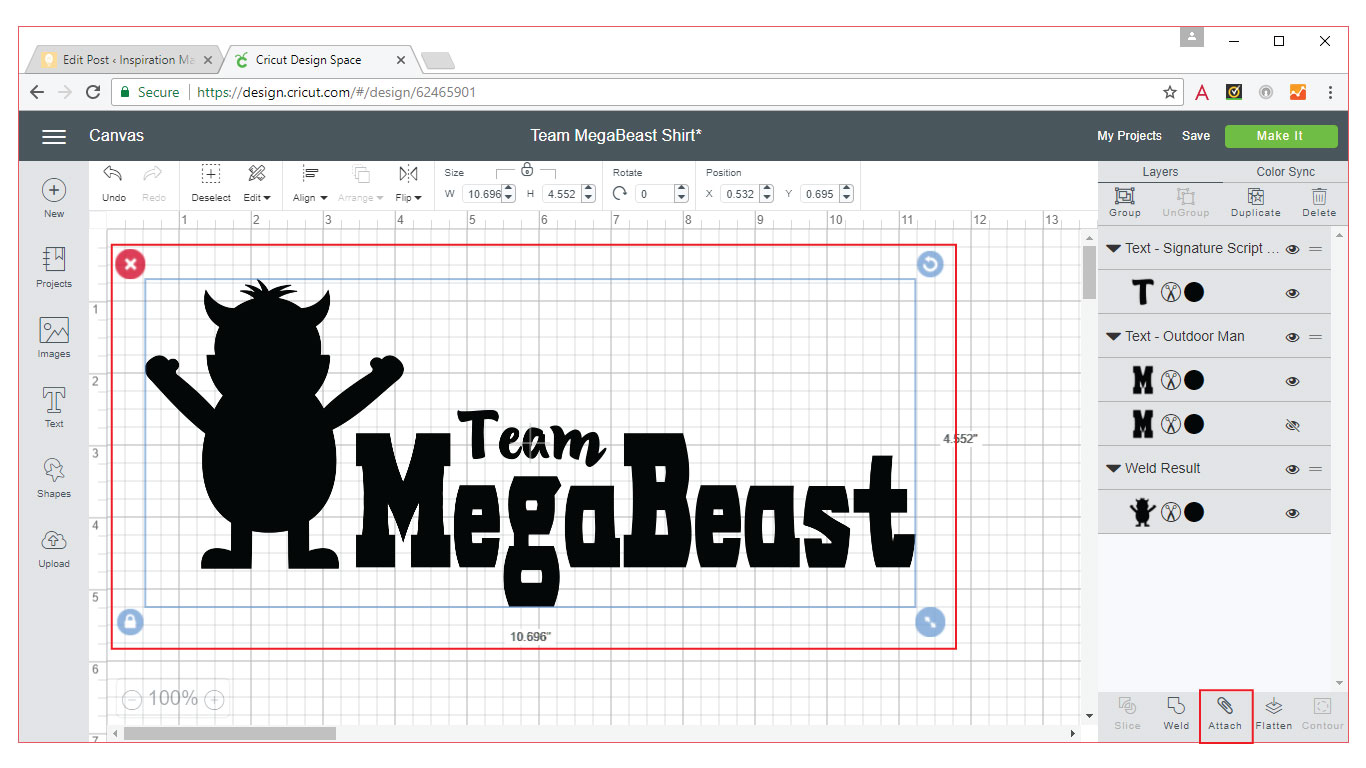
Resize and place the image where you want it to go. Next, select the entire design (CTRL-A on Windows computer) and click attach.
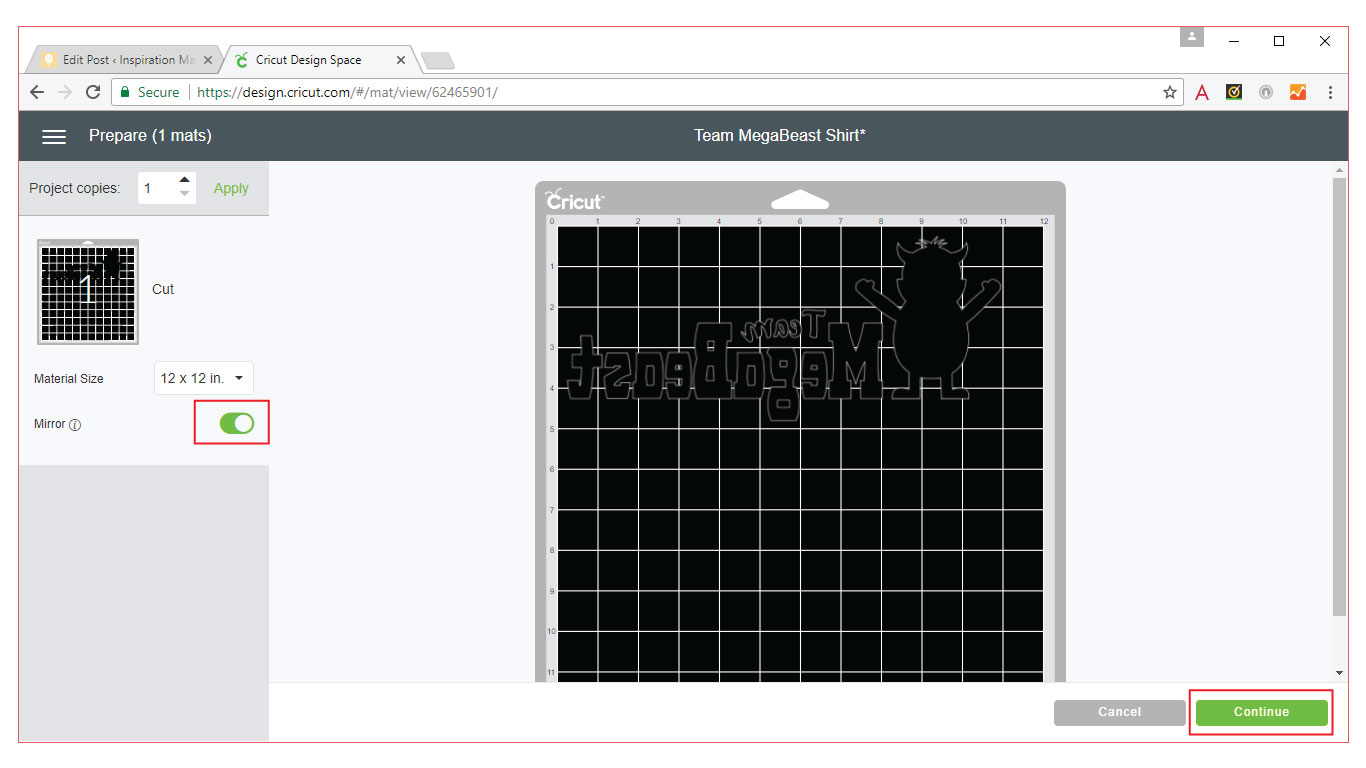
Now it’s time to send the design to the machine! Simply click on “MAKE IT” in the top right hand corner. Because we’re using Heat Transfer Vinyl you need to click MIRROR. Click continue.
Set the dial of the Cricut Explore to . Load your Heat Transfer Vinyl onto a Cricut mat (shiny side DOWN!) and into your machine. Click Go on Cricut Design Space and watch in amazement as the machine cuts out your design!
Remove the mat from the machine, weed out the excess vinyl and then it’s time to adhere the design onto the shirt following the directions on the Heat Transfer Vinyl.
That’s all there is to making your DIY Team Shirts with the Cricut Explore. Creating t-shirts is probably the thing I use my Cricut for the most, though I do use it to create stencils and banners and tags a ton too.
Did you know that you can sign up for Cricut Access? Plans start at $4.99/month, and depending on which one you choose, you get to use a certain number of images and fonts plus get discounts on physical purchases!
