

I am by no means skilled at clay. I’ve played with it a few times (check out the fun Christmas ornaments the kids and I made last year) and really enjoy it as a crafting medium. That being said, I figured out how to make some super easy clay buttons and am going to share with you how to do so! If I can do this, you can do this.
Supplies Needed:
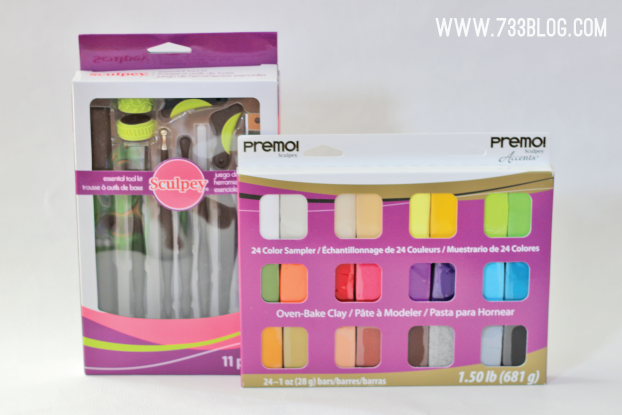
Premo! Sculpey Clay – you’ll be tempted to buy a cheaper clay – don’t. These are buttons, they are going to go through the wash and face everyday wear and tear. You want a high quality clay to stand up to the abuse. The good news is, you can get a ton of regular sized buttons out of one little bar of clay.
Surface for working with your clay – I wish I had a 12×12 tile on hand. It would have been ideal to use because I could have created the buttons on it and then placed it straight in the over. Since I didn’t have tile, I used wax paper and then placed that into a throw away aluminum dish. Do not use your cookie baking sheets.
Rolling pin – do not use your kitchen rolling pin… or if you do, do not ever use it with food again!
Two pieces of cardboard – I tore the flaps off a box – they were the ideal size, 1/4″ thick.
Metal Frosting Tip or Small Circle Cutter – Again, do not use with food once you’ve used this on clay
Clay Knife or Xacto Knife
Tooth pick or other similar tool to create button holes
(Sculpey included a box of tools for working with clay that had almost everything I needed for this project and they made things a ton easier)
Directions:
Now that we’ve gathered all of the supplies, let’s get started! 
Choose what color you want your buttons to be.
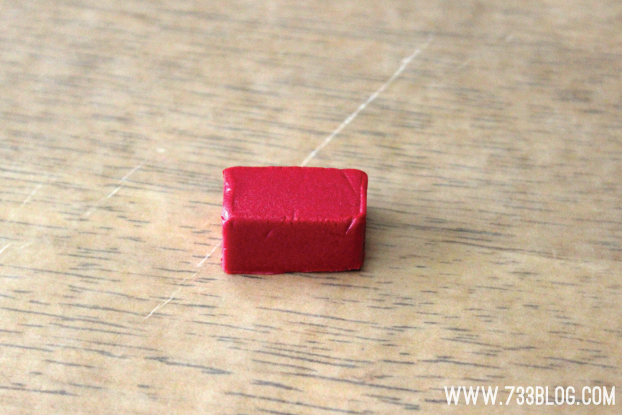
Cut 1/4 piece off of the clay bar.
Condition clay per instructions on the box – rolling into a snake, a ball, etc. Really work the clay until it is warm and easy to manipulate.
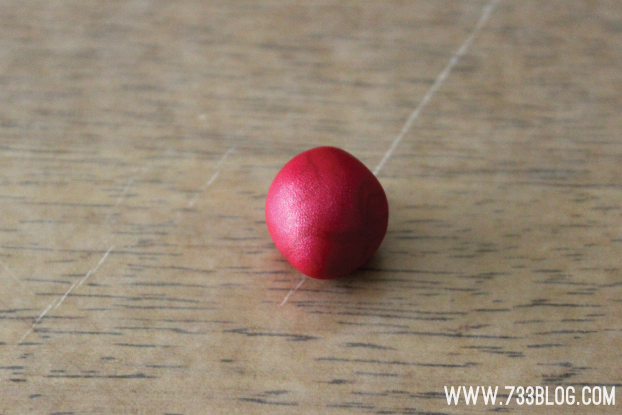
Roll into a ball and place on your working surface.
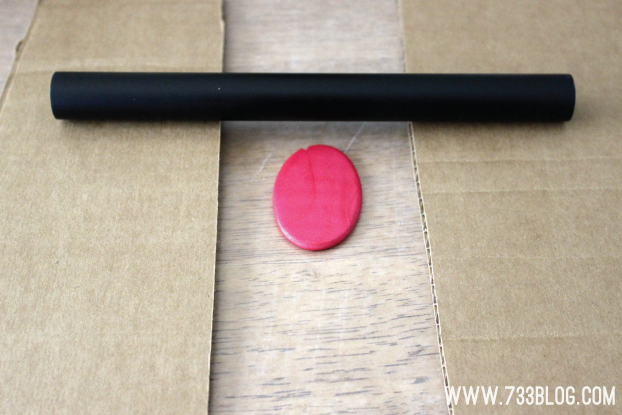
Place the two pieces of cardboard on either side and begin rolling out the clay.
The cardboard helps keep the thickness of the buttons uniform.
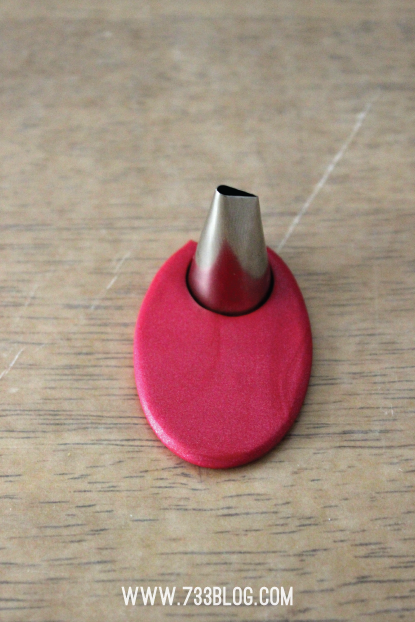
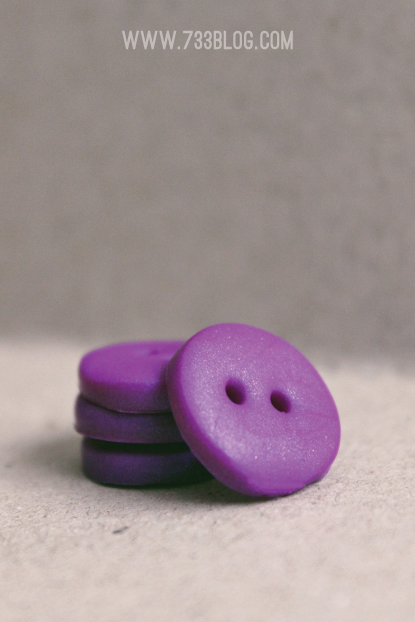
Once the clay is rolled out, use the circle cutter to cut out the buttons.
My clay pieces did get stuck in the bottom, so I blew through the top of the tip until a portion of the clay popped out and then gently worked the rest of it out. Try not to warp the edges or leave finger prints.  A few days after my first attempt, I made a few more buttons and it hit me!
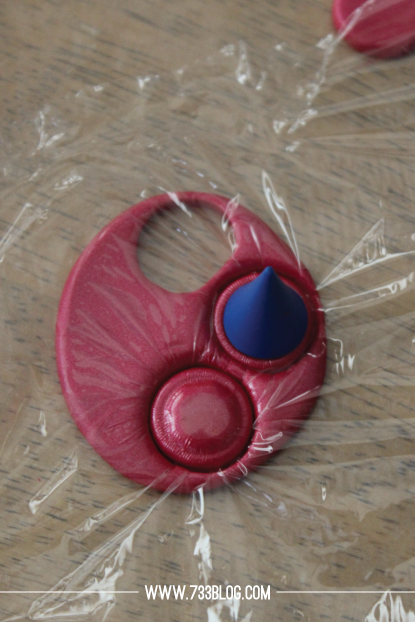
If I used plastic wrap over the clay, it wouldn’t get stuck inside my cutter… and it worked!
But it does change the shape of the buttons – makes the edges rounded more.
What a great discovery! Now I can get two different button styles with the same cutter.
I also used the cover of an old food coloring bottle to add a rim to the button – so look around your house for items you can use to embellish your buttons.
A few days after my first attempt, I made a few more buttons and it hit me!
If I used plastic wrap over the clay, it wouldn’t get stuck inside my cutter… and it worked!
But it does change the shape of the buttons – makes the edges rounded more.
What a great discovery! Now I can get two different button styles with the same cutter.
I also used the cover of an old food coloring bottle to add a rim to the button – so look around your house for items you can use to embellish your buttons.
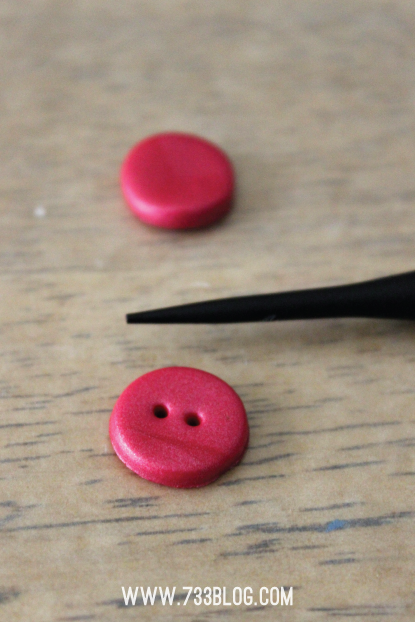
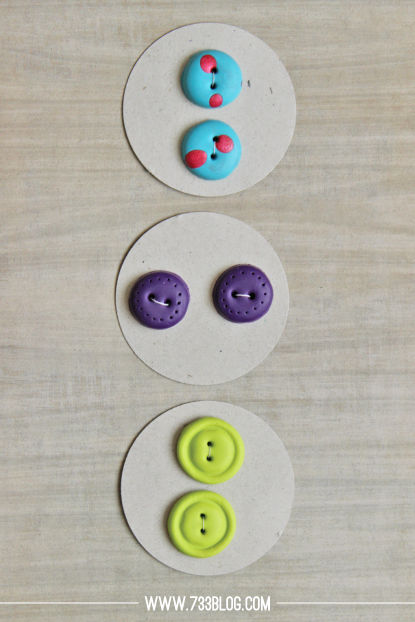
Place the button back onto your work surface and using a sharp object, create your button holes.
I chose two for these ones.
That’s it! You’re done, unless you want to embellish in other ways – a rim of dots, combining colors or placing an indent in the center of the button!
Place the wax paper inside a disposable aluminum pan, or a baking pan that you don’t need any more, and bake according to the directions on clay package. Mine went in the over at 275 degrees for 30 minutes.

Easy and adorable, right?
What do you think? Will you give it a try?

Do you know if these hold up in the washer/dryer, or would the items require hand-washing and/or line drying?
As long as you use the higher quality clay and follow the baking instructions on the box, they can survive the machines. I wouldn’t put them through on heavy duty cycle or anything like that. And they may be a tad softened after coming out of the dryer but they harden back up.
Thanks for asking!
A good inexpensive work surface for clay is a flexible cutting mat. They are thin, usually translucent sheets of stiff food grade plastic. I usually pick mine up two to a package at the dollar store (I keep getting more – they have multiple uses), but I’ve also seen them at grocery stores.
As far as holding up in the washer/dryer, I have not made any myself, so I don’t have any personal information to give, but everything I’ve read, if you have good clay (Premo/Kato/some Fimo), they will hold up well.
I’ll have to check my local dollar store and see if I can find anythin of those. Do you put them directly in the over too, with them being plastic I would be afraid they would melt.
VERY cute! I love the idea of making your own custom buttons. 🙂
Those are super cute. I finally got back into Sculpy this past fall and I forgot how much I loved it.
these are SOOO adorable! I love how cute they are!
i love them! and i love this stuff! i could probably have played for DAYS with it!!! great job!
Really cute buttons. How about making them on a silicone baking sheet (like Silpat), that, of course, you devote to crafting not cooking. That would be non-stick but able to go into the oven.
I. love. these!!! I am a huge fan of Sculpey…pinned these right away!
Oh my goodness, I LOVE the idea of handmade buttons. So clever! Can’t wait to get started 🙂