
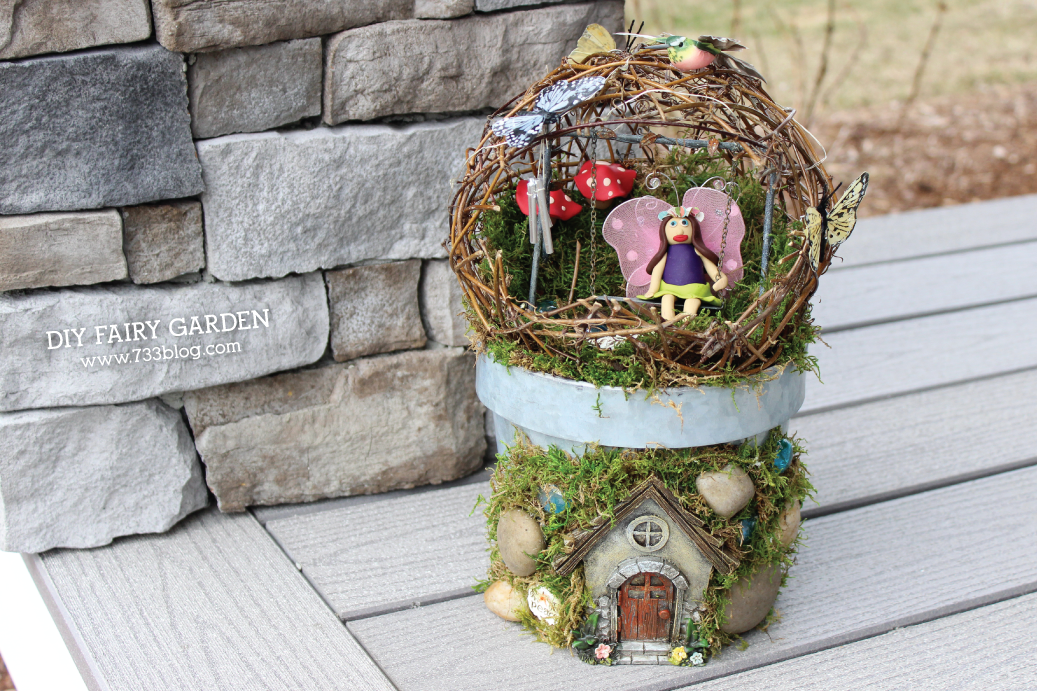
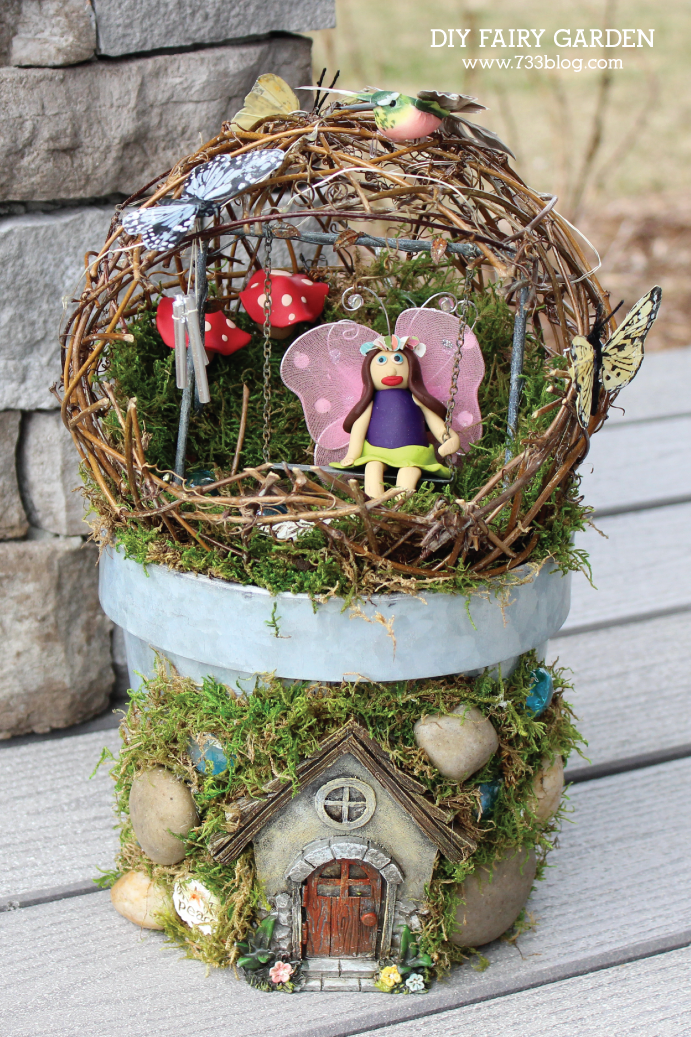
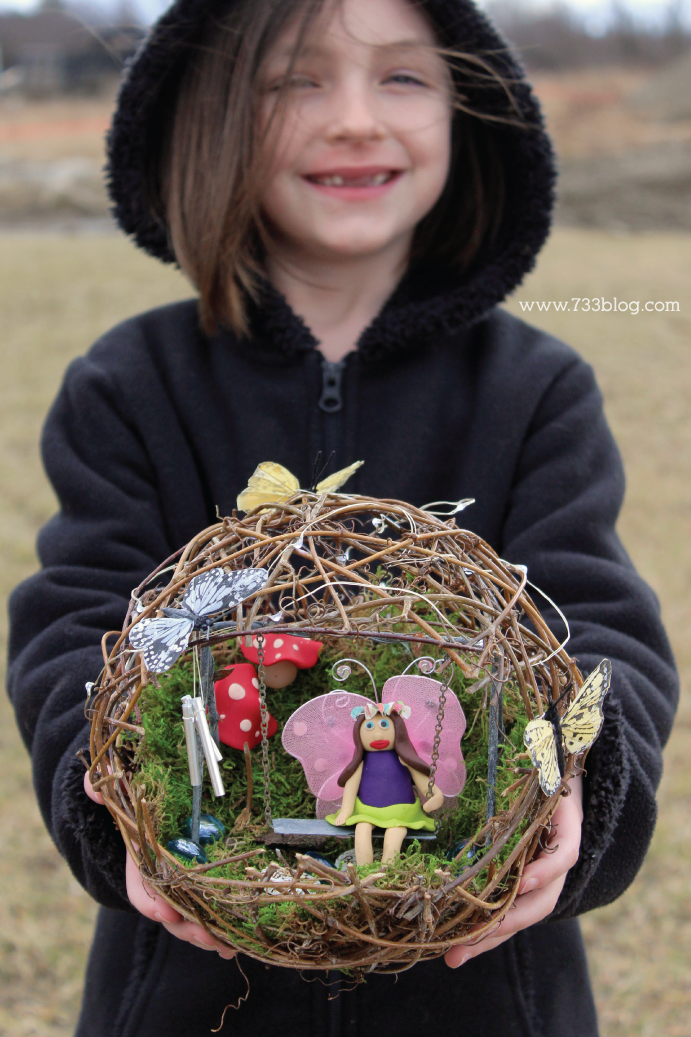
Are you guys loving the Fairy Garden trend? I’m assuming that since you clicked over to this post, you must be at least a little interested in it! I’ve seen some super cute Fairy Garden Ideas out there and knew my little girl would love her own Fairy Garden so decided to try my hand at it. Because this would be going into her room, I decided to take a different approach and create it in an unusual fairy garden container that could be placed onto a flower pot. So what did we end up using? A grapevine sphere! This miniature fairy garden is fairly inexpensive to create and really has such a magical look to it. Once we put it in my daughters room she asked if we could leave her window open so that a real garden fairy could come and visit. I think my heart melted a little. I love the innocence of youth! In fact, she recently lost a tooth, and ended up putting her tooth next to her Fairy Garden to entice the Tooth Fairy to stay! Although she did not awake to find the Tooth Fairy swinging in the garden, she DID find a note from good ole TF saying that she enjoyed using the swing!
Let’s get started, shall we?
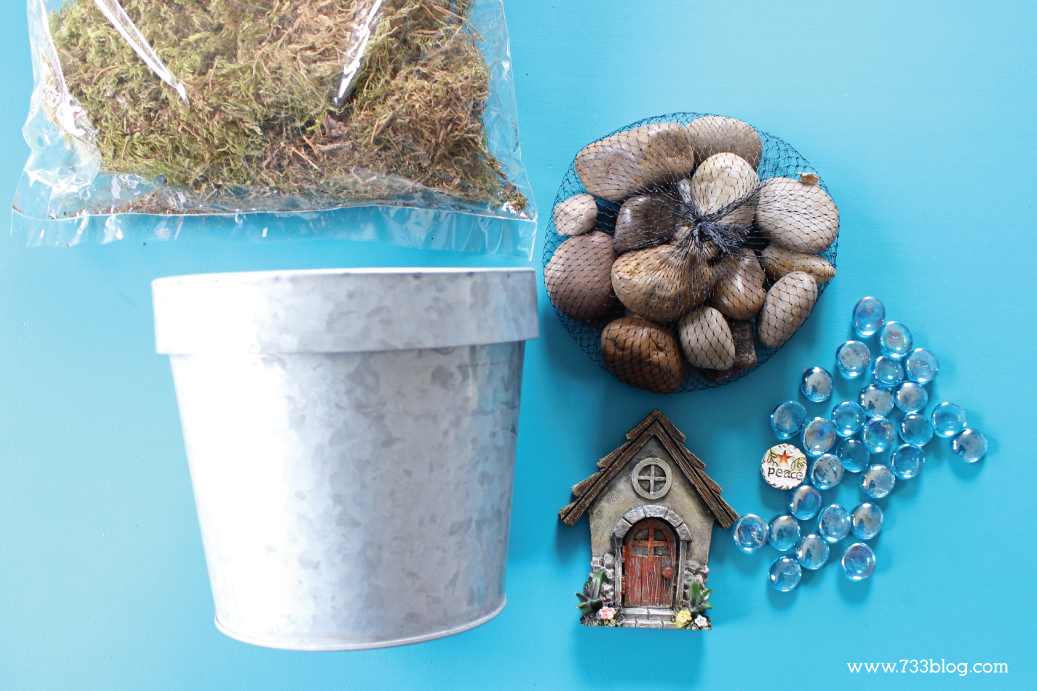
SUPPLIES:
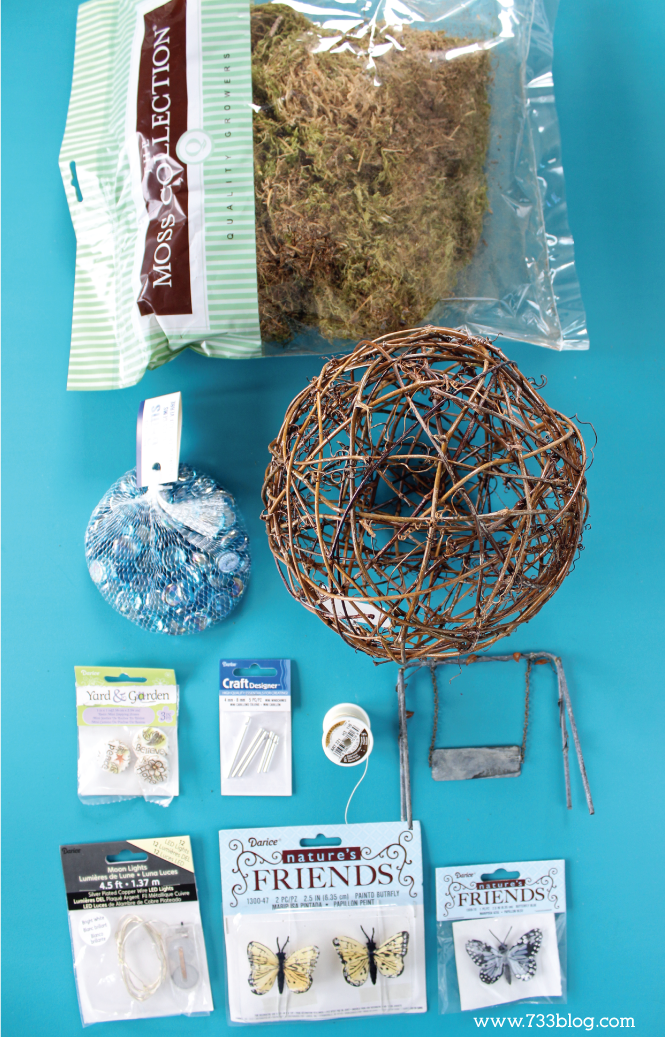
FAIRY SPHERE:
Grapevine Ball (ours was 8″)
LED Light Strand
Sheet Moss
Spanish Moss
Fairy Garden Supplies
Butterflies
FAIRY HOME FLOWER POT:
Gemstones
Flower Pot
Stones
Fairy Door
Wire Cutters or old scissors
Hot Glue
Gorilla Glue
DIRECTIONS:
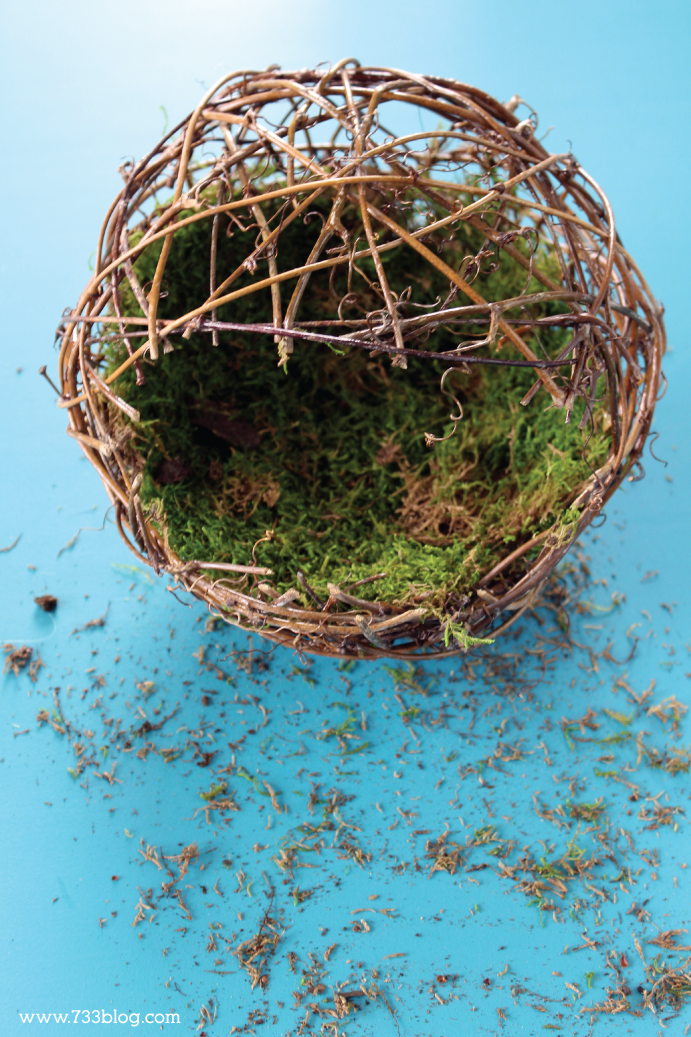
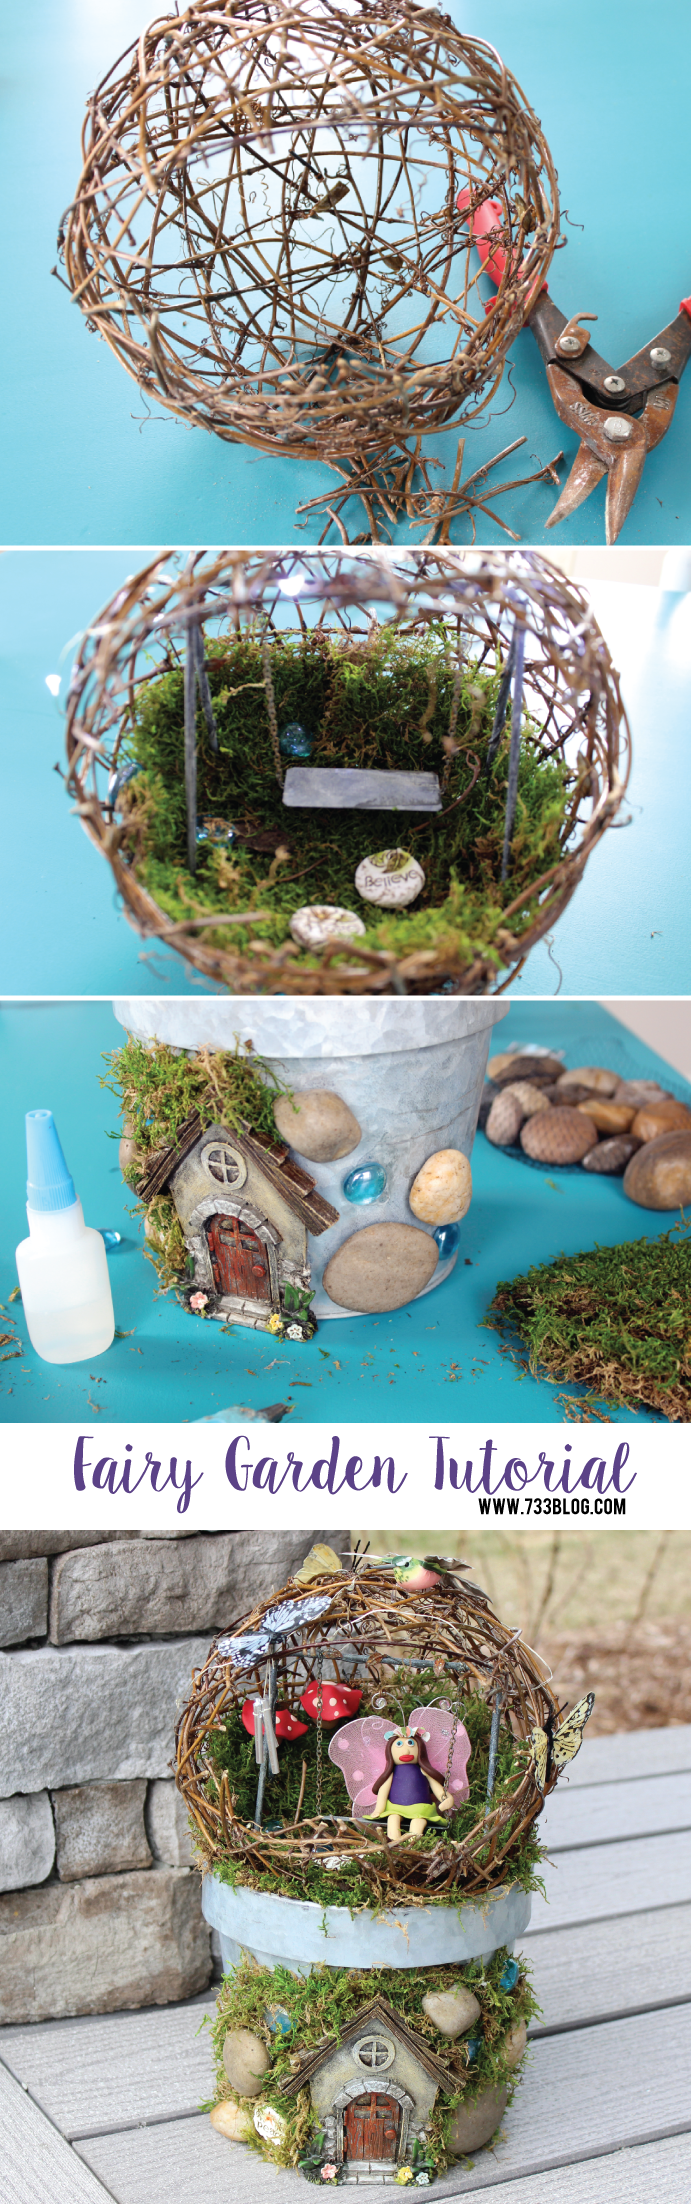
Cut an opening in the grapevine ball. This will be the entrance to the fairy garden.
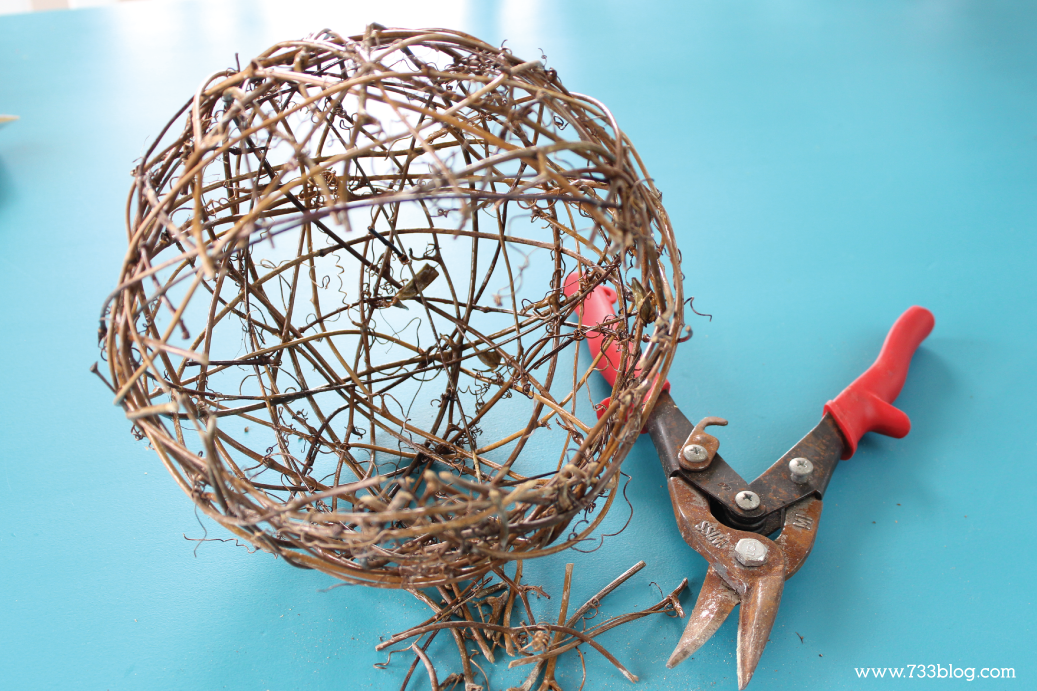 Using sheet moss, line the bottom of the ball and about half way up the sides.
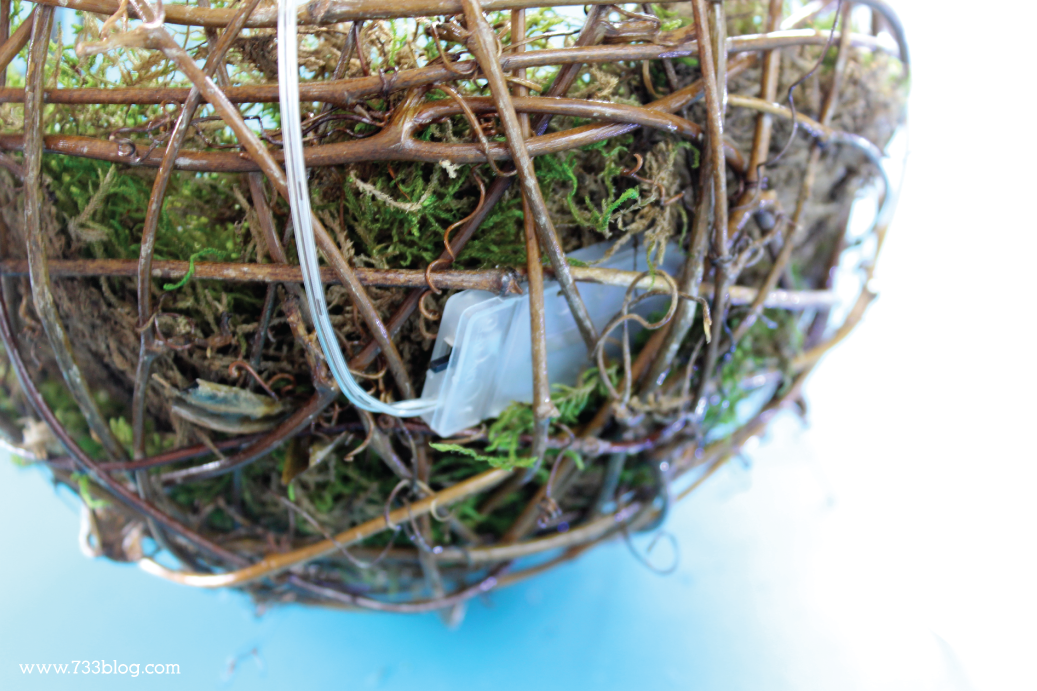
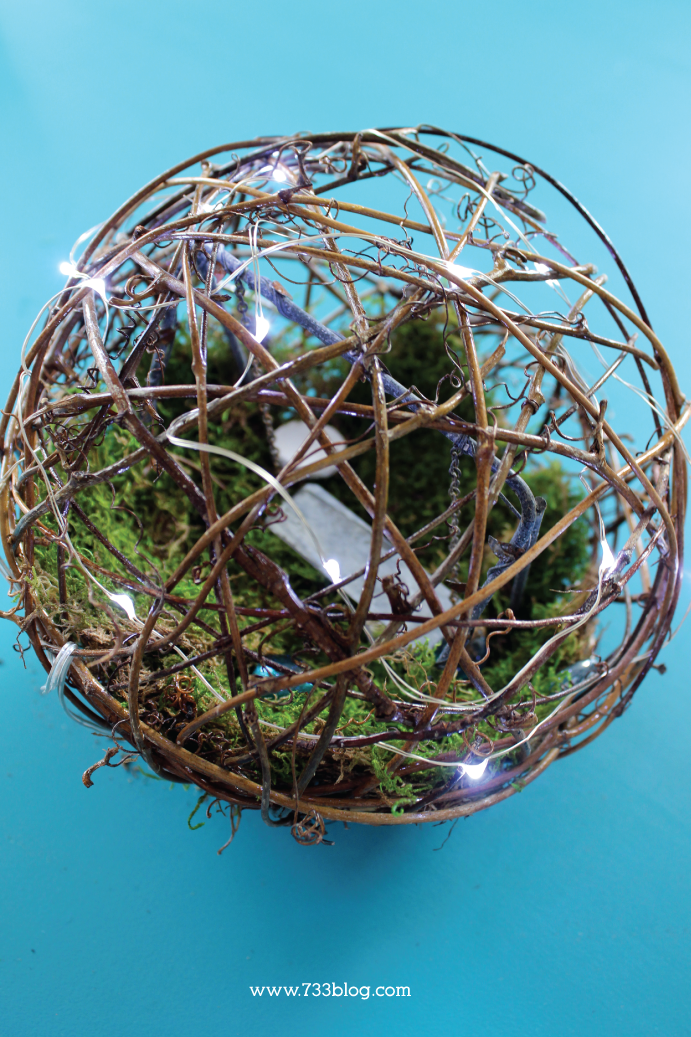
 Insert the battery pack of the LED string lights into the moss at the back of the ball, making sure the switch is facing out. Now thread the lights throughout the top and sides of the ball.
 Add in your fairy garden accessories. The swing I used is a tad big for the 8″ sphere so if you’re considering using it, I’d suggest going up a size or two on the ball. It does fit, but limit’s the amount of other accessories that can fit into the space. I used a dab of hot glue on the back of the stepping stones and blue gems to keep them in place.
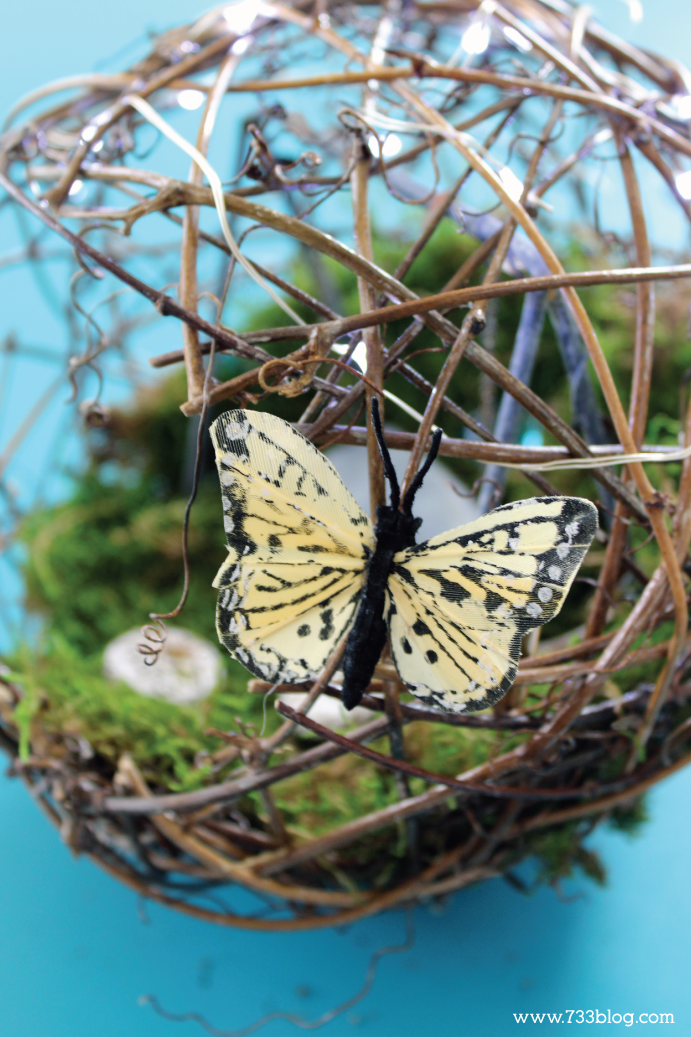
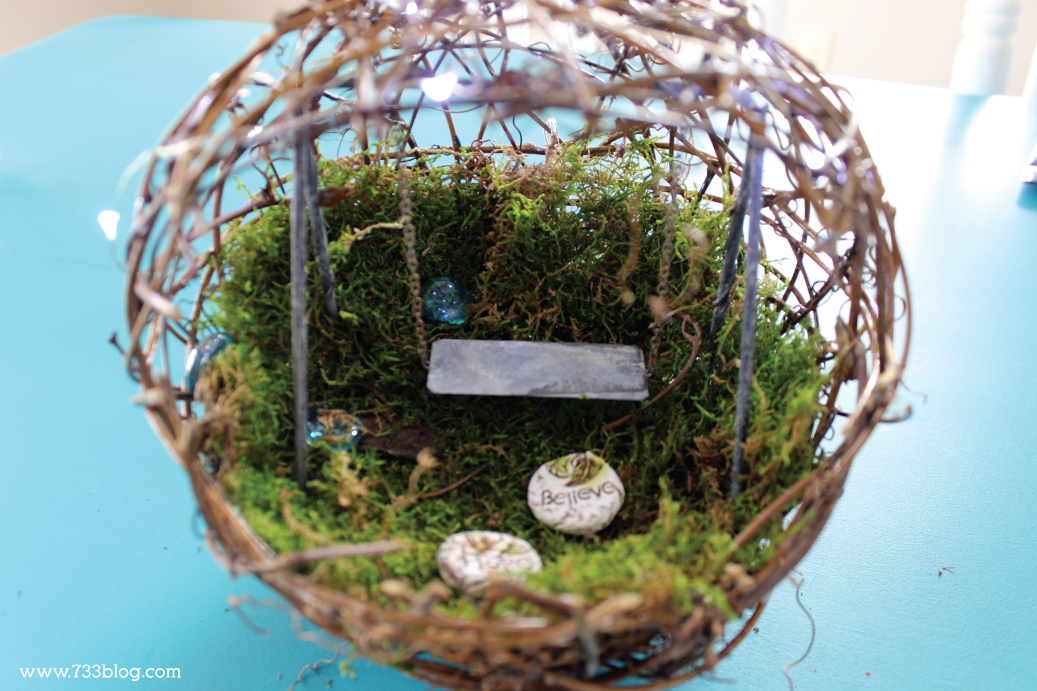 I also added butterflies to the outside of the garden with a bit of hot glue.
 Next, you’ll want to add in your Fairy! I ended up making our fairy. You can see how I made our Clay Fairy in a video I shared recently. I also made some Clay Toadstools to add a splash of color.
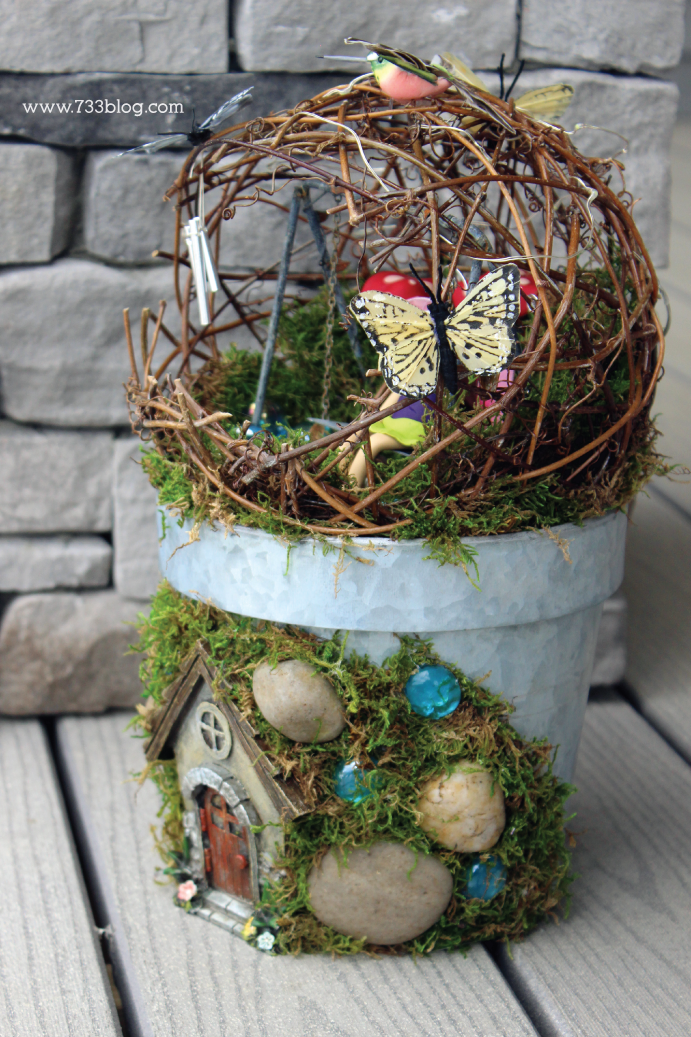
 For the base of the Miniature Fairy Garden, I created a Fairy Home using a flower pot. I saw the Fairy Garden Planter idea on Consumer Crafts and knew it would be the perfect base for our Fairy Garden Sphere!
 Using Gorilla Glue, I adhered the Fairy Door, stones and gems to the pot.
 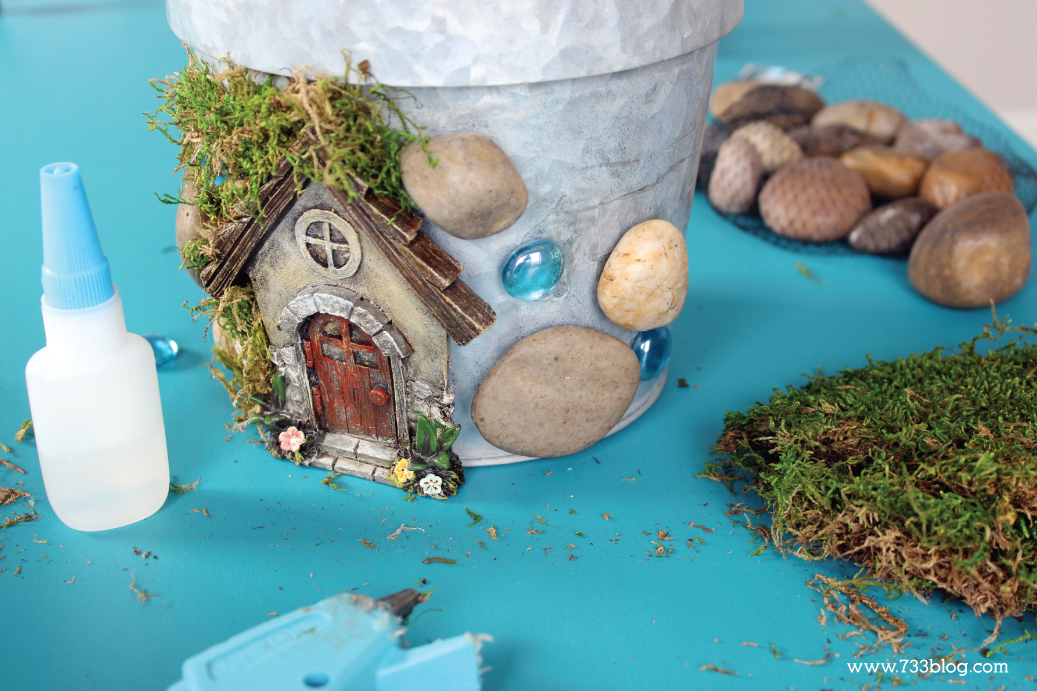 Using hot glue, fill in the spaces between the stones and door with moss.
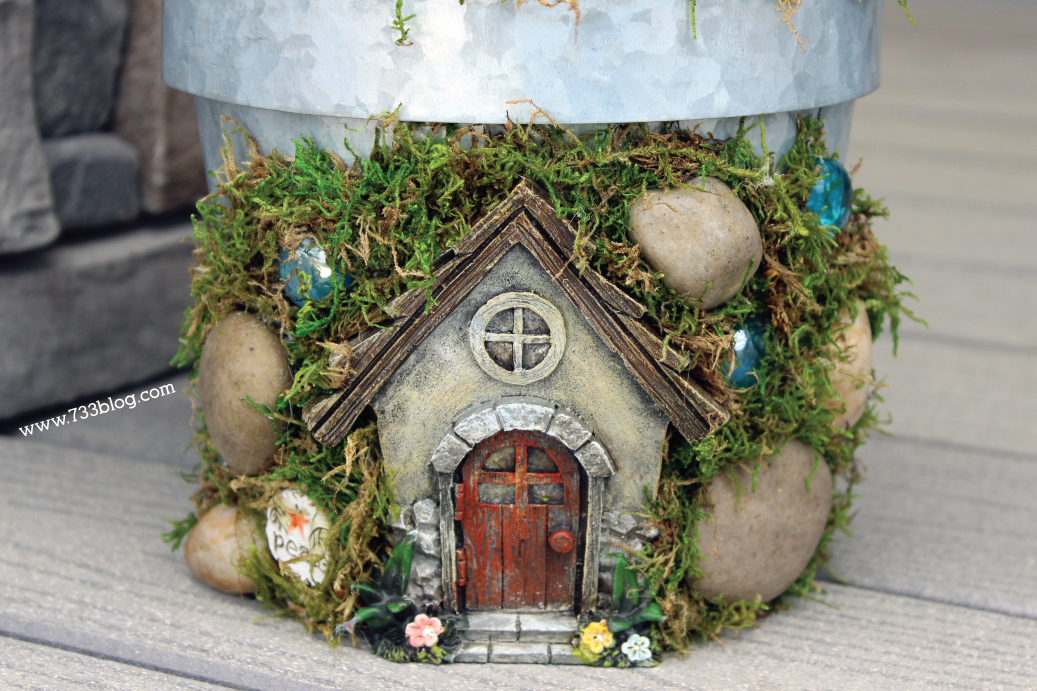 Lastly, place the sphere on top of the planter, fill in the gaps between the pot and sphere with moss. You’re Miniature Fairy Garden is complete!I love how it looks lit up at night:
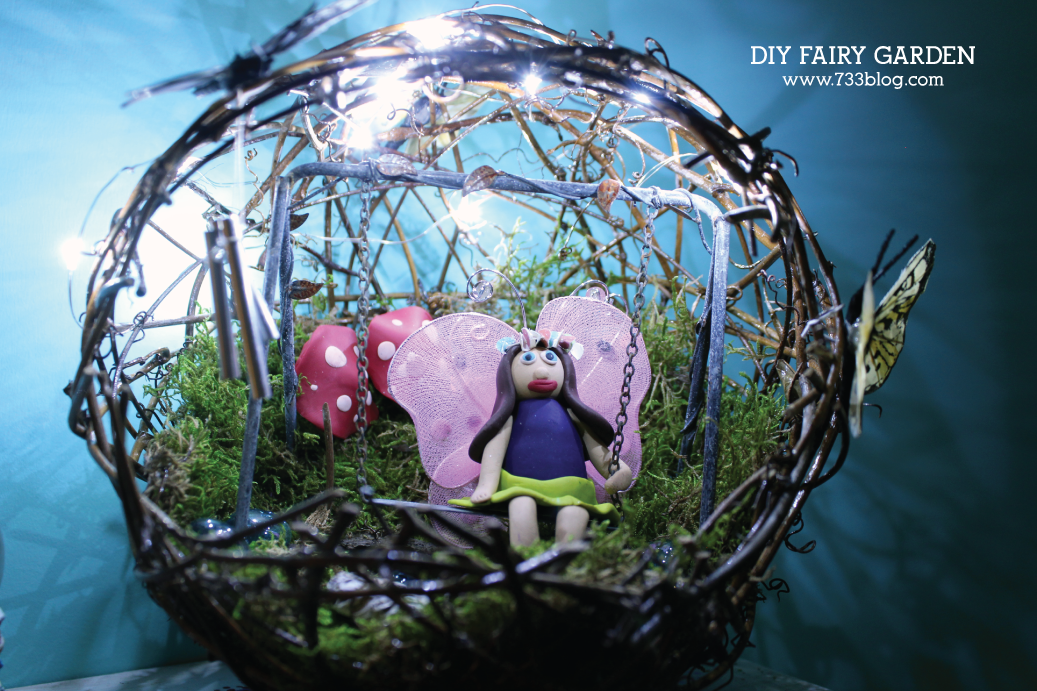 My daughter has the Fairy Garden in her room and uses it as a night light. I sneak in each night to turn the lights off.
Here’s a few more shots of our creation:

 This post originally appeared on Crafts Unleashed where I am a paid contributor.


where can I get the sphere
Mine came from Michaels or Joann’s – can’t remember which.