
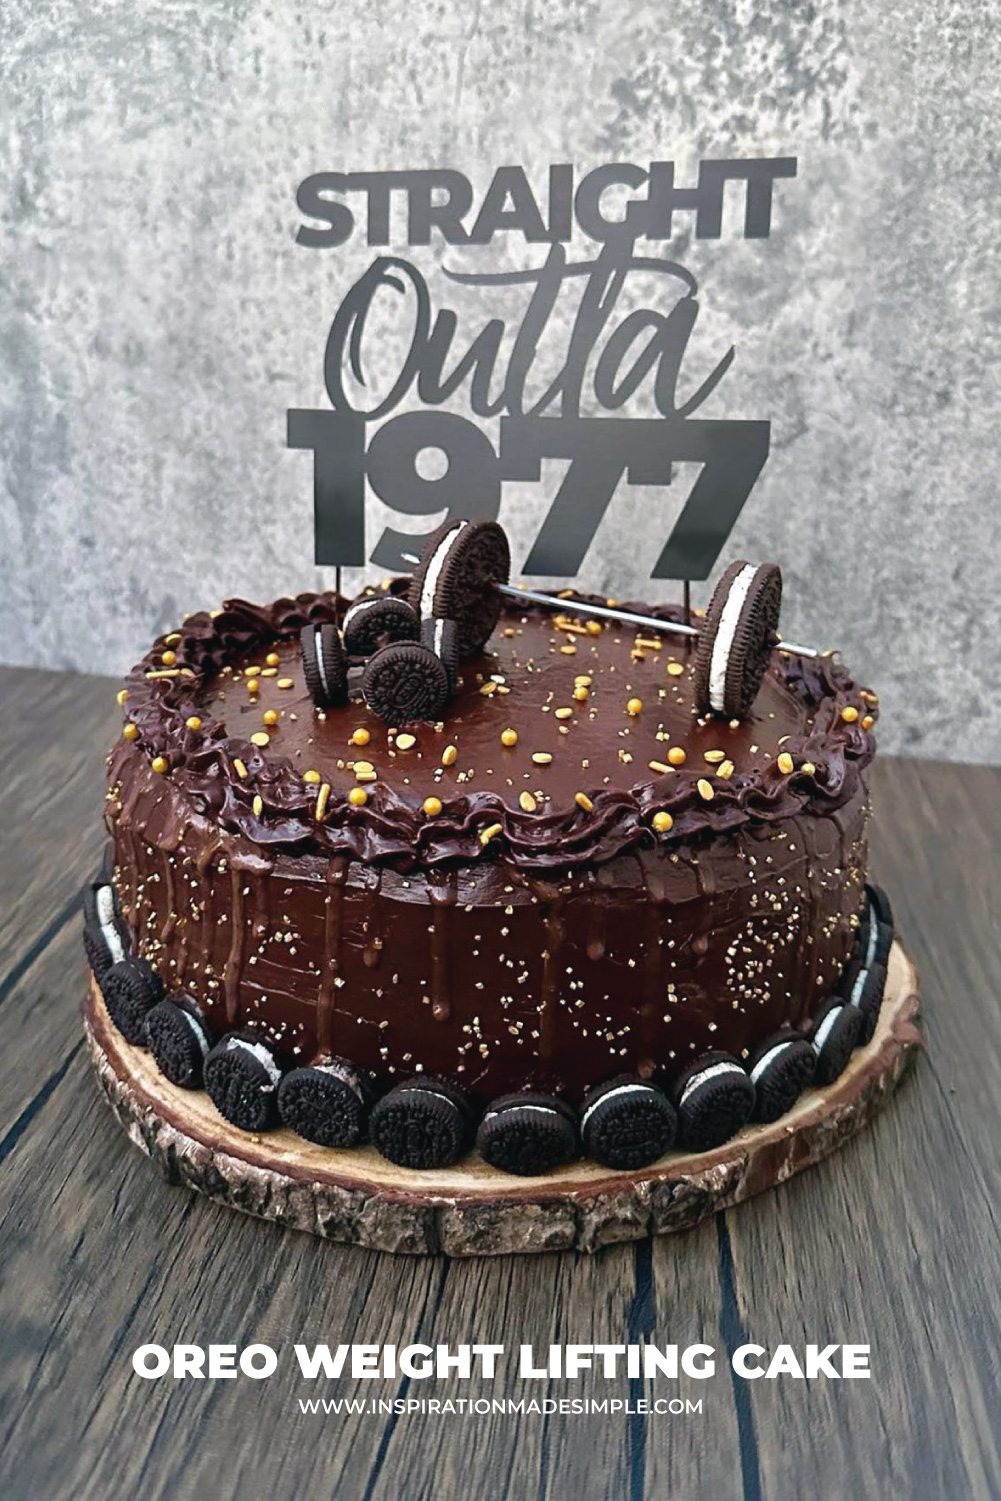
My husband, Todd, told my daughter, Olivia, that the only thing he wanted from her for his birthday was a homemade cake… and he wanted me to help. Olivia is her mother’s daughter through and through, so together we started planning an awesome cake that we knew Todd would love – a DIY Weight Lifting Themed Cake!
He stipulated that we had to use a marble cake and whipped chocolate frosting and that we could not use buttercream or fondant. So how to make a gym themed cake?
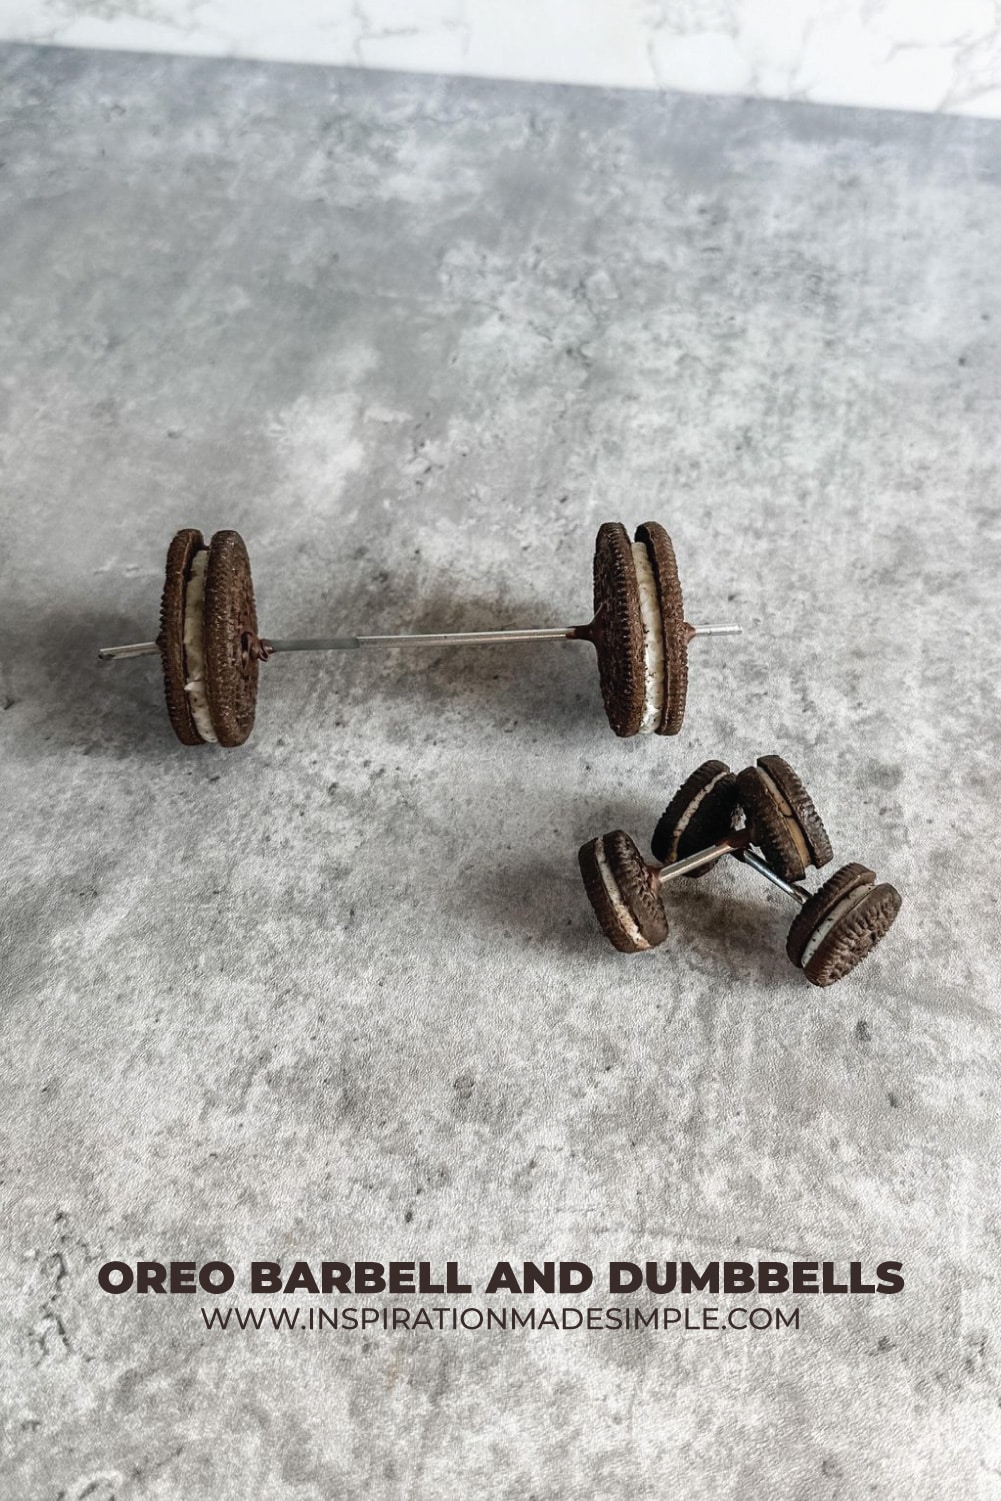
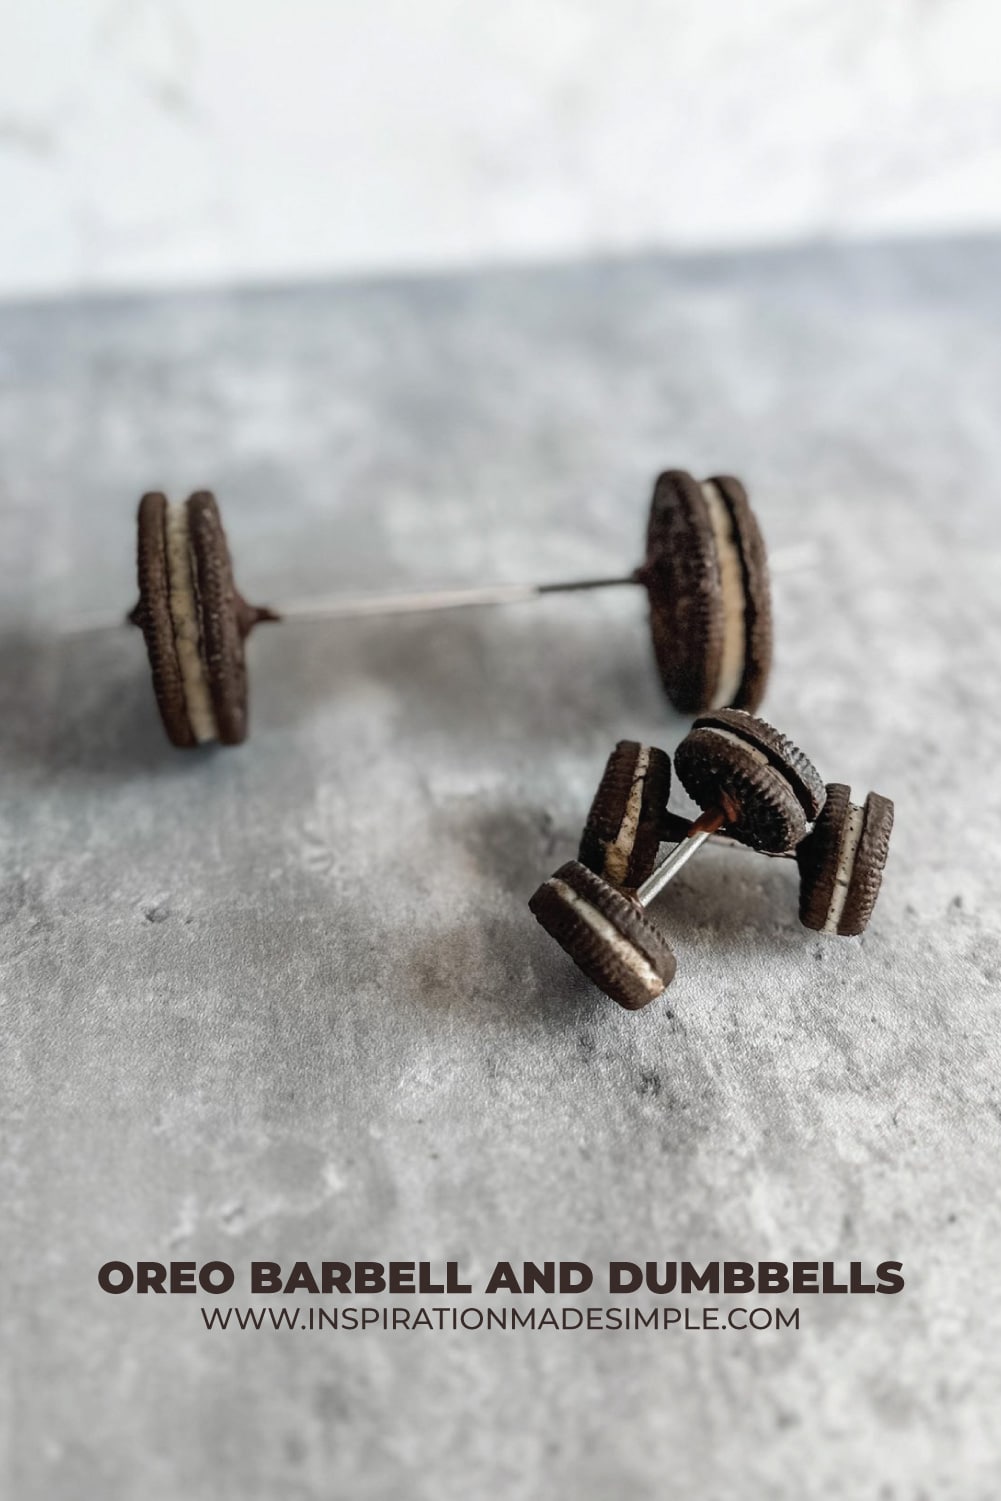
No worries! As soon as we decided on a weight lifting themed cake, I knew exactly how we could make weights – with OREOS! And when I remembered that there Mini Oreos exist, I got even more excited because I figured we could make both a barbell and dumbbells!
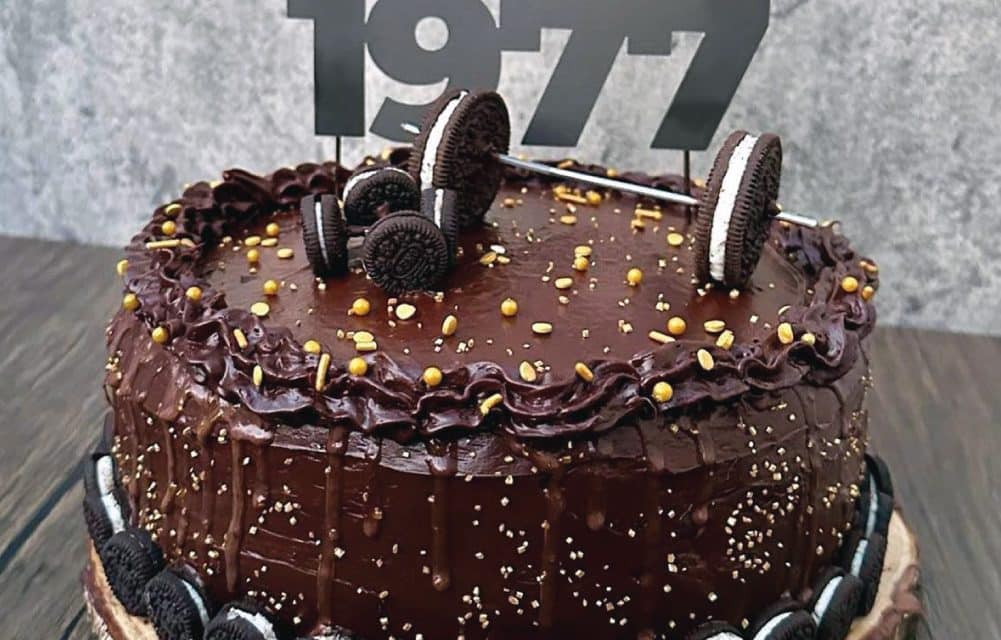
It took a bit of brainstorming, and a trip around the grocery store to figure out what to use to complete the weights, but when I saw some silver candles, I knew they would do the trick! Olivia and I also decided that we would try our hand at a chocolate ganache and create a drip cake, with the Oreo weights as an edible cake topper, along with a “Straight Outta 1977” topper that I designed and cut with my Cricut Maker 3.
Before I get into the how, why don’t I show you how we did:
I mean, come on! Isn’t that fun? Do you have a weight lifter or power lifter in your life that would enjoy this cake? Then buckle up, because I’m going to show you how I made the Oreo weights. These aren’t hard to make, but they are annoying to make. If you don’t care about eating them, you can totally make this much easier and just use hot glue! 🙂 Let’s get into the tutorial!
Oreo Barbell and Dumbbells Cake Decor
Supplies:
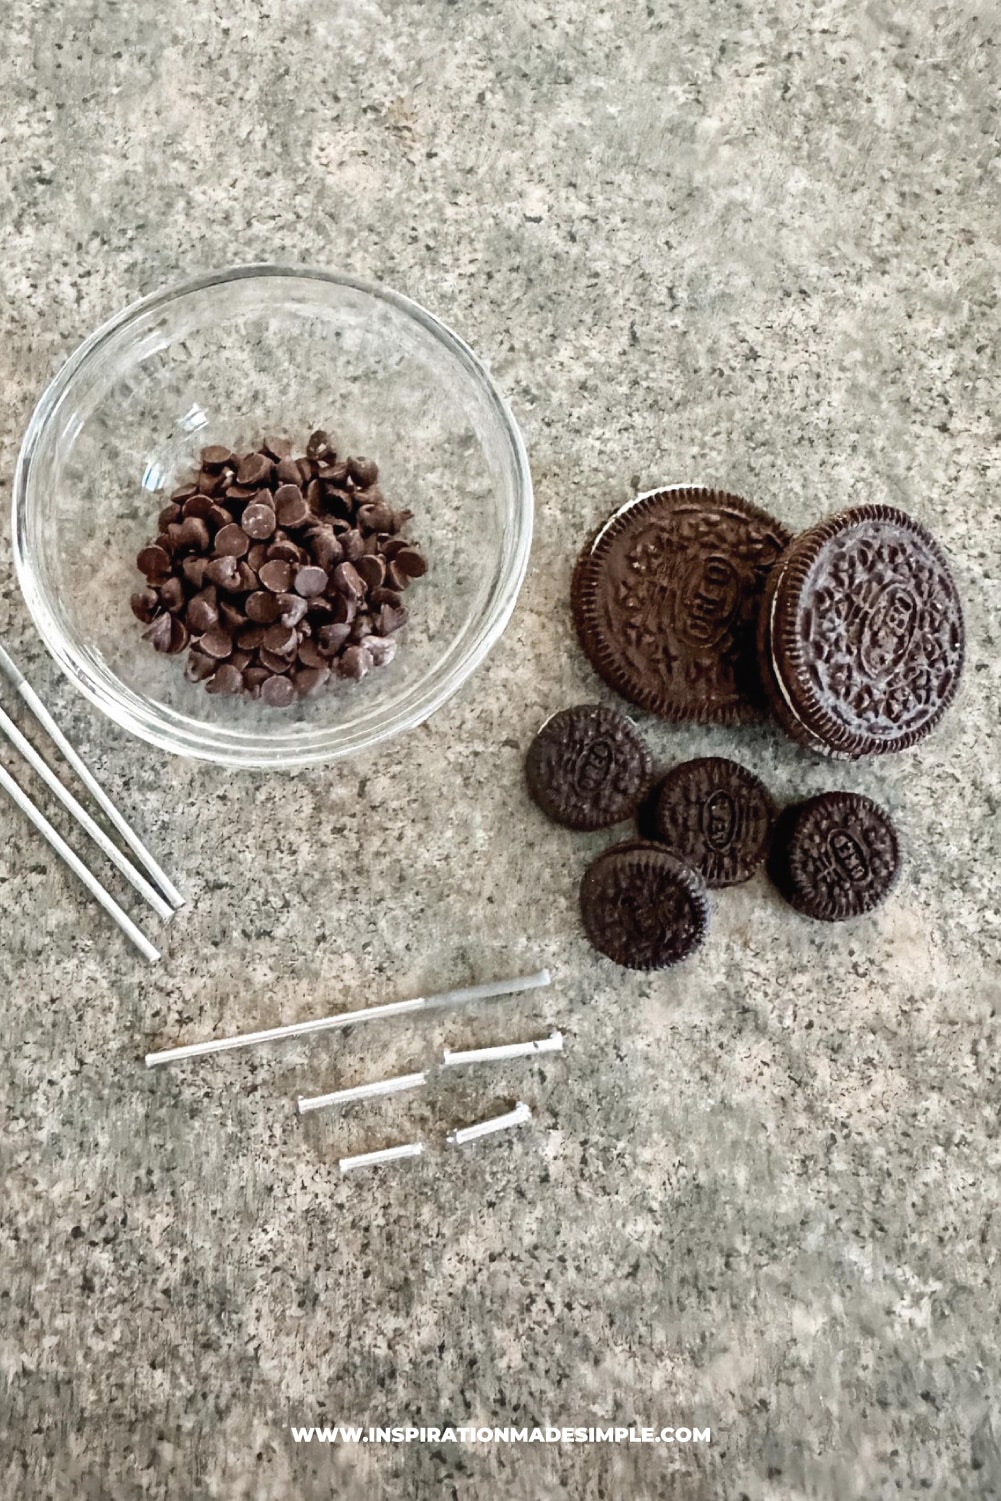
DoubleStuf Oreo Cookies
Mini Oreo Cookies
Chocolate Chips
Silver Sparkle Candles – skewers can also work if you can’t find candles
Directions:
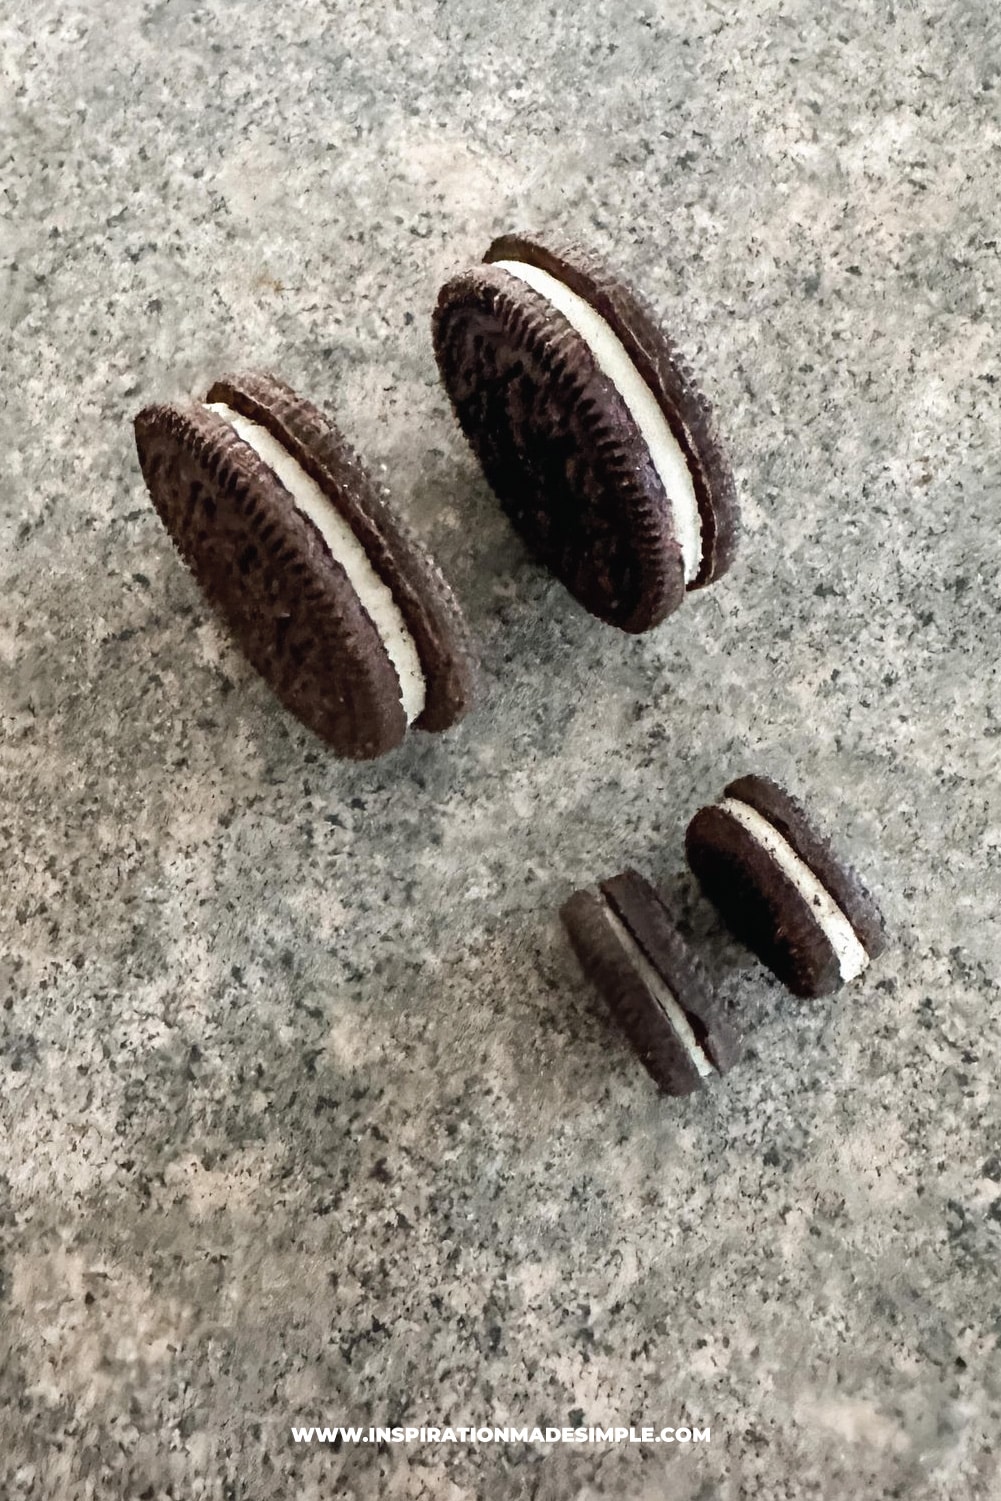
First, pick your Oreos. Yes, the cookie matters! For the barbell, you’ll want to find two large cookies that stand up fairly straight on their ends – this will help when putting them together.
For the mini Oreos, you may need to squish the two cookie pieces together and even them out, as these little sandwiches tend to be a bit wonky.
Once you have the cookies you plan on using, place a 1/4 cup of chocolate chips in a glass dish and melt in the microwave. Put in for 30 seconds, take them out, stir, and put back in for another 30 seconds. Continue until melted.
This is very important – let the melted chocolate cool for a bit. If it is too hot, it is going to take forever to set and you’ll be stuck holding the candles in place while you wait. I waited until I could stir the chocolate and make “peaks” with it.
While you’re waiting for the chocolate, cut the candles to size. The barbell is easy – it uses a full candle for the inside piece. I then cut two approximately 1/4″ pieces off from a full candle to create the pieces that stick out the other side of the cookie weight. For the dumbbells, I cut approximately 1/2″ pieces – 1 per dumbbell.
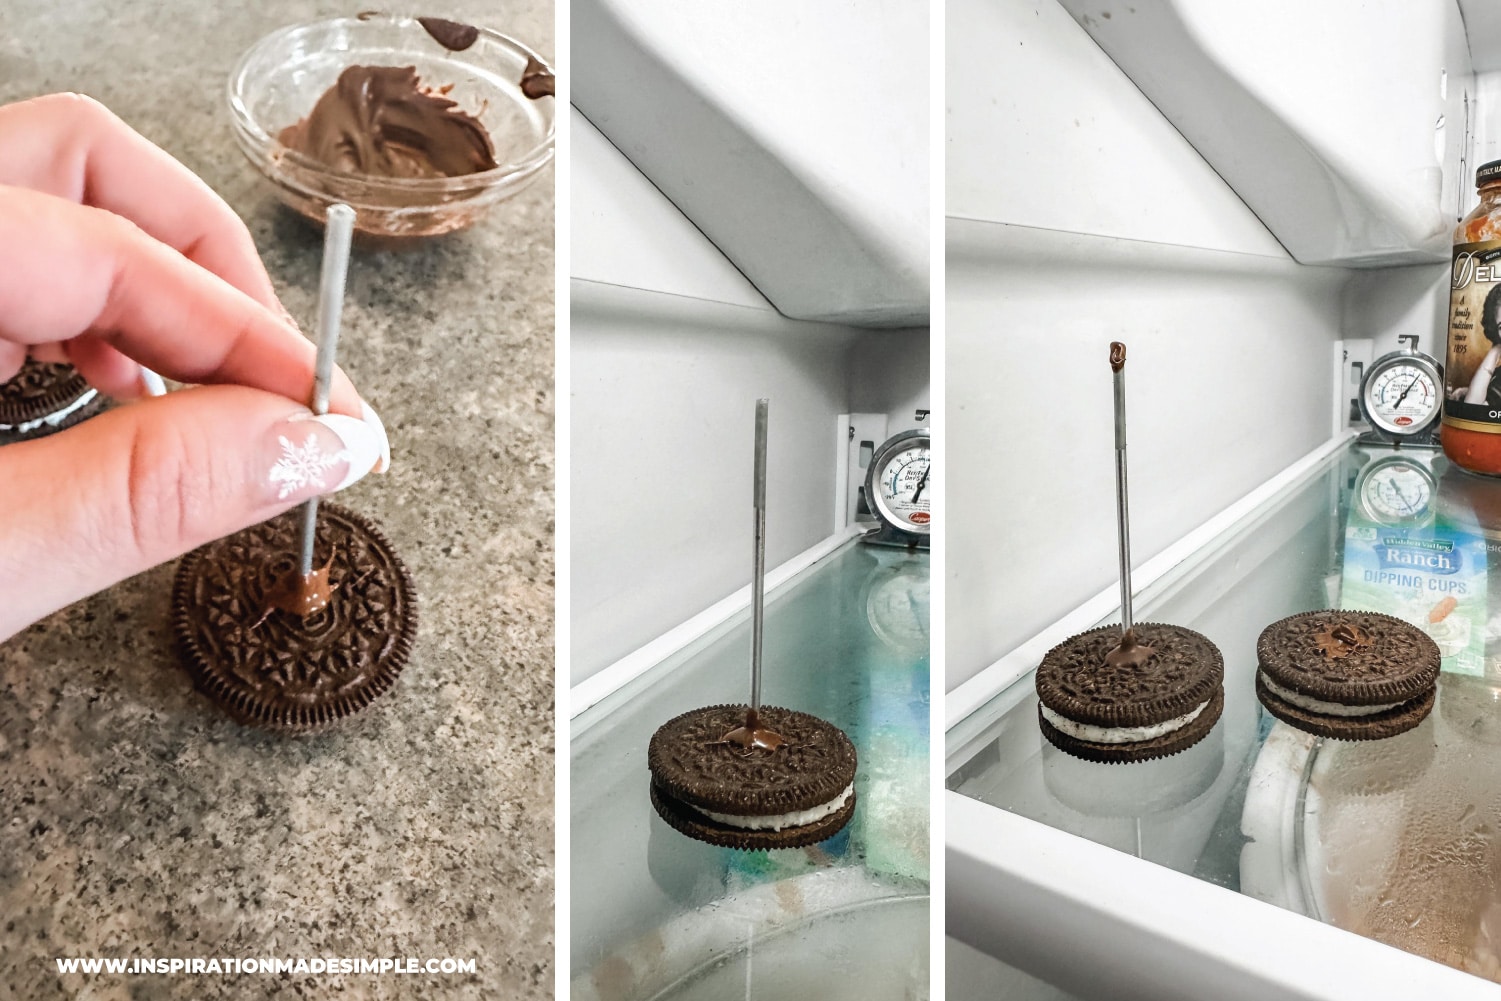
Now it’s time to assemble the weights! We’ll start with the dumbbells.
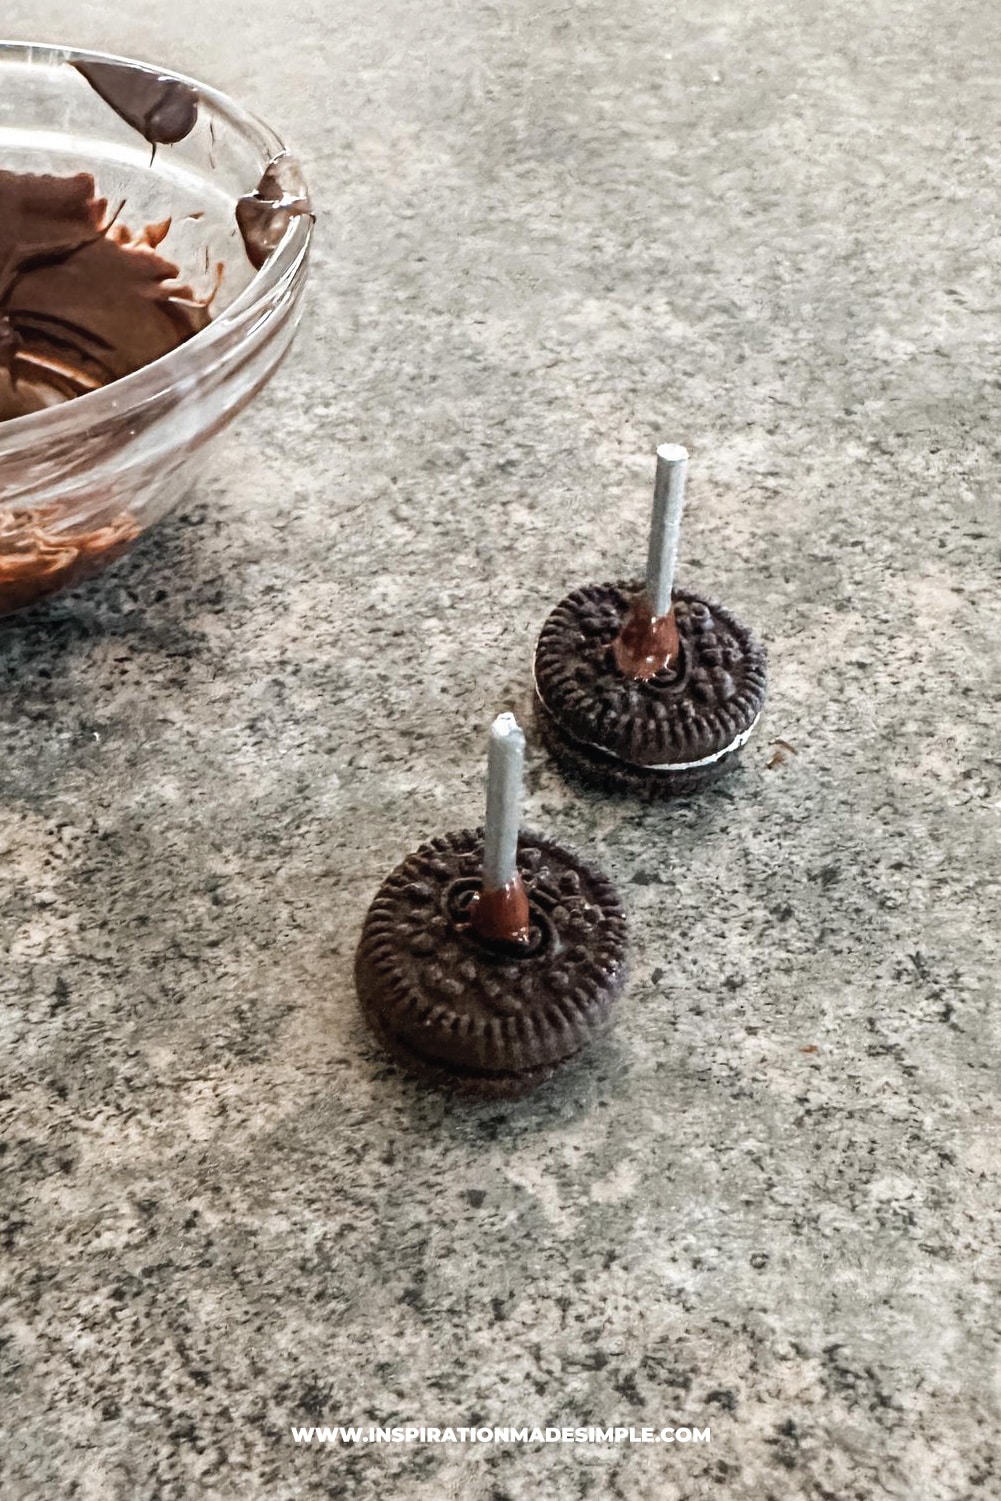
Dip one end of your cut candle into the melted chocolate and then secure it into the middle of the Oreo. I did this inside my fridge to help speed up the process. Once the candle could stand on it’s own, I closed the fridge and left it inside. Do the same for the second dumbbell.
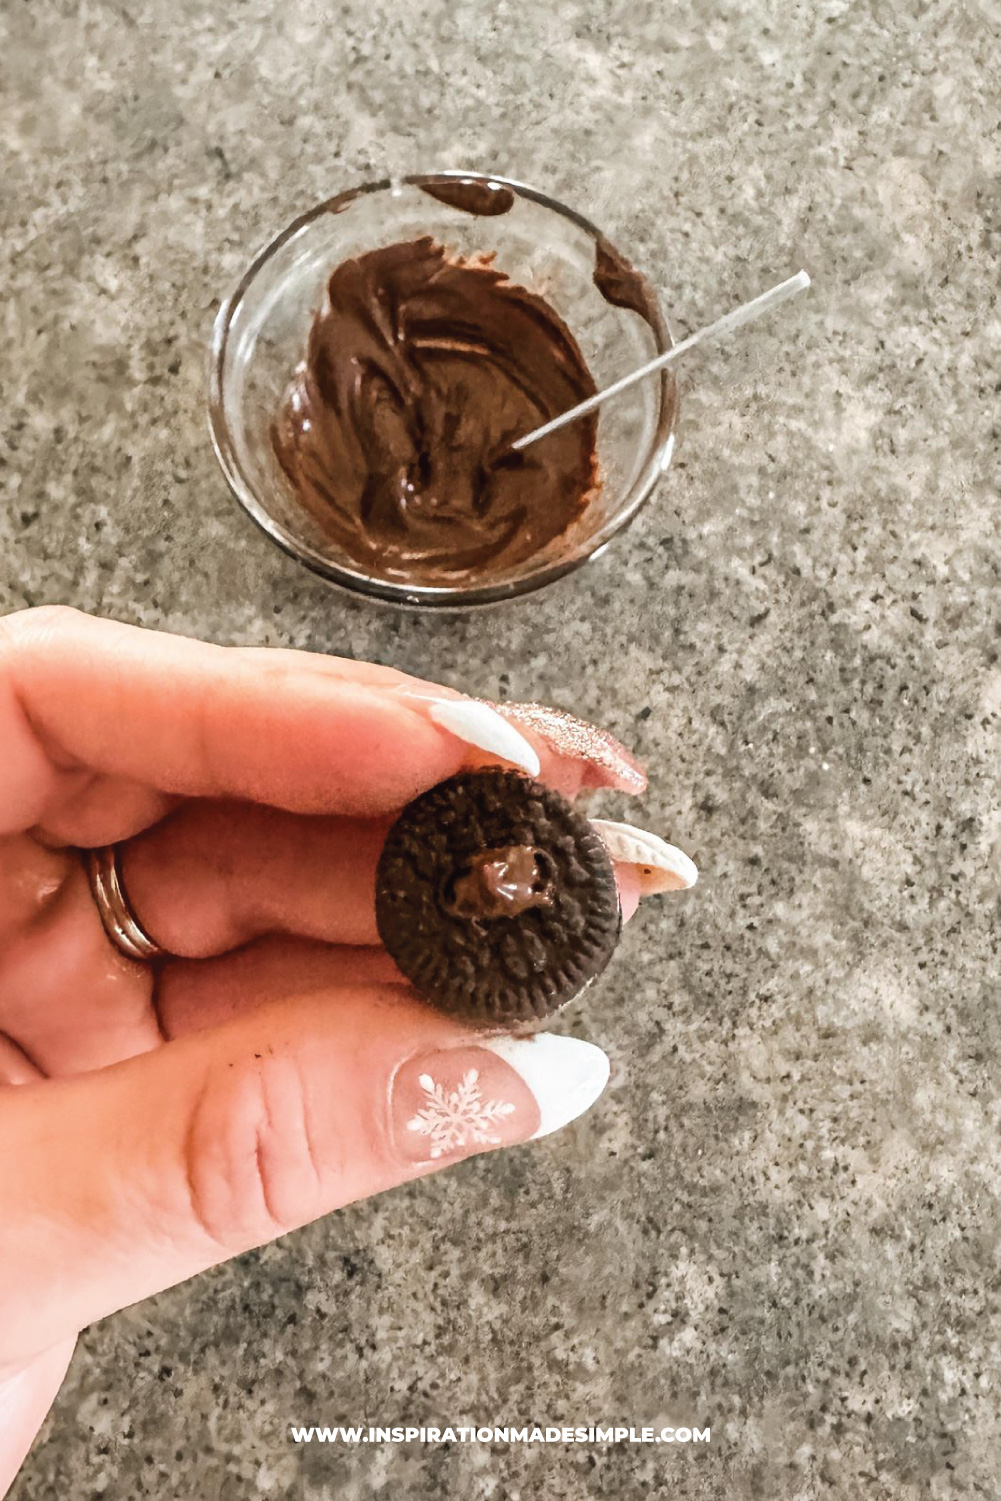
Once the chocolate holding the candle in place hardened (about 2-3 minutes), I added a dot of chocolate to the middle of the second Oreo.
Again, inside my fridge, I turned the Oreo with the candle attached onto its side, and then attached the second Oreo to the other end of the candle, holding the cookie in place until I could let go and the pieces stayed together. Leave the newly formed dumbbell in the fridge until you’re ready to decorate the cake. Repeat for the 2nd dumbbell.
Forming the barbell is basically the same, but on a bigger scale. The only difference is when I added the dot of chocolate to the second Oreo, I left it inside the fridge for about 30 seconds so I was sure that it would be sticky enough for the candle to stay in place without sliding.
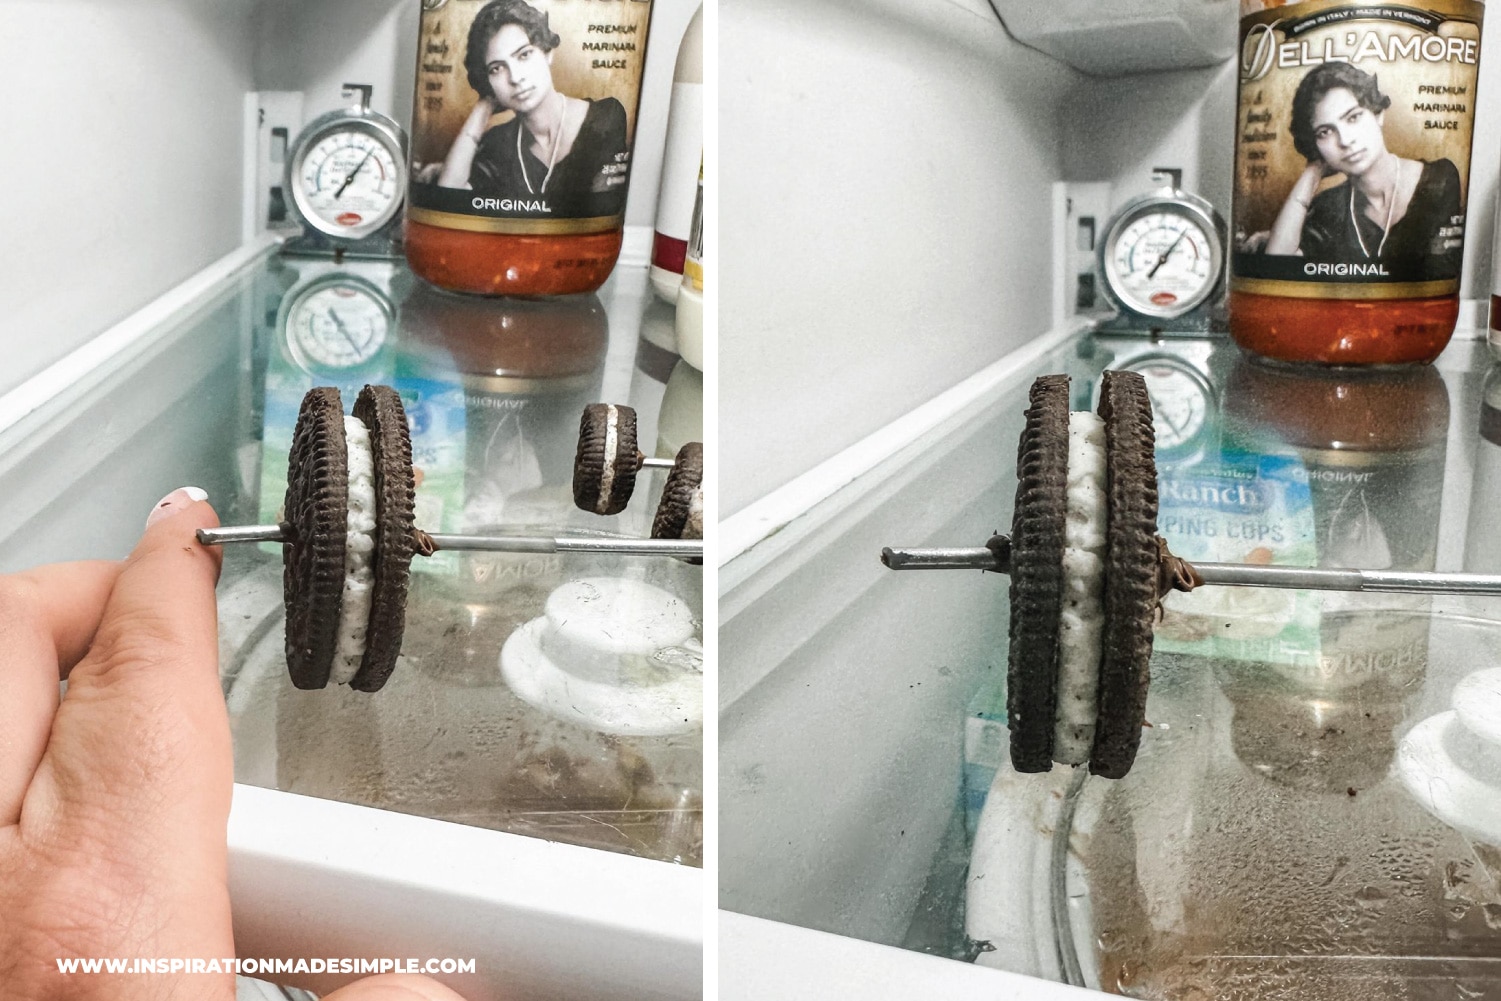
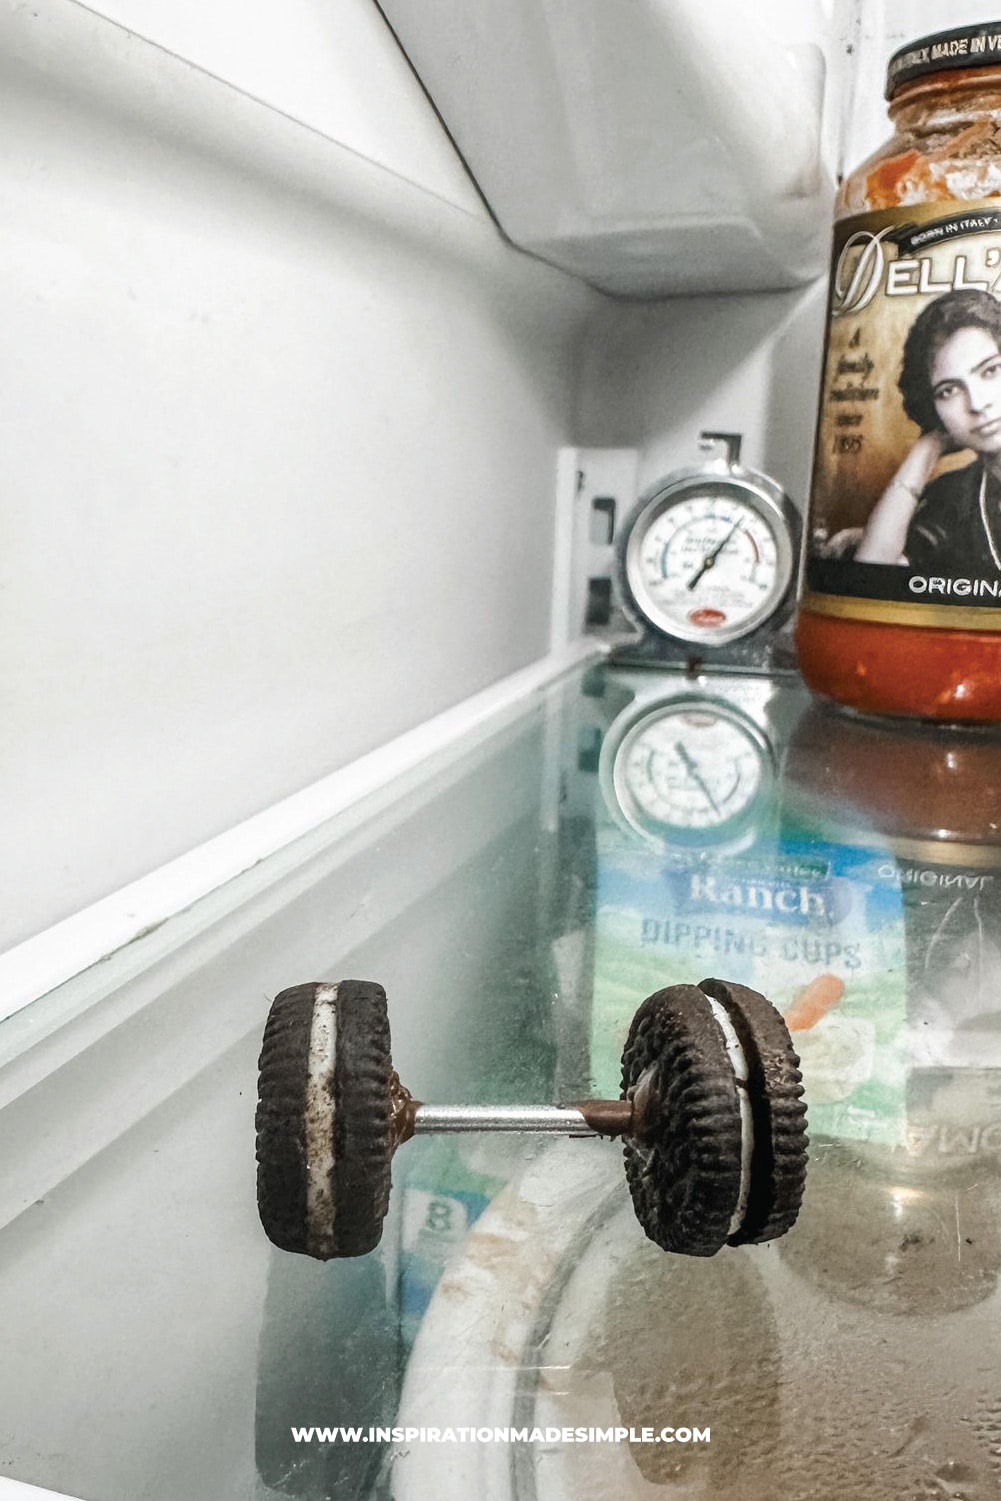
The last step is to add the two end pieces of the barbell to the outside of the Oreo cookies. I dipped one end of the candle into the chocolate and held my hand in the fridge to allow the chocolate to start to harden. After about 30 seconds, I attached it to the outside of the cookie and held it in place for about 30 seconds. I slowly let go, making sure that it stayed in place and didn’t start to fall. Repeat for the other side.
That’s it! The Oreo Weights are ready to use as decoration!
These Oreo dumbbells would make for a great gym cupcake topper too.
We used box cake mix and created two marble cakes that we layered with chocolate frosting in between. We crumb-coated the cake and placed it into the fridge to chill.
Once the frosting set, we frosted the cake and put it back in the fridge.
Once the cake was chilling, we made Homemade Chocolate Ganache using the recipe below.
Homemade Chocolate Ganache
Ingredients
Heavy Whipping Cream
Pure Chocolate Baking Bar – Baker’s brand 45% German Chocolate, found in the baking aisle
Combine 1:1 ratio of cream to chocolate. We used 1 cup cream and two 4 oz baking bar.
*note, this is why our ganache was too thin. I only had one bar and forgot to cut the cream in half – whoops!
Directions
Chop up the baking bar using a large serrated knife.
Place the finely chopped chocolate into a heat-proof glass or metal bowl. Note, the finer you chop the chocolate, the quicker it melts with the cream.
Heat the heavy whipping cream on the stovetop in a small saucepan until it begins to simmer. As soon as little simmers around the edges of the pan begin, turn off the heat and immediately pour the warm cream over the chopped chocolate.
Let the mixture sit for a few minutes before stirring.
Stir slowly with a metal spoon or rubber spatula until smooth.
Decorating the Birthday Cake
Let the ganache cool to a thicker consistency before creating your drips. We did a test drip on the cake to make sure it was ready. We used a spoon to create the drips on the side and then used a piping bag and frosting to ring the top of the cake.
Place the cake inside the fridge to set.
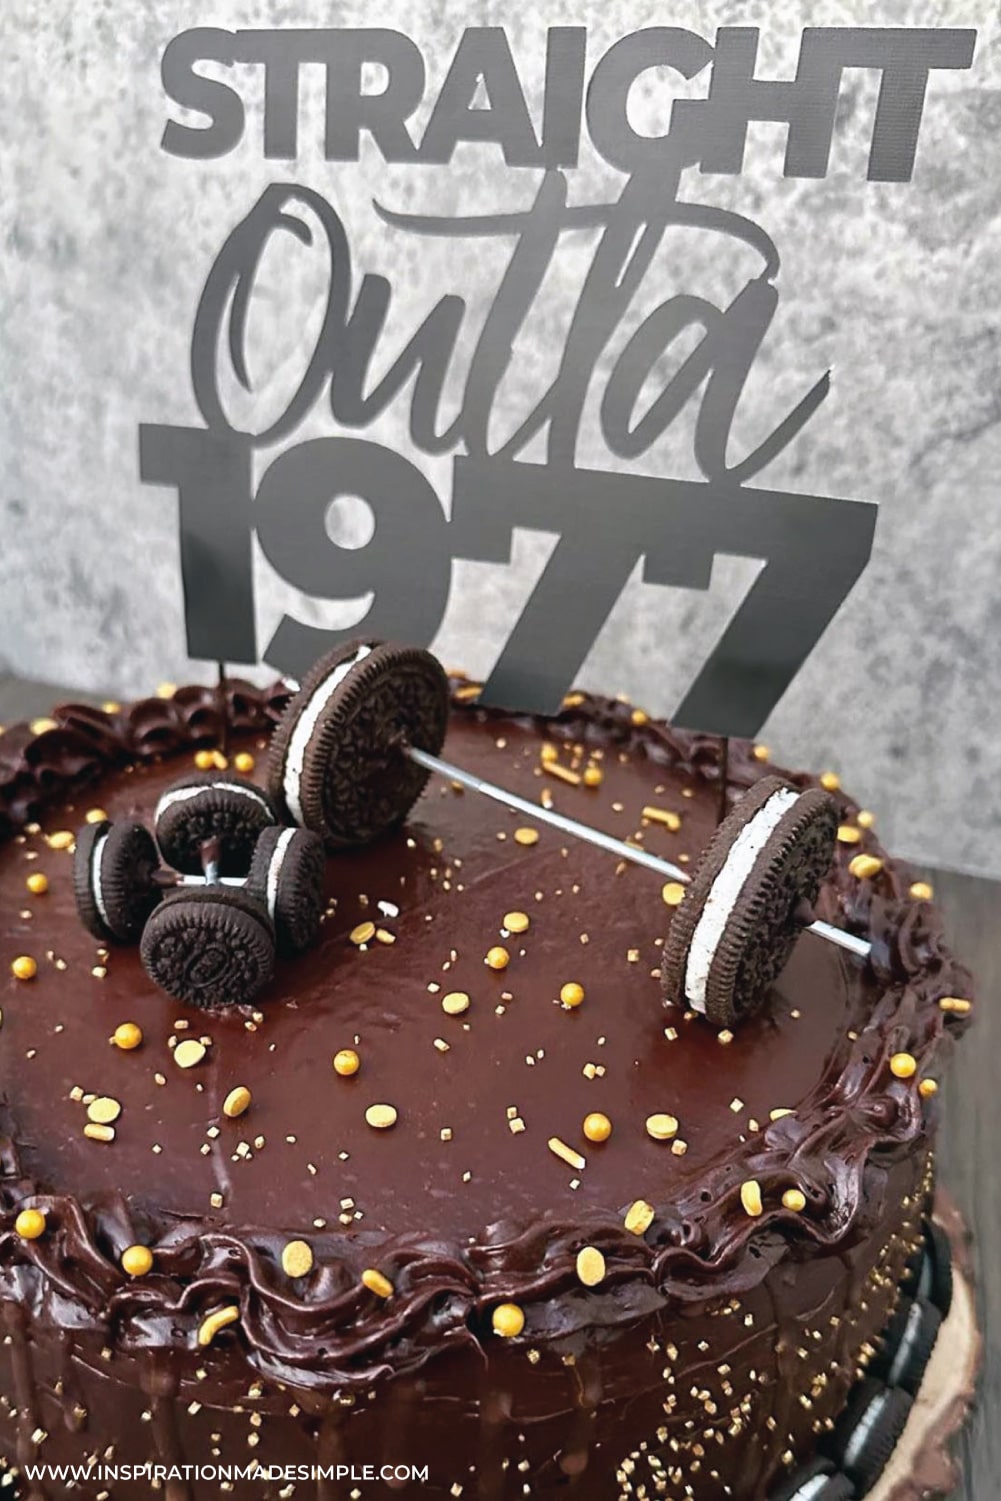
Once the cake has set, add the barbell and dumbbells to the top of the cake.
Add a cake topper and some candles and you’ve got an epic homemade weight lifting cake!
DIY Cake Topper
If you have a Cricut and want to make this Straight Outta 1977 topper, head over to my Cricut Design Space Cake Topper File!
Or if you prefer, here’s the SVG file. Personal use only, do not alter.
***
Olivia was so proud of the end result, and not going to lie, so what I! It may not have been perfect, but it was made with love, was beginner-friendly, and Todd loved the end result!
If you’re interested in another really easy cake idea, check out my DIY Naked Cake I made using a simple grocery store cake and flowers!
