
Once Christmas is over it seems that most of the outdoor decor goes away and that makes me sad so I’m going to remedy that situation! Today I’ll be sharing how to create a simple DIY Wintry Snowflake and Pine Cone Door Hanging that uses sparkly white pieces to make a beautiful piece of decor.
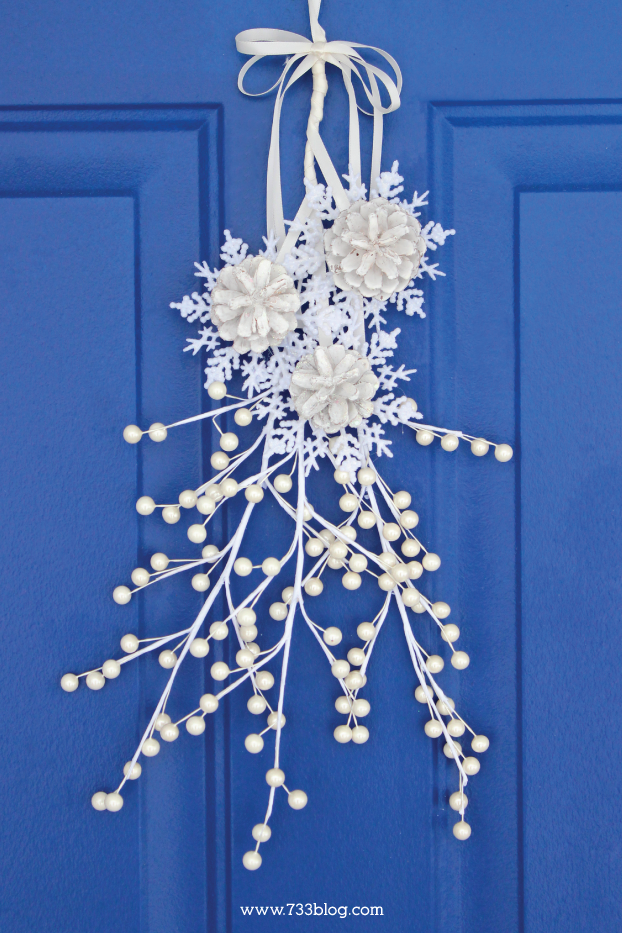
This door hanging is very simple to make and is beginner friendly! The only special tool you’ll need is a Hot Glue Gun, so let’s get started.
SUPPLIES: (contains affiliate links for your convenience)
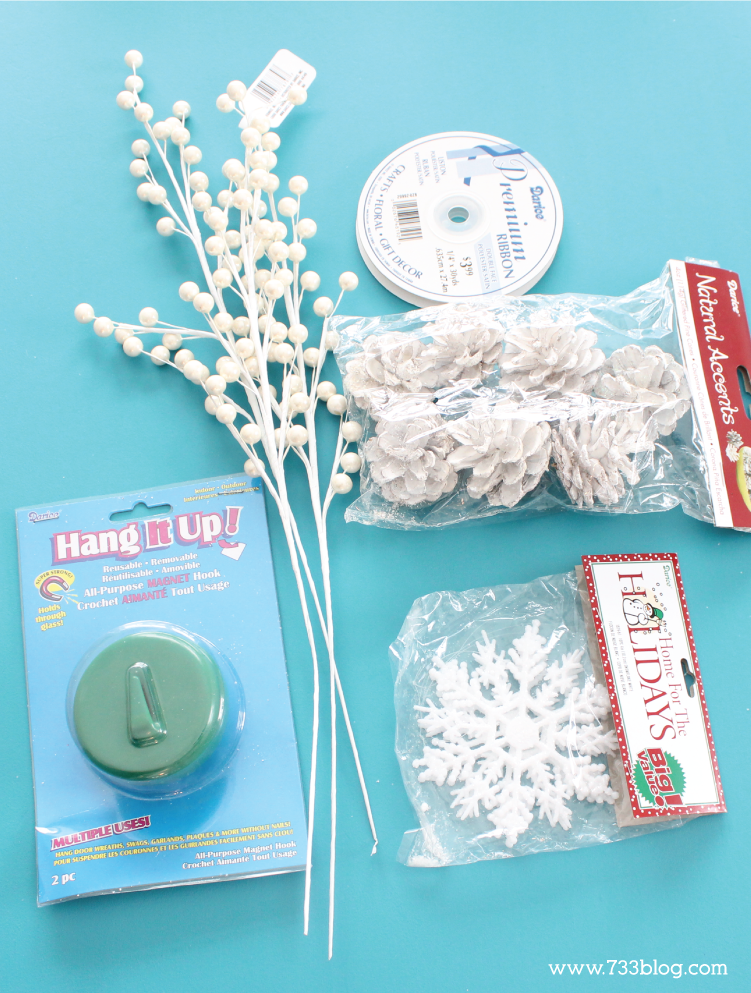
White Glitter Pine Cones
4″ White Glitter Snowflakes
White Ribbon
(3) 18″ White Berry Pearl Spray
Magnetic Wreath Hanger
Hot Glue Gun
Scissors
DIRECTIONS:
- Twist together the ends of the three Berry Pearl Sprays. Spread out the limbs of the spray until you achieve the look you desire. Set this aside.

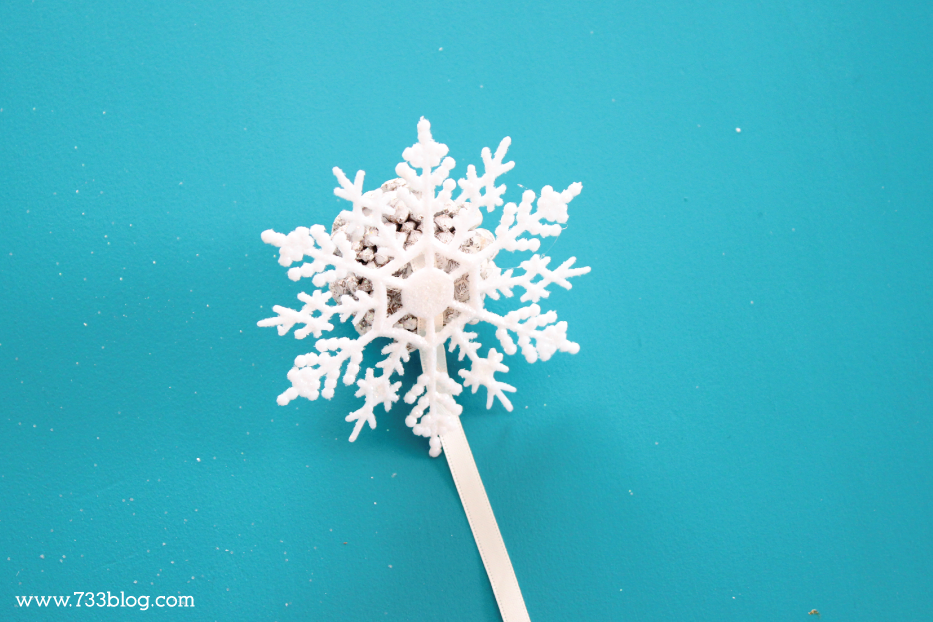
2. Measure and cut about a 12″ length of ribbon. Hot glue one end to the back of a pine cone.

3. Hot glue a glitter snowflake over the ribbon. (Repeat steps 2 & 3 two more times.)
4. Take one of the pine cone/snowflake pieces and wrap the ribbon around the top of the pearl spray and hot glue in place.

5. Repeat step 4 with the other two pieces, shortening them a little so the pine cones are a little bit higher than the first (see images below). Trim any excess ribbon.

 6. Cut a 5″ length of ribbon, create a loop and hot glue it around the top of the spray.

7. Lastly, create a simple bow out of the ribbon and hot glue it to the top of the spray.

Place the magnetic wreath hanger on your front door and hang your completed Wintry Door Hanging, step back and admire! I accidentally ordered a green magnetic wreath hanger, so I spray painted it white and once dry, I painted it with the blue paint from my front door. It worked perfectly and now my wreath hanger is totally invisible!
Originally seen on Crafts Unleashed, where I am a contributor.


