
I recently shared the Unicorn Themed Sensory Bottle that I made. It was in preparation for craft time with my daughters class. However, I decided I didn’t want to do the unicorns because they took a bit of time weeding and the bottles I decided to use for the class were smaller, which would have made the prep work even more for me! I decided on an Ocean Themed Discover Bottle instead. It is easy to make the water look like the “ocean” and there are plenty of sea creatures that I could cut out of vinyl. And let me tell you, these 6 year olds were SO excited to get crafting! Each and every one of them was into making their bottle the best one possible.
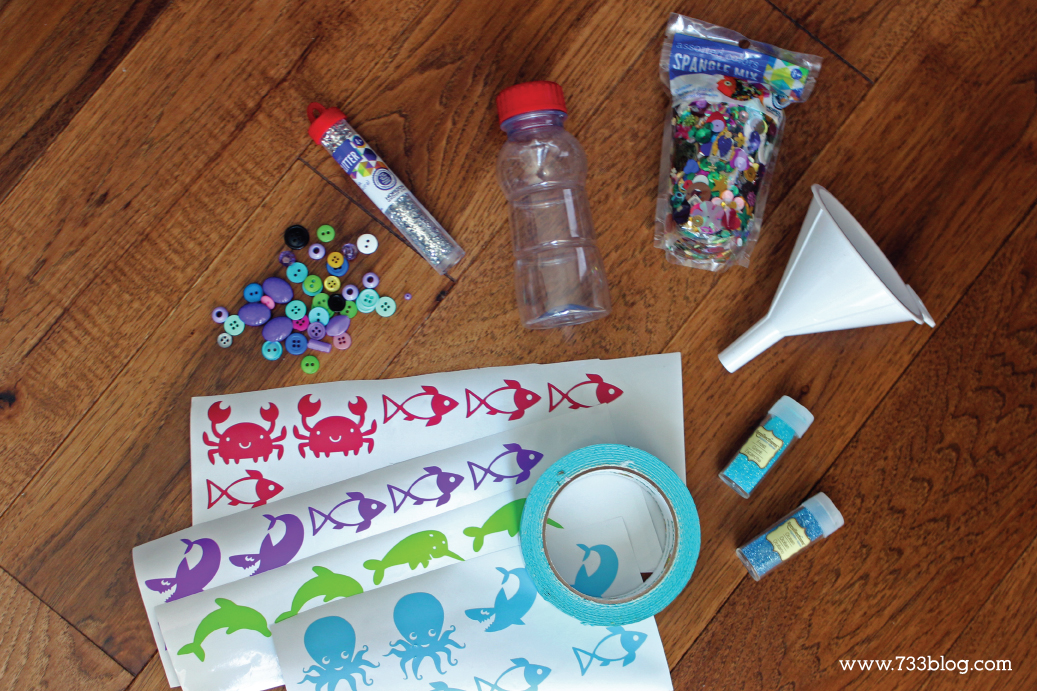 The concept is the same as the sensory bottle I shared before – fill the bottle half way with water, add in a teaspoon of glycerin, add in your filler, put on the cover and shake, make sure the glycerin is slowing things done enough – if not, add more, fill to top, tighten cap, place a piece of duct tape over it, add on your stickers or vinyl cut outs and voila! You’re done!
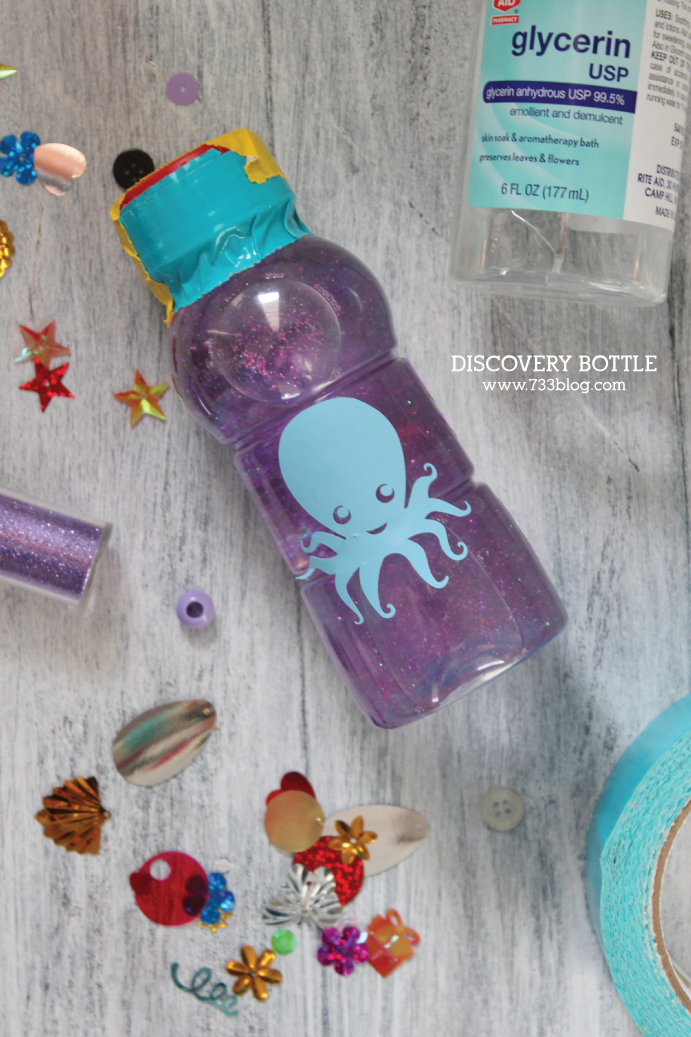 The spangle mix I bought had a bunch of shell shapes, the kids used mostly those, though they did go for other shapes like flowers and sparkly items. They were enamored with the tornado effect of the bottles, especially when we turned them upside down and really got a great view of the swirling water. They were all pretty excited to go home to share their parents their creations!
How I handled this as a group activity with just myself and limited supplies:
I ended up working with 8 kids, so I set up an assembly line. I had 4 funnels, so 4 kids put the funnel in their bottle, I poured the water from a pitcher. As I finished one, they passed the funnel to a person without one and we went through the group. After that I had two teaspoons and handed them to two kids. I poured glycerin into one spoon and as they poured it into their bottle, I did the next child. Once one was done with the spoon, they passed to the next person that needed one and we went through the group. Next up it was time to add the filler. I gave each child a handful of beads, buttons and spangles. As they were adding those to their bottle, I had 4 children grab the funnels and I had them choose a glitter color and watched them pour it in, telling them when to stop. They then continued adding their other filler and the other four kids did the glitter. Once everyone had their filler in, we did the water pouring assembly line again. Then we tightened our caps and they chose vinyl stickers to add to their bottles. As they were doing that I walked around and put the duct tape on the lids.

