Hello fellow creative people, my name is Melanie and I’m so excited to be sharing my ideas with you today on Kim’s blog! I saw her call for guest bloggers and begged her to let me stop by. My blog home is the Crafty Cupboard, where I do lots of tutorials, share great ideas, and post my finished projects. Come by for a visit- I’ve hit 100 followers this week, and am having a giveaway! Don’t you just love shameless plugs?

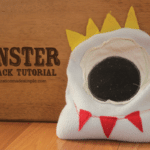
Today I want to show you how to make a fabric lunch sack. We are taking the “brown” out of “brown bag lunch!”
For this project, you will need:
1/2 yd main fabric
1/2 yd lining fabric
coordinating felt
heavyweight interfacing OR insul-brite (available in most fabric stores in the utility fabric area)
sew-on velcro
air or water-soluble marker
sewing supplies
First, cut your pieces. You need:
Main fabric: 2@ 12w” x 14h”, 1@ 3″ x 12″, 1@ 6″ x 8″
Lining fabric: 2@ 12″ x 14″, 1@ 6″ x 8″
Interfacing: 2@ 12″ x 14″, 1@ 3″ x 12″ (If using insulbrite, don’t cut the 3″ x 12″ piece. use the interfacing instead)
LET’S BEGIN!
Cut 2″ out of the bottom corners of all the large pieces. The bottom is the 12″ side 🙂
Iron your interfacing onto the back of your main fabric using the instructions on the package. I am using InsulBrite (like batting with a foil layer to insulate better) for this example. I just acted as if my InsulBrite was attached already.
Place main fabric right sides together, matching the notched corners.
Sew the sides and bottom together using a 1/2″ seam allowance. Iron your seams so they lay flat. Since I was using InsulBrite, I trimmed the InsulBrite to right next to the stitching to decrease bulk in my seams.

Take your notched corners and match seams. Sew together.
Trim the seam allowance to about 1/4″.

Sew your big lining pieces together the same way. Then, iron a 1/2″ hem on the top of both the lining and main fabric pieces. Place the lining inside the main fabric wrong sides together, like so.

Now we are onto our flap. Cut out your applique from felt (or another fabric, don’t feel obligated to use felt!) and sew it onto the 6″ x 8″ main fabric, making sure you avoid the edges by at least a generous 1/2″.
Sew the lining piece to the applique’d piece right sides together. Clip the corners.

Turn right side out and use a chopstick or something skinny and blunt to get your corners all nice and square. Iron the opening so it is even and topstitch around the entire piece at a scant 1/8″ seam allowance.

Insert the applique piece into the main bag body like so: (or you can pin the app piece on the outside of the bag if you prefer)

Be sure to not cover any of the applique! Pin in place really well. Topstitch around the entire top of the bag, enclosing the applique piece really well, at a 1/8″ seam allowance.
At this point, I added my velcro. I wanted the flap to be on in order to determine placement. I just closed the bag, put a pin in where I wanted it to shut, and marked with a air-soluble marker where I wanted to put the velcro.

I simply pinned on a 1″ piece of velcro onto where I marked the fabric, and stitched it on. No picture here, I think this was the point where my three-year-old wanted to sit on my lap while I sewed.
To make your straps, iron the interfacing to the 3″ x 12″ piece of fabric. Fold in half long-ways, right sides together, and sew along one short edge and the long edge, leaving the other short edge open for turning. I use my flute tuning stick to turn my straps 🙂 I knew it was good for something! Iron it flat and sew a 1/8″ seam allowance around the whole thing, closing the opening as you go.

Place your straps on the top BACK of the lunch bag with the ends overlapping about 1 1/2″, pinning them in their desired spot.
I sewed an X onto the strap to secure it onto the bag.
At this point, you could be all done! My bag (which I made a bigger one for car snacks and church snacks) wasn’t standing up beautifully, so I decided to sew the sides again!
I put the bag flat on the table like so and drew a line with my marker from the bottom point to the top.

Then I stood the bag up, pinched the fabric along the line (make sure you catch the lining fabric!) and pinned the heck out of it.

I stitched from the top to the bottom at about 1/4″ and ended up with a more sturdy bag.

Ah, perfect for lunch time, picnics at the playground, field trips, or a grab bag for the car!

I hauled this around for a few days this past weekend and it was great! The InsulBrite I used kept my grapes cold and crisp for much longer. I’m lovin’ it 🙂 I hope you do too!

Melanie